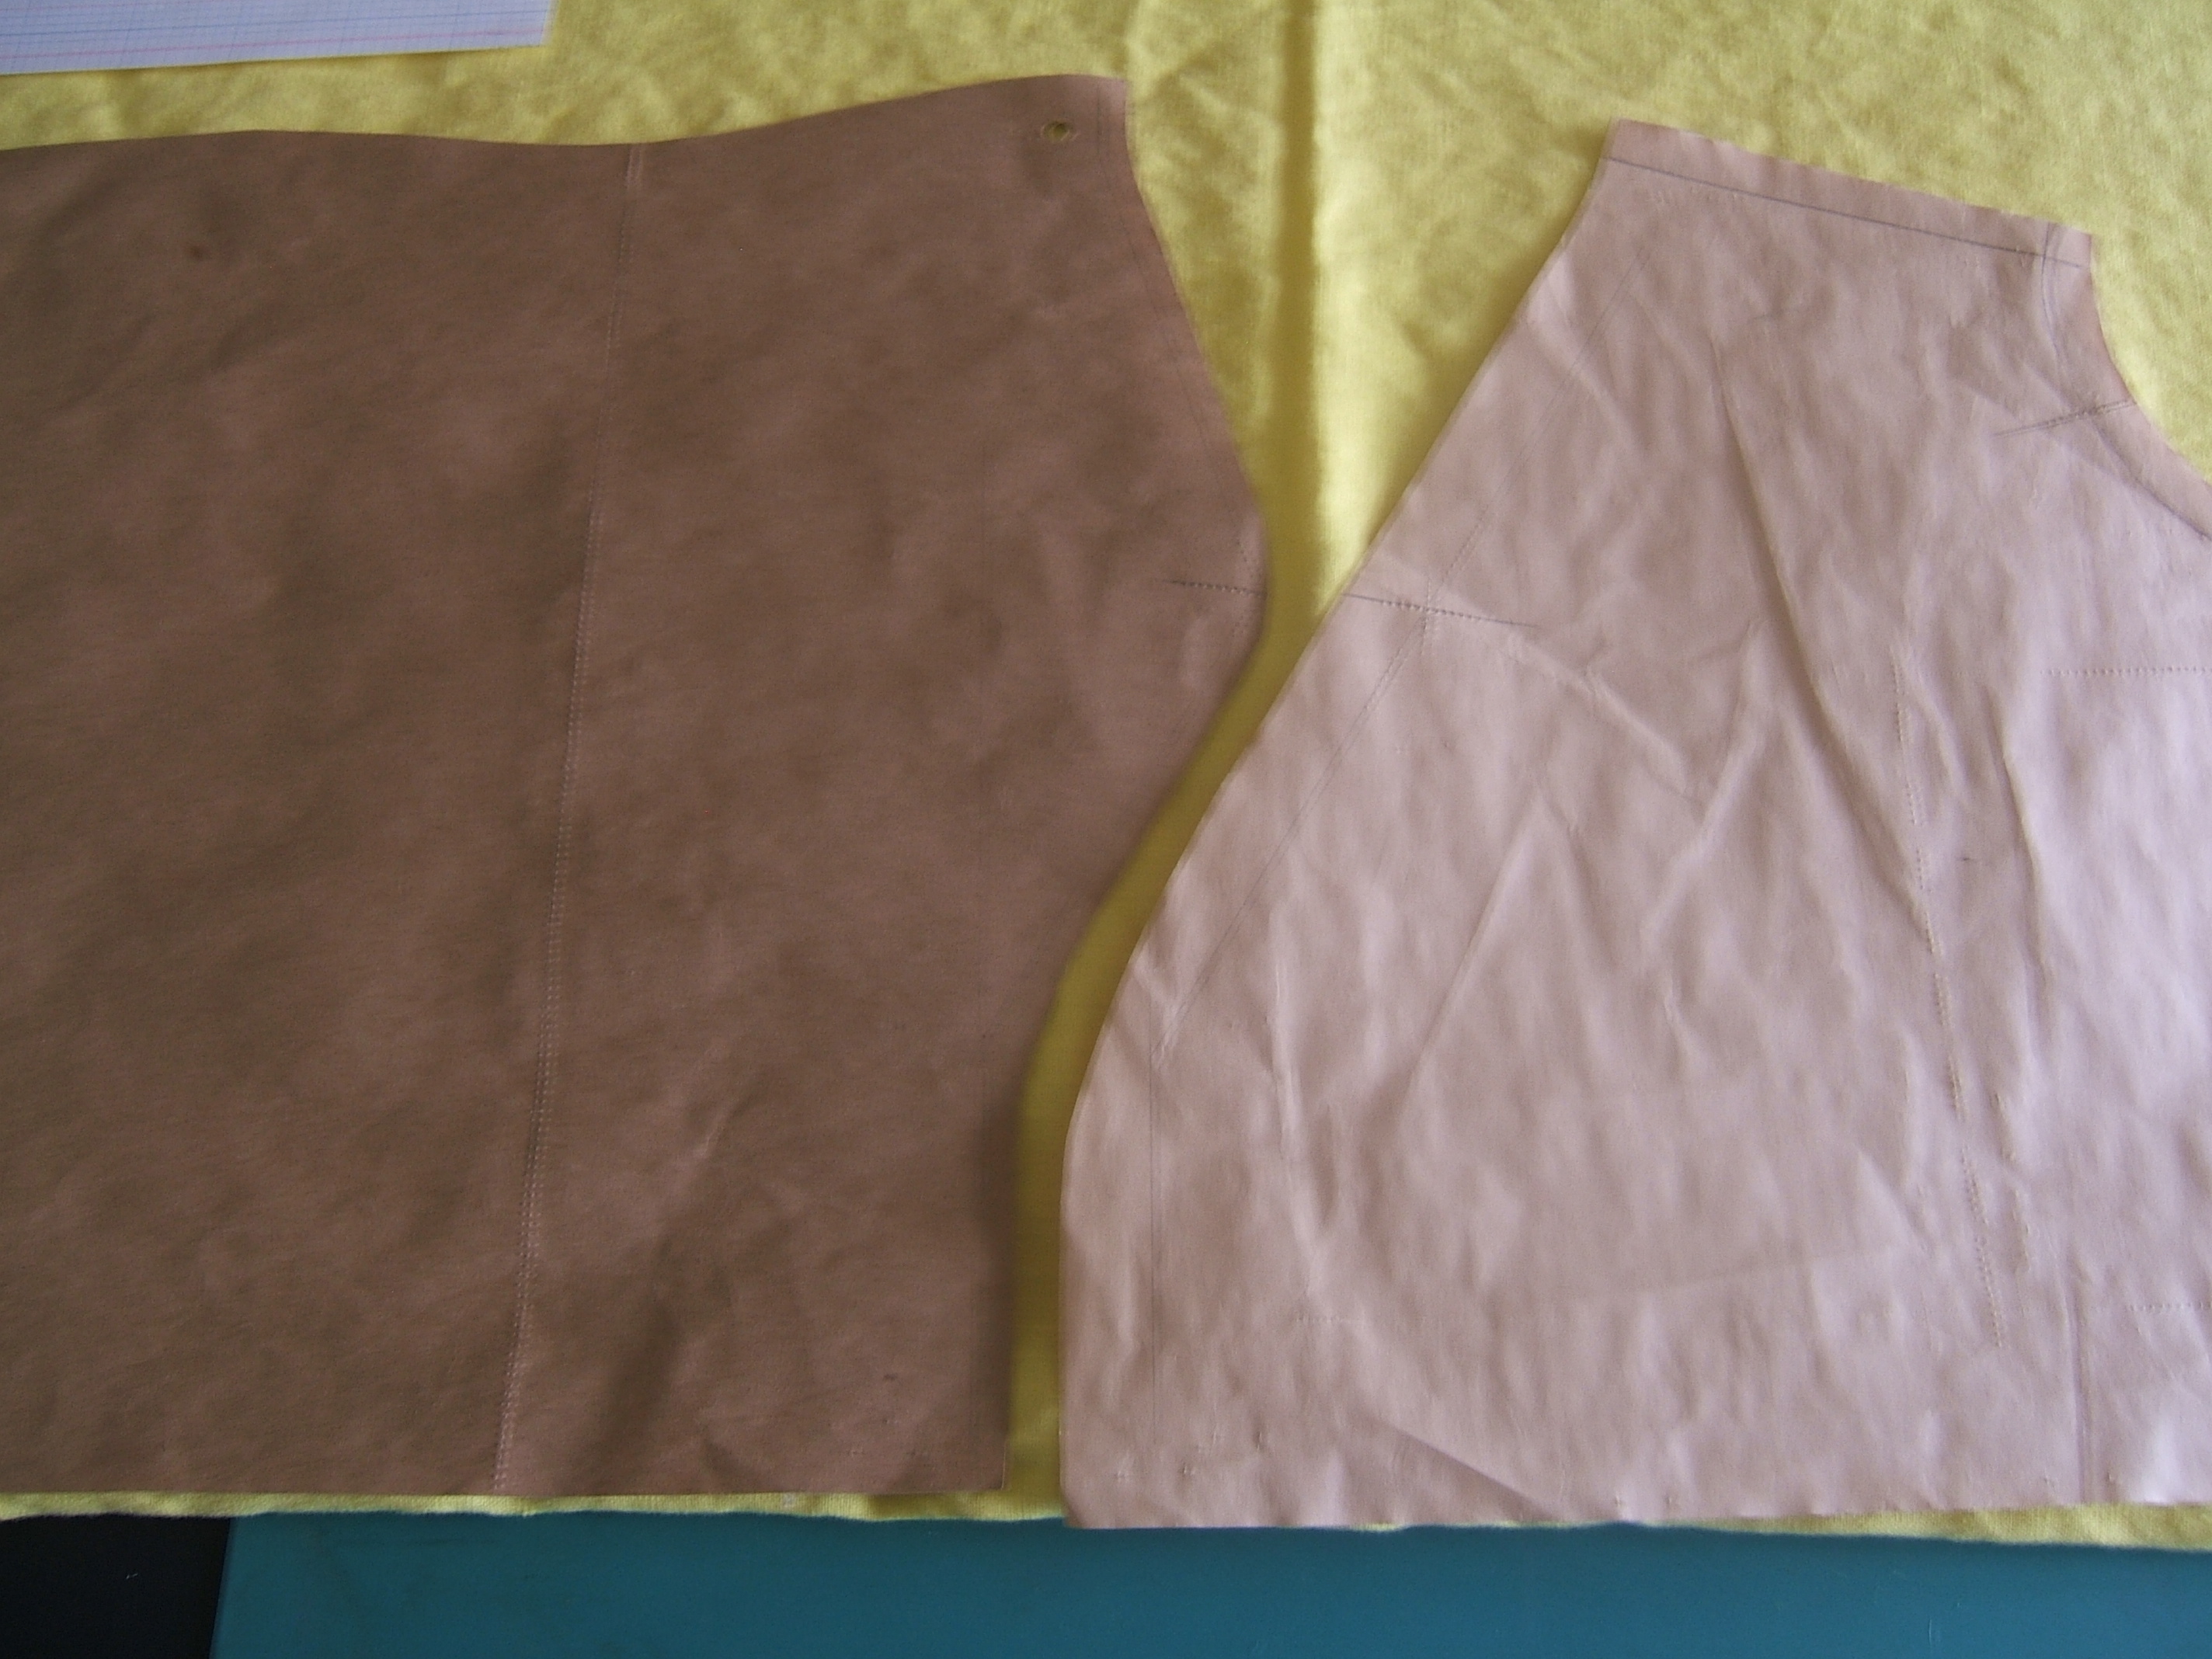
I pinned the casings in briefs #2 this morning.
Then I cut off a piece of red basting thread and made two bar tacks. This proved surprisingly difficult. I'd expect someone who had never seen a needle before to do a bar tack right the first time, with proper coaching. But I had to take the second tack out twice —I just couldn't get it level— and then I had trouble tucking in the ends.
Maybe it's naptime. (Well, it is *now*; I've been fiddling around with e-mail and the Web.)
Briefs #2 are in the drawer, not without drama. I ran out of bobbin thread while sewing the casings, and for a while I couldn't remember where I put the balls of 100/6 cotton. I must get around to sorting out the stuff in the northeast corner of the sewing room.
Then I started to lay the cord elastic along the line on the yardstick, careful that it was straight but not stretched. Oops, I should have the scissors in my hand when I'm doing this. So I got the scissors out of the drawer, very carefully measured thirty-three inches, and discovered that I had the sheath in my hand and the scissors had vanished.
After a bit I decided that it was better to fetch scissors from the other sewing machine than to spend the whole day hunting scissors. I carefully put them right back after the first cut, then started wearing them around my neck, tucked into my timer pocket. (That pair is attached to a loop of twill tape that usually serves to re-assure me that the scissors are in the proper drawer of the treadle sewing machine.) And I put them back into the drawer as soon as I'd sewn the last gap closed!
I seem to be down to two #10 crewel needles. I wonder where I bought them?
I found the scissors on my typing hat, which was on the floor under the ironing board. Now the sheath has gone missing.
Pinned the casings in another pair of briefs this morning. I meant to sew them too, but there was a garage-cleaning frenzy and I had to save some stuff.
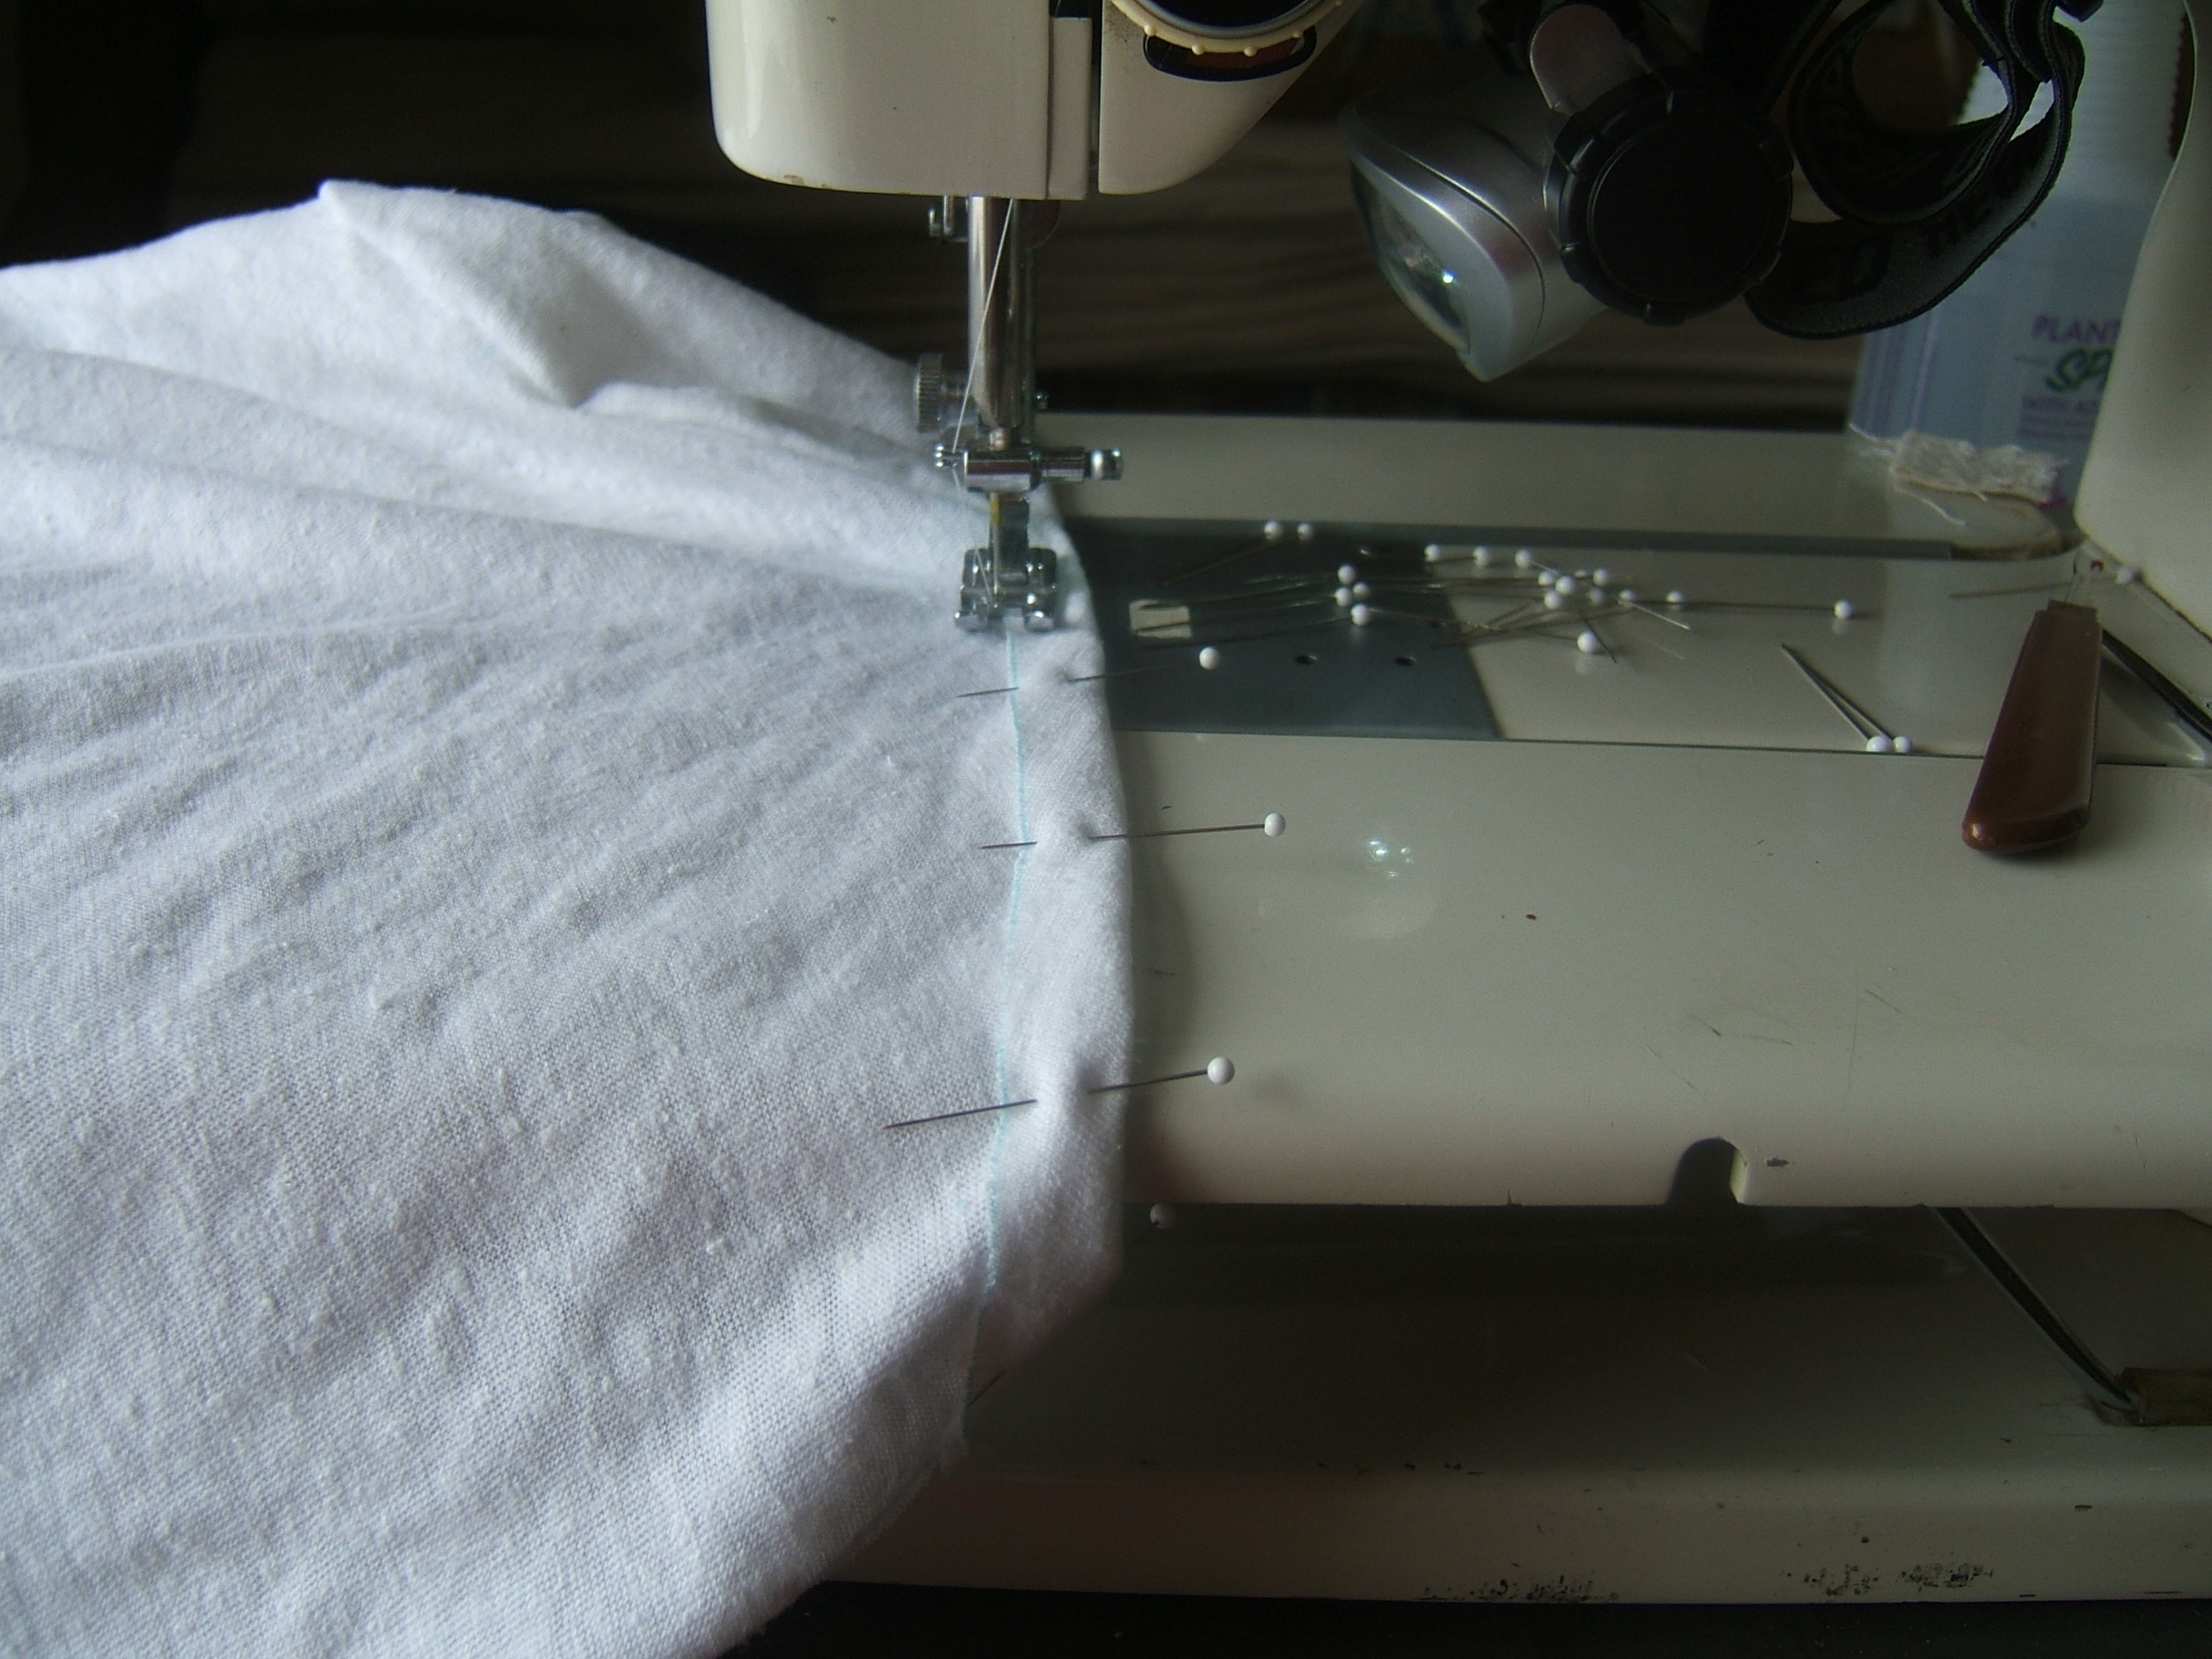
I think I sewed #3 yesterday. It's sewn, anyway. I pinned #4 this morning,
and I'm in the process of sewing it. With right-angle pins, I can sweep each pin aside without stopping the machine to pull it out.
⁂
I haven't opened the box of red glass-head pins yet, but I'm close — I have exactly enough white glass-head pins to pin one pair of briefs.
#5 is pinned and on the machine, but it's nap time.
I tore the sleeve of my black long-sleeved cotton T-shirt while taking it off yesterday. It's so worn that I put my finger through the fabric next to the cuff. I think I'll baseball-stitch the three-cornered tear instead of throwing the shirt away, since I don't know where to buy a long-sleeved T-shirt. I do have a half-cotton T-shirt, but it's thinner.
⁂
Well, that was exciting. I sewed the waist casing of briefs #5, then just as I was starting to sew the first leg hole, a pin struck one of the two mystery holes in the throat plate and slid on down in.
I took the needle plate and the throat place off, but couldn't see the pin. So I took the shuttle out, still couldn't see it, but much poking and puffing later it came into view and I got it out. Then I started having at the greasy dust this process had exposed with a cotton swab and a quarter of a "Box of Rags" brand paper towel.
After a bit I saw the point of another pin poking up at the back wall of the compartment. It would have been easy to pull it out with tweezers, but without thinking, I poked at it with the cotton swab in my hand and knocked it out of sight. Eventually I had to take the wires off the machine —I think that this is the first time I pulled the plug on the machine end of the power cord— and carry it out to the garage, where the air compressor blasted out the pin and a good bit of dust.
And now the machine is back together and there's a piece of correction tape over the mystery holes. I think that they are for attaching an attachment; I must dig out the manual.
If only to refresh my memory as to what ought to be oiled.
Dast I sew that leg hole before lying down for a nap?
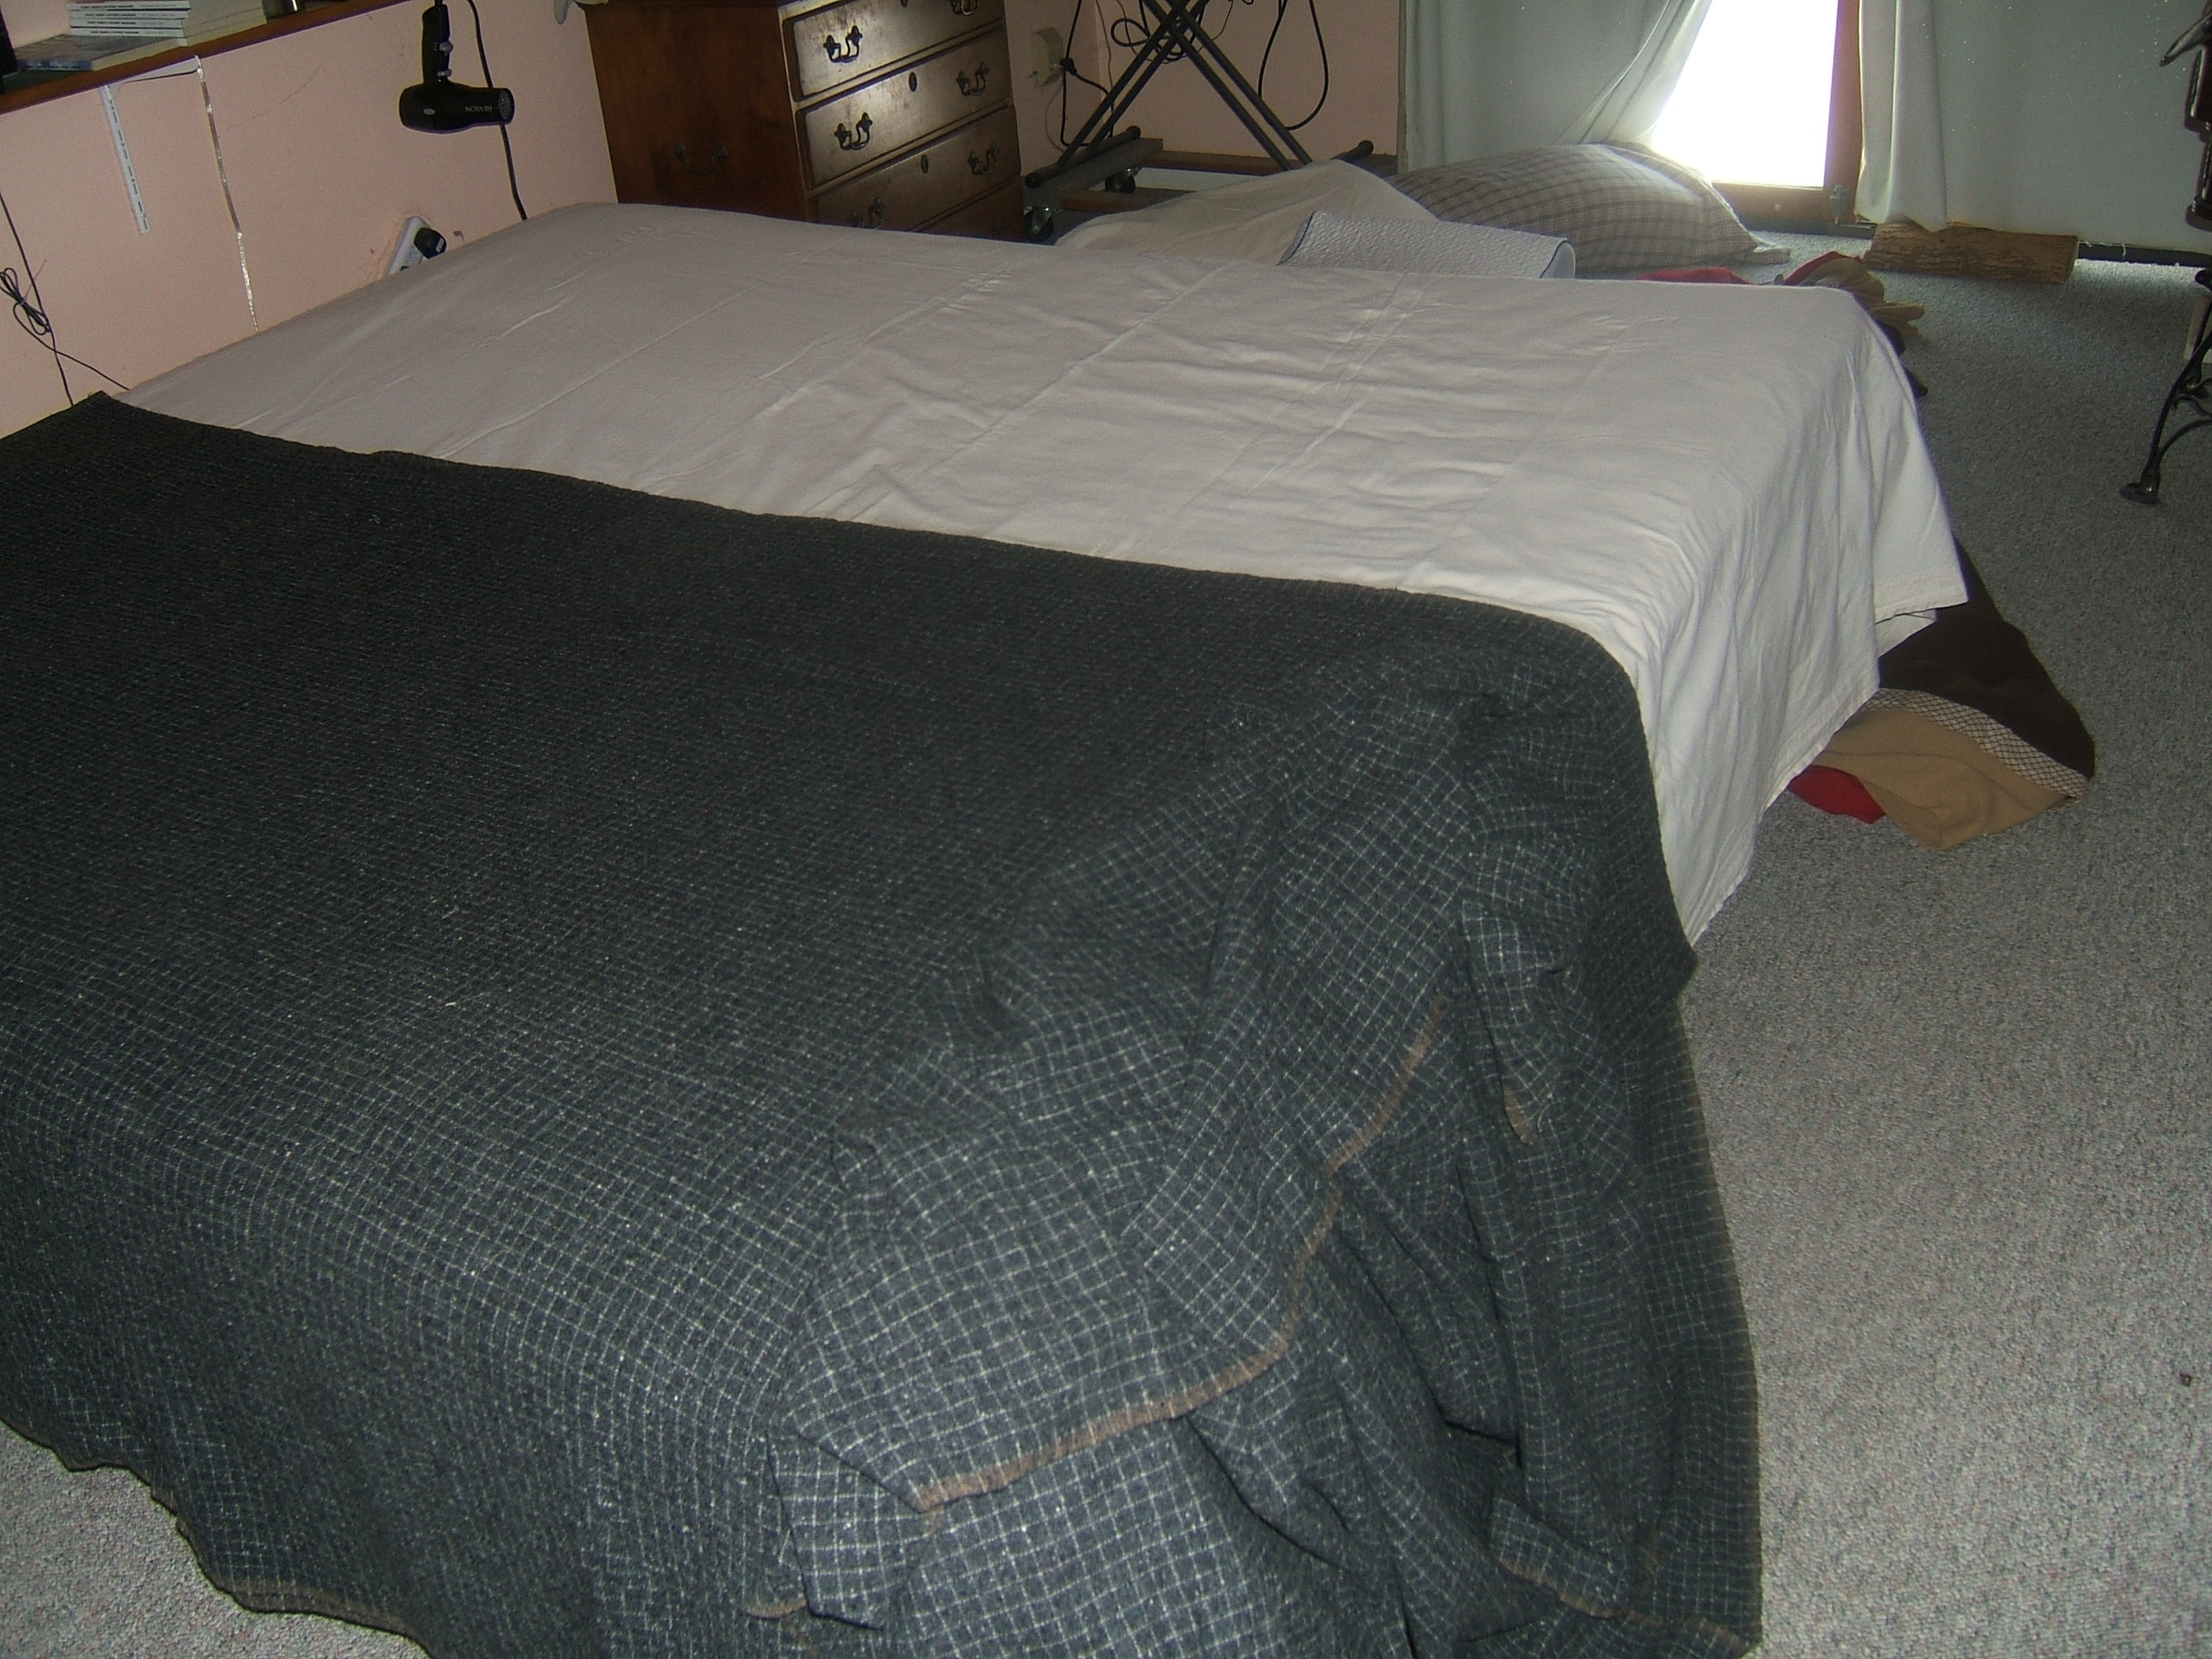
A while back I got up in the middle of the night, pulled out the top item in the blanket box, and threw it over the bed. It was a ratty old synthetic blanket that is still around because it's one third of a mattress pad. (And I must remember, next sheet-changing day, that it's time to throw one of the two blankets on the bed into the wash and put this one on the bottom of the pile.)
Today was wash day and also time to re-make the bed from the mattress pad up, and I thought it high time to roodle around in the blanket box and find a nice blanket for the top layer. Oops! Nothing in there but single-bed blankets and a blanket meant for a double bed, but too small to put on a king bed crosswise.
And a piece of wool I bought intending to make a suit. It is so ugly that I never cut it, but it should make a very nice blanket.
Al approves this proposal.

It's kinder hard to be sure measuring it all folded up, but I think I have eleven yards.
I think I need six inches less than three yards. On the one hand, I don't want it dragging on the floor, on the other hand, I'm not at all sure this wool has been washed.
If it is eleven yards, taking out six to make a blanket will leave five. Perhaps I should simply cut it in half and make two.
Five and a half — two and three quarters — nine inches less than three yards, and I can bind the ends instead of hemming them.
But how much will it shrink? It won't fit into the washing machine, which suggests strongly that it hasn't been washed, but it may date back to when I did my washing at the laundromat in Voorheesville. Even after I bought the Maytag, I vaguely remember taking yard goods there.
I've sewn #5 and begun pinning #6. I don't think I've mentioned that I've been pressing the seams open with my fingers. This jersey doesn't open itself, but it stays open once firmly informed that it should. In addition to pinching between my fingers I stretch the seam while pushing up from below.
⁂
After pinning #6, I had three pins left over.
But I noticed a few that should be stuck into the bent-pin cushion on my dresser, and I found a plastic-head pin that I presume to be the one blown out of the sewing machine. It must have been in the works a long time!
The bent-pin cushion is the lid of a small basket. There always seems to be a shortage of bent pins when I want to take a pin out of circulation for the long term, as when I pinned an old sheet around an unwanted thingummy so that it would be clean when we turn it in with our leased car.
I'm feeling a bit time-for-a-nap, so I'll put away a few things in the garage instead of finishing #6. Since I started with #7, this is the last brief.
All briefs now await elastic and inventory marks. Instead, I'm measuring the wool. Folded double, it is four yards and twenty-eight inches long — and that carpenter's folding ruler was really handy; buy your sewing tools at the hardware store whenever possible.
While measuring, I noticed that the ends have been zig-zagged, so it has been washed.
I have inspected my box of silk scraps, my box of synthetic scraps — must not forget that that box contains a substantial amount of the ripstop I made my yellow windbreaker from — the closet, and the laundry room, and I've concluded that the nicest binding I can make from what I've already got is the black ripstop left over from my wind pants. I bought nearly twice as much as I needed, because I hadn't expected the pieces to lay out side-by-side so much. Black china silk would be even nicer, but though there's a fairly-large piece, it isn't that large. And what I have is too thin and flimsy.
Went to Dharma's web site, which is where I got the black habotai. Their only black habotai is 8mm — and so is their chiffon. White habotai can be had as thick as 16mm.
This search led me to notice that the shelf in the half of the closet that I can't use for fabric is just lying on its supports. I think I'll get a screwdriver, take out the lower hanger rod, and move some of the too-long-for-the-closet fabrics out of the laundry room.
And I can probably throw out some of the shirts now hanging on the upper rod.
⁂
Ooooo . . . they have some 12.5mm 63% silk 37% wool fabric that would make a *lovely* scarf! But they sell only whole yards, so a scarf would cost $28.34 plus shipping, and I don't want white.
Hmmm a pre-made 35" x 35" scarf is $16.23. Five inches smaller than I'd make. So I folded and pinned a forty-eight-inch scarf to thirty five and tried it on. Clearly intended to be tied under the chin — so that's why we never tied our scarves at the back of the neck in the forties — but if I wrapped it around my neck, it overlapped enough to pin. That would eliminate the bits that sometimes poof into the sight of my rear-view mirror. But it would be more trouble to put on. But a white scarf is acceptable.
⁂
Kneeling to measure the cloth in half, I realized that that would make the blanket two yards and twelve inches long, if I took only half an inch at each end for the hem. So I measured a blanket that is barely long enough. Two yards nine and a half inches.
Back to the pin-marking.
⁂
My original plan was to take pins from between earlier pins when I ran out; after all it's theoretically possible to do the job with only two pins. But when I moved a dramatically-bent pin, I thought I should take this opportunity to inspect each pin as I removed it and throw out the defective ones, so I opened the box of red-head pins that I bought when I noticed that my supply of white-head pins was getting tight. I took out a few, being very careful not to fluff up those that remain, put them on my Grabbit, and finished the job.
When it was time to pull the pins out, I put the good ones on the Grabbit and the bad ones on a magnet I'd snitched off the fridge. Much to my surprise, there were only four pins to be added to the bent-pin repository. Perhaps I didn't examine the pins carefully enough.
The cat is curled up on the fabric — it's already too late to keep the cat fur off — so I'm going to leave him there and go to bed myself. Then I'll finish the cut, brush the half that I plan to put back into the blanket box, and tumble it in a hot dryer for a while. Perhaps I should move it directly from the dryer into the freezer, just to be sure.
The scrap is in the laundry closet, awaiting attention. This evening, I cut the blanket piece in half, with the cat's help, and pinned the lap seam to sew it into a blanket. I was inclined at first to hand-baste it with 100+ to be sure the stripes match, but realized that it would be easier to stroke and stretch it on the bed of the sewing machine than to do so on my lap. Lacking a smooth-topped piece of furniture of the correct height, I put a magazine-style advertisement on my knee to do the pinning.
When I went hunting for black silk to thread the sewing machine, I remembered that I also have gray silk. But a strand of the gray laid on the gray flannel shines bright, while a strand of black disappears.
I also found part of a spool of black spun silk, probably bought before I got access to Superior Threads, and I think I'll use that up on the basting pass. Spun silk should blend into the fuzz better even though it's thicker.
But I suspect that there is significantly more thread on the bobbin than on the spool.
The selvages on this fabric are flat and even and eminently usable — except for the orange threads that I at first took for sun fading even though there is no sun in the blanket box.
I thought that four rows of black zig-zagging would dim the orange a bit, but on the bed the orange seam is more conspicuous than the orange edges.
I learned, rather late, that when you are matching stripes on a lap seam, you need to put the pins at right angles to the seam, to secure only a point.
I'm wearing briefs #6 with no elastic and no inventory mark. Inserting elastic is the perfect interruptable job to do between loads of wash, but I'm still recovering from yesterday's shopping trip, and have just enough mental power to do the wash. Perhaps after my nap.
The spun silk nearly finished the basting passes. I didn't make a dent in the bobbin, so I put the empty spool back into the bag with it. Also there is a bit of yellow wool with a threaded #10 needle stuck into it in the hole of the spool.
I moved the wide linen fabric from the laundry room to the newly-available closet. Now I can open the dryer door!
I had already moved the cottons, which take up more rod space. There are three hangers of linen and six of cotton.
Two of the cottons are, as near as I can tell without unfolding them, an osnaburg tablecloth and an osnaburg curtain. The tablecloth is not made of the same osnaburg that I bought so much of to make curtains for three rooms and two doorways, but something thicker. Seems to be a tad loose of weave; this might be something I can use when I've used up the unwashed osnaburg for my embroidery gig. If I ever get another gig.
Another two hangers are rather a lot of black twill and somewhat more white twill, which I thought handy to have on hand for pockets and the like.
The remaining two are a red-checked damask that I bought when I thought I would want to make several tablecloths and aprons, and some orange duck I bought by mistake when I wanted to make yellow aprons for the Auxiliary fire committee. As far as I know, the Auxiliary still doesn't have a turn-out uniform.
The red-checked apron is still in use, the two tablecloths are not. When I went to the laundry room to count the tablecloths, I found an alphabet book in progress (the baby is a grandfather), and two stained osnaburg tablecloths that I mean to make into dish towels when there is a need for them.
⁂
In the afternoon I embroidered inventory marks on briefs 6, 5, and 4. It was convenient that the seven-segment displays of those numbers can be represented by six, five, and four bar tacks.
It also helped that I could see the wash-out numerals through the fabric, to guide me in embroidering them backward on the inside.
After supper I'll embroider three orange bar tacks on #3 and be done.
⁂
It's just as well that I chickened out of embroidering the last inventory mark. Looking around for something useful to do before vegging out on the Web and usenet, I saw my blue hat on the ironing board and thought of working a hexagram over one of the holes, but that is also a mind-engaged job, then I noticed a little crocheted hexagram that has been lying on the board for ages waiting for me to find something to sew it to — perfect!
And I did a perfectly-appropriate job of sewing it on: neat, but not out of proportion to a gardening hat.
I missed half the hole.
When I looked for threads to make the inventory marks, I was startled that there is no floss in the backpack, then remembered putting all the stuff that belongs in the flat upper compartment into the keyboard box where I keep extras.
I'm cutting 33" pieces of cord elastic and putting them into 32" waist casings. No wonder I didn't miss the elastic while I was wearing #6!
I washed #6 yesterday, and today I put elastic in it. In the process, I found #5, which I'd rolled up and put into the arm of the futon with the tools when I got tired of mending gaps. I left the bag of tools and both briefs on the eating table, so I'll be sure to notice them in the morning.
I've written on my shopping list that I want a spool of really-pale blue cotton thread. That will be after I've mended all the gaps with a grayish baby blue.
At every gap, one of the four ends is grease stained. At the beginning end — I think. I can't figure what is doing it. Perhaps cleaning and re-oiling the shuttle race again will mysteriously clear it up. Nothing in there has dirty grease on it, and if there were, it would get on the stitches, not just the end.
I'm concentrating on bedding for a while. I pulled a sheet blank off the pile of muslin, and I intend to make the remaining gray windowpane wool into another blanket. And then hem both blankets.
After having another dither over my scraps of silk. They would be nice — but spectacular. Spectacular and bedtime don't mix.
This leaves one pre-torn sheet on the stack of muslin. One blank on the ironing board, one finished sheet on the bed, one finished sheet in the linen closet.
Much to my surprise, one linen sheet is still hanging in there.
This morning I cut the flannel in half and pinned a lap seam. The Necchi is still set up with black silk.
I remembered to use right-angle pins. I had to separate the seam to get my fingers under the seam to pin it, so I matched a stripe, stretched the seam to verify that I'd matched the correct stripe, and stuck a pin into a stripe between that stripe and the previous pin. The weight of the fabric pulling on the seam sometimes caused difficulty.
When I was nearly done, I realized that I wanted the pins stuck the other way around, so I went back up the seam reversing them. I quickly learned to stick a pin in the stripe adjacent to a pin or between two pins before pulling a pin. This process made the pins closer together, and there weren't a lot left on the Grabbit. Sometimes I stuck a few pins into the fabric to make them easier to pick up.
After my nap, I sewed the first and hardest row of zig-zag of the seam. I found that close-together pins were a very good idea. The pins definitely didn't get flicked out of the way as the needle approached! If only because they would have been lost in the waves of wool; each went back onto the Grabbit as soon as it was pulled.
After supper, I still felt intelligent enough, but I couldn't see what I was doing by the overhead light, and with all that wool to shove through, I couldn't put the headlamp back on the machine.
While attmpting to use the headlamp to thread a needle, I learned that the control circuits have decayed. One can light two of the LEDs, or four other LEDs, but not all eight. I'd noticed odd behavior, but I hadn't taken it off and looked into it while switching. I guess I'd better put "headlamp" on my shopping list.
I finished the lap seam this morning. I wasn't as careful as I was with the first blanket.
While sewing the last pass, I managed to put the needle through a fold of the blanket and had to cut the thread to get it out. Then I ran out of thread and put on the almost-empty spool, thinking that this was a good time to use it up. It lasted until I was exactly seven of the little windowpane squares from the end. My pocket ruler says that that was a smidge more than three inches.
That left a lot of thread ends on the seam, some of them almost long enough to save for hand sewing, but when I spread the blanket out on the bed, I couldn't find one single loose thread. It didn't help that variations in the weave give the illusion of black threads wandering over the surface.
!! My horsehair clothing brush!
So I brushed both sides of the seam. I found some white hairs, but no black threads. There were a couple of false alarms when I saw a black thread, but brushing the fuzz smooth erased it.
While examining the blanket, I decided to finish the raw edges by turning exactly on a white thread to make a 3/7" hem, and zig-zaging twice. Rather like the dish-towel hem at http://wlweather.net/PAGESEW/RUFFTEXT/ROUGH010.HTM#dishtl.
My handy-dandy solar calculator makes the squares just a tad under 1.1 cm.
But hemming the blanket can wait until I've hemmed the sheet.
And now it's past nap time.
From 2018SEW1HTM: "I pinned hems the width of an appointment card in the muslin this morning." [I used a business card instead. I wonder what "brittle brackle" is?] [Wikipedia never heard of it, but it has heard of "butter brickle".]
I've pressed the turn-under in one end of the muslin. Because of the volume of the fabric, I've decided to finish one hem before starting the other.
I ironed a shirt a few days ago, and found the dimmer switch quite hot when I turned it off. Ooops! We were careful to use a porcelain fixture that could stand that much current and a "drop cord" that could stand that much current, and Dave cut the cord to exact length to cut down on the resistance — but by the time we put in a dimmer switch we'd forgotten that the iron outlet is on the same switch as the light. A dimmer switch is not designed to take that much current!
The first suggestion was that I plug the drop cord into another outlet when ironing, but the uninterruptable power supply is plugged into the only outlet available, and it isn't that uninterruptable. It's designed to allow an orderly shut-down. After dithering and franticking a bit, we realized that the UPS has two surge-protection outlets that we don't use for the computers, and they are on the more-convenient end.
So I pulled the plug of the drop cord and plugged it into the UPS to press the turn-under. Worked, and nothing got hot, but the plug is hard to pull out and push in. I rubbed the prongs with a little contact cleaner on a rag, and it helped a little — and made the prongs look better — so I took another rag and cleaned the prongs on the iron plug.
Looking to see how I hemmed the sheets brought my attention to the shelf-cleaning and the remark that it was a pity I found a place for my hams without being obliged to tidy the end of the fiction shelf. Which caused me to reflect that if I put the iron down there, I could stand it on its heel and put it away hot. The shelf where it was is just a hair's breadth too low to allow that, and it has been annoying.
Then I noticed that if the iron and the "baby gown" box swapped places, I could put the iron away standing up — and not have to bend over to get it off the fiction shelf. Saved from tidying again!
⁂
After my nap, I sewed the first hem, then pressed and pinned the other. Not quite enough time before supper to stitch it, and it will be too dark to do so afterward. But the sun doesn't set until 6:00 (18:00) now.
It was, indeed, much easier to press and pin the hem without worrying about what the other end was doing.
Also, the plug went in and out a little easier than when I tested it earlier. I think that I'm working corrosion out of the socket. It probably also picks up a little lube from the prongs. So I should clean the prongs again soon.
So much for being bright-eyed and alert in the morning! While sewing the other hem, I wandered off the fold four or five times. So after mending those places, I examined the hem I sewed yesterday, and it is perfect.
Probably a good time to take a walk, leaving the house for the first time since Sunday. I'll suit up as soon as I fold the new sheet and put it away.
hemp-cotton briefs Yesterday,
while I was waiting for a load of wash, I sewed up
the elastic gaps in 5 and 6.
And writing that required me to move my to-do list from 2018SEW2.HTM to this file. Must make a note of it in the weblog — and get on with closing 2018.
I've decided how to finish the two blankets. A Creative Sewing poster said that a patented hemming method is detailed in the current Threads — to which I have no access. She said that one folds under a quarter inch and top stitches — which is hardly a patentable idea; I've been making once-folded hems for decades, so there must be a bit more to it. But it made me realize that on windowpane fabric, folding just one repeat right on the white thread would make a neater finish than my usual inch, so I'm going to hem the new blankets. Two rows of zig-zag, as usual.
I still fancy piecing silk scraps into a binding, but not for these blankets.
The scissors I keep in the drawer of the Necchi have been missing for weeks. They have to be within arm's reach of the machine! Meanwhile, I put the loop attached to the White's scissors around my neck every time I borrow them. The timer pocket keeps them from rattling around.
I sewed one of the four hems today. I started pinning the fold, then when reaching for pin #5, I realized that I was putting the pins so close together that I might as well baste.
I wanted to work off a spool, but the spool of #50 black installed on the Necchi appears to be my only one, so I used the White bobbin that was in the bag where the spool belongs. It fit into my timer pocket nicely; a spool would have been reluctant to unwind.
Basteing instead of pinning made me turn the white line a bit farther to the wrong side, so that I could use it as a stitching guide. Ten feet is a bit much for basteing off the spool, so I cut off at the center seam, and paid more attention to taking long stitches thereafter.
I emptied the bobbin before I'd finished the first row of zig-zag, which caused me some concern because that is my last spool of black #50, I'd sewn some off it, and I can put an entire spool of Size A on a forty-yard bobbin. But I let the winder run until it snapped shut, and there is still plenty on the spool. A hundred meters is only eleven yards longer than a hundred yards. #50 must be significantly thicker than size A.
This morning, I stitched the hem that I basted yesterday, and still appear to have plenty of thread on the spool. I basted with black 100+ to economize the #50 silk, and put one stitch in each square, which kept my stitches long. The spool was, indeed, harder to stitch from than the bobbin. I should have put it into my timer pocket, sideways so it could roll.
The turn-under is exactly as wide as the presser foot, which made it easy to put the first row of zig-zag exactly down the middle.
Hope I remember all that, because I plan not to start hemming the other blanket until I'm sure I can put it back on the bed before bedtime.
In the afternoon, I picked out the hems of my charcoal-gray suit pants. This proved easier than I expected, but I had to keep shifting the work into the sunlight whenever I picked a thread.
I'd expected it to be very difficult because the fine black thread is sunk into the fabric and impossible to see, but it turned out to be a strong smooth filament thread — I'll have to sort through my synthetics; I don't recall ever having anything but fuzzy chopped-staple polyester and a couple-few of spools of vintage nylon, none of them black, and a very coarse "bonded" nylon. And the thread on the lace side matches the lace perfectly. I was surprised, upon picking it out, to see that is came from a spool of gray "subsilk" thread that I still have. I saved a few of the longer snippets and held one against the spool to make sure.
It wasn't quite as easy as snipping the gray thread in a few places and pulling the black thread right out, partly because I didn't realize, before doing the first leg, that both rows of stitching and the securing of the overlap had been done in one pass. I had made the hem by turning up an inch and appliquéing gray lace over it.
I think I shall turn the hem up on a thread-marked line, verify the length, then sew the lace onto the outside bottom of the pants with the scalloped side just barely hanging over, turn up on the marked line again, and top-stitch the scalloped side.
I was thinking that I'd have to wind a gray bobbin, but I'll want the gray thread in the needle both times. I may use some random bobbin of subsilk in the bobbin for the first stitching because it will be hidden inside the hem, and I might want to take it out again some time.
hem up pants of gray suit
While pinning the hem up to try it on, I decided to just sew it that way, using the old hem for a turn-under. The lace is pretty, but I don't even see it myself — and there are tiny holes in the pants.
Then I put darts in the fronts of the legs of my black grubbies, thereby covering small holes in the knees. The last time I took in the legs of grubbies, I trimmed the darts and covered the raw edges with zig-zag, but there isn't that much wear left in these. I stitched a toe's width from the seam, then turned around and stitched back down along the fold.
I sewed it on the treadle. I thought it would be hard to stitch lengthwise on a flatbed, but I just turned the leg inside out and smoothed a couple of inches at a time, and the teacup didn't get in my way at all, though there were a couple of times I was glad that I've learned how to start the treadle without pushing the handwheel.
It probably would have been a different story if I'd made the pants close-fitting, as was my goal the previous time I darted sweat pants. I made the darts two inches wide at the bottom, which took out four inches in each leg, and the pants don't miss it at all.
I folded the leg, right-side out with the seams matched at the bottom and enough off to lie flat at the top, then stroked the length of an appointment card with my nonce pencil. Then I laid my twenty-four-inch ruler with one corner on the fold, one corner on the edge of the hem, and the edge touching the top of the appointment-card line, and drew the rest of the stitching line.
According to the creases inside the hem, the flowered skirt was taken up first one inch, then half an inch since it was last washed. I'm inclined to "awk scrickle I'm shrinking fast!", but it's really that my fear of tripping over my hem is growing fast.
The to-do list says to take it up two inches, but I tried both skirts on (and then measured them against each other: they are precisely the same length) and decided that one inch would be enough. But I plan to use the White's longest stitch (five to the inch) to sew the hem.
I seem to have come close to that last time, as the hem was easy to remove. Oddly, the needle thread was easier to pull than the bobbin thread. So I'd pull until the rumples got hard to move, cut the thread an inch or two beyond them, pull the thread out, then pick up the freed bobbin thread, pop a stitch through by pulling on it, cut it an inch or two beyond that, pull the bobbin thread out, turn the work over, pick up the freed end of the needle thread, and repeat.
Meanwhile, the cat curled up on the other end of the carpet sample I was using to catch the threads, so I haven't shaken it yet.
Before doing that, I put plywood on the ironing board, and went around the hem with an appointment card and my nonce pencil
Then I interrupted work to type this. I've got one pin stuck in to hold the hem one inch wider. Should have it sewn by supper time. But it's time for a nap now.
⁂
hem up flowered skirt two inches
I did get it sewn by sunset. I wish I'd begun with the black skirt, because I want to wear this one to church to make sure it's short enough before shortening the other one, and I think I wore it last Sunday.
And then I pressed it. The fifties meaning of "pressed", i.e. ironed it without steam or sprinkling. It needed it, as the pleats had all been pressed (literal meaning) into creases by hanging in the closet. The creases from the previous two turn-ups also pressed out.
Ran out of bobbin thread partway around, and had to pause to re-fill it. I did use five-to-the-inch stitches.
GIMP BLANKET2.JPG and
BLANKET6.JPG Sometime
yesterday I scaled two pictures and named the the
links I made on 14 January. There was a
typo in one of the filespecs; instead of
correcting it, I changed the link to match.
One of my two pairs of silk tights has a couple of small holes that need to be darned before they become large holes, so I've been looking for the thread I ravelled out of the pair that was too tight in the waist. I think maybe I used it up because it is very good for fine darning. Yesterday, inspiration struck: at least two of the silk rags I saved for making patches have the original waistbands — I can ravel out more!
And since I don't need to get the over-enthusiastic elastic out, I don't need to find a spool to keep the thread on: I can ravel out one needleful at a time.
Today's chore is to get the pattern for my linen jersey down off the wall. My newest linen jersey was made in 2010, so it may be a bit disordered. I have quite certainly forgotten how to use it, but last time I took notes.
I did have it off the wall to use as a basis for designing my overjersey in 2014.
⁂
In moving stuff to gain access to the pattern wall, I noticed that the box my point presser is in is marked "#695 | POINT PRESSER | 1/12 DOZEN".
This also reminded me that I have a point presser. I've never used it — probably because I don't know that I have one.
Perhaps it would help if I took it out of the box and put it next to the sleeve board.
The woven-jersey pattern needs a list of the pieces. I shall write it on the pattern for the back pocket, which isn't used with any other pattern. The back pattern has a note that I used it to make my red-silk crepe underdress. The sleeve pattern was used to make the taxicab jersey and the linen-print suit that I don't wear because it's too loud. I think I'll wear the tunic with black jeans some time. I appear to have thrown out the sleeve pattern I used for the taxicab jersey.
I've got the front and the front yoke, the back and the back yoke, the sleeve, the back pockets, and the front pockets. In glancing over my diary for the taxicab jersey, I see that I don't need interfacing because I'm using hook-and-eye tape. And now I see that it's time to re-copy my shopping list again.
The collar! No pattern for interfacing; I think I'll draft a new one. The diary said that the curry collar was an inch too short; the pattern piece says it was used for both the curry collar and the taxicab collar. Fawchunately, both jerseys are still around.
First impression: the complaint about the curry collar was that I never hooked the top hook. That hook is three-fourths of an inch lower on the taxicab jersey. Also, the curry-jersey collar is sewn with half-inch seams, the taxicab with quarter-inch seams. That makes it half an inch longer. But superimposing the collars shows that it's an inch longer. Must have stretched some, and I'm using a better-quality fabric this time, and also using Pam's fusible interfacing. But the curry collar is long enough. Must try both on before cutting. And carefully read the diary. I might have shifted the pattern a quarter inch from the fold.
When ironing the skirt I wished, once again, that I knew who made the fabric. I got further proof of how good the print is this morning when I'd been fumbling with the fastenings for a while before I realized that I was putting it on inside out.
I was sure that my red silk underdress left many inches of my long slip hanging out, but if I shorten the skirt again, I'm going to have to shorten the under-dress too.
I'd be really, really worried about my back were it not that most of the things I've been shortening hang from the waist.
I think I'll start the list to be written on the pocket pattern today. I don't want to write on the pattern until I'm sure I don't want to make changes, so I'll keep the list at the bottom of this file, between two asterisms and above the stuff that is commented out. Perhaps I'll also refrain from writing "WJ#1" and so forth on the pieces until I have used all of them.
I rode to Lowery's yesterday and bought a quarter yard of hook-and-eye tape. There wasn't any ice-blue cotton sewing thread. I probably have some in my embroidery-floss collection.
I put the linen on a card table and measured it. I may put this project on hold until Dave is done with the taxes so I can use both tables — or go to K-Mart and buy a third table. I'd like to have three to cut out on; I can open out the eating table, but I want to fuss and dither with the fabric on the table; it's not comfortable to dither on a table that has to be cleared off at supper time.
I found a long-sleeved T-shirt at Our Father's House, but I think I'll repair the old one anyway.
The new-to-me shirt is baggy in the sleeves and tight around the chest. I also bought one that appears to fit better —snug in the sleeves and as big as the other in the chest— but I can't put my head through the neck. So I'll donate it back.
I see that I need to cut two on the fold for the front yoke. I think I need to make a whole pattern to simplify layout.
I also need to make an interfacing pattern for the collar. I plan to use quarter-inch seams, but I think I'll trim half an inch off the pattern to allow ample clearance from the stitching.
Now should the interfacing be ironed to the part of the collar that shows, or the part that rubs against the neck?
I can get most of the pattern pieces on the fabric with it folded in half to fit on the card tables.
I should have drawn a thread across one end long ago.
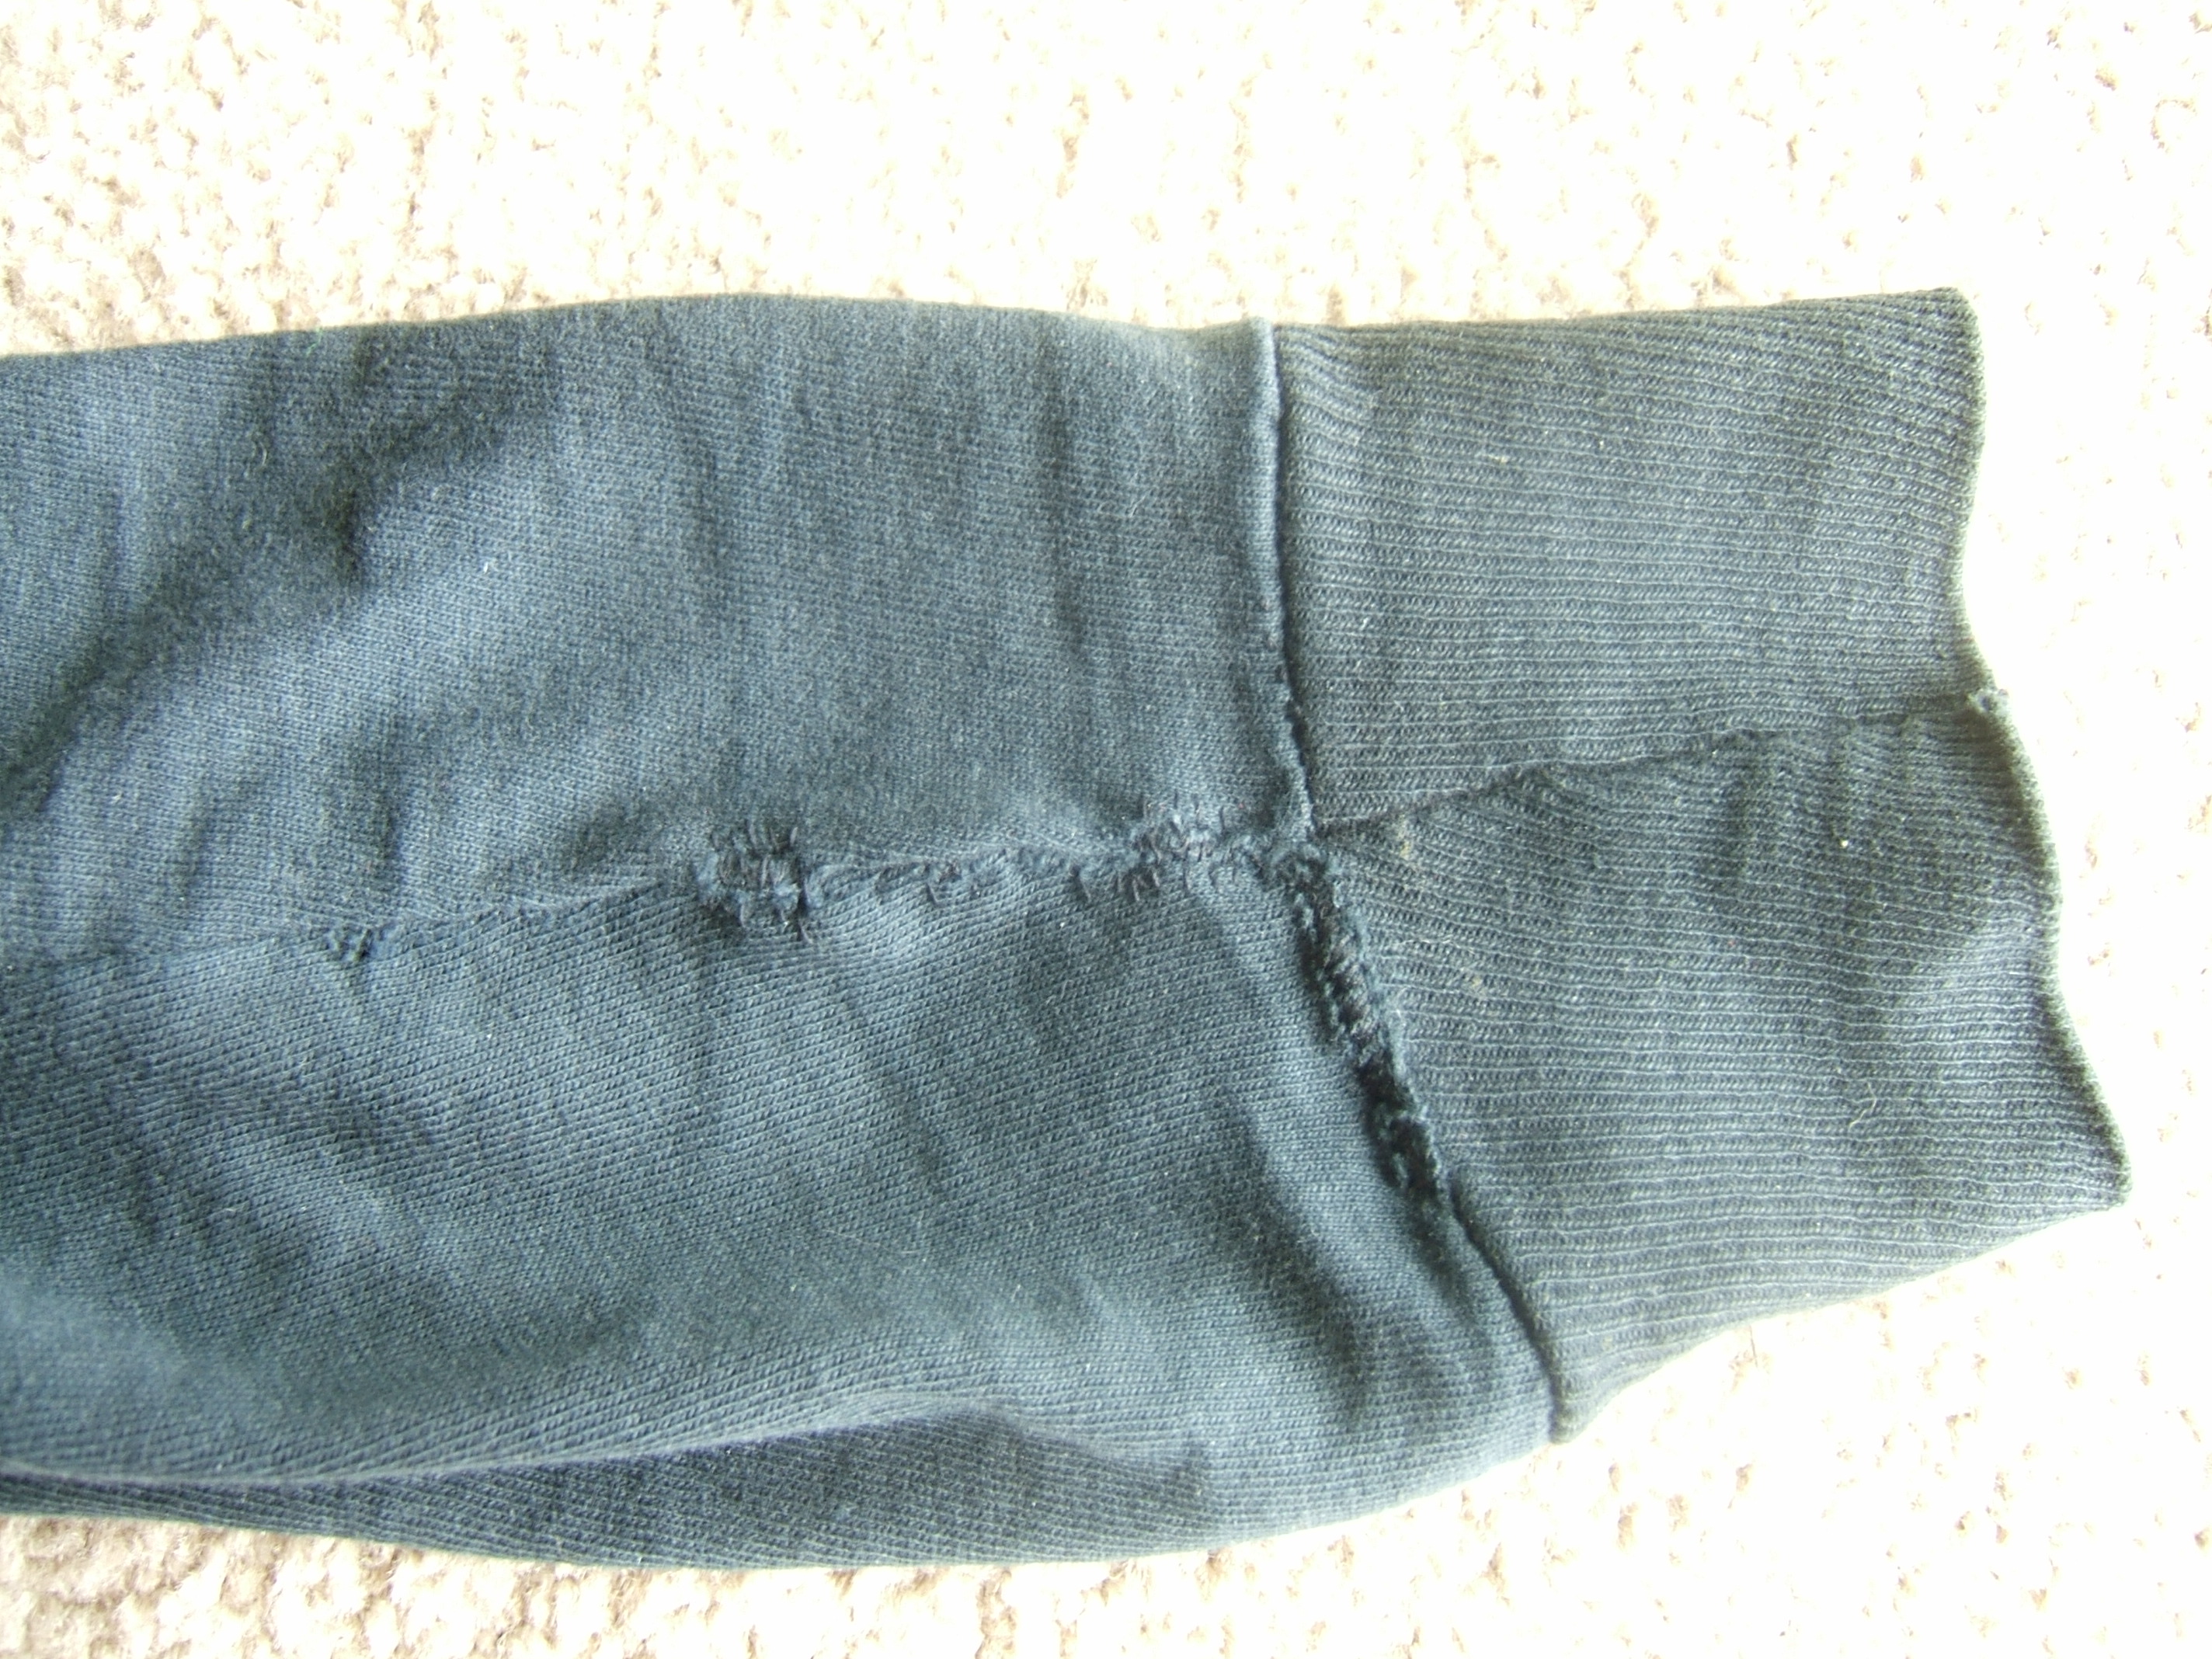
I decided that the T-shirt was worth mending. It went easier than I expected.
First, I selected my weakest black cotton thread — well, I'm sure there is black floss in my embroidery collection, but "Subsilk" sits out on the shelf where it's easy to find. I didn't want the thread to tear through the feeble fabric of the worn shirt.
Working on the wrong side, I ran the thread through the lumpy overlocked seam joining the sleeve to the cuff. No backstitching, again because I want the stitches, not the fabric, to give under stress.
I took a stitch to hold the corner of the tear in place, and found myself in a good place to begin baseball-stitching the sleeve to the cuff. I like to work baseball stitch by putting the needle down through the fabric and bringing it up through the gap being closed. At least I liked it that way today. With the tear horizontal, I stuck the needle down through the overlocking, then turned the needle to point up and stuck it through the fabric, and continued to the end of the tear.
I ran the thread through the overlocking back to the corner, then stretched the seam well to be sure the thread wouldn't break when I put the shirt on.
At the top of the seam, the fabric was worn away on both sides of the overlocking, and there were holes on the other side here and there as I worked down the tear. I dealt with this by putting the needle in near the edge of the tear, weaving over the overlocking and under the edge of the hole on the other side, and dipping under the overlocking to return. This kept me in rhythm when the tear was all there was and I could work the same way that I re-attached the cuff. I ended by running the thread through the overlocking.
This won't hold long, but I won't need this shirt after I finish my new long-sleeved jersey. I've been looking at the dinjy* sleeve-ends on the old jersey, and wondering whether I should cut the casings of the sleeves from black linen when I make the new one. If I do, I should also cut the collar from black linen. And put a black patch under the top of the pencil pocket. Hrrm . . . and if I faced the casing of the back pockets with black, I could pick it off when it wears through. Time to spend some quality time with my scrap box. I don't offhand remember black linen that isn't pants weight.
*dinjy: neither "dingy" nor "dingey" is spelled correctly. I think that this is an oral-only word.
⁂
Before mending the T-shirt, I drew threads at both ends of the yellow linen. The first thread broke so frequently as to give me pause with respect to the durability of the fabric, particularly since it didn't really break, it just sort of sighed apart, sometimes leaving me with a bit of fluff pinched between my fingers. At least it was always easy to tell which thread I'd been pulling.
The other thread came pretty close to coming out all in one piece; I stopped several times and cut it. Which one does by picking up a loop of the thread a few inches from the end, pulling more gathers into the fabric and stroking them away from the proposed cut, then cutting close to the fabric so that the old end is easy to pull out and one has a good long end to take hold of to continue pulling.
This is something easier done than said. I should take pictures some day.
⁂
After mending the T-shirt sleeve, I picked out the hems of Dave's new pants. I had been tempted to turn them up two inches without picking out the old hems. It wasn't hard, as the thread was slick and they were secured with simple straight stitch. I cut the inside thread every inch or so.
Meditating in the night, I realized that I needed reinforements under the corners of the patch pockets, and could use black rectangles the full width, thereby covering up the stains from my pencils. (Somebody must make a pocket case for a non-mechanical pencil, such as grandmother had in her library table.)
Also realized that I needed to add belt casings and a belt to the pieces that need to be cut.
I appear to have plenty of fabric; I think I will make a matching scarf even though I'm up to my neck in linen scarves. The do-rag, of course, can fit in almost anywhere. But I'd better lay it out at the same time as the jersey.
Perhaps I have black linen scraps suitable for making another do-rag.
⁂
DH wants to wear his new chinos tomorrow, so I pressed and pinned the hems, but there is something wrong with the upper tension on the White and after sunset, I can't see and think well enough to figure out what. Perhaps I can finish the job in the morning.
Ak-chew-wally, it wouldn't take long to sew them by hand, but I don't feel like locating suitable thread. Particularly when I have only artificial light to see the colors by.
Since they need to be shortened two inches, I turned them inside out and drew along an appointment card with my wash-out marker, then pressed the old creases sorta flat — polyester doesn't yield up professionally-pressed creases — and folded and pressed the raw edge to meet the blue line, then folded and pinned with the raw edge inside the fold as a guide.
He tried the pants on and wanted them an inch and a half shorter. I had sewn with five stitches to the inch, so getting the hem out was little trouble. I planned to repeat the previous procedure, but this made the hem so wide that it noticed the taper of the leg, so I intend to cut along the crease of the old hem, which is still visible, and then fold up to match the new mark.
The width of a business card plus an inch and a half happens to be the length of a business card, so the new fold line was easy to mark.
Just as I got out the smaller cutting mat intending to cut along the crease, it was time to lie down in order to finish my nap before time to leave for an appointment, and now I'm definitely in "do not operate heavy machinery" mode.
Should be fairly safe to search RUFFTEXT for mistakes.
search site for "comcast"
Searched all pages this morning and didn't find any links to the site that isn't there any more.
Then I was reminded that the pants-shortening had hung fire, and finished the job. I cut on the wrong crease the first time, but the only result is that one of the offcuts is in two pieces instead of one. The overhead light shining straight down was hopeless for cutting on a crease, so I carried the small cutting mat and its board into the living room, put it on the floor, and cut by the sky-light coming in through the glass door.
I have been contemplating my yellow jersey.
I tried on the taxicab jersey. The collar meets, but just barely. Switching from half-inch seams to quarter-inch seams made the taxicab collar half an inch longer than the curry collar. I think I shall draft a pattern half an inch longer than the taxicab collar for the yellow collar.
The front pockets on the taxicab jersey aren't as bad as the back pockets, but they are definitely grungy, and the graphite inside the pencil pockets is prominently visible. I'm thinking of making the notebook pocket black, and putting a black decoration on the phone pocket — perhaps concealing a snap, like my jacketing overjersey. A snap would make the pocket easier to clean.
I also notice a smudge on each side of the front, close to the shoulder seam and about an inch from the sleeve seam. What brought that on?
The patch on the front is very prominent because the scrap had not been exposed to the sun for years. I think I should put an applequé in this place.
The belt casing above the keys-and-lipstick pocket is worn through. Still functional, and the rest of the shirt is worn out, so I don't think I need to do anything. The entire back casing is grungy, particularly over the wallet pocket. Oddly, it's least grungy over the handkerchief pocket, which I frequently get into while moving. I stop before taking anything out of the other two pockets. Perhaps it's because I'm often wearing gloves when I use my handkerchief a lot. (Does not compute.)
I went through the linen box and selected the scraps from my knickers and black bra. No date on the tag, but the bra is no longer around, and I'm pretty sure the knickers are also long gone. My bra pattern says I made a black one in 2009.
There is one large scrap, but if I cut a belt casing and a back-pocket facing, I may end up piecing. And I need elastic casings for the sleeves, too.
There are also thumb prints on the shoulders of my curry jersey, but the spots are slightly orange rather than dirt color. I don't see thumb prints on my cotton-knit jerseys, but if I stare hard enough at the one that's completely worn out, I can see a shadow on one side.

Looking at my sleeve when I should have been listening to the sermon, I visualized a black band that wide on the end of my jersey sleeve and didn't like it. Then I noticed that when I have two rounds of elastic and a very narrow ruffle, the right side of the sleeve does not touch my arm.
So I intend to sew on a black facing that comes to the right side only the width of a very narrow seam allowance, to give a piped effect. Then stitch in the ditch for the first elastic channel. But this will make the ruffle four layers thick, which might make it stiff.
On to the collar: black or yellow? Even though there is very little collar staining on the old jerseys, I think I'll make it yellow lined with black. Sew the yellow side on first, then secure the black side with top-stitching and continue all around the collar. The white interfacing ironed onto the yellow side will keep the black from showing through.
A better job of darning than I thought: putting on T-shirts this morning, I thought that I had the wrong one because I couldn't see the darn.
Of course, the mend is black on black and the light at the back of the closet isn't all that great.
Where matters stood this morning: I had copied the interfacing pattern with the excess length folded out (as I used it for cutting last time), copied the collar pattern half an inch longer, laid the interfacing pattern on the collar pattern and thrown it into the recycling bin, drawn around the collar pattern, and used my blue-plastic measuring dinger to mark a line half an inch from the cutting line.
This morning I meditated on how to make the interfacing symmetrical, then cut along the line where I'd drawn around the collar pattern, folded it in half, taped three places along one edge, then cut just outside the half-inch line. I cut the taped edge last so that everything stayed lined up. Then I laid it on the collar pattern and it fits.

Unfortunately, white-on-white doesn't photograph at all.
Next I'll determine the sleeve length.
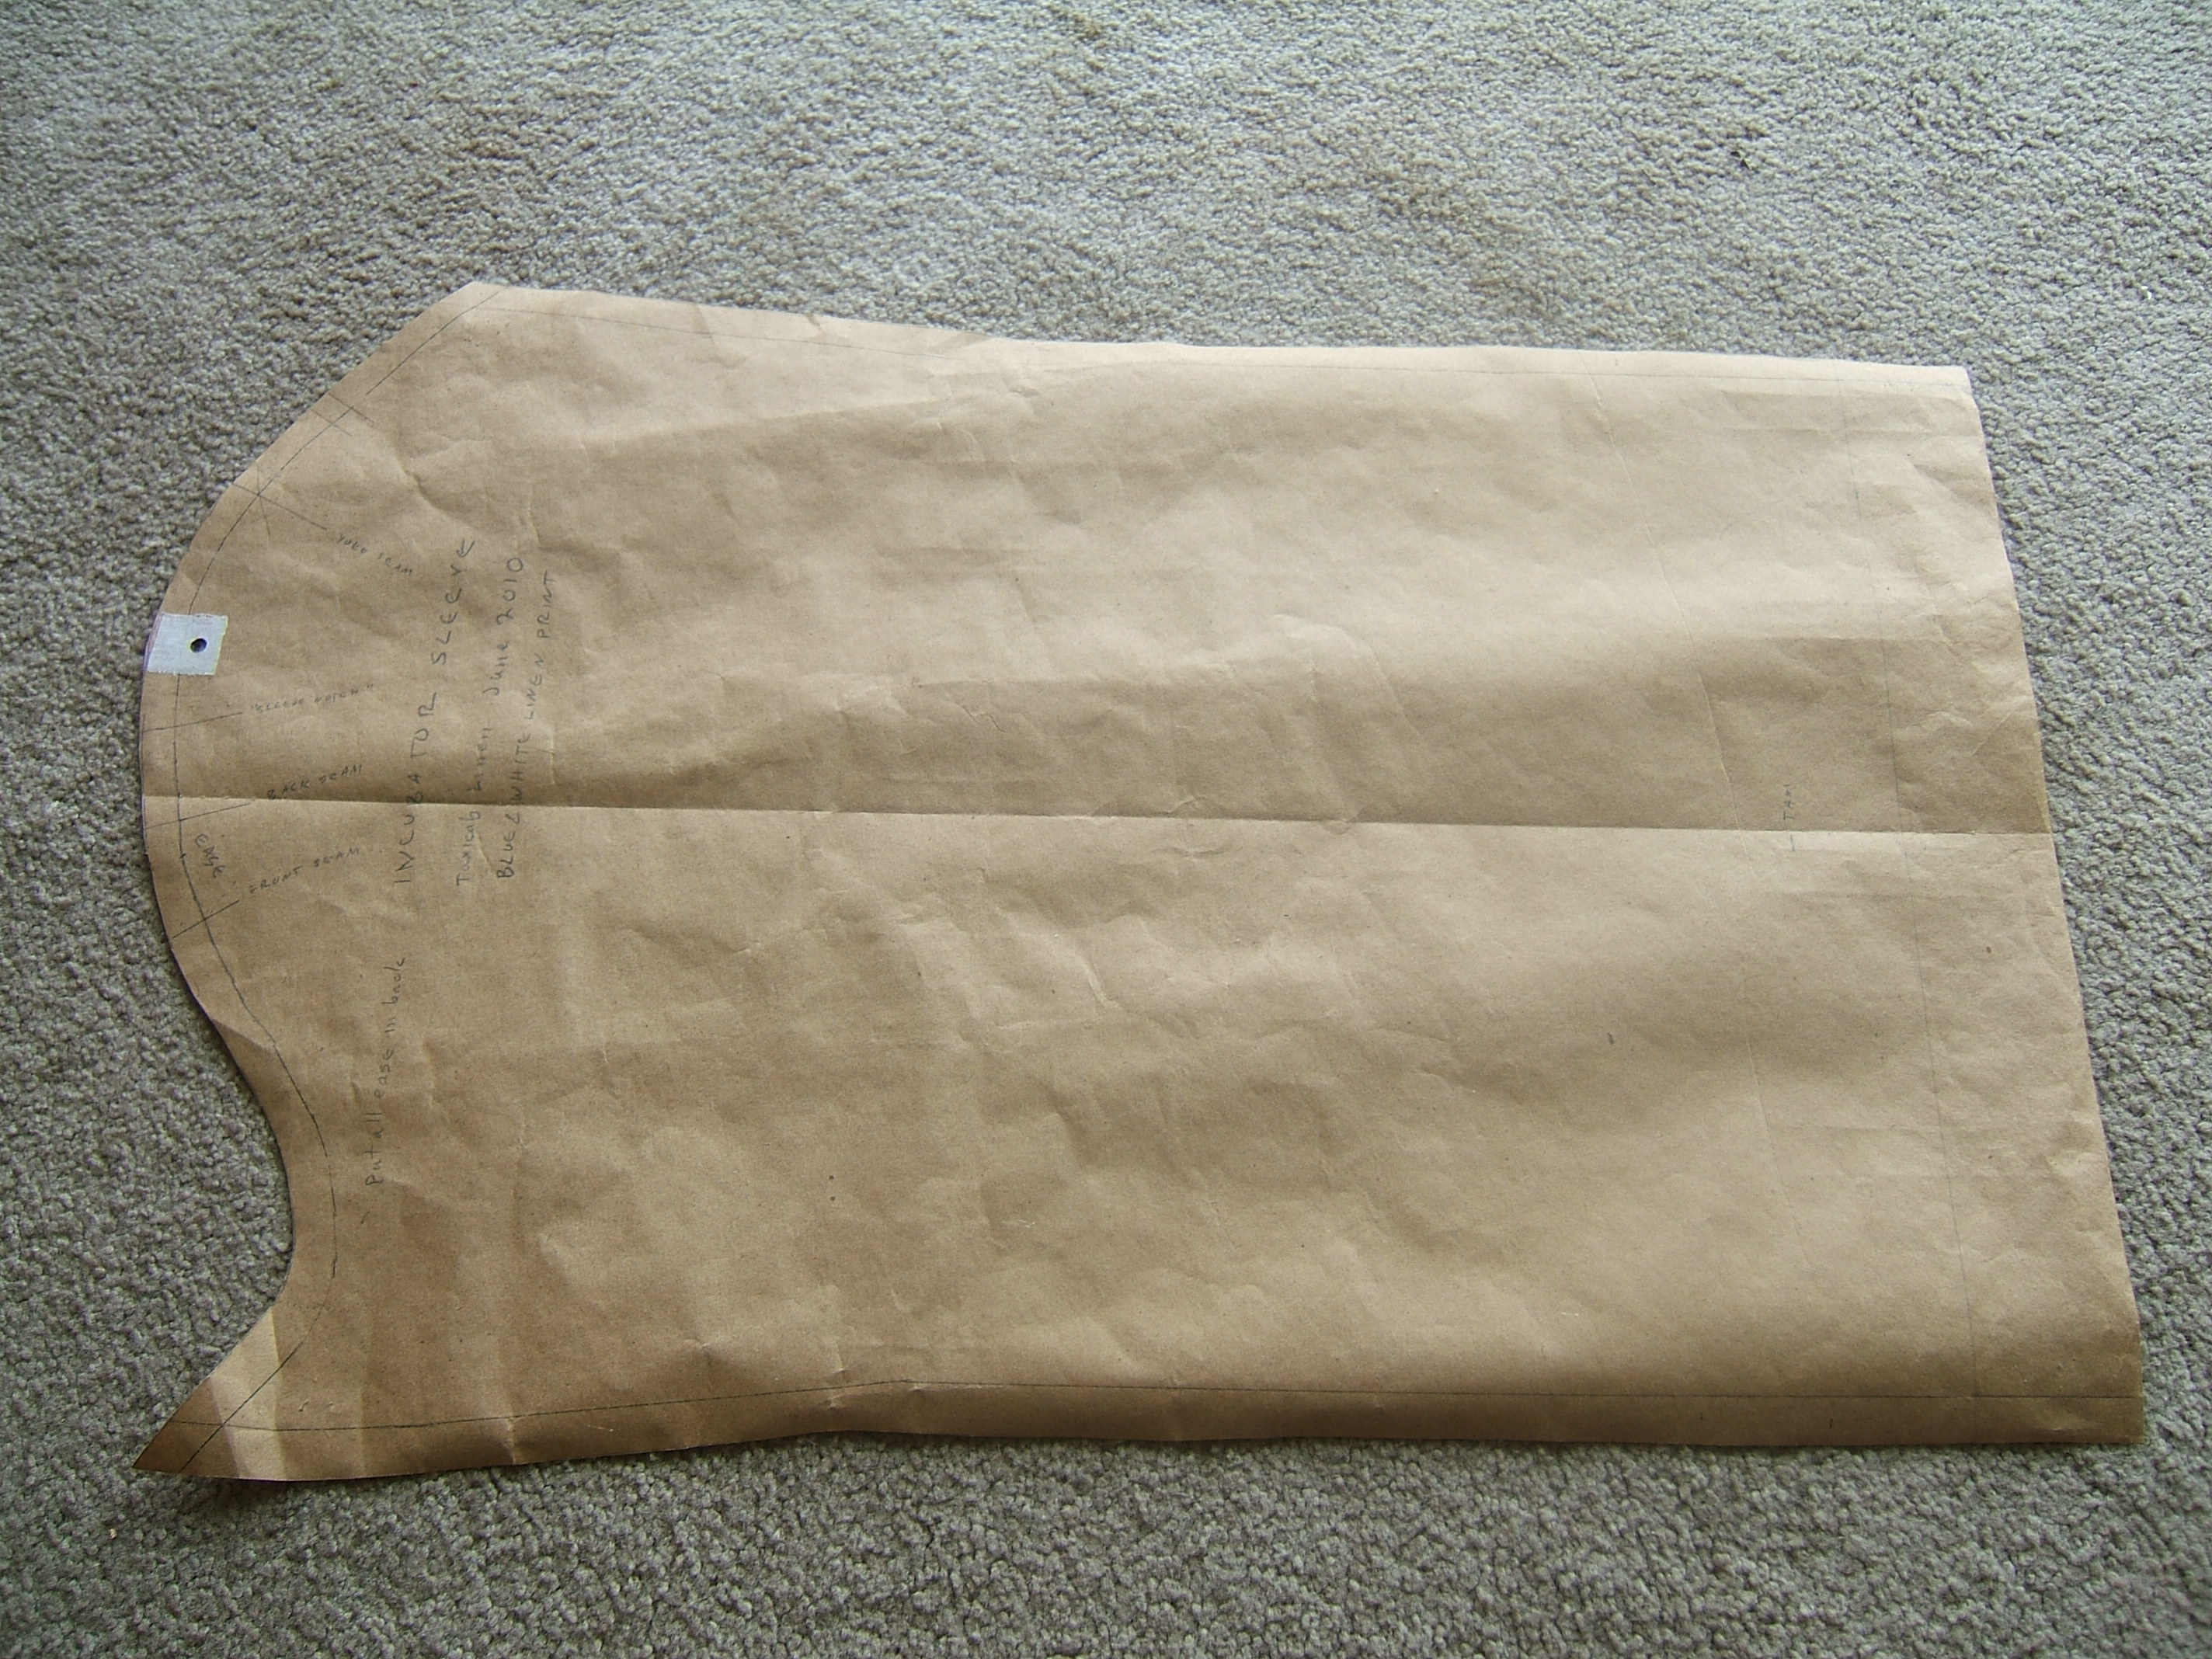
It would appear that the taxicab jersey was the first time I used the incubator sleeve on a woven. I got the length by adding two inches to a sleeve which had already had two inches added to it, and when the sleeves got too dirty to wash, I cut an inch and a quarter off — which I know because some providence made me save the strips I cut off, and they are plainly labeled by dirt-stain zig-zags. This must have been the second time I shortened the sleeves: when I measure the sleeves against the pattern, the ends come an inch and a half above the two-inch line — that is, the line showing the original length of the sleeve that I lengthened two inches.
But what about the shirring I mean to make with two rows of elastic? That might call for a longer sleeve.
The black-print shirt sleeve ends half an inch below the two-inch line. The raw-silk shirt sleeve ends just at the two-inch line.
Wurra, wurrah. Well, I can be sure of the right length for the facing. The black-silk hem is two and three-fourths inches wide, and has a wider ruffle than I plan to use for the jersey. The print-shirt hem is two and five eighths, and also has a wider ruffle than I plan to use. Add three-fourths for the seam and turn-under, and we have three and a half. I would like the facing to extend a bit above the casing, so that's four inches by the width of the sleeve. Maybe four and a half.
The casings on the black raw silk shirt are half an inch wide, and there is five-eighths of an inch between them.
The lower casing on the print shirt is five-eighths, the upper is nine sixteenths, and there is three-fourths of an inch between them.
I think that I shall stitch three casings but fill only two, leaving two rows of ornamental stitches between them.
I shall sew the facing on after the flat-fell seam of the sleeve is done, so I can press open the facing's seam and hem down the allowances; then I can open the seam to put the elastic in, and just leave it open.
Off to cut another pattern piece!
⁂
Grump. My spreadsheet paper is nowhere near as long as the sleeve is wide, so I had to use newsprint.
And now I remember that I have a roll of plotter paper.
Today I'm shortening Dave's new slacks. Picked out the hems; the thread was so slick that cutting a thread and pulling apart unravelled for an inch in both directions. Also so strong that I could pull four or five inches of the needle thread out. Tried what I presume is the bobbin thread first, and it stuck. Next step is to press the hem open and cut along the crease.
As I mark more and more pieces to be cut in black, the scrap from my knickers is starting to look rather small. I'd rather not use two shades of black, and the remaining uncut piece of black linen is sheer — which is why I haven't made it into bras yet. That, and it has a real selvage, which I hate to waste on bias-cut bras.
⁂
Again, the overhead light was hopeless for cutting along the stitching line. This time I turned it off and walked around to the other side of the ironing board so that the light from the window came from my right.
After lunch I marked around with a business card, and was on my way to the rocking chair with the pants draped over my arm and the pin dish in my hand when I remembered that I press a crease matching the raw edge to the blue line, I don't pin it. So I think it's nap time.
I think I'll find my beige thread before I lie down.
⁂
It matches pretty well, but there isn't a White bobbin in the bag, and I don't have a spare White bobbin. Well, it won't kill me to use the Necchi!
The thread looks as though it were made for these pants, even though their color is nothing like the "oakwood" the thread was professionally matched to. I also used it for all the shirts made with prints or stripes chosen to harmonize with the oakwood, and the grayish-beige/beigish gray color seems to blend in everywhere. In case I lose the spool, it's Guetermann cotton, color 3400.
I should look at Guetermann's poly to see whether it has a color 3400.
Sigh. Oakwood linen twill — or was it a cotton and linen blend? — made great pants, very temporarily. The weave was loose and the threads feeble.
⁂
I considered making a full pattern for the back of the jersey, then realized that it was a rectangle with two corners nipped off. I intend to make patterns for all the rectangular pieces, as that makes it easier to see what can be gotten out of a scrap. Also serves as a check list, and can be pinned to the piece as a label. I think I'll also make a pocket pattern with the extra inch already added.
I just realized that I need to put the pattern I used to make my white-linen do-rag on the pile. I am not going to make a pattern for the 36" by 2 1/2" band!
I plan to cut all the black bits before trying to arrange the yellow — that's going to require the eating table and both card tables, I suspect.
I think I'll put a black reinforcement patch for a snap on the phone pocket, and make a matching yellow patch for the notebook pocket. Odd. The pencil pocket of the taxicab jersey is dirty all the way to the bottom, not merely marked at the top like the cotton jersey that I plan to cut into cleaning rags as soon as the yellow jersey is ready. And when I started, I meant to say that the curry jersey isn't marked at all, but it's marked on the inside like the taxicab jersey, but it's a better fabric — and the marks don't extend below the double fabric of the hem — so the dirt doesn't shine through.
At any rate, the top hem of the notebook pocket of the taxicab jersey is grubbier than the phone pocket, so I'm right to make the pocket black — or at least with a black hem.
I haven't re-read the "Cool, and as ugly as a mud fence" file yet.
⁂
Just read down as far as my reasoning on back pockets and the drawstring, while making the curry jersey. My current reasoning is that if the pockets are too high, I can tie the drawstring a little looser.
Naptime! I've got to wake up in time to make supper. I left off at "I made the casing in three pieces".
⁂
Almost prepared supper an hour early. While waiting for time to put it in the oven, I continue to read.
Elastic . . . somewhat to my surprise, I have suitable elastic in my stash. Wide elastic is essential for this; for most jobs I use two or three rows of quarter-inch elastic because it breathes — and is easier to install. The notes don't say how long the elastic is, and neither does the pocket pattern. The elastic is 3/4". The old jerseys are worn enough that I can see that the elasics in them match each other, but not the piece in hand. I do have a scrap that matches those two, and I like the way it stretches much better than the piece in hand. I must add "elastic" to my shopping list.
Now I've added "tape for ends of elastic" to the list of notions. Ta Dah! I have three cards of 3/4" twill tape. I selected the white one because it's thinner than the unbleached tapes, and might be tighter woven.
I've improved on the attachment of the bottom of the back pocket. I think that that will be discussed in the notes on the taxicab jersey below.
And now I'm down to "She wore her New Jersey" and I think I'll knock off for the day. It's four minutes until time to take supper out of the oven, and I'm hungry.
⁂
Name tag!
I bought a yard of 3/4" elastic and seven White bobbins yesterday. I showed him a sample and asked for half a dozen; he said there were seven left in the bag and I took all of them.
The casing allowance on the back pocket is an inch and five sixteenths. Twice that is two inches and five eighths. Making it a quarter inch wider to avoid a pile-up of folded edges: two and seven eighths. So three inches would allow for a millimeter of error and a sixteenth of an inch to hang over to allow for the turn of the cloth.
⁂
I woke up asleep and went back to bed after breakfast, but after lunch I cut out the sleeve facings. I think that if I cut a three-inch strip off the scrap that it will be exactly wide enough for the pocket-casing cover. I need a pattern only for a label — so I think I'll just make a label.
Fabric seems a bit sheer to have been selected to make knickers.
Resuming reading: "three-fourths is just right" for the width of a pencil pocket.
25 June 2010: I forgot to boil the hook-and-eye tape. It's on the stove now.
6 July: I need 3/8 yard of 34" elastic. So I'll have 5/8 yard left over.
Says I trimmed the neck-hole as well as making the collar longer. I'll just make it fit when I sew the slightly-longer collar to the shirt.
7 July: "I should have cut the casing strips two and a quarter inches wide, maybe two and a half. But I think I can make two inches work."
Drat. No anchor tags, so I can't link to 13 July, where I discuss attaching the casings.
17 July: the back of the neck hole must be eased onto the collar to make up for the lack of dowager-hump darts. I have marked that on the yoke pattern.
20 July: don't dead-reckon the hook-and-eye tape, sew on one half, then hook them together and baste the other one. One side of each tape can be sewn on by machine, but the other has to be sewn by hand. Machine stitching should continue to edge so that it can disappear into a seam instead of needing to be ended.
Ha! The last paragraph of 27 July speculates on the possibility of knotting the end of a thread by working a french knot in the air. When I read this post
On 3/8/2019 9:36 AM, Gabrielle Stanley wrote:
My favourite tricks to keep thread from tangling:
1) Don’t have too long a piece of thread. The longer it is, the more it tangles.
2) I use Thread Heaven rather than beeswax, as it doesn’t need to be ironed to go into the thread.
3) Stretch the thread before starting sewing. I tend to combine this with making the knot if I need one.
NB. I use the technique of winding the thread a few times around the needle, pinch the windings and pull the needle through while continuing to pinch. (I think it is a millinery knot, see here for pictures:
http://www.sempstress.org/skill/the-easy-way-to-tie-a-knot-at-the-end- of-your-sewing-thread/ )
This makes a very neat knot without the loops that sometimes happen when you do the 'wind the thread around your finger and rub it with your thumb' method.
I don’t pay any attention to whether I knot the cut end or the free end and have never found I get problems.
4) When I take a stitch, I put my thumb or a finger (from the fabric holding hand, not the needle pulling hand) on the place where the thread goes in to the fabric and press - a little more than lightly, but not pinching tight. This seems to somehow prevent the knots that sometimes form on the surface and stop the thread from pulling through.
Another set of pictures for tying this knot:
https://www.instructables.com/id/ Quintential-Way-to-Knot-Your-Thread-When-Sewing/
Gabrielle
a few days ago, I thought that the millinery knot was entirely new to me.
Won't be long before I forget it again, since I hardly ever tie a knot that's meant to stay in the work.
I've never ironed beeswax into thread, and I can't think of a reason to experiment. You'd probably get more wax on the iron and the surface you are ironing on than into the thread. If I want wax inside the thread, I just draw the thread over the wax a few more times.
Wouldn't need a surface to iron on, come to think of it; the thread could be drawn over a hot iron standing on its heel.
All done reading the notes on the taxicab jersey, and I've made a label to pin to the pocket facing when I cut it.
I cut off a three-inch strip of black linen for the pocket facing and pinned the label to it. I won't trim the ends until after it's been sewn to the pocket.
In the sleepless night, I wondered about sewing it to the pocket in a way to stay lined up when the casing is folded, then realized that what I need to do is to draw a blue mark on the fold line on the wrong side of the pocket, line up the pocket and facing, and baste along that line. Use black thread and don't take the basting out; it will remove itself with wear.
It's over sixty outside. I'd better get this project moving.
Tore one end off the facing label so that it won't be mistaken for a pattern.
Measuring, with the aid of four corsage pins to keep the nearby elastic stretched: The back belt casing on the taxicab jersey is 20 1/2" long.
The curry jersey back belt casing: 22".
The back pattern at the waistline mark: 12 1/4", on the fold, 24 1/2, minus seam allowances 23 1/4.
And I find that on the front pattern is written "casings 2" strips front 2" x 13" back 23".
The ends of the old casings are hemmed, which gives half an inch of clearance to the seams (plus one eighth). I'm planning to fold the casing in half and sew the ends, which takes only a quarter inch off, so I should probably cut 22 1/2".
Now 2 1/2" folded in half is 1 1/4". If I put the raw edge on the waist mark, sew, and fold up, that leave 3/4" to be folded down; if I keep the fold a quarter inch above the waist line, that makes the casing only half an inch wide. Then sewing it down with two rows of stitching subtracts a quarter inch — if I use this plan, I should cut the casing three inches wide. Checking: three, one and a half, three-fourths past the fold, a quarter off for the bottom seam, half an inch wide extending from the stitched-down fold a quarter inch below the waist line to the loose fold a quarter inch above the waist line. I'm planning to use three- <checks> I don't have three-quarter inch tape. Oh, well, the half-inch tape in the taxicab jersey worked well enough. And I could use one-inch tape.
Or white three-quarters, for that matter. All will end up as ropes less than half an inch across anyhow.
<visualizes> Yes, the bar tacks securing the pocket divisions can be kept between the two rows of stitching securing the bottom of the casing.
Off to make a label and draw a thread.
I cut the collar interfacing yesterday. Started to — can't have been on the day before, because I was wiped out when I got back from Pierceton. Anyhow, I began by drawing around the pattern with a wash-out marker, discovered that I'd slopped off the edge of the fabric, washed it off, and had to wait for it to dry before starting over.
This morning, I noticed that the little lamp table didn't have a lamp on it, and moved all the pieces that have already been cut onto it. Now it's much easier to see what I'm doing.
It being wash day, removing the drawstring from a pair of sweat pants is my sewing goal for the day.
⁂
Opening the casing was a lot more complicated than I expected. First I had to pick out a label sewn in just where I wanted to open it, and eventually I learned that what appeared to be a hem was an very neatly flatlocked band. When I finally got the casing open, cutting the stitches holding the drawstring was nothing.
Then when I tried to untie the dangling knot this whole exercise was intended to get rid of, I realized that it had been washed a few times. I was tempted to cut it, but a #10 knitting needle finally did the trick. When I got it out, I was glad that I hadn't cut it — it's black twill tape of the width I was planning to use for the belt of the jersey, it's thicker, it's exactly the right length, and the ends are already finished. So I put it on the lamp table and put both of the candidate tapes back into the box.
At some point in the struggle, I damaged the stitches holding the ends of the elastic together, so I'll have to re-stitch that before sewing the casing back on.
⁂
Turned out that the stitches were also unsecured on the end my seam ripper was never near. I think these were basting stitches and the stitches holding the drawstring were supposed to do the job. Whatever, I put a bar tack at one end, and then to save stopping and starting again, I sort of overcast/diagonal stitched to the other end to make another bar tack. Then I found a needle threaded with black and overcast the split in the seam joining the ends of the casing. They had been joined with a pressed-open seam with almost no allowance, so hand-sewing was easiest.
Now I'm halfway through re-threading the zig-zag machine with black polyester.
Lying awake in the night, I ask myself: I get my cell phone and notebook out much more often than my wallet and keys, so why are my back pockets so much more worn than the front pockets? And the back pocket I get into most often is the handkerchief pocket, and it's the least worn. At least it makes sense that the pocket with my keys in it is more worn than the wallet pocket. Perhaps it will make more sense by daylight.
I'm re-thinking the scheme of making the notebook pocket black. The black fabric is thinner than the yellow fabric, and though there is little wear on the old pockets, using a thin fabric is pushing it. Also, it's really, really hard to make a black pocket look decent with a yellow pocket on the other side, and I do want to put black patches under the tops of the pockets after all. Don't really need re-inforcements because the yoke is double. I considered facing the notebook pocket like the back pockets, but visualized it and said "yuk"; not to mention that it would be a pain to make neat.
Since I've been referring to this shirt as a "linen jersey" rather than as a "woven-fabric jersey", I changed the pattern-piece numbers from "WJ" to "LJ".
Only two more black patterns to cut, and there's plenty left in the scrap. I need a collar lining and two front-pocket reinforcements.
I washed the crumples out of the salvaged belt — had to wash a drainer of dishes to get a clean pot to wash in. Well, I could have gotten the other saucepan out of the cupboard, but then I would have had two dirty pots instead of none.
All the rectangle patterns have been cut except the front belt casings. All of the black pieces have been cut, so it's time to assemble a bunch of tables and spread out the yellow linen
I cut the collar lining by resting the concave side against the thread-straight line. That left exactly enough straight edge to cut two pocket facings; I'd thought I might have to cut one, then draw another thread to cut the other.
I have folded up the black linen and put it back into the scrap box.
Oops! I left the small cutting mat and its plywood on the printer, where I'd put it to get right-angle sunlight for cutting along a drawn thread. By good luck, nobody wanted to print anything.
I'm setting up the other card table and a little white folding table that happens to be the same height.
⁂
The bad news: the tables are little more than half as long as the fabric. The good news: it looks as though I'll use little more than half the fabric.
I almost forgot to include the band for the do-rag in my estimation, and cut a 2 1/2" strip of paper to serve as a label.
I measured from the drawn thread to the fold: two yards, four and a half inches, which makes the total length four and a quarter yards. Dunno how I got 4' 8" for the untrimmed length, but I'm going to leave it in the list of materials. Perhaps I ordered four yards and got a little extra; I appear to have mislaid the packing slip.
Ah, but I have the confirmation e-mail. $9.72 dollars a yard and #38.88 total. My calculator says I ordered four yards. And it was probably a bit more than four and a quarter before I washed it.
I think I'll put the mat back on the printer and cut along one of the drawn threads. No, on the table — this isn't black-on-black.
Yet another off-label use for the walker. It's a very convenient seat when I'm cutting along a drawn thread.
I think it's now time to write the part numbers on the pattern pieces, by way of making sure that I've got all of them.
Put on my longer black slip this morning, found it to be a tripping hazard, put it on the ironing board, and wore the calf-length black slip. What's with all my skirts getting longer? I'm still five foot two.
Yesterday, when I took my old cotton jersey off, I discovered that I'm going to have to take a stitch to keep the pencil from escaping. Whenever I wear it, I'm highly motivated to get on with making the linen jersey, but those are days when I can't sew.
So I reflected that there is daylight left and I have a needle already threaded with white 100/6, put on a thimble, and set out to work a bar tack above the hole in the pencil pocket. Whereupon I discovered that a great deal of the side stitching is missing, so I sewed a U shape instead. It's a sloppy job, but it's almost warm enough to wear my newer, thinner, and tighter cotton jersey, and I'll gleefully cut this one into skillet wipes the moment my linen jersey is fit to wear.
Oh, dither, dither — do I want to cut the do-rag on the long grain or the cross grain? The cross grain of the linen is significantly stretchyer.
The do-rag that I made from a bandana has the side pieces and the top on the bias, and three pieces of the band are probably two pieces of long grain with cross grain in the middle.
The ends of the band are finished in a cute way in which the end is cut on the bias, then seamed, so that you don't have overlapping allowances in the corner. I've forgotten the name of this finish and what it is supposed to do, but I rather suspect that I did it this time because the ends were already on the bias.
I can't tell which grain the white linen do-rag was cut on. Neither way has any stretch.
I think I want to cut all pieces of the do-rag on the long grain.
I marked blue arrows in one of the selvages of the yellow linen today. I also noted that if I cut a rectangle just long enough to cut a pair of sleeves, I can get the side pieces and the top panel of the do-rag out of the scrap.
On the long grain.
Planning to wear the thin cotton jersey tomorrow, so no sewing.
Still haven't copied the LJ numbers onto the pattern pieces.
Some sewing after all — I found a headlamp for the Necchi at K-Mart. I couldn't find a suitable light at any of the fancy stores, but I knew K-Mart would come through.
Once I finally found the sporting-goods section.
This evening I drew threads to cut the band for the do-rag, and a rectangle which should give me a pair of sleeves and the rest of the do-rag.
Also printed out a copy of the "Items Used" list as an aid to numbering the pattern pieces.
Bought a new clothesline pole in the morning. I think I'm going to like having parallel lines.
Wrote LJ numbers on all the pieces. All are present.
⁂
Cut along the drawn threads, pinned the band label to the band. Now I need to remember whether I cut paired pieces with the right or wrong side folded to the inside. I think I fold the right side in so that I can write on the wrong side.
⁂
Folded the right side in, pinned the selvage thirteen inches from the cut edge. This makes exactly enough double fabric to cut the sleeves, and worlds of room for the do-rag. The fabric is half a millimeter shorter than the sleeve pattern; I suspect that the fabric would lengthen more than that if I ironed it — I probably should dry-iron the rest of the fabric — but I'll scant the seam allowance at the top of the sleeve.
I won't be cutting until after my nap.
⁂
Now the sleeves are cut.
When I checked before pinning, I found that the selvage had been pinned a quarter inch out of line in the middle, so I re-measured and re-pinned. Somehow this made the length of the sleeve exactly right.
I'll be able to get both the do-rag and the outer collar out of the scrap with room to spare, but I'm done for the day.
Just swapped the new headlamp for the old one. I don't think I'm going to like having to switch to blinking before I turn it off. It also starts on the brightest setting. Since the current project is all straight stitch, it will be a while before I use the new lamp in earnest.
The "flood" setting appears to be a large number of LEDs under a diffusion plate. Someday I shall put on sunglasses and count them. The "spot" setting is a single LED in a reflector that makes concentric rings like the olde tyme flashlight. I can't imagine why anyone would go to the trouble of duplicating that. Maybe it's an inevitable property of a cheap reflector.
The old light is too dim to notice as supplemental light. I might use it as a "be seen" light next winter, if it hasn't deteriorated further.
I ravelled threads out of the strip of selvage from beside the sleeve, and think that I can use warp threads for hand sewing if I want stitches to match perfectly, so I kept it. And the next time I draw a warp thread, I'll try cutting it a little less often. Maybe pull it until it breaks, the first time. I can find broken ends, it's just harder.
To postpone decisions, I hand-basted the turn-under for the pre-graded flat fell that will attach the sleeve to the body.
Then I fiddled with the patterns and realized that if I cut a strip wide enough for the back pocket, I can get the back yoke and one front pocket from the scrap. But I need two back yokes and two pockets — no wonder I haven't noticed this before.
The front yoke and the front are about the same height and width, but each requires a tad more than half the width of the fabric.
The back-pocket facing needs to have its turn-unders basted.
I may need to make opened-out copies of the half-patterns.
⁂
Three-eighths of a yard is 13.5 inches. The elastics in the taxicab and curry jerseys measure sixteen inches and just short of sixteen inches. And yes, I felt for the end of the elastic where is it sewn to the tape. It could have stretched, but the pockets aren't too loose.
I appear to have used two inches of twill tape on each jersey.
⁂
I'll be using my new light pretty soon — I have marked my long slip to be taken up an inch and three quarters. I meant to take it up two inches, but while I was sorting through the snack bag for a card to cut four inches long, I realized that an appointment card is three and a half, and decided that that was close enough to my wild guess.
⁂
The hem is pinned. Because the knit is stretchy and the hem is wide, the pins aren't a lot more than an inch apart, and in spots less than an inch. If I don't sew this before I cut again, I'm going to have to get more pins out of the box.
But not tonight, even though there is black thread already on the Necchi.
I was all set to do some major decision-making when I laid out my patterns and the back yoke was missing. By the time I found the translucent gray pattern lying on my gray carpet, I was out of the mood.
But I have established that I do, indeed, have worlds of fabric. I think I could get this shirt out of three yards, and I have four.
There will definitely be a triangle scarf.
Today I took "sew up Dave's pocket" off my to-do list and put "tighten elastic in drawers" on. There was a patch pocket in the side-seam of his new pants, like a watch pocket, but caught in the bottom seam of the pocket, not at the side. He found it a nuisance and today I got around to overcasting the mouth with tiny stitches; he says he can't tell the pocket is there now.
And my drawers felt a bit droopy in church.
Now to sew the hem of my long slip, which I would have preferred to the short one today. Hey! I found the flat-bed plate without any trouble, and I remembered how to put it on.
Drew threads on Monday
On Monday, I drew a thread to cut off a piece the exact height of the back, thinking that I could get both back yokes out of the scrap. Today I cut the back, and discovered that I can also get the belt casings and one of the front pockets. But I'm going to hold off on cutting the pocket, as there would be a flaw in it where I drew the thread for cutting off the do-rag band a bit too far.
Before cutting the back, I cut the top and sides of the do-rag, and the outer collar. I've marked one of the layers of the back yoke on the fabric with wash-out pen, but plan to knock off and take a nap now.
Pieces left to cut: the front, the front yoke, the front pockets, the back pocket, and the scarf. There are two or three yards of fabric left.
I could start assembling the do-rag now, and have separated it from the other pieces and put it on the ironing board.
Pattern says I made my present do-rag in 2011, and it's only a little frayed, so (as far as I remember) I intend to use the same exact techniques.
pair of 5" x 6" rice bags
Sewing before breakfast: Dave wanted to put a hot pack on his ear, and we've forgotten where we stashed the denim bags of popcorn, so I poured a cup of rice into each bag, re-threaded the Necchi, and sewed them shut.
Bag says it's an extra-special kind of rice, but I think it was left over from when Fred was dying and we were making him special food. ("If he won't eat it," Dave said, "I will!" Pity I don't remember the recipe.) The kitten that replaced him has been geriatric for some time, so I suspect that it is stale. And I don't like white rice, except for filling rice bags.
I wonder why I put the wrong side of the print on the outside? Perhaps I meant to turn the seams to the inside.
It's easy to see how the dart was concealed in the yoke seam. I plan to cut these two pieces interlocked on the fold, as in the picture. Then I'll have to cut the other yoke piece, two front pockets, and a triangle scarf.
I think that today I'll work on the back pocket and maybe the do-rag.
I refreshed the pressing of the facing, pressed the turn-under of the pocket, laid the pocket on my leg board, franticked around for a while, fetched a marker to draw a line on a washrag I mean to cut in half, spotted the facing where it had fallen off the stool, drew the line anyway, after going back to fetch my shaku stick, which is a centering ruler and oh, man, I'd like to make another trip through the Ben Franklin store with a fistfull of 1960 dollars.
Pinned the facing on with right-angle pins, just concealing the edge of the pocket, then went to the rocking chair by the large window in the living room to baste the facing to the pocket with just a bit of the facing showing behind the wrong side of the pocket. I aimed for half a millimeter, eyeballed from memory. I found it impossible to see how wide the stick-out was against the background of my navy sweat pants, and very awkward to hold the work up to show against the light brown carpet.
I remembered reading an old book that said one must always spread a white cloth on one's lap while sewing, and fetched a kitchen towel. Holding the towel on my lap prevented me from crossing my legs, and that sufficed to keep the beige carpet behind the work.
⁂
After leaving the pocket and facing under a weighted board for a while, I set up the White with black cotton thread and basted along the outer edge of the blue line. Then I trimmed the excess facing; a strip across the width of the scrap had been only a tad longer than the width of the pocket, so I left shaping it to the pocket for later.
When I folded so that the stitching was just barely inside the pocket, the casing folded exactly on the blue line. This meant that none of the turn of the cloth was between the stitching and the basting, and the casing could lie flat.
After pinning the fold, I pinned the free edge, sewed along the fold, and stitched again half the width of the toe from the fold. Then I turned to the right side and edge-stitched the edge of the facing.
I could put the elastic in at this point, but I think I'll wait until after I attach the pocket to the back. Oops, I forgot to copy the pocket-divider lines onto the pocket. ?? No divider lines on the pattern. Ah!, they are on the pattern for the back. I'll need to use the chalkpaper again — hmm, better add it to the list of tools — but it's time to knock off for the night.
Addendum: When I was ready pin the fold just before sunset, I fiddled with the rocking chair a bit trying to get closer to the window, then "Hey! It's well over fifty degrees F out there!" and I sat at the picnic table. Where the light was wonderful.
I had missed the divider lines when I marked the back. I marked them, marked the pocket, and then realized that I need the back markings on the right side and copied them by rubbing the side of the marker over pins stuck into the lines, then joining the dashes with the aid of a ruler.
I must find my chapter on marking and make sure I've mentioned that when taking a rubbing of a pin, one must hold the fabric taut with the fingers of the other hand.
I also trimmed the three-inch strip I'd cut for the back casing to twenty-three inches and sewed the ends.
I wonder what I did all morning? I spent the afternoon making turkey ala king.
I plan to sew the belt casing on before sewing the pocket on to save a thread change. Besides, I haven't wound a bobbin with ecru thread yet.
Checks: yes, the spool and ball of ecru 100/6 are on the leaf of the Necchi stand.
And black thread is now on the notions list.
Another advantage of the sewing-machine needle over the nail: I wanted to take my back-pocket pattern down from a needle so high that I can just reach it when standing on a stool. I just took hold of the bottom of the pattern and pushed up, whereupon it slid off easily.
'Course I needed the stool to put it back, but by then I had two patterns to hang up.
I turned a sheet of dustpaper dust-side out and put it inside the folded pattern for the back pocket, and was in the act of slipping a white-side-out sheet over the pattern when I remembered that I have typist's carbon paper, and typist's carbon is not designed to brush off.
Been a while since I used it. There is stuff in the pattern trunk that I'd forgotten owning. I took out one of the slips of yellow paper, punched a hole in it, wrote "Woven Jersey" on it, and hung it on the needle when I hung up the back and back pocket. The sleeve pattern is on the "woven sleeves" nail.
So I transferred the divider-stitching lines and hung the patterns up. Then I tried my fine-print glasses into my taxicab jersey pocket. They fit, but just barely, and the corner has been patched where they wore through. They fit loosely into the curry-jersey pocket, and that shows no signs of wear. My wallet fits loosely into both jersey pockets. Next step is to compare the stitching on the jerseys to the lines on the fabric.
⁂
I was thinking of moving the left divider right half an inch, and the right divider a quarter inch, but the curry jersey middle pocket is exactly as wide as the marks on the fabric, and my wallet fits it very loosely, so I think I'll move the left divider and leave the right divider alone.
No sweat; if I'm wrong, moving the divider is an easy retrofit. I'm not planning to put tapes under the stitches this time.
I attached the back belt casing today. I was concerned that three inches wasn't wide enough when I was using it double, but it looks pretty good. I matched the raw edge to the waist and sewed one toe-width from the raw edge, about an eighth of an inch. (Three millimeters.) Then I folded it up, finger-pressed it, and stitched one toe-width from the fold. This completely enclosed the raw edge.
Then I used the half-inch tab of the blue-plastic measuring dinger to mark a dotted line below the fold, and folded the free edge of the casing down to cover it. That's the first time I've used the air-erasable marker in a long time. I meant to use the water-erasable marker, but when I went to the pencil mug I remembered that I'd left the washout marker in the parlor, and reflected that this was one of the few times that I can be sure that I'll use a mark at once.
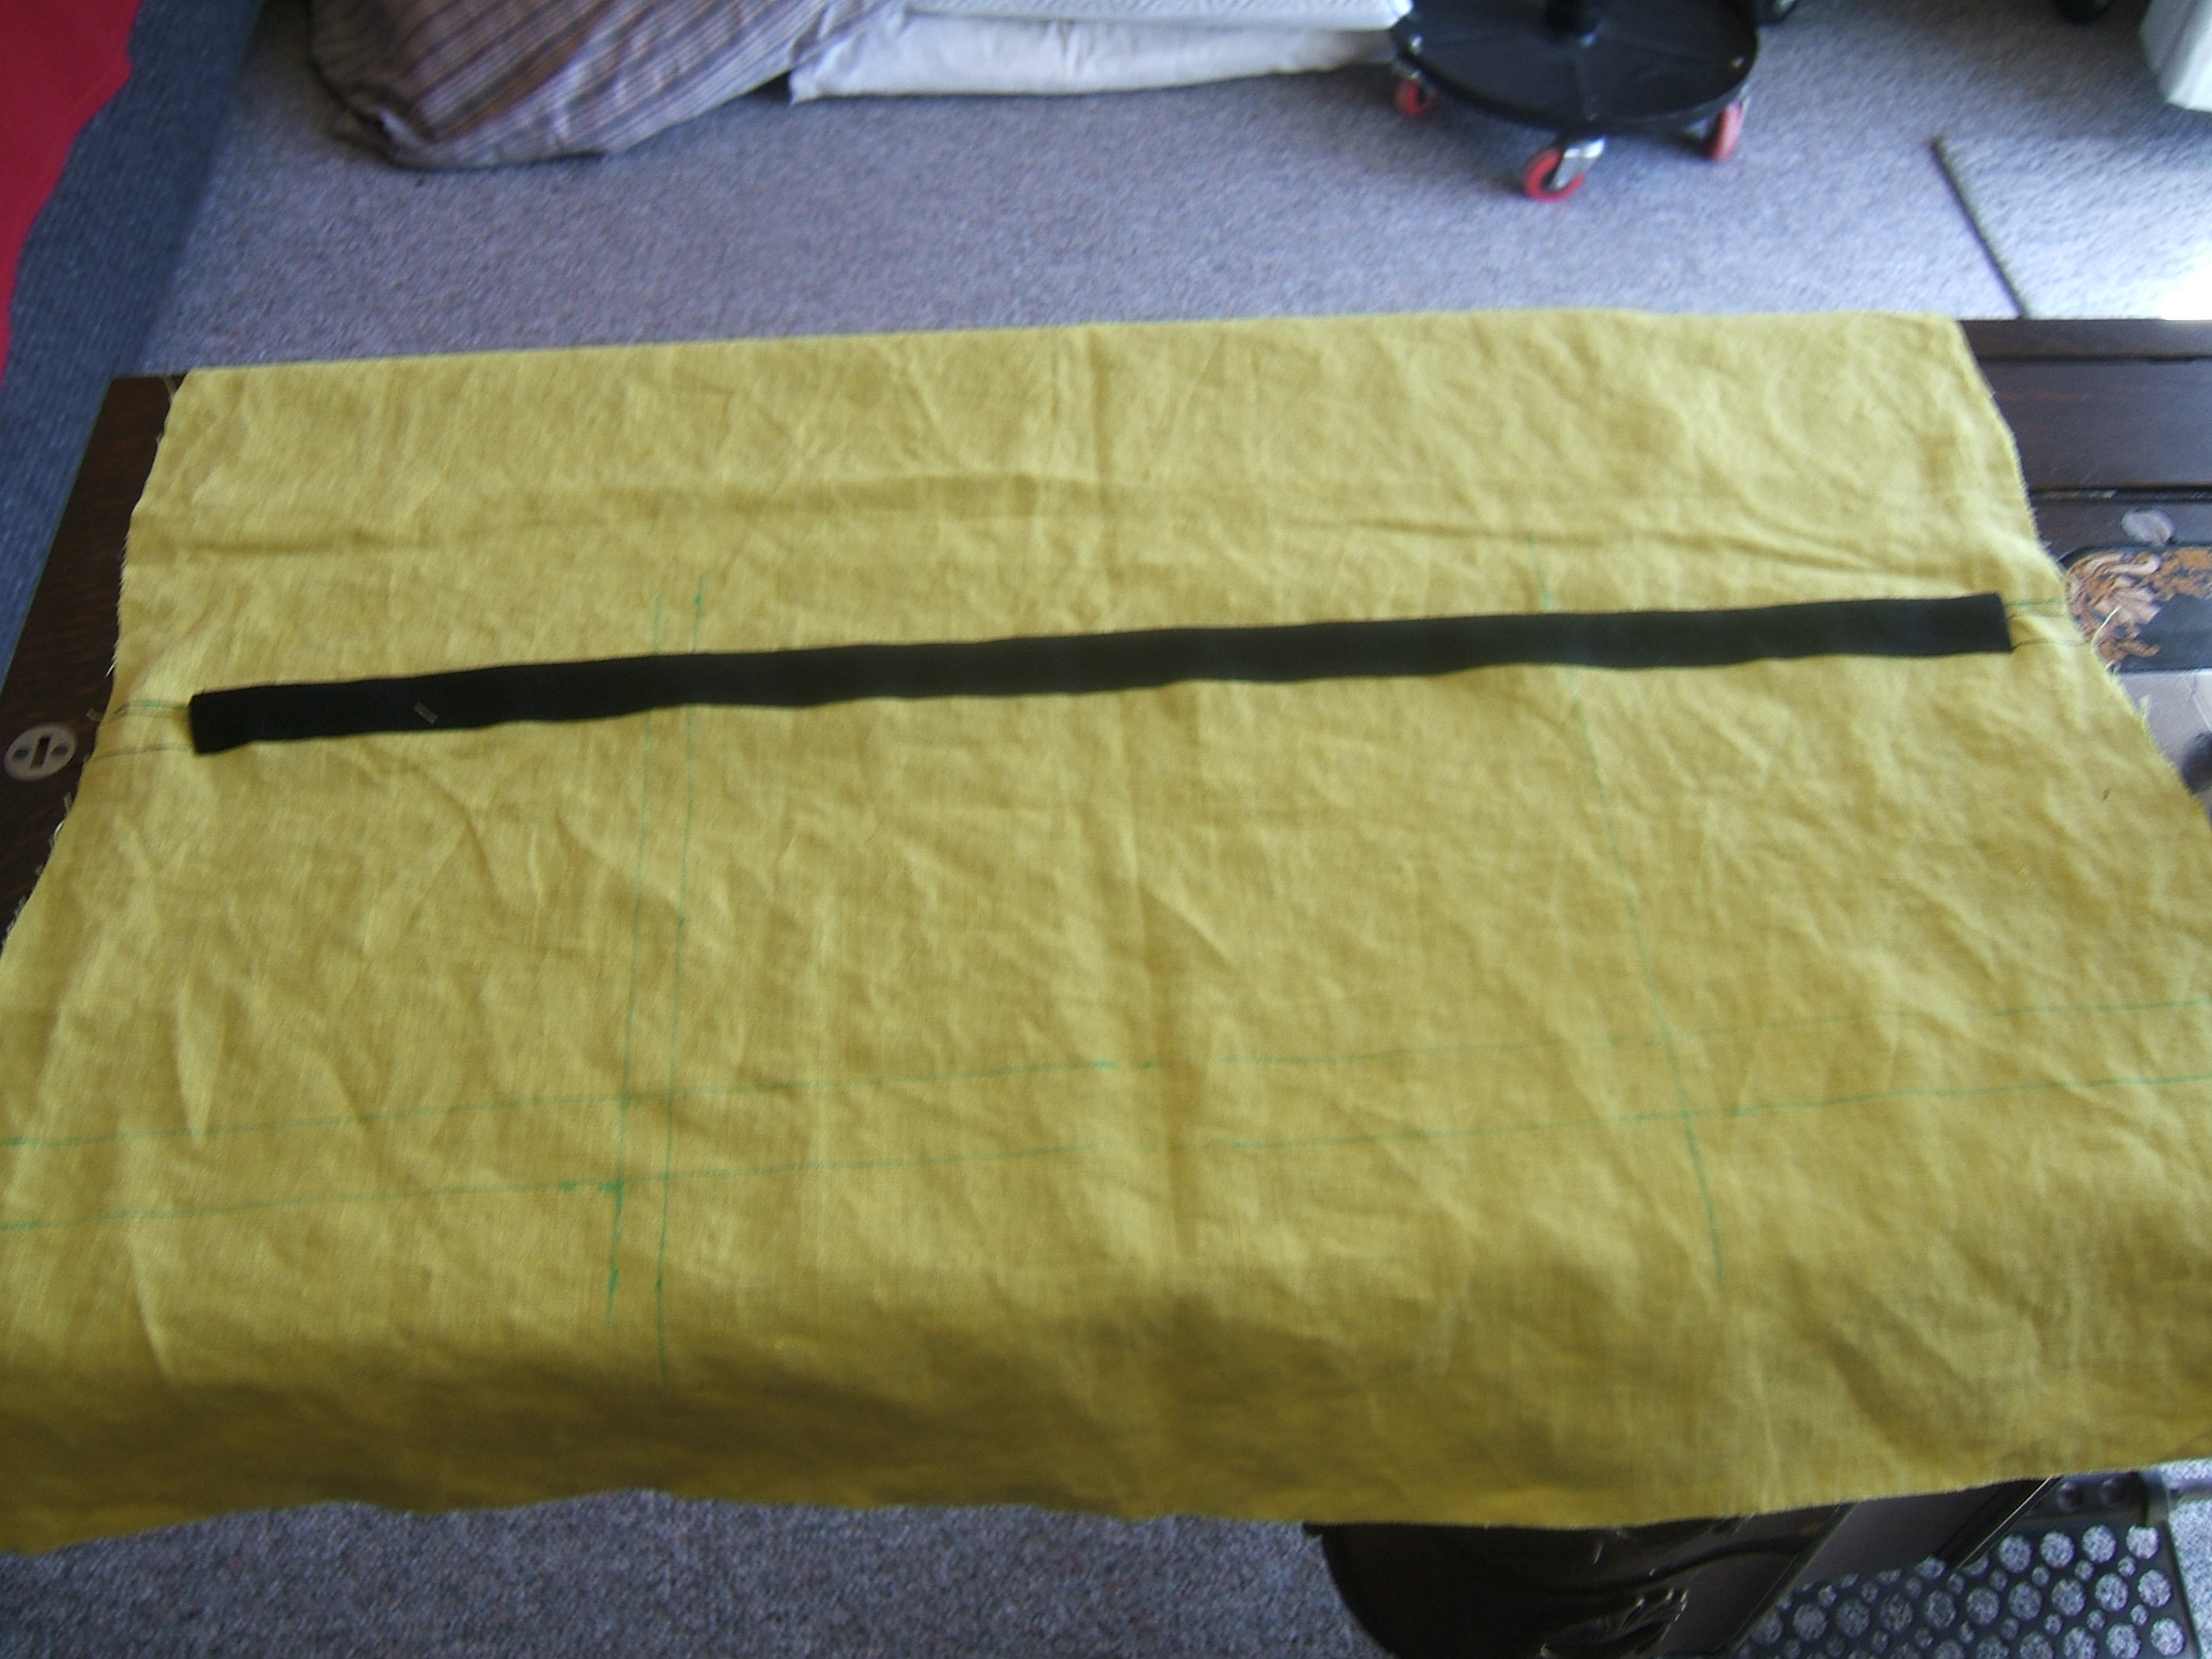
The casing is seven eighths of an inch wide. (Twenty-two millimeters.)
Now to sew the pocket on. First wrong side to right side with the straight raw edge matched to the line drawn on the back.
⁂
This time the stitching did not fully enclose the raw edge. I ignored it. It will be inside a fold and difficult to see.
I decided to do the pocket stitching before inserting the elastic, because it is easier to do when the pocket is flat. I'll pick the white stitches out of the black facing before putting in the elastic, and replace them with black hand stitching.
I folded the pocket up on the fold line drawn on the back. This made the top of the pocket about nine sixteenths of an inch below the top of the casing. Plenty of room for a half-inch tape, particularly since the belt will press on the top of the casing, and not on the bar tacks.
I have realized that I need a snap on the right front pocket to keep my cell phone from falling out — a large snap, so that it will take force to undo it.
And I have decided to use two name tapes: One on the right back pocket, and one on the left front pocket.
But I've already sewed the divider lines for the back pockets. Ah, well, a name tag isn't much hand-sewing.
But I haven't sewed the side seams. I *could* sew it by machine. But I think it would be easier to sew it by hand. I've pinned the tag a little to the left of center. Gave brief consideration to sewing it to the middle pocket instead.
First chore this morning was sewing on the name tag. My fingers want to go numb when I'm hand-sewing this morning, and frequent pauses to stretch my arm and wiggle my fingers wasn't helping much, so when the thread tied itself into a hopeless knot about half-way through, I decided to regard what I'd already done as basting and finish the job by machine.
I'm using white thread for this job, to match the white label, so I'd better add it to the notions list.
⁂
I gritted my teeth and cut sixteen inches off the 34" elastic. Cutting the two two-inch pieces of twill tape may be the first time I've used the grid on my cutting mat. (I used a tape measure and scissors to cut the elastic.)
Then I zig-zagged the tape to the ends of the elastic, using white thread and the Necchi.
When picking out stitches to open the elastic casing, I wished heartily that I'd had the wit to lengthen the stitch when sewing the part of the pocket dividers that I meant to pick out! It didn't help that I needed to preserve the threads for threading into a needle to make a bar tack and hide the ends. Straightening the ends by drawing them over beeswax at intervals did help.
Now the elastic is in the casing, but I haven't permanent-basted the ends or made permanent-basting bar tacks. Considered doing that teeny chore before lying down for my nap, visualized losing the ends of the elastic inside the casing from a groggy error. I've already had to re-insert it from failing to secure the bodkin well enough.
Must have been yesterday that I sewed the ends of the elastic casing, and tacked the pocket-division points. I sewed the ends of the casing by machine, straight stitch, U-turn, another pass. used black "quilting" thread to tack the divisions, and plan to use the same thread to hand-sew the pocket divisions. I'll hand-baste the sides of the pocket to the back with white or ecru 100/6.
Starting to fuss over cutting the front, front yoke, front pockets, a scarf, and a bra.
I have a plan made, and have folded the fabric and pinned the cut edges together. I need to remember to lie on the floor at intervals, because my back objects to standing still.
⁂
front pinned, yoke begun.
⁂
Front and both yokes cut out, one of the yokes marked (the one I took the pattern off so I could cut the other). Two pockets and the shirt is all cut. I don't think (famous last words) that the scarf and bra will pose any difficulty; there is worlds of fabric left, a yard and a quarter of it full width.
Must look up how much bias tape I need for the bra.
⁂
Whoosh, *that* took some hunting. 13 December 2017: "it takes 23" to do an armhole". I also took 23 7/8" and 22" to do other armholes.
So if the bias strip is 48", I'm in business. Since the bias edges of the bra add up to 44", I'll have to have a bias line more than 48" long to cut them. Or will I? The one on the left slants away from the selvage, and the one on the right slants into uncut fabric.
It nap time.
⁂
I've done enough standing for today, but pulling threads is done sitting down, so I cut out the front pockets before folding up for the day. The shirt is now cut out; from now on it's simple assembly.
I have plenty of scarves and bras, so only the desire to get the fabric out of the parlor puts urgency into cutting those out.
I think I'll sew the front yokes to the back yoke, then sew pockets on the front yokes.
Checking the list, I see that the patches for under the snap fastener haven't been cut, but I plan to do that at the last minute before sewing them on.
Checked to make sure I have a snap fastener. There is only one that's big enough, but one is enough. I left it in the box to be sure it doesn't get lost.
Just noticed a hole in the knee of my slopping-around pants. I could mend it, but I think it better to wear it until it gets unwearable, then downgrade one of my pairs of sweat pants.
Hand basted the sides of the back pocket to the sides of the back. I gradually became aware that the thread I was using was 30/6, not 100/6, and how I could be sufficiently oblivious to wind a bobbin with it, I don't know. I peeled the label off the bobbin and dropped it into the snack bag with the ball, and took my second needleful from a ball of ecru 100/6 that has just enough left on it to wind a bobbin. I put an empty bobbin — one of the seven I recently bought — into the bobbin case so that I could put it back into the machine.
⁂
There's no hole in the side of the new bobbin. Made it hard to start winding. And I had to use a snippet of cloth as a shim to make it turn with the shaft.
After supper, I wanted to sew the front yokes to the back yokes. The pocket markings are on the wrong side and they are wanted on the right side, so I used the red thread in the basting needle to work a couple of two-stitch bar tacks at each of the eight corners. Only four of those corners will be needed, but I thought it easier to mark all than to plan out which ones would end up on the outside.
The light had faded by the time that was done, but I have a light on the sewing machine. Sewed the shoulder of one side of one front yoke to one shoulder of one back yoke, then pinned the other front yoke to the other shoulder. Lined up easier than the first time — no offsetting to make the raw edges cross at the seam line. When finished and I started sorting out to sew the other back yoke to the assembly, I discovered that the pieces fit nicely because they were the same piece: I had sewn the front yoke to the other shoulder of the other front yoke.
So I folded up for the night and went to the rocking chair, which still had good light, to pick the seam out. Luckily it was short, and plain straight stitch.
I plan to press the shoulder seams open, since they will be fully enclosed.
I had a moment of worry about the durability of a plain seam, but there isn't the least sign of wear or failure in the shoulder seams of the taxicab jersey. There's wear of the fabric at the collar end of one shoulder seam of the curry jersey, but the stitches are perfect.
I washed my cotton-jersey jersey yesterday, and had to wear my doublknit jersey to buy groceries. The elastic in the back pocket is stretched out. I judge it worth repairing even though there are patches where the pocket dividers pulled out. While planning how to repair it, I realized that I don't need a belt casing — all I need is a belt loop at each of the pocket-support points. That will be easy to retrofit — at least it won't add much effort to changing the elastic.
I was amazed at how fresh and clean the jersey jersey came out of the washer. Even the graphite in the pencil pocket is gone.
I did slop lots of liquid detergent on all the dirty spots.
I'm hoping to get the yokes finished today. And iron the shirt I washed a couple of weeks ago.
⁂
Lots of practice picking. I sewed the other shoulder, noticed that the last half inch was a tad off, picked back and corrected, laid out with the aim of positioning the other back yoke, noticed that the seam I sewed — not yesterday; I was washing clothes — was sewn right side to wrong side, picked it out, pinned, unfolded to be sure, resewed, laid out again, discovered that the first seam I'd sewn today had the sleeve hole where the neck hole belongs, picked out again, and I'm about to resew very cautiously.
⁂
Yokes attached with no further drama. Before lunch, I folded the front yokes as they will go and used one pin per seam to indicate which shoulder went with which shoulder, then pinned each shoulder properly. After lunch, I checked, then sewed both shoulders in one pass.
After I press the seams open, I can get on with attaching the front pockets and setting in the hook-and-eye tape. I think that after pressing I'll baste the raw edges into position.
I plan to attach the belt casings to the front before I sew the front to the yoke. I also need to do some hand work on the back pockets.
Good thing I wrote that last paragraph, because the belt casings aren't in my pile of things to be pressed. Well, first they have to be cut to length and the ends sewn. Hope I can remember exactly how I did the back casing, as it worked out fairly well.
Speaking of which, I had an epiphany regarding my T-shirt jersies. I'd had in mind, once the linen jersey is wearable, to add belt casings — which aren't really compatible with knits. While examining the stretched-out elastic on the snap-vent one (an old one made before I realized that I never use the vent for ventilation and can get a T-shirt over my head without one), I realized that all I need are four belt loops, one at each support point. Those will be quite easy to retrofit — I can use twill tape.
My linen drawers have been on the ironing board for some time because the elastic in the waist needs to be tightened. So I carried it to the living-room hand-sewing station, on the way looking for the place to open the casing to let the elastic out — and noticed that the casing is worn completely through in spots; I need to cut it off and make a new one out of bias tape.
Cut, yes! I was planning to pick out the stitches, but then I'd trim the stitching line off while removing the worn fabric. So the job takes one step back toward "easy", after jumping forward into "big deal".
I did baste the raw edges of the back pocket into position. It's now on the rocking chair (my living-room hand-sewing station) waiting for me to sew the casing smooth over the non-stretch tapes at the ends of the elastic, to keep wrinkles out of the seams, then bar tack and hand sew the black parts of the pocket dividers. I plan to use quilting thread for that.
On to that shirt! I used to iron at least five shirts a week, why is ironing just one such a big deal now?
This morning I finished the back, then ran Grandmother's widest bodkin through the casing to make sure I hadn't sewn it shut.
I laid the front-pocket "reinforcements" — black to not show pencil marks — on the telescope ready to miter the corners and baste the turn-unders — I had pressed the long edges under after ironing the shirt — and was interrupted by lunch.
While my reuben was frying, I pinned the raw edges of the yokes, intending to baste before pressing. I noticed that this would conceal all the notch marks, so I grabbed the nearest threaded needle and sewed a short bit of running stitch into the marks. No "this is the wrong side" knot, to make it easier to pick the marks out.
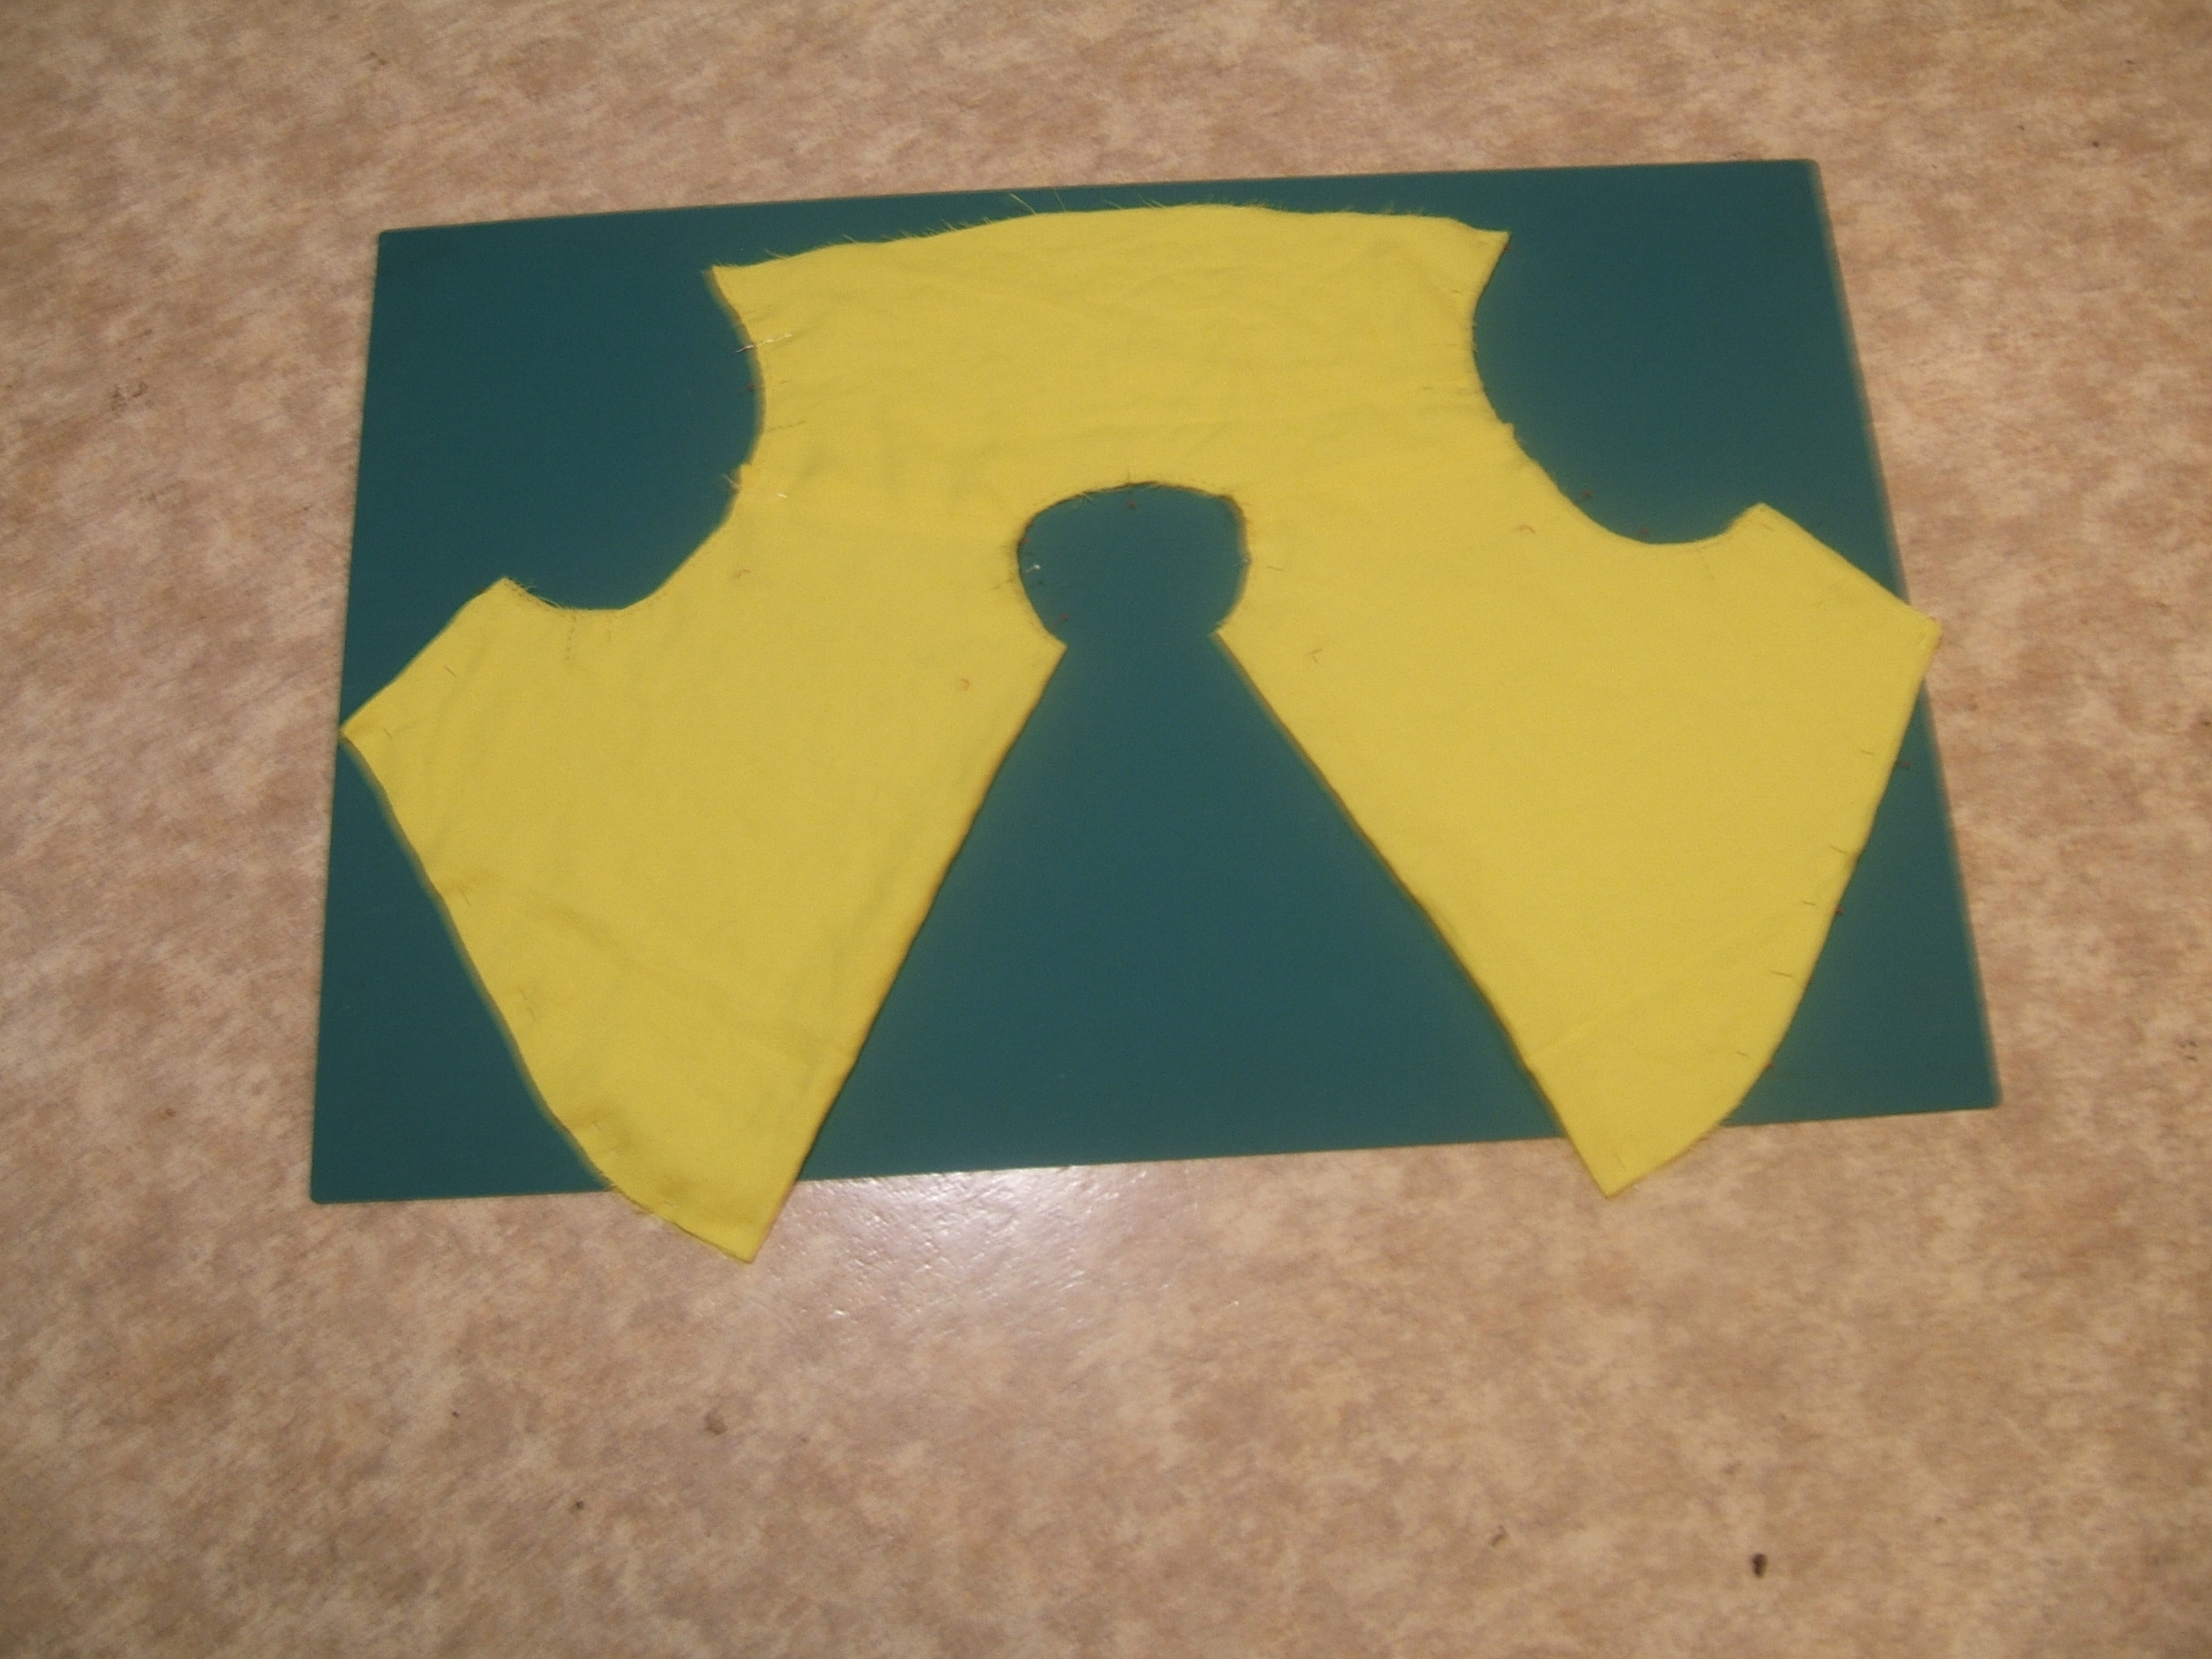
When I press the yokes, I shall have to decide which side is the outside, as the raw edge of the inside back yoke needs to be pressed under three eighths of an inch. And the pressing will be immediately followed by appliquéing the front pockets and installing the hook-and-eye tape.
But right now it's nap time, and in the afternoon I need to make cornbread. Not to mention sewing four pieces of twill tape to my doubleknit jersey.
I think I'll select the tape before I lie down.
⁂
The old jersey is retrofitted for tomorrow's ride. It was harder than I expected. This jersey is so old that the seams were pressed open, rather than flat felled. (Seems to have held up just fine.)
So it seemed obvious: bar tack the ends of the quarter-inch tapes inside the pocket, through the seam allowances that had been turned to that side. Everything seemed to get in the way, and I was really looking forward to the next pair of bar tacks on the pocket divisions.
It seems that after patching the places where the tops of the pocket divisions had torn through the fabric, I backed them up with little circles of heavy canvas to make sure it didn't happen again. It was really, really hard to push a needle through, which interfered with precise placement of the needle. Not to mention that the thread seemed determined to lasso everything in sight, and to tie itself in tiny knots.
The other side seam was comparatively easy.
I may need to remove or reduce the tuck across the back, but the jersey seems fit to wear tomorrow.
I basted around the armholes and neck hole of the yokes after supper.
Doubleknit jersey seemed to do well as is. I had it under a windbreaker most of the time.
The front-pocket reinforcements have been on the telescope with the long edges pressed under and a threaded needle stuck in them for some time. Today I mitered the corners on one as for a handkerchief hem, basting the turn-under on the short edges in the process. I made no effort to keep the thread out of sight on the side that would be between the layers.
Picked up the other and found that the pressing on one side needs to be pressed out and done over.
So I'm going to sew the ends of the pocket hems before heating up the iron. Better cut out the belt casings and sew their ends also.
I just read the instructions for the handkerchief hem. Not much like what I did to the appliqués, but the principle is the same: fold over a needle, pinch, overcast together — in this case, lying flat as I want it when finished, since there is no need to hide the threads.
I'm surprised that I gave so much emphasis to the "trim to a seam" method and so little to the "full dart" method. The latter is always the one to use when it doesn't lead to the raw corner of the fabric poking out.
Stop yapping and start sewing, Yaji.
At the end of the previous session, I cut an inch-and-a-half square of black linen and turned the corners in, basting the creases. It came out wonky, I pulled out the basting, tried again, it came out wonkier. I decided that I needed to press the creases instead of basting. So I creased the square to show the center and drew a cross with my Nonce pencil. I folded one corner in to cover the cross, set the iron on it, and turned to various distractions — yesterday it was an appointment to get my eyes examined. I passed with flying colors, you can wait a year for the next one, and I was out before I'm normally up and dressed. But I was left somewhat unwilling to to any thinking (not to mention that it took the whole day for the drops to wear off even though I wasn't dilated), so all I accomplished was picking up some groceries on the way home and, after an early nap, scaling several photographs and finding their proper places in this file.
This morning I picked up the square, folded another corner in, and decided that basting was the way to go after all — except for the crease that had had a cold iron sitting on it for days. This time I got it neatly square on the first try, except for a tuft of raw edge peeking out at each corner, and that was easily taken care of when I basted the square to the pocket. I creased a line to show the center of the pocket and marked it with a wash-out pen, then measured the pocket of my wool overjersey to see how far down to draw a cross line.
I'd basted the creases with white thread, so I used red-brown thread to baste the square to the pocket. I basted first in the middle, starting with running stitch along each diagonal, then in the spaces between the diagonals matching the "stitch" left when I jumped from one diagonal to the other, then I went around the edges, pulling out the white stitches and tucking the raw edges under. As I was making that last round, I considered whipping the edge down by hand, but after it's pressed, it will work fine to pull the basting out of each edge just before it's machine stitched.
Now it's washday, and nothing needs ironing this week, or at least nothing is going to get it. So there probably won't be any more sewing.
I was tempted to press the skirt of Dave's chambray nightshirt this morning, but shook it and hung it in the closet.
When putting away yesterday's laundry, I discovered that a stitch had broken in a seam of briefs red/2. After changing the sheet, my first chore was to mend that. I puzzled for a bit on how to get the back back between the crotch pieces, then shoved one edge out of the way and whipped the other edge to the back, pushed the needle through to the other side, and whipped the remaining fold to the back. The repair is hard to see even though I know which pair and where to look.
Then I pressed all parts of the jersey, the hem at the tail of the do-rag, and the turn-under on the band of the do-rag. [Turned out that I should also have pressed the short hems at the back of the side pieces, but they were short and the fabric is linen, so pinching and pinning sufficed.]
I had to back up a couple of steps on the tail hem. The short bit at the end is supposed to be turned up first, and only one turn, as it will be concealed inside the other two hems. The meeting of the two hems is really wierd if you don't turn up the short edge first. [I should have turned it up a tad wider.]
The White is set up with white thread, so when I resume work after lunch, I'll sew my name tag to the front pocket first. Next, I think, will be to attach the casings to the front.
do-rag from scraps of yellow-linen
jersey
I was supposed to be working outside when I did that yesterday, but I was so close to getting something finished!
The new do-rag is hanging on the bike even though it will be weeks before it's warm enough to wear it.
When pressing the belt casings, after doing the first one I realized that turning it right-side out would have been much easier if I'd pressed the seams open first; while looking around for something to press the second casing on, I remembered that I have a point presser. First time I've ever used it. Worked well.
I should look up its other functions.
I'm still tickled by the box being labeled "1/12 dozen".
After sewing the name tag to my front pocket, I looked around for the spool of ecru 100/6, finally gave up and decided to wind a new one, ran both batteries of the screwdriver flat, decided that I had enough wound to go on with — there's no way I'll come close to emptying it on the current project — and cut off from the ball.
Then I went to install it on the White and found that the "white" thread on it was ecru. I switched spools anyway, in order to use up the smaller spool first. I keep two spools of white 100/6 so there will be one for each machine; I can handle having two spools of ecru 100/6.
And since I hadn't noticed the ecru thread on the white nametag, I used ecru to sew the tag on the do-rag even though the Necchi is already set up with white thread.
I sewed several pieces after changing the spool before I noticed that the stitching was horrible on the bobbin side. The loosely-held bobbin thread was easy to pull out before re-stitching.
I tightened the top tension, tightened it some more, and had it set for thread-snapping tight before it occurred to me to check whether I'd made a mistake threading the machine. Then I used up two scraps of fabric getting the tension back where it belonged.
The fabric and the pattern for the bra are still on the card table in the parlor. I piled all the pieces of the jersey on top. The back is ready to sew to the yoke, so it's mostly the front pockets that are holding up assembly. One of the black patches is ready to appliqué; the other needs to be mitered and pressed. I have yet to cut a scrap to put between the layers of the yoke for the snap. I've decided to make it large enough to back up the entire pocket. The black diamond for the other half of the snap is basted in place, waiting for me to put black thread on one of the machines. The left pocket is complete and ready to attach.
No sewing to be done today; I spent the morning in the garden, and intend to spend the afternoon baking a cake and making a pot of soup.
⁂
Or maybe going out to dinner. Came back too tired to bake even though the ingredients are all measured and ready to mix.
When I was preparing to sew the name tag to the front pocket, I fiddled and faddled with a seam gauge trying to center it. Finally the dime dropped and I folded the pocket in half and creased it, folded the tag in half and creased it, and lined up the creases.
I read the entry for April 19th, then whipped out my handy-dandy solar calculator. The diagonal of a forty-inch square is fifty-six inches. One strip of bias tape will be worlds aplenty for binding the armholes of the bra.
I located the scrap that I rejected for cutting a front pocket on 3 April 2019, lined up the pocket pattern on it, and made a snip at the fold line. This will leave half the hem allowance above and below the pocket I'm reinforcing. I made another snip to make the patch a centimeter wider than the pattern. Since the edges of the pocket are folded under a quarter inch, this should leave nearly half an inch clearance on each side.
Perhaps I should try it against the pocket and the marks on the yoke before drawing and cutting.
Washday. Between loads, I mitered the corners of the black pocket reinforcement — "trim" would be more accurate. The trims don't match, but I can arrange that what sticks out from under the pockets does match.
I used my new thread snips.
A while back I mislaid the scissors that belong under the Necchi, and took the pair that I keep in a snack bag in the arm of the futon, together with magnifying glasses, a seam ripper, a pair of tweezers, a thimble, two needles stuck into a scrap of wool, and a bit of beeswax in a "pill pouch" bag. The back-up scissors from the other arm of the futon (where I keep duplicate sewing tools) are too big to go into the snack bag, so I decided to indulge myself in a second pair of stork scissors. (The first pair are kept in a glass-front bookcase in the parlor.)
So when I rode on Saturday I stopped at Lowery's. They no longer sell stork scissors, so I took the cheapest pair of snips they had: a teeny pair intended to carry in a purse. I like the design: the sheath protecting the very sharp points is tethered so you can't lose it, and you have to stretch the tether to put the sheath on, so the sheath can't fall off while it's rattling around in your purse.
I've used it only for thread snipping so far, but it seems obvious that one can stick it through fabric to start a cut. A very short cut!
On the other hand, I don't like the cheap colors of the plastic parts. I chose mint green as the least objectionable.
While shopping for scissors, I noticed that seam rippers of the style I like are only eighty-nine cents, so I bought one for the other arm of the futon.
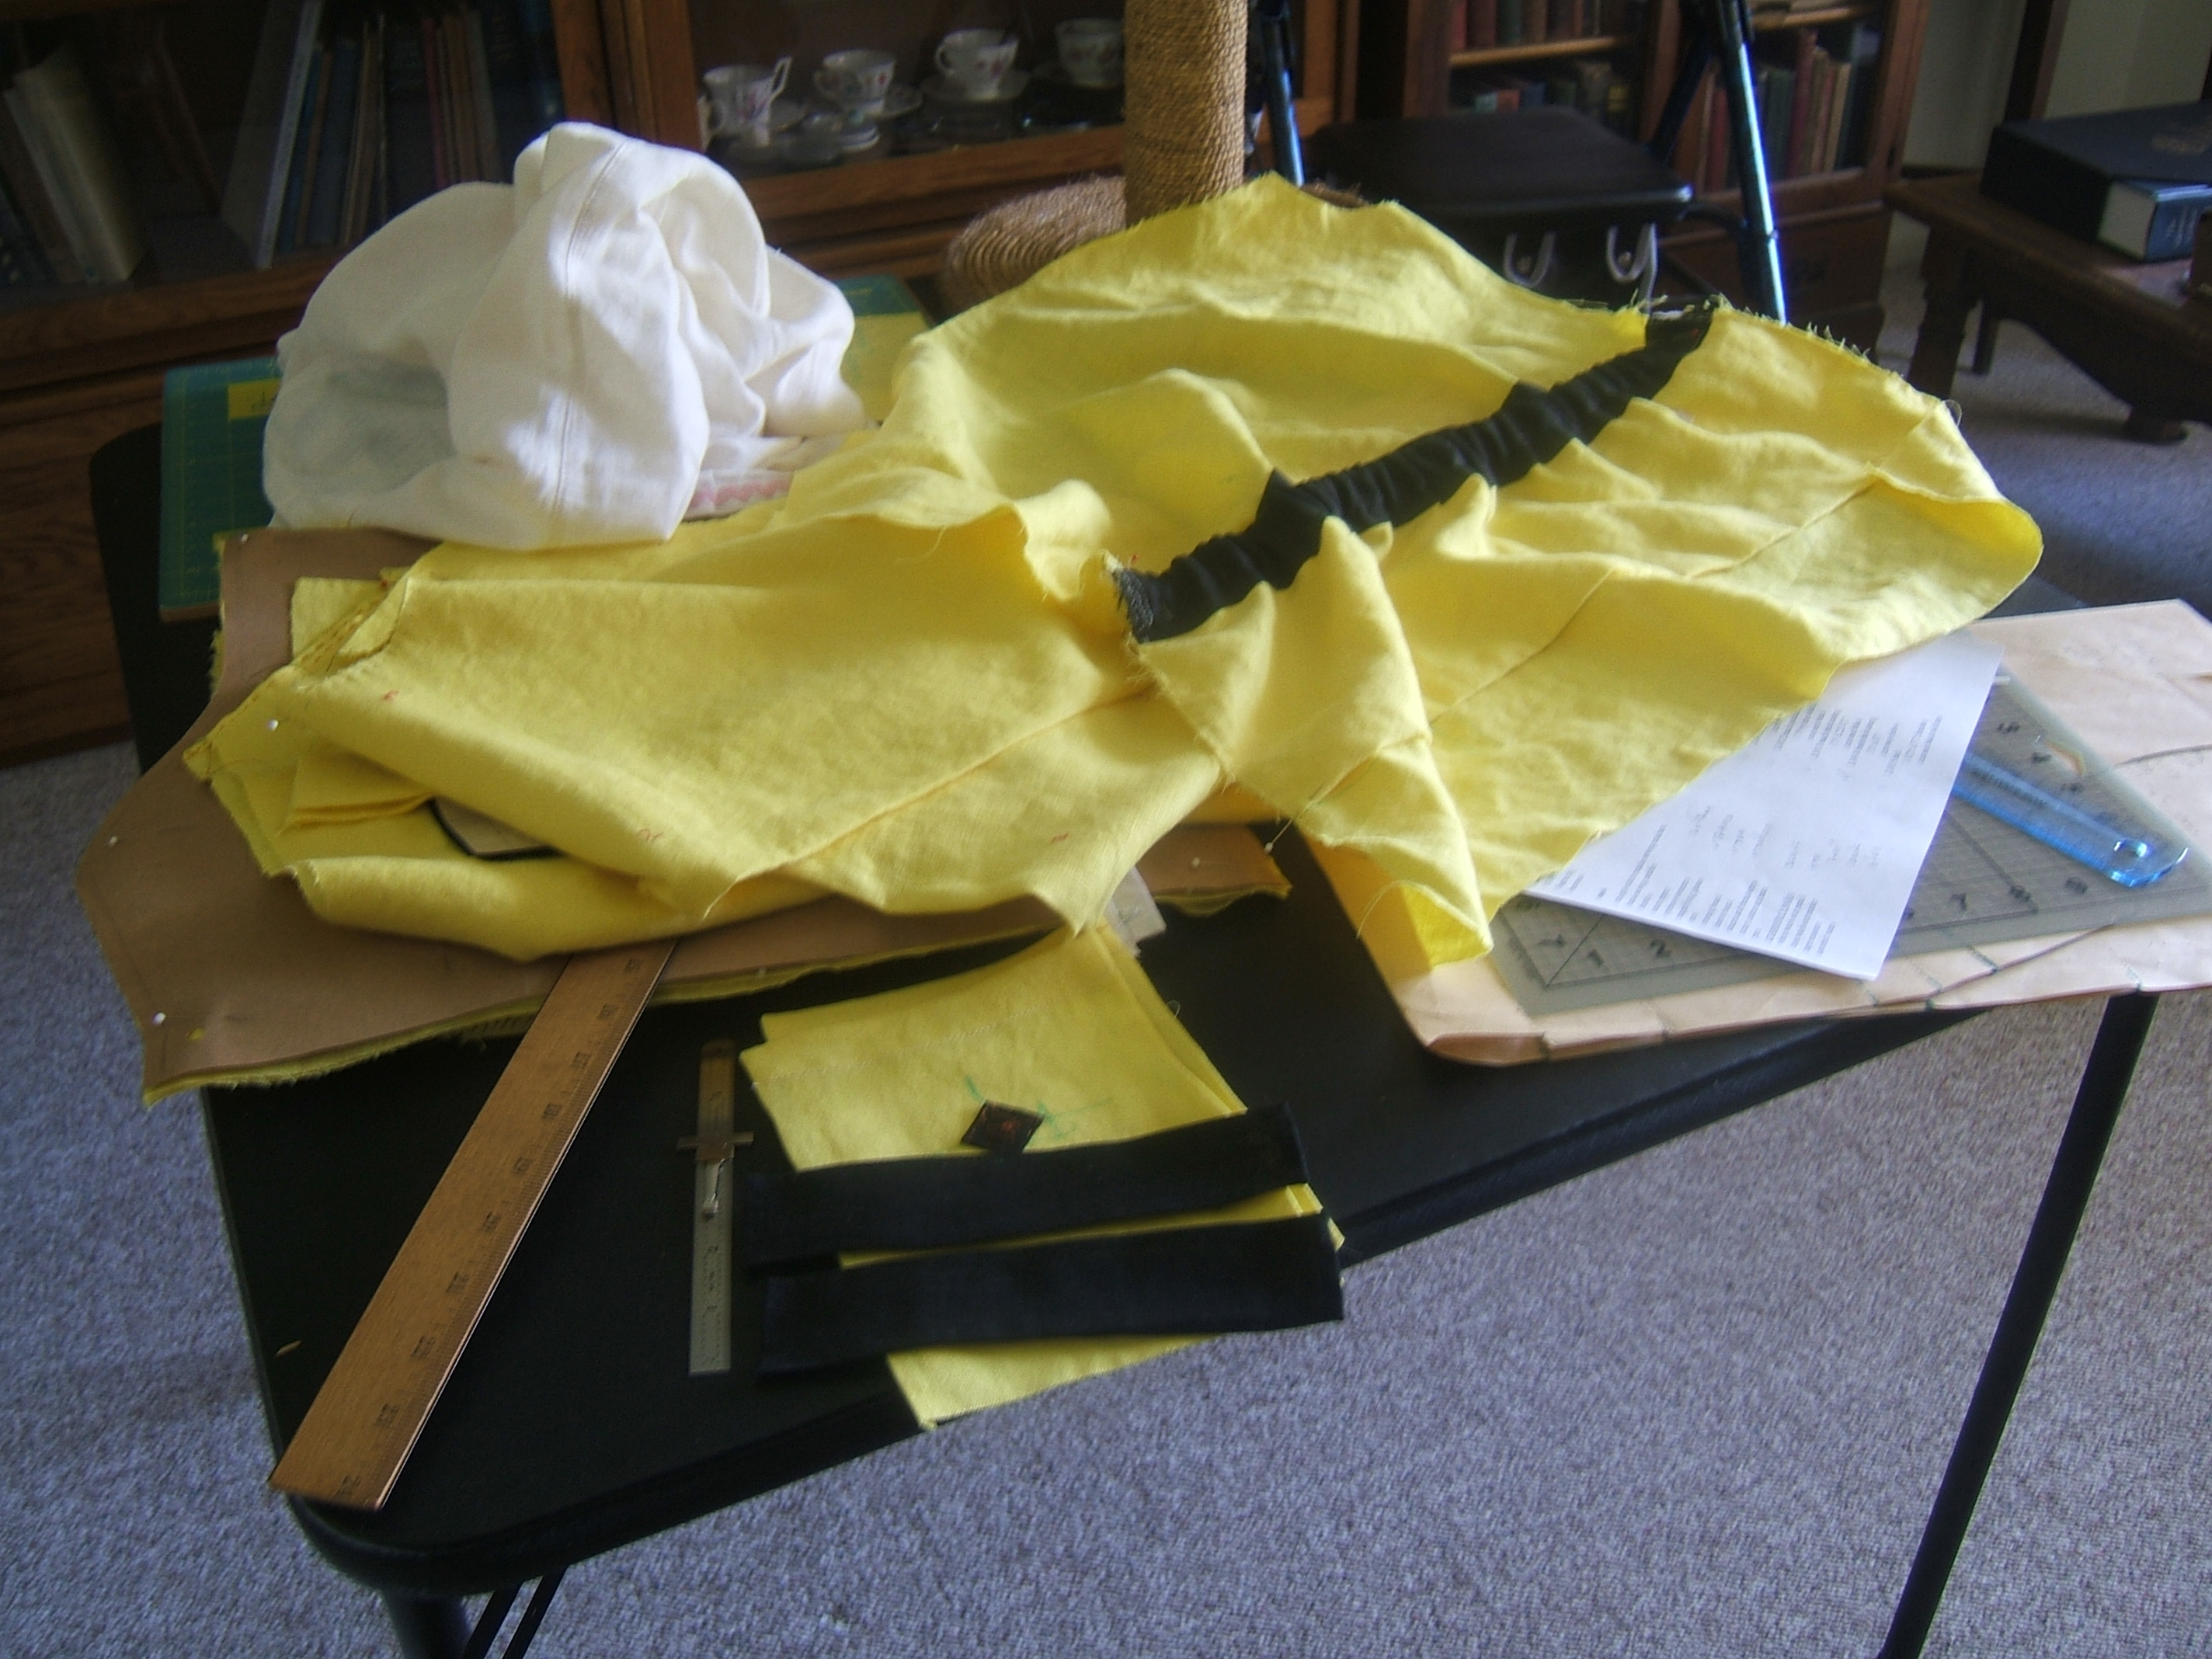
My to-do pile. The white puff is a pair of underknickers that need a new elastic casing; the scratching post indicates that I haven't done any real work since the parlor was swept last Tuesday. In the foreground are the front pockets and the trims that will go under them.
Hmm . . . it looks as though I need to re-stitch the hem on this pocket.

I spent today in the garden, but in the evening I stitched around the snap reinforcement on the right front pocket. I pulled the basting around the edges out as the needle approached, but left the basting in the middle alone. I'll pick it out just before sewing on the snap.
When I was looking around for black thread, I discovered that I still have a spool of Coats SuperSheen, which is a six-cord thread. I'd have been using it instead of the Guetermann if I'd remembered that I had it. But none of the black stitches in this project are structural, except for hand-stitching with with heavy-duty thread.
Just checked the linen-tape box. There is very little white tape, and what there is is too narrow to replace a casing. Some of the lime-green tape is wide, but I didn't bother to unfold it to see how wide and how much.
Pro forma, checked the pant-linen box. No white at all, of course.
Struggled it onto the shelf on top of a box of silk that wants to fall off if there isn't a weight on it, and discovered that I'd put it in with the label at the back. Sometimes the easy way saves trouble in the long run — instead of struggling it off the shelf and turning it around, I made a new label and stuck it on the visible side.
And worlds of various whites in the linen box. Since I'm only postponing the tricky bit with the jersey yoke, I didn't select one to use in repairing the linen drawers.
And now, wash-out marker in hand, I go to write "outside" on two of the pocket places. I figure putting the mark in a place that will be covered up will shorten the time it takes to make the finished product presentable. Were it not for the stray squiggle, I'd be tempted to leave the blue cross on the right front pocket.
⁂
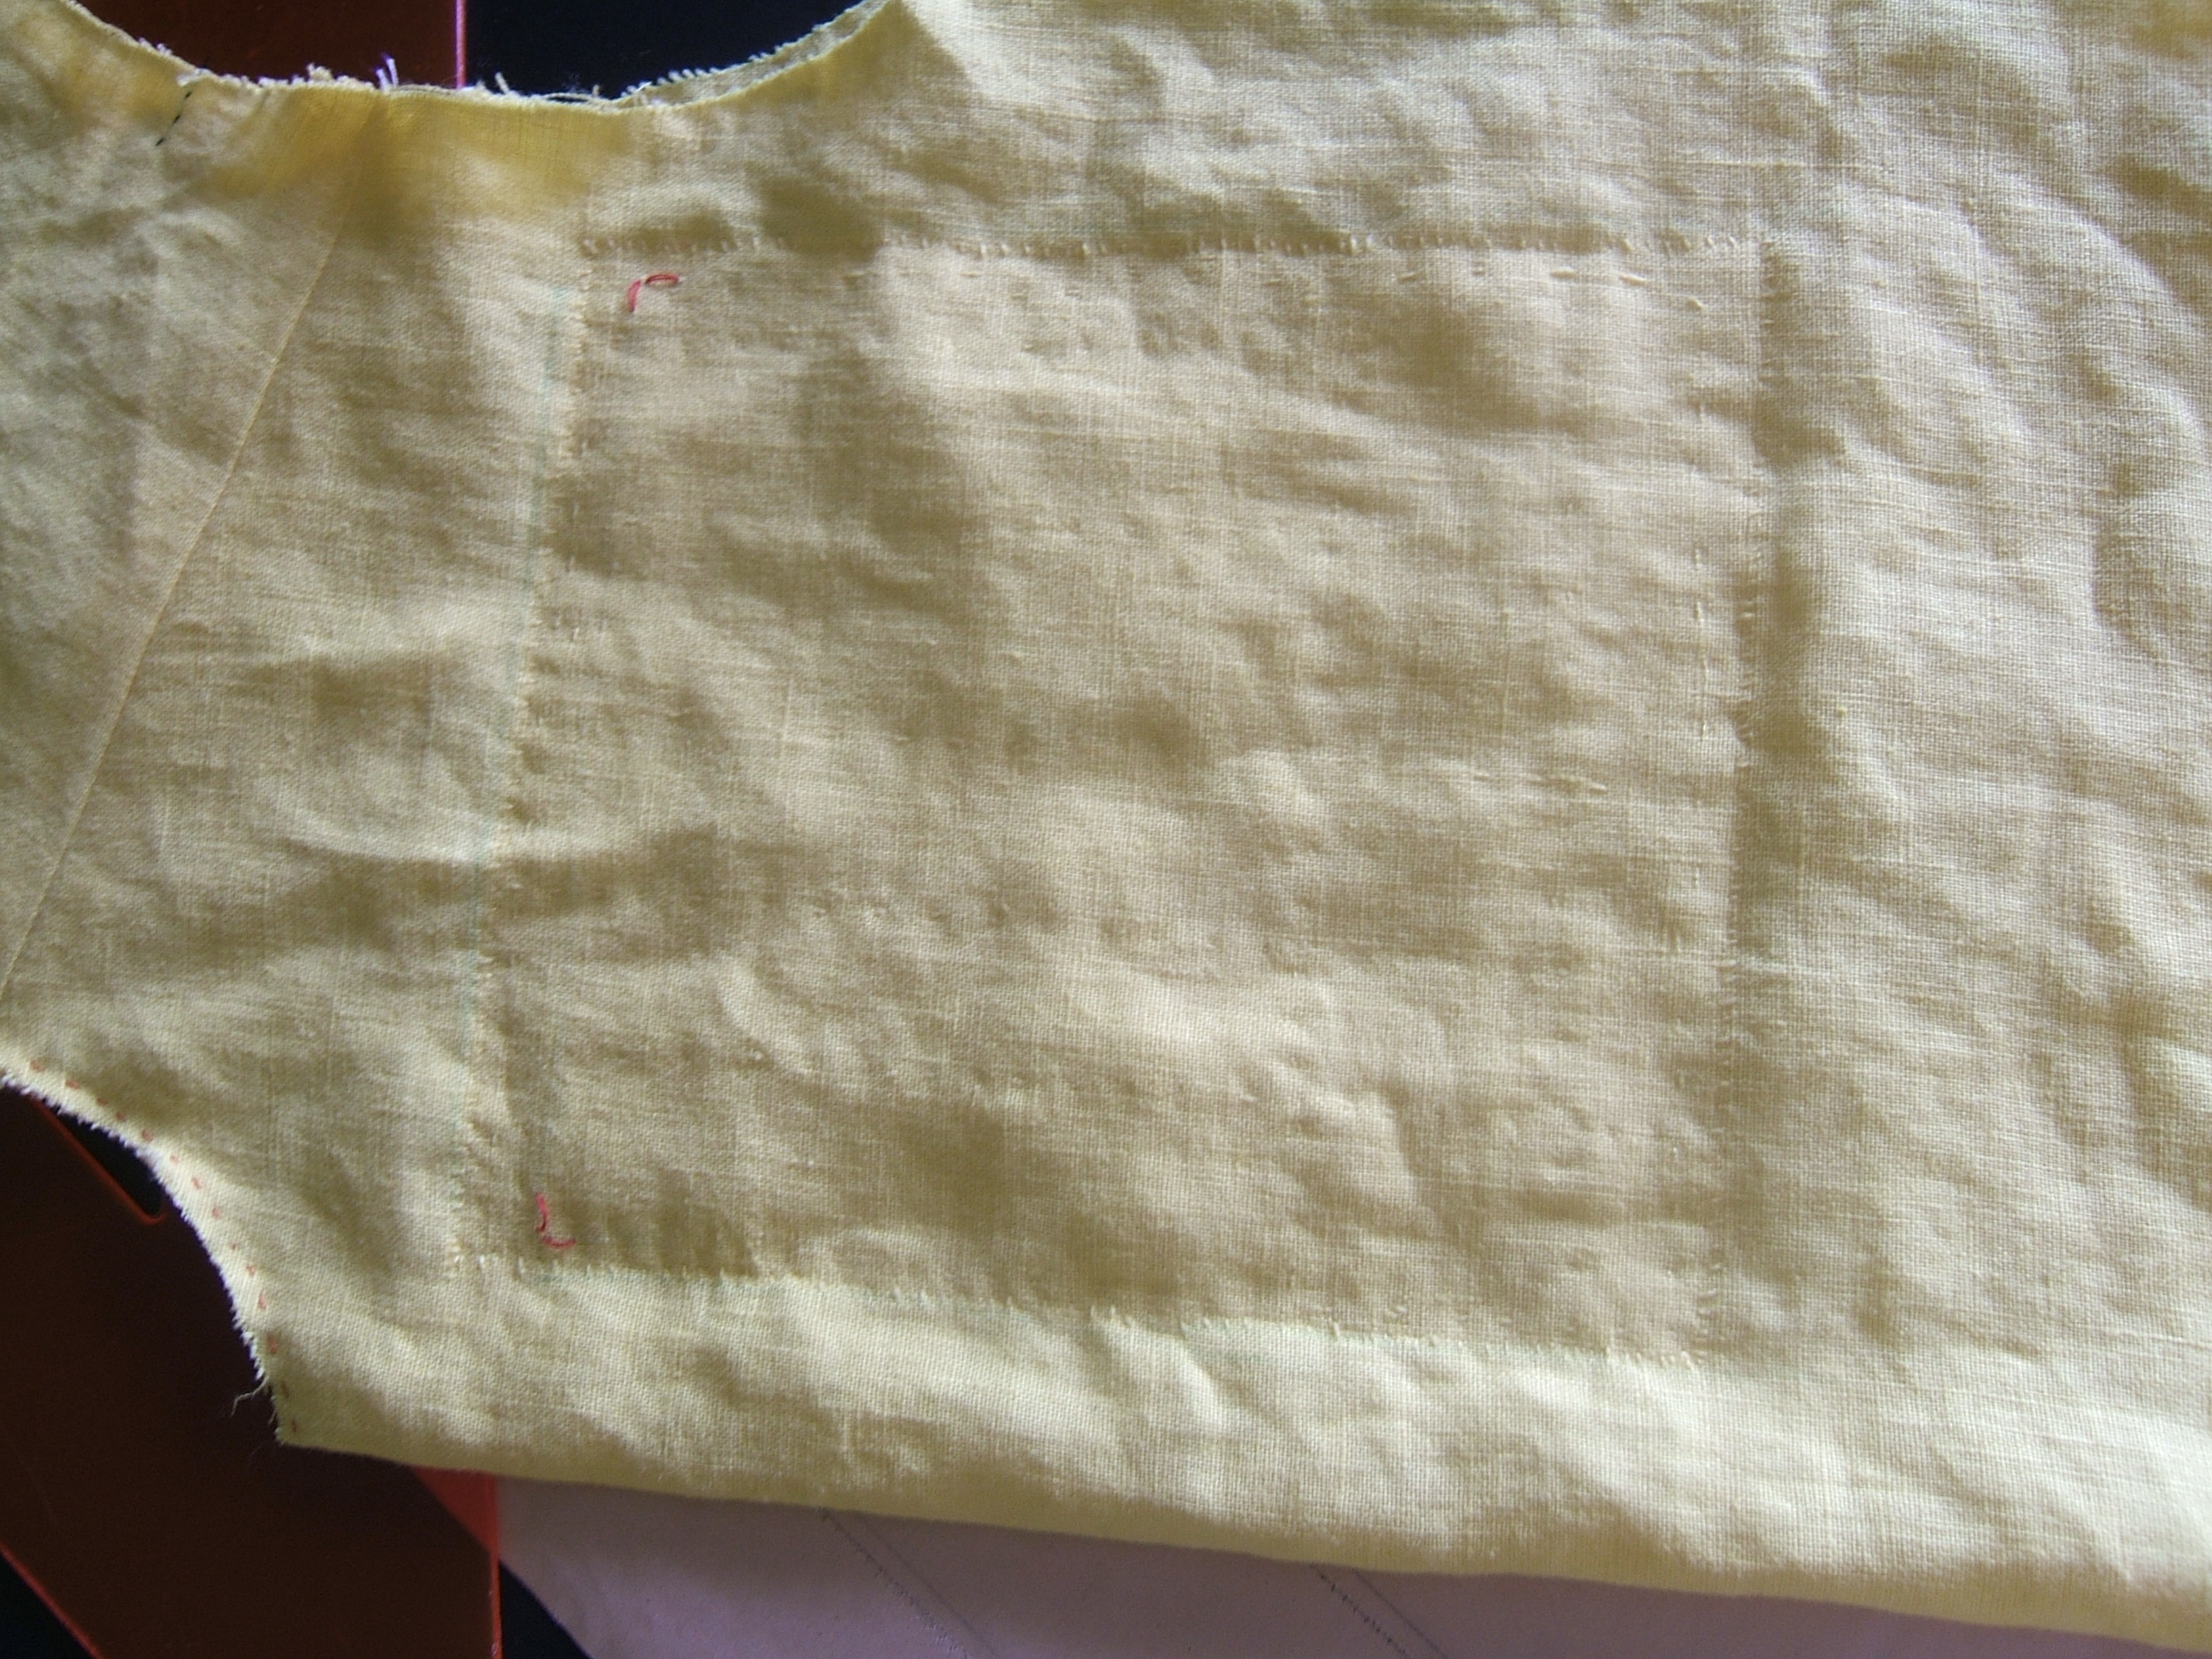
For weft threads, the ravellings were surprisingly easy to sew with. They drifted apart only twice before I started whipping the edge down, and weren't all that hard to deal with even then. I quilted with the work lying flat on the "craft mat", rather thoroughly: all around the edges and about an inch apart both ways. I took stitches as short as I could about a quarter inch apart. None of that will be needed after the pocket and the pocket trim are sewn on, but I wanted to be free to wool the patch around while overcasting the edges down. I tried to make all stitches along the threads and about a quarter inch apart. My goal was to catch at least three threads of the patch and exactly two threads of the yoke. I raveled out one thread on three sides before beginning. (The fourth side had already lost one thread at the edge.) Two of the ravelled threads were suitable for sewing with, showing that I had had a steady hand while cutting out.
Later, I pulled the stitching out of both pocket hems and did them over. On the right pocket, I also straightened the hem a little; it had been wider in the middle. (Still is, but not as much.)
Re-basted the edges I undid to get the pocket backing in, then basted a 3/8" fold into the edge of the lining of the back yoke, then read the first entry in the saga of the curry jersey and pulled the basting out again. Half an inch, I think I can iron in.
Before heating up the iron, I started sewing the belt casings to the front so that I could press them too. I'd forgotten the waist mark when cutting out, so I carefully laid dustpaper to put the marks on the wrong side, then remembered that I want to sew the casings to the right side, so I opened out the fabric, laid it over dustpaper, and went over the waist line with the marking wheel.
I laid my shaku stick with the center mark on the center of the front and made a mark three bu to each side to show how much separation to leave between the casings. The exact distance doesn't seem to matter very much. The separation on the taxicab jersey is significantly more than the separation on the curry jersey, and I never noticed when I was wearing them.
I thing a centishaku is a bu. I'm sure that a decishaku is a sun.
Checking, I learned that in addition to the carpenter's shaku and and the longer cloth shaku, there is a smaller shaku used for measuring footwear.
I also learned that it is not a co-incidence that my bamboo shaku stick just barely fit between nodes of the bamboo.
Now I'm too stupid to iron, and tomorrow I have to go shopping. Whimper. I really, really want this jersey to wear on Saturday.
Today I tore an old pillowcase into three sweat rags. Then when I was hanging the whites on drying racks, I tore two sweat rags into skillet wipes.
No sewing on Saturday, Sunday, or Monday, and tomorrow is the only dry sunny day in the prediction, so no sewing tomorrow either. My dislike of my old jersey is getting stronger.
If I retrofit my other cotton jersey to take a belt, I think I'll put on a casing instead of belt loops, but only in the back. And undo one of the darts I put across the back.
Dave's shortest nightshirt needs pockets. I think it will be quicker to shorten one of his other nightshirts.
I also need to add pockets to a newly-demoted pair of tights.
Back to my sewing again! In where I make and I mend.
And I can't remember the rest of the Gene Autry tune; when I try , I get the tune to "I fight to the finich and always eat spinach".
I finally pressed the front casings and the yokes, then I re-pressed the turn-under at half an inch. I was annoyed at first that there was an inch and a quarter to mark along, but the half-inch tab is only half an inch long. Then the dime dropped and I started matching the end of the marking edge to the beginning of the previous mark.
I kinder wish I'd basted instead of pressing. It wouldn't have taken significantly longer, and the fold wouldn't wobble.
⁂
Stitched the fold in the front belt casing that I pressed this morning. I guided the edge of the presser foot on the stitching that attached the casing (which I continued to the raw edge for neatness) until I hit the casing, then maintained the foot at that distance from the edge to the other end and followed the stitching off the edge. Couldn't see the stitching in the gap between the casings very well. The next step requires a little intelligence, and it's nap time. I think I mark a line under the casing, fold it down to meet it, and stitch twice. <Checks back> Nope, I stitch only once.
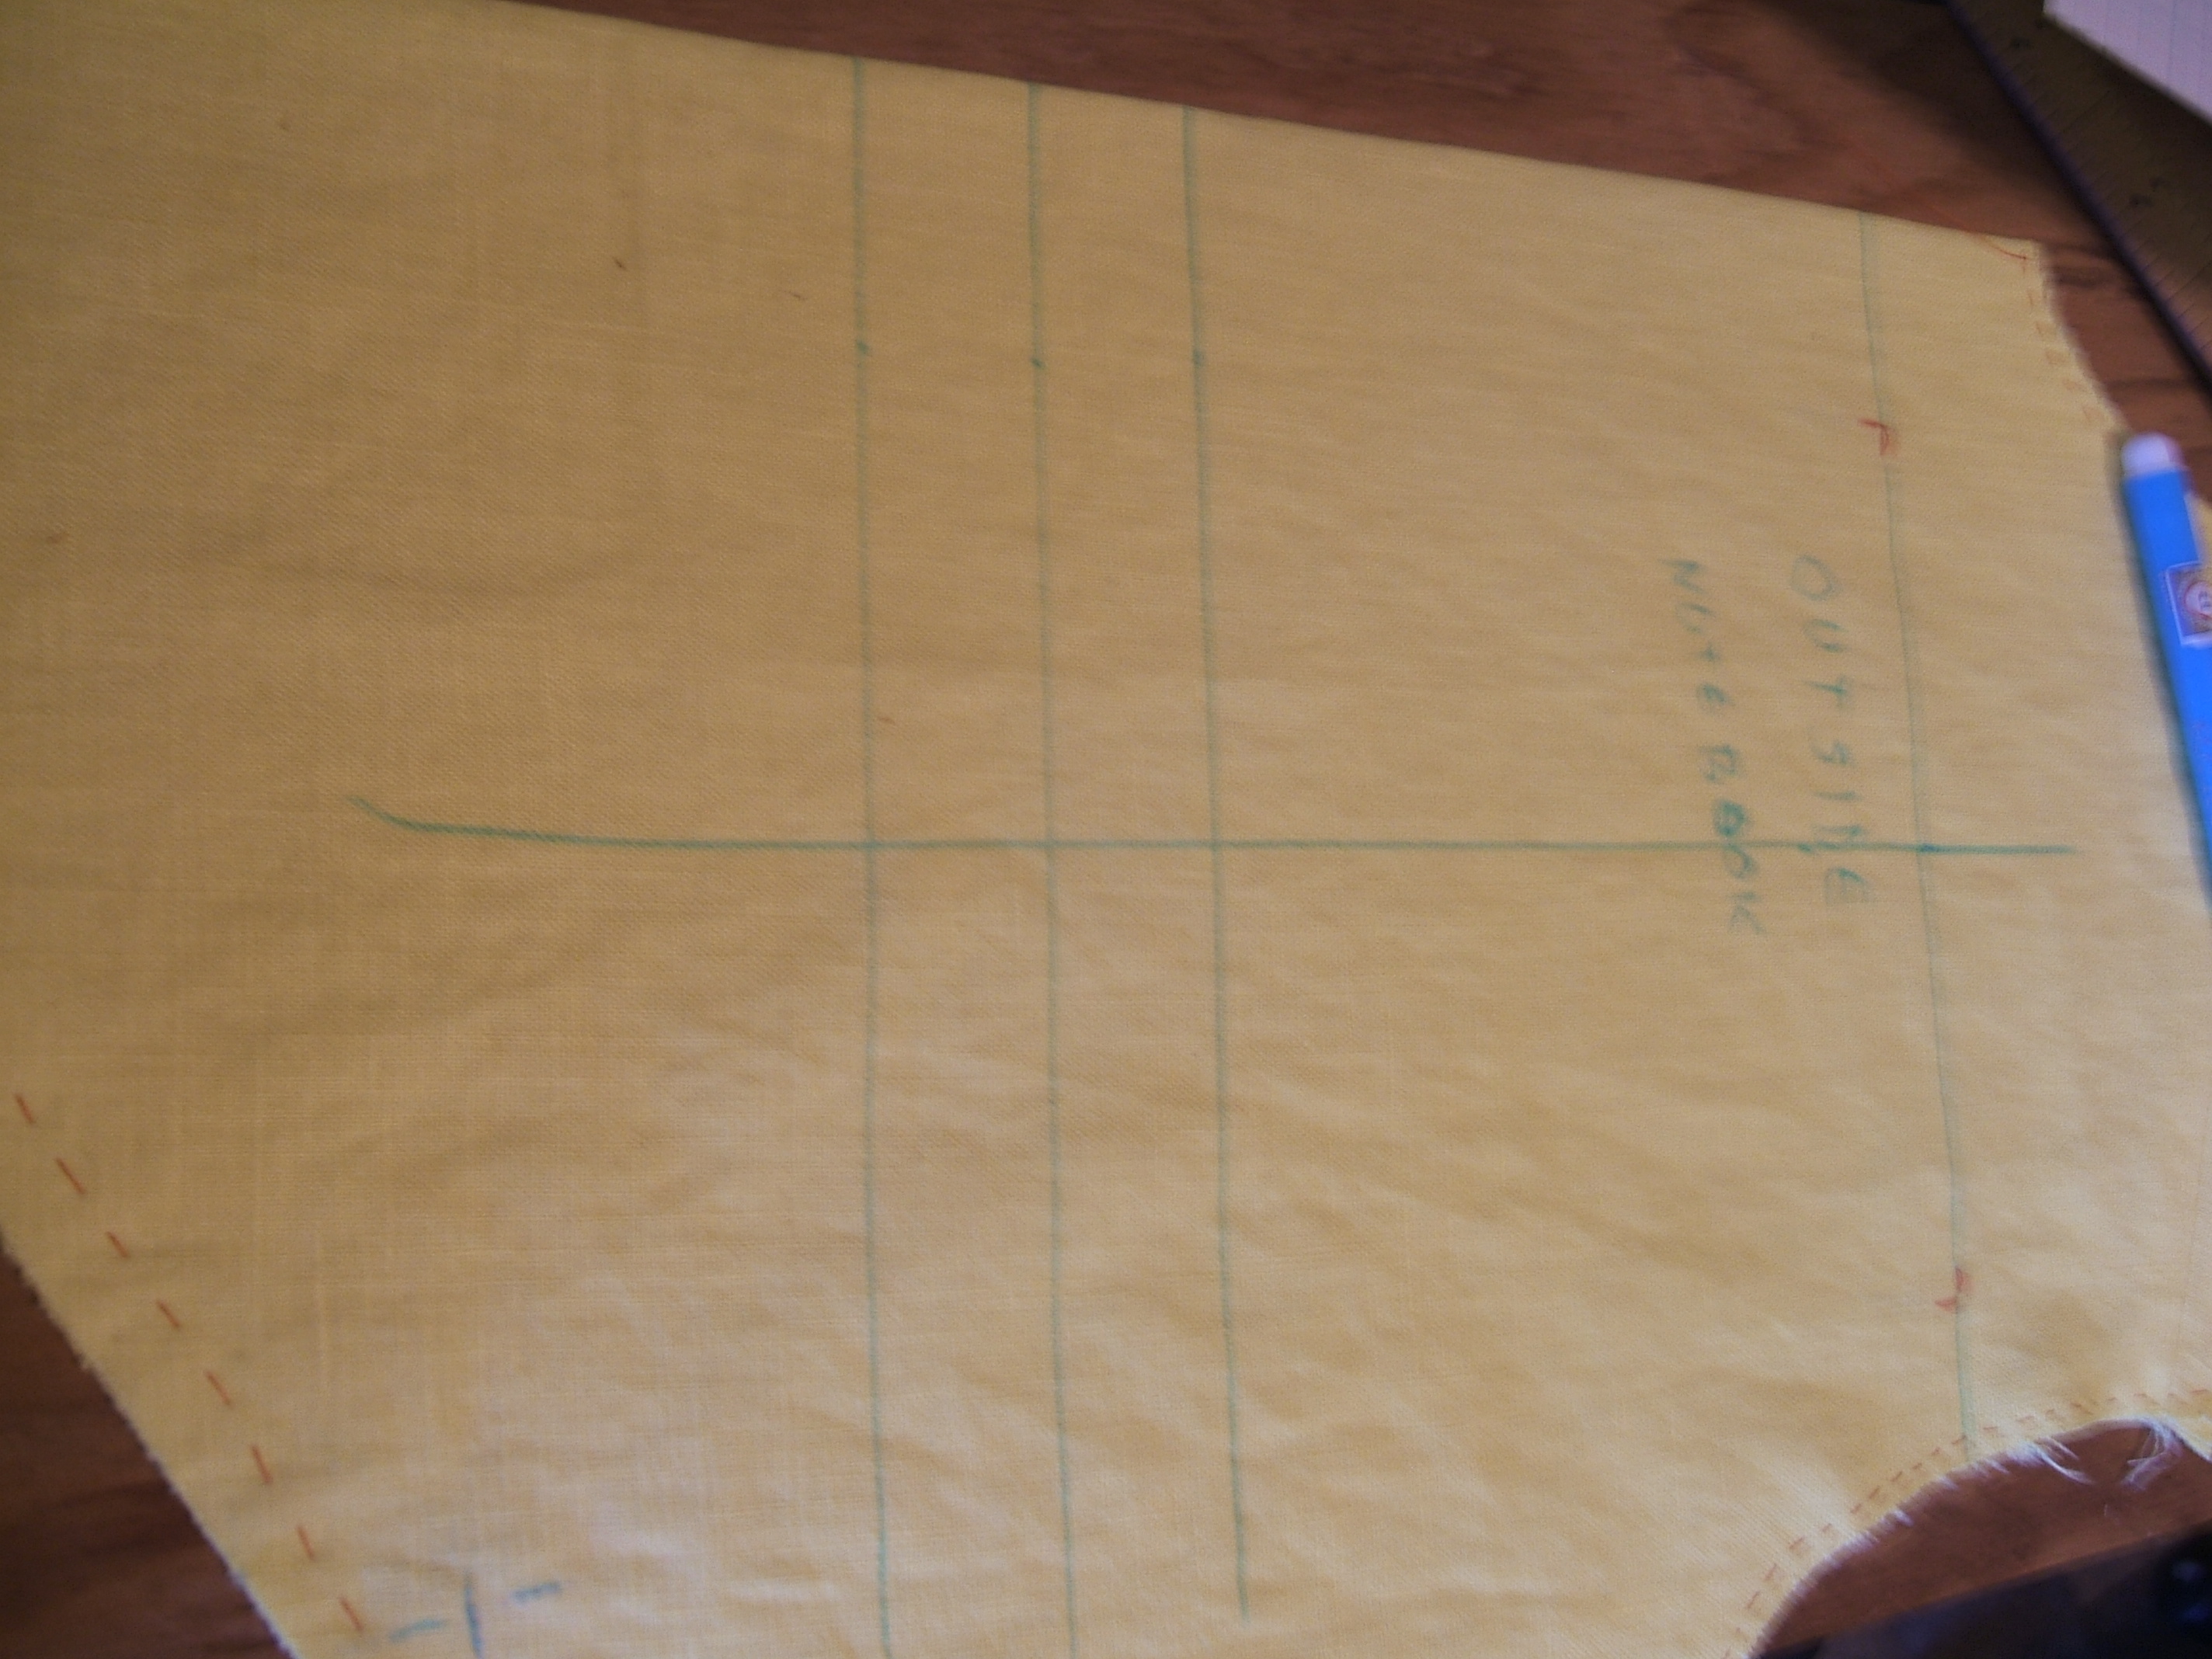
After supper, I used my shaku stick to mark the exact center between the pocket marks, then used my "two-sided craft mat" to mark a line parallell to the center fold through this mark, and also horizontal lines to mark the pocket top, fold, and stitching line — and the bottom of the pattern, which has nothing to do with the case, but it was there.
Now to mark the other side.

And after supper I marked the matching line for sewing down the belt casing. Only line of stitching to finish, but I decided to use the remaining daylight to move an asparagus plant.
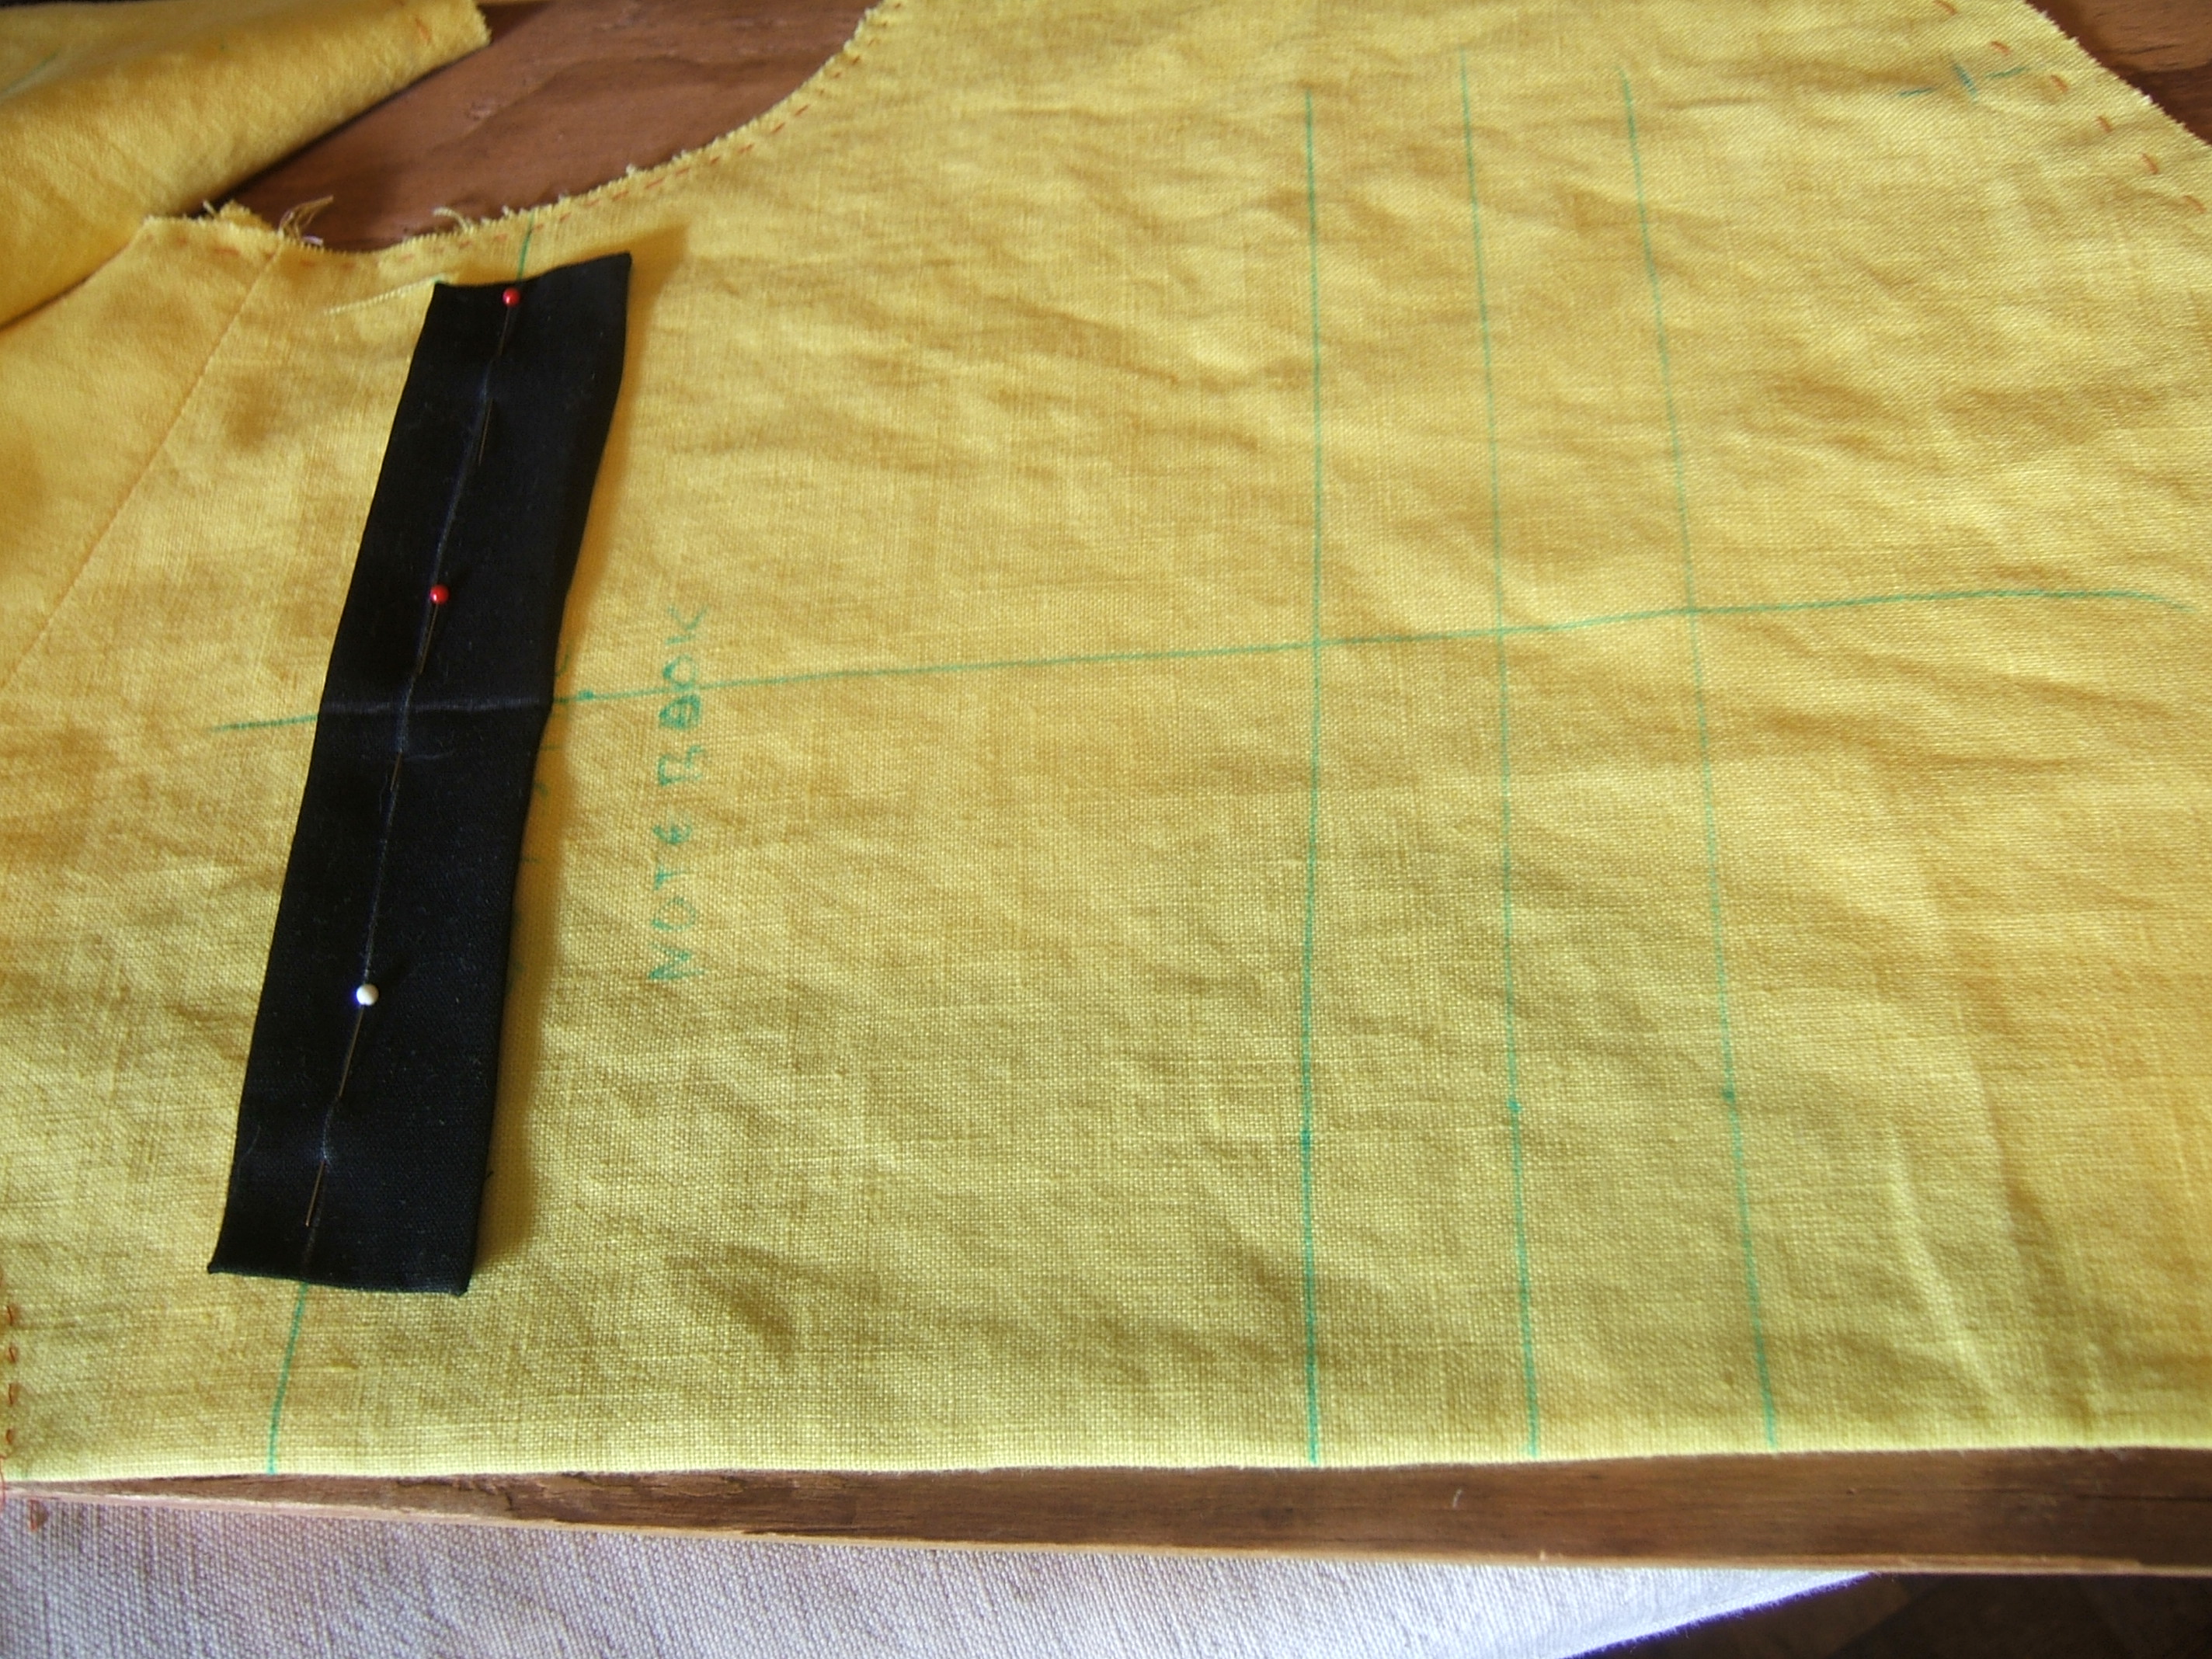
If you click to enlarge the picture, you can see the white lines on the black pocket trim.
Sometimes two errors cancel out. I marked the raw-edge line the full width of the fold allowance above the fold line, forgetting that it needs to be half an inch less for seam allowance. Then when fiddling to place the pocket, I realized that I'd marked the fold line a quarter inch low — the words "fold line" meant the line they were on, not the bolder line below.
The pattern is on spread-sheet paper, which is conveniently ruled. I put pencil marks on the proper line to draw my attention to it in case I use this pattern again.
So, the fold line being a quarter inch higher and the allowance a quarter inch wider, the line I marked will do just fine.
Back to the pinning.
⁂
The front is now ready to sew to the yoke, but I'm giving serious consideration to picking out the stitching I just did and putting it back an eighth of an inch lower.
Before lunch, I sewed the pocket trims to the front yokes and pinned one of the pockets.
And now it's nap time.
⁂
At last I have sewn the large snap to the pocket. That leaves only two notions to be checked off my list: tape to cover the ends of the snap tape, and elastic to put in the sleeves.
But the elastic is to be put in dead last, and I don't want to cut it ahead of time.
I'm glad that I attached the notebook pocket first, as it will have to be picked out and done over. But it's functional now, I can pick a patch pocket off a finished garment, and I really, really, want to wear this shirt.
Main thing wrong with the notebook pocket is that the raw edge wasn't scroonched enough to make the fold-up completely cover the fold down. So I ran a gathering thread about an eighth of an inch from the raw edge of the cell phone pocket. I may heat up the iron and press out the puckers. Finishing the pocket is for tomorrow. It should take only a few minutes, then I can sew the collar on.
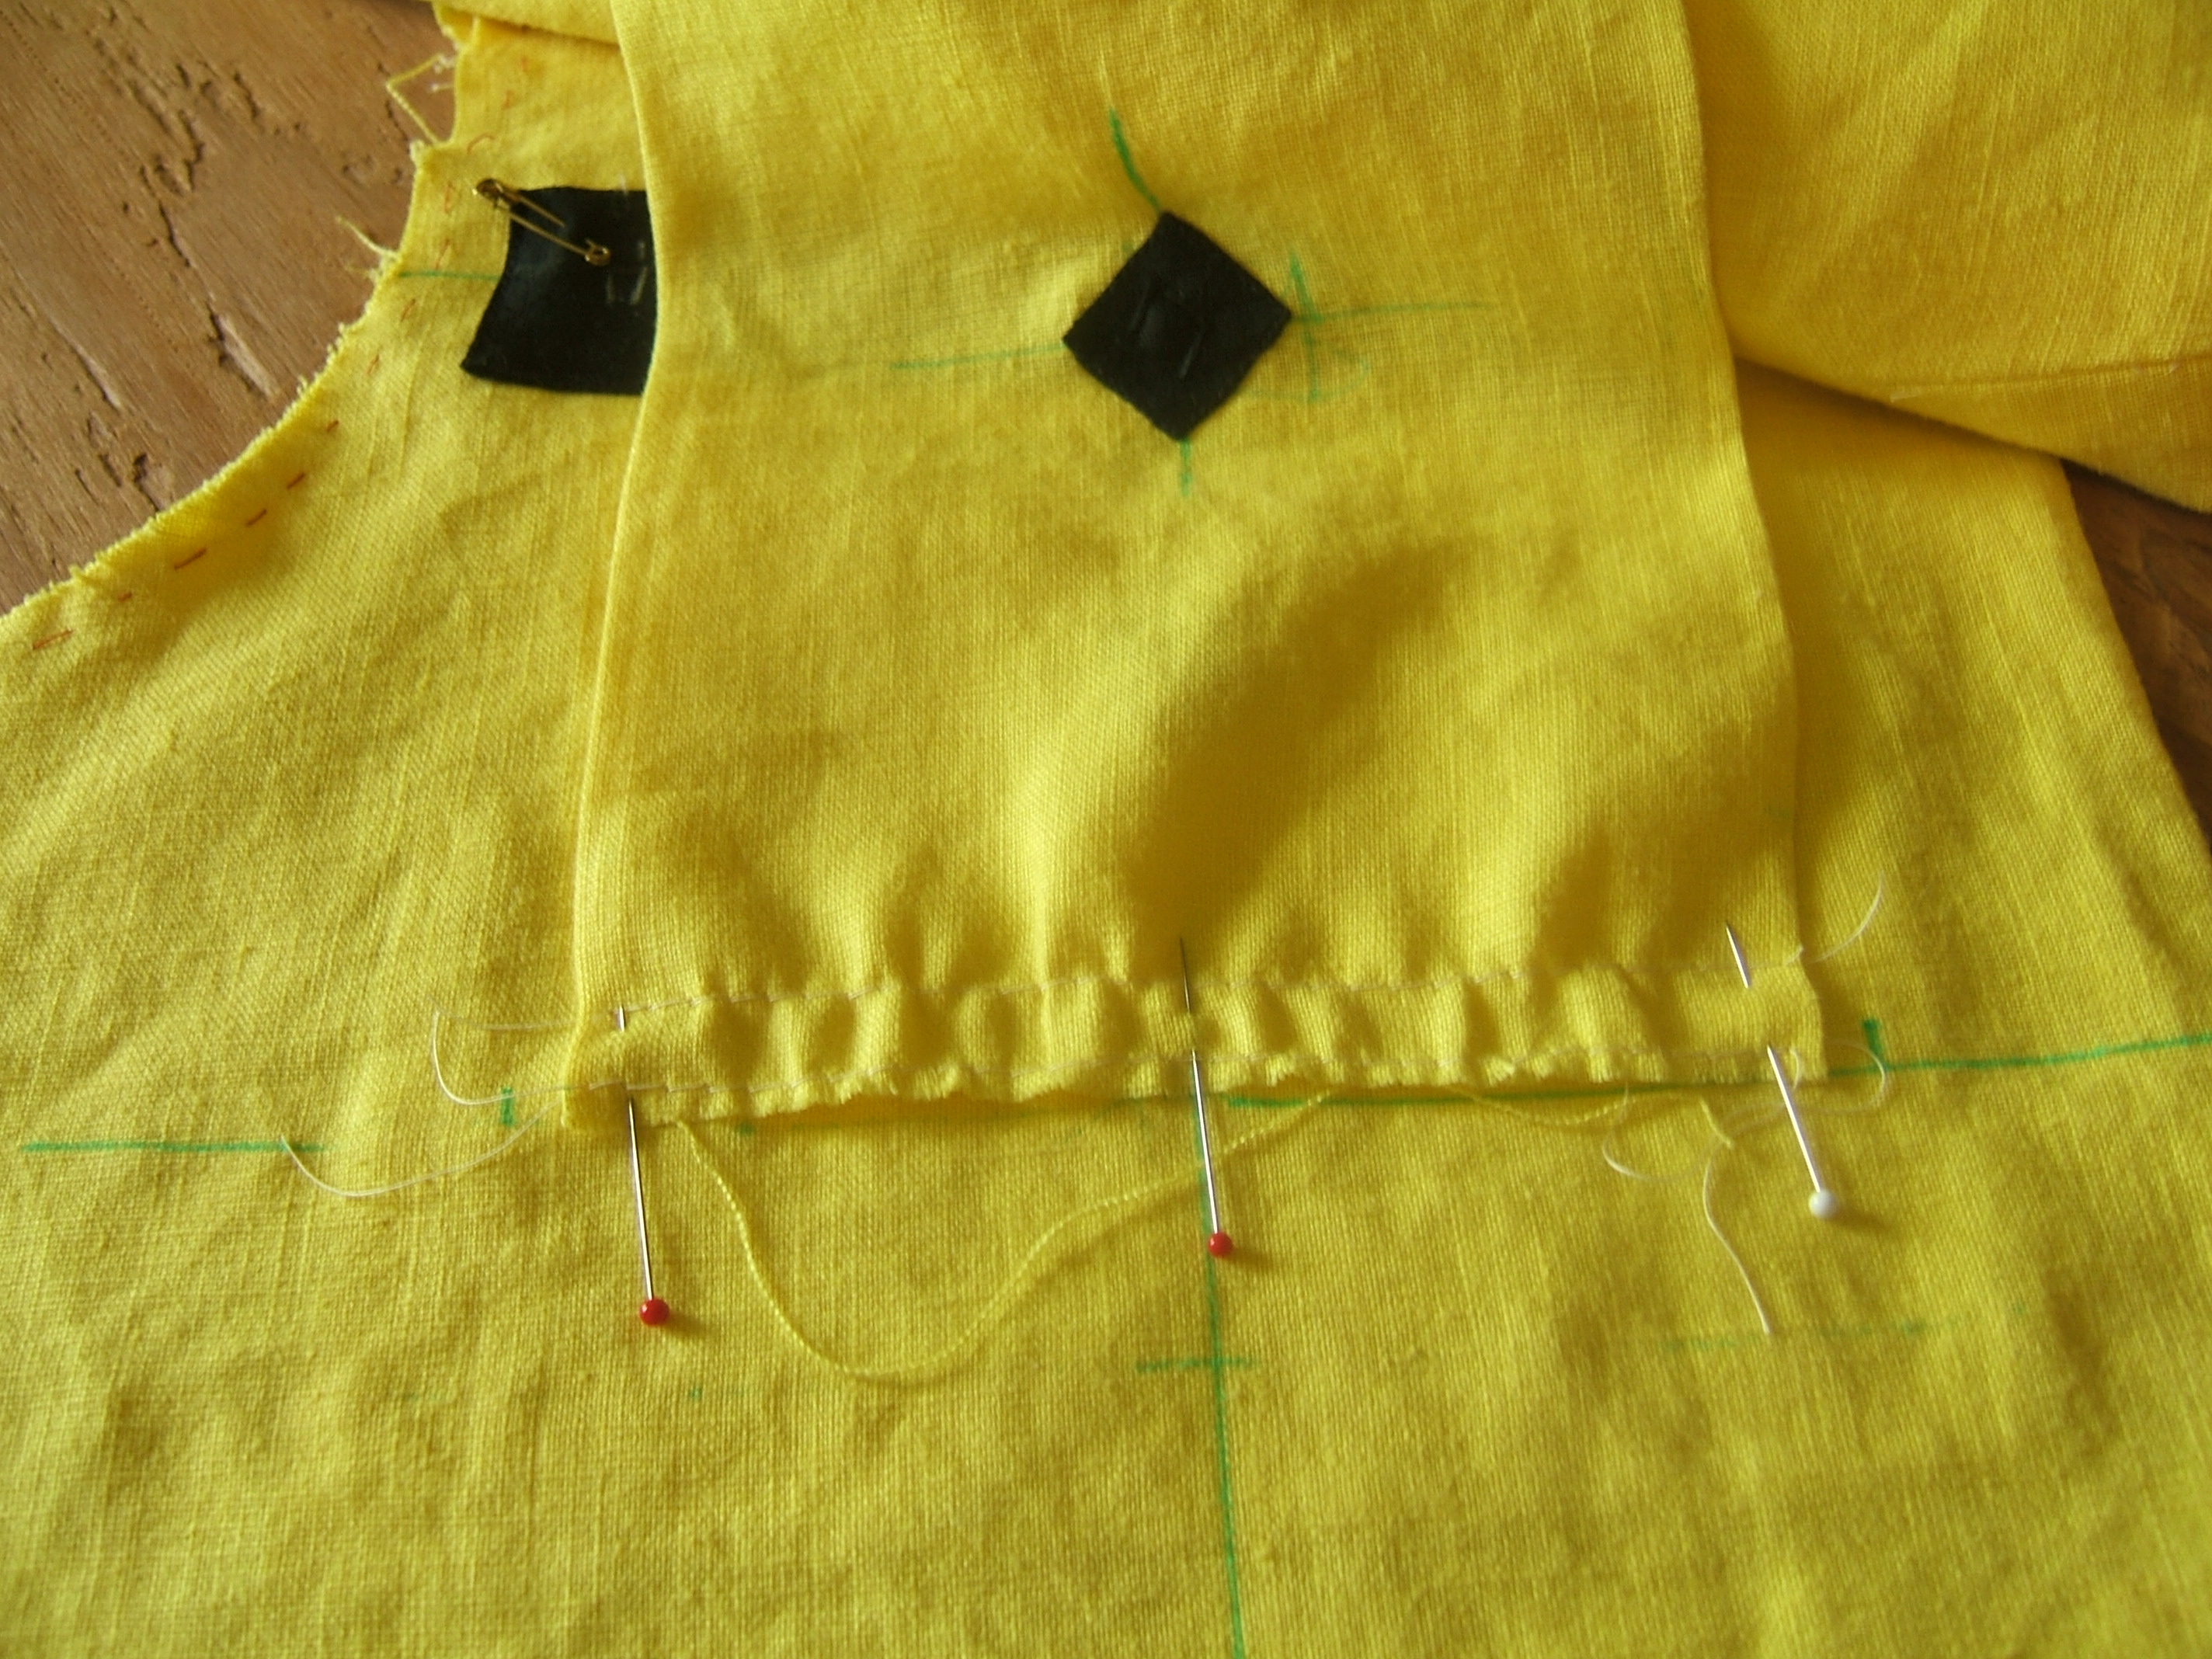
One row didn't scroonch it enough, so I put in another gathering thread. Note pins at ends and center to distribute the gathers.
Linen doesn't ease worth a nickel. I think I'll use the longest stitch to sew it on, cut stitches to release pleats, then sew for real.
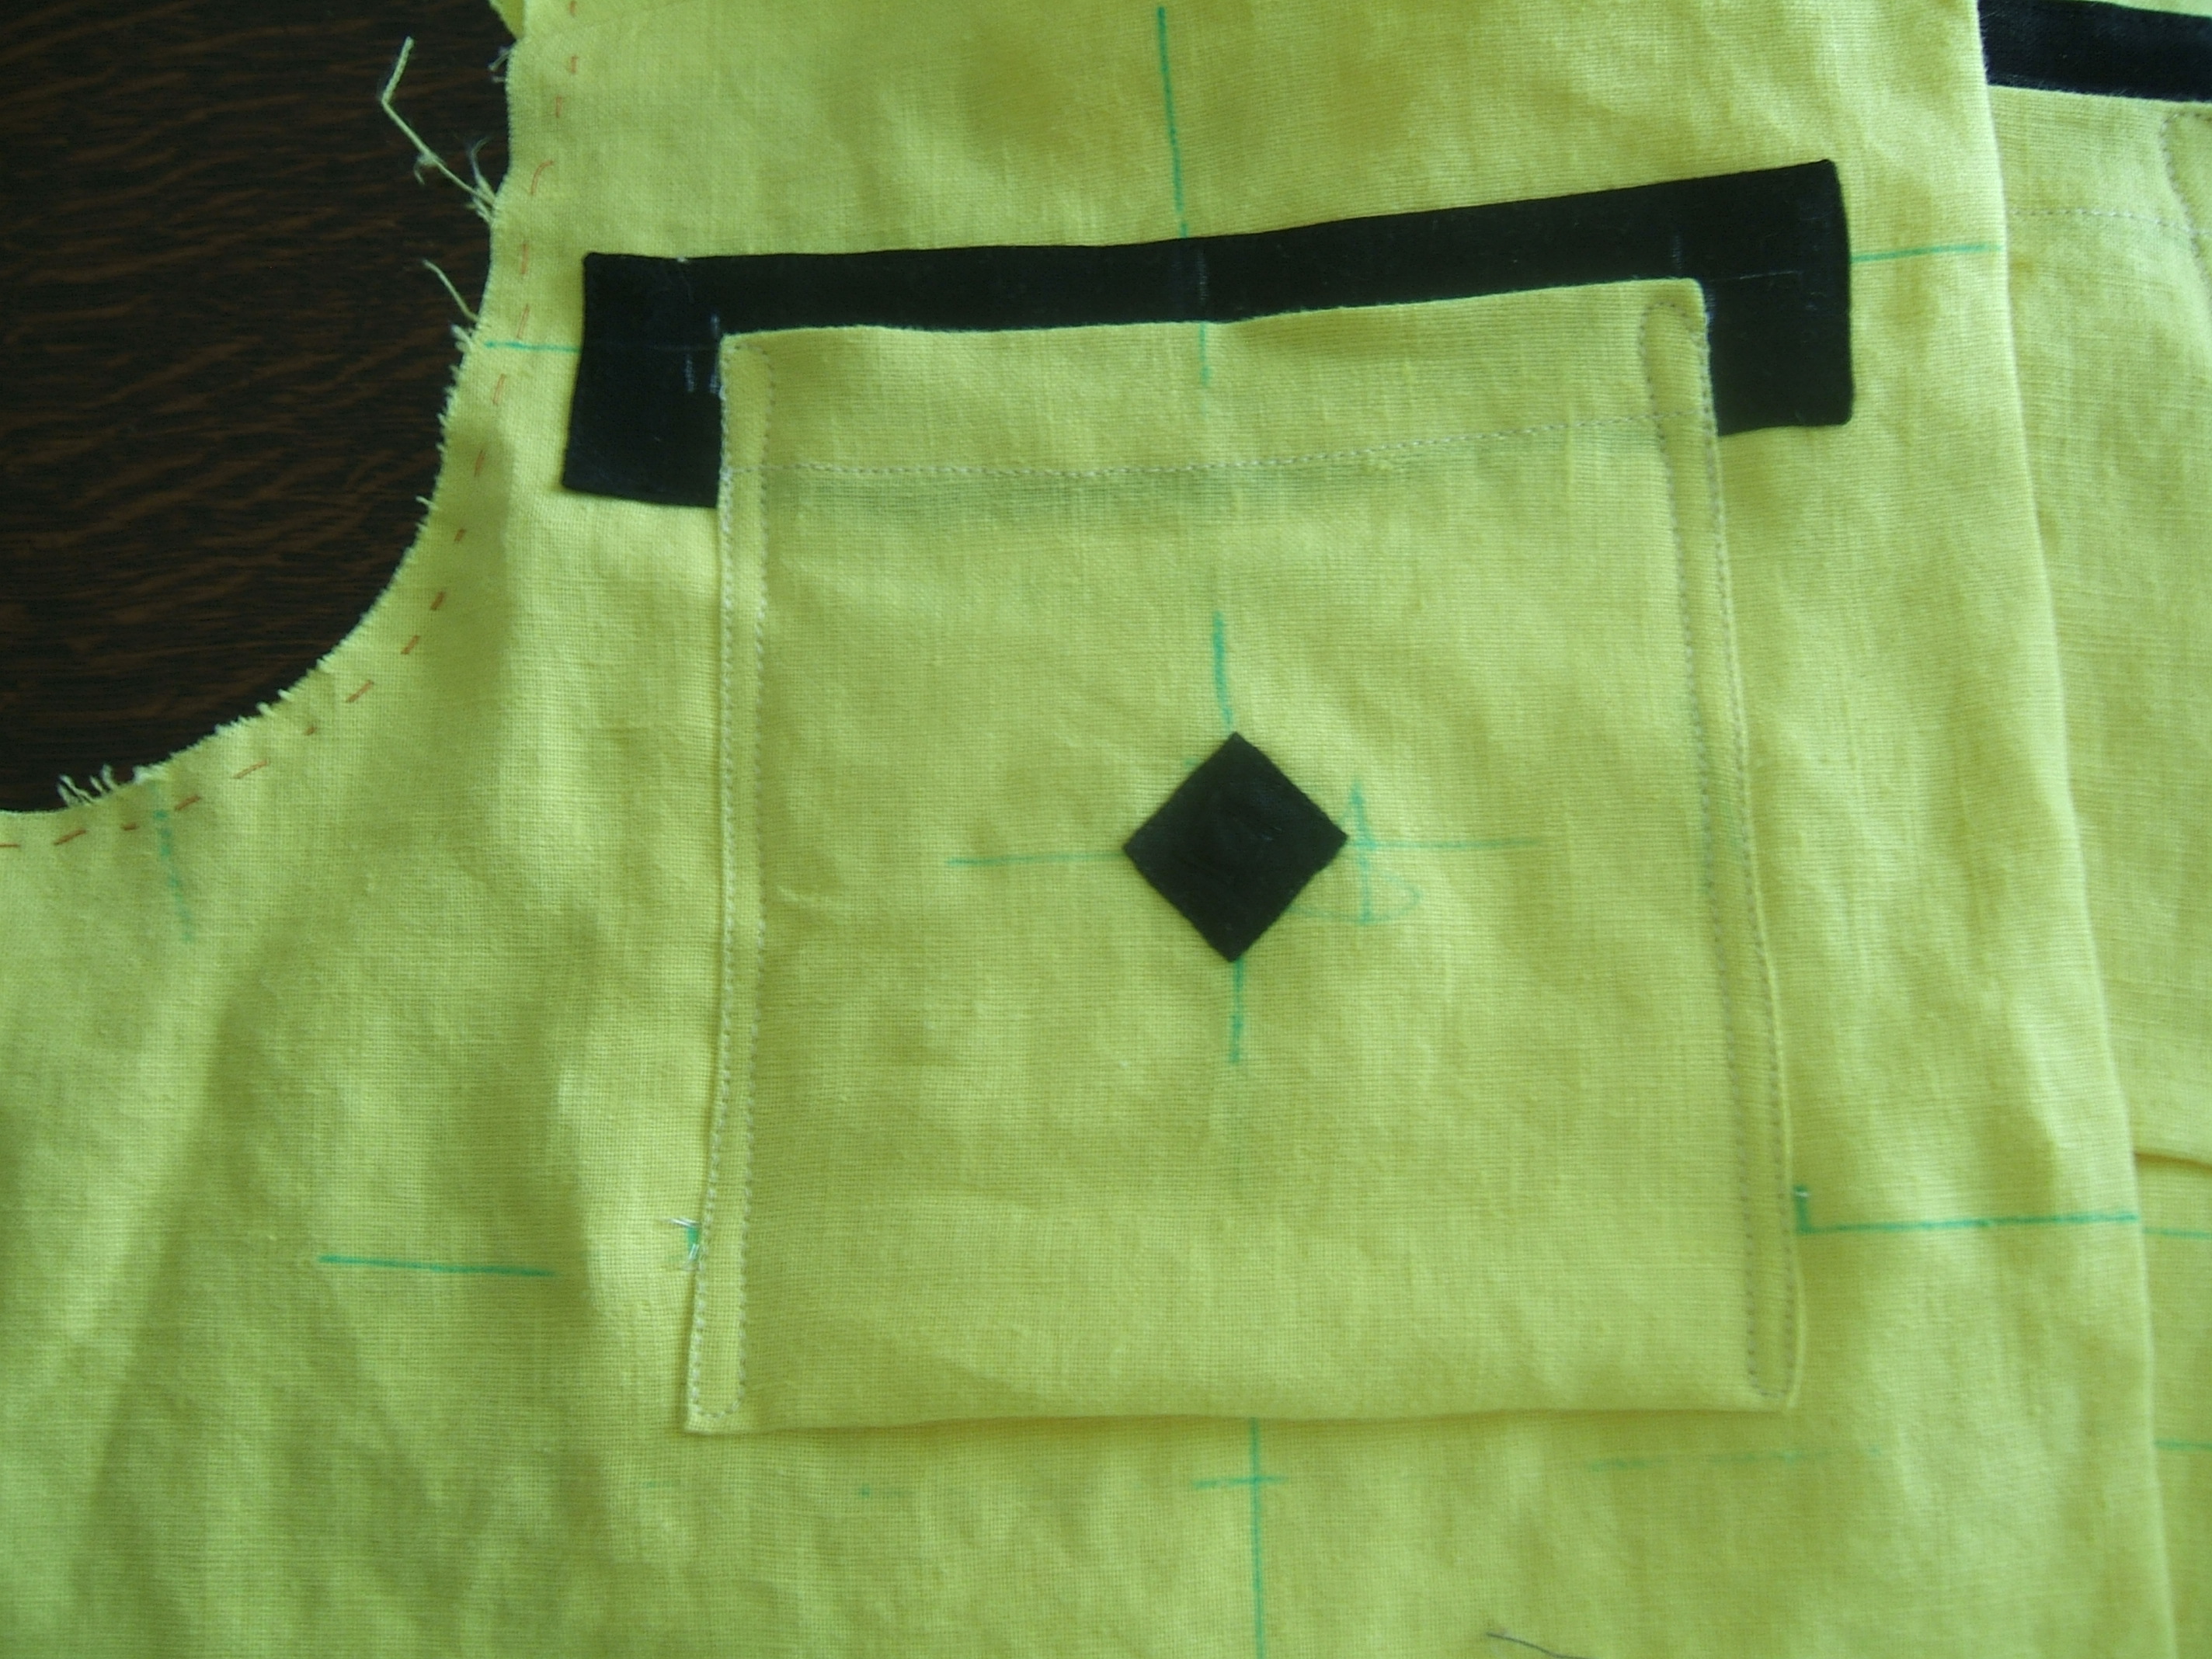
It's on, and it's nevah coming off, even though I drew the matching line a quarter inch too high, and that means that I have to undo the snap to get my cell phone out.
I thought the collar was next, but the hook-and-eye tape has to go on first.
Umm . . . yes, when the notebook pocket comes off, the phone pocket comes off. At least I won't have to put quite as many stitches in as I will have to take out. But the jersey might wear out before I get the time to do it.
Meanwhile, I have to wear my cotton jersey to the farmers' markets tomorrow. I'm hoping not to need the older cotton jersey before I can replace the elastic in the back pockets.
⁂
I've been studying the hook-and-eye tape and both the old linen jerseys. I considered re-threading the Necchi, but there just isn't anything there for a zipper foot to take hold of. There is no alternative to sewing one side of the tape by hand. I plan to sew that side first, as it's easier to maintain a constant small distance when taking one stitch at a time.

On Saturday evening I took the yokes and my snack bag of hand-sewing tools out to the front porch and finished hand-sewing the edge of the tape. I didn't intend to rip the pockets off until after sewing the collar on, but I didn't want to go back into the house and the seam ripper was right there, so I took the side stitching of the notebook pocket out. With the pocket dangling down I had access to the pocket trim, and decided that with all that picking out going on, I might as well trim it to a more-graceful width, so I picked that stitching out too.
On Sunday, I picked out the hem of Dave's muslin nightshirt so that I could shorten it. Then I basted the turn-under so that I could wash it today. I used ecru thread and the White's longest stitch, which is five to the inch. I calculate that that is a hair more than five millimeters; the longest stitch on the Necchi is four.
I had hoped to sew the collar on today, but didn't quite make it.
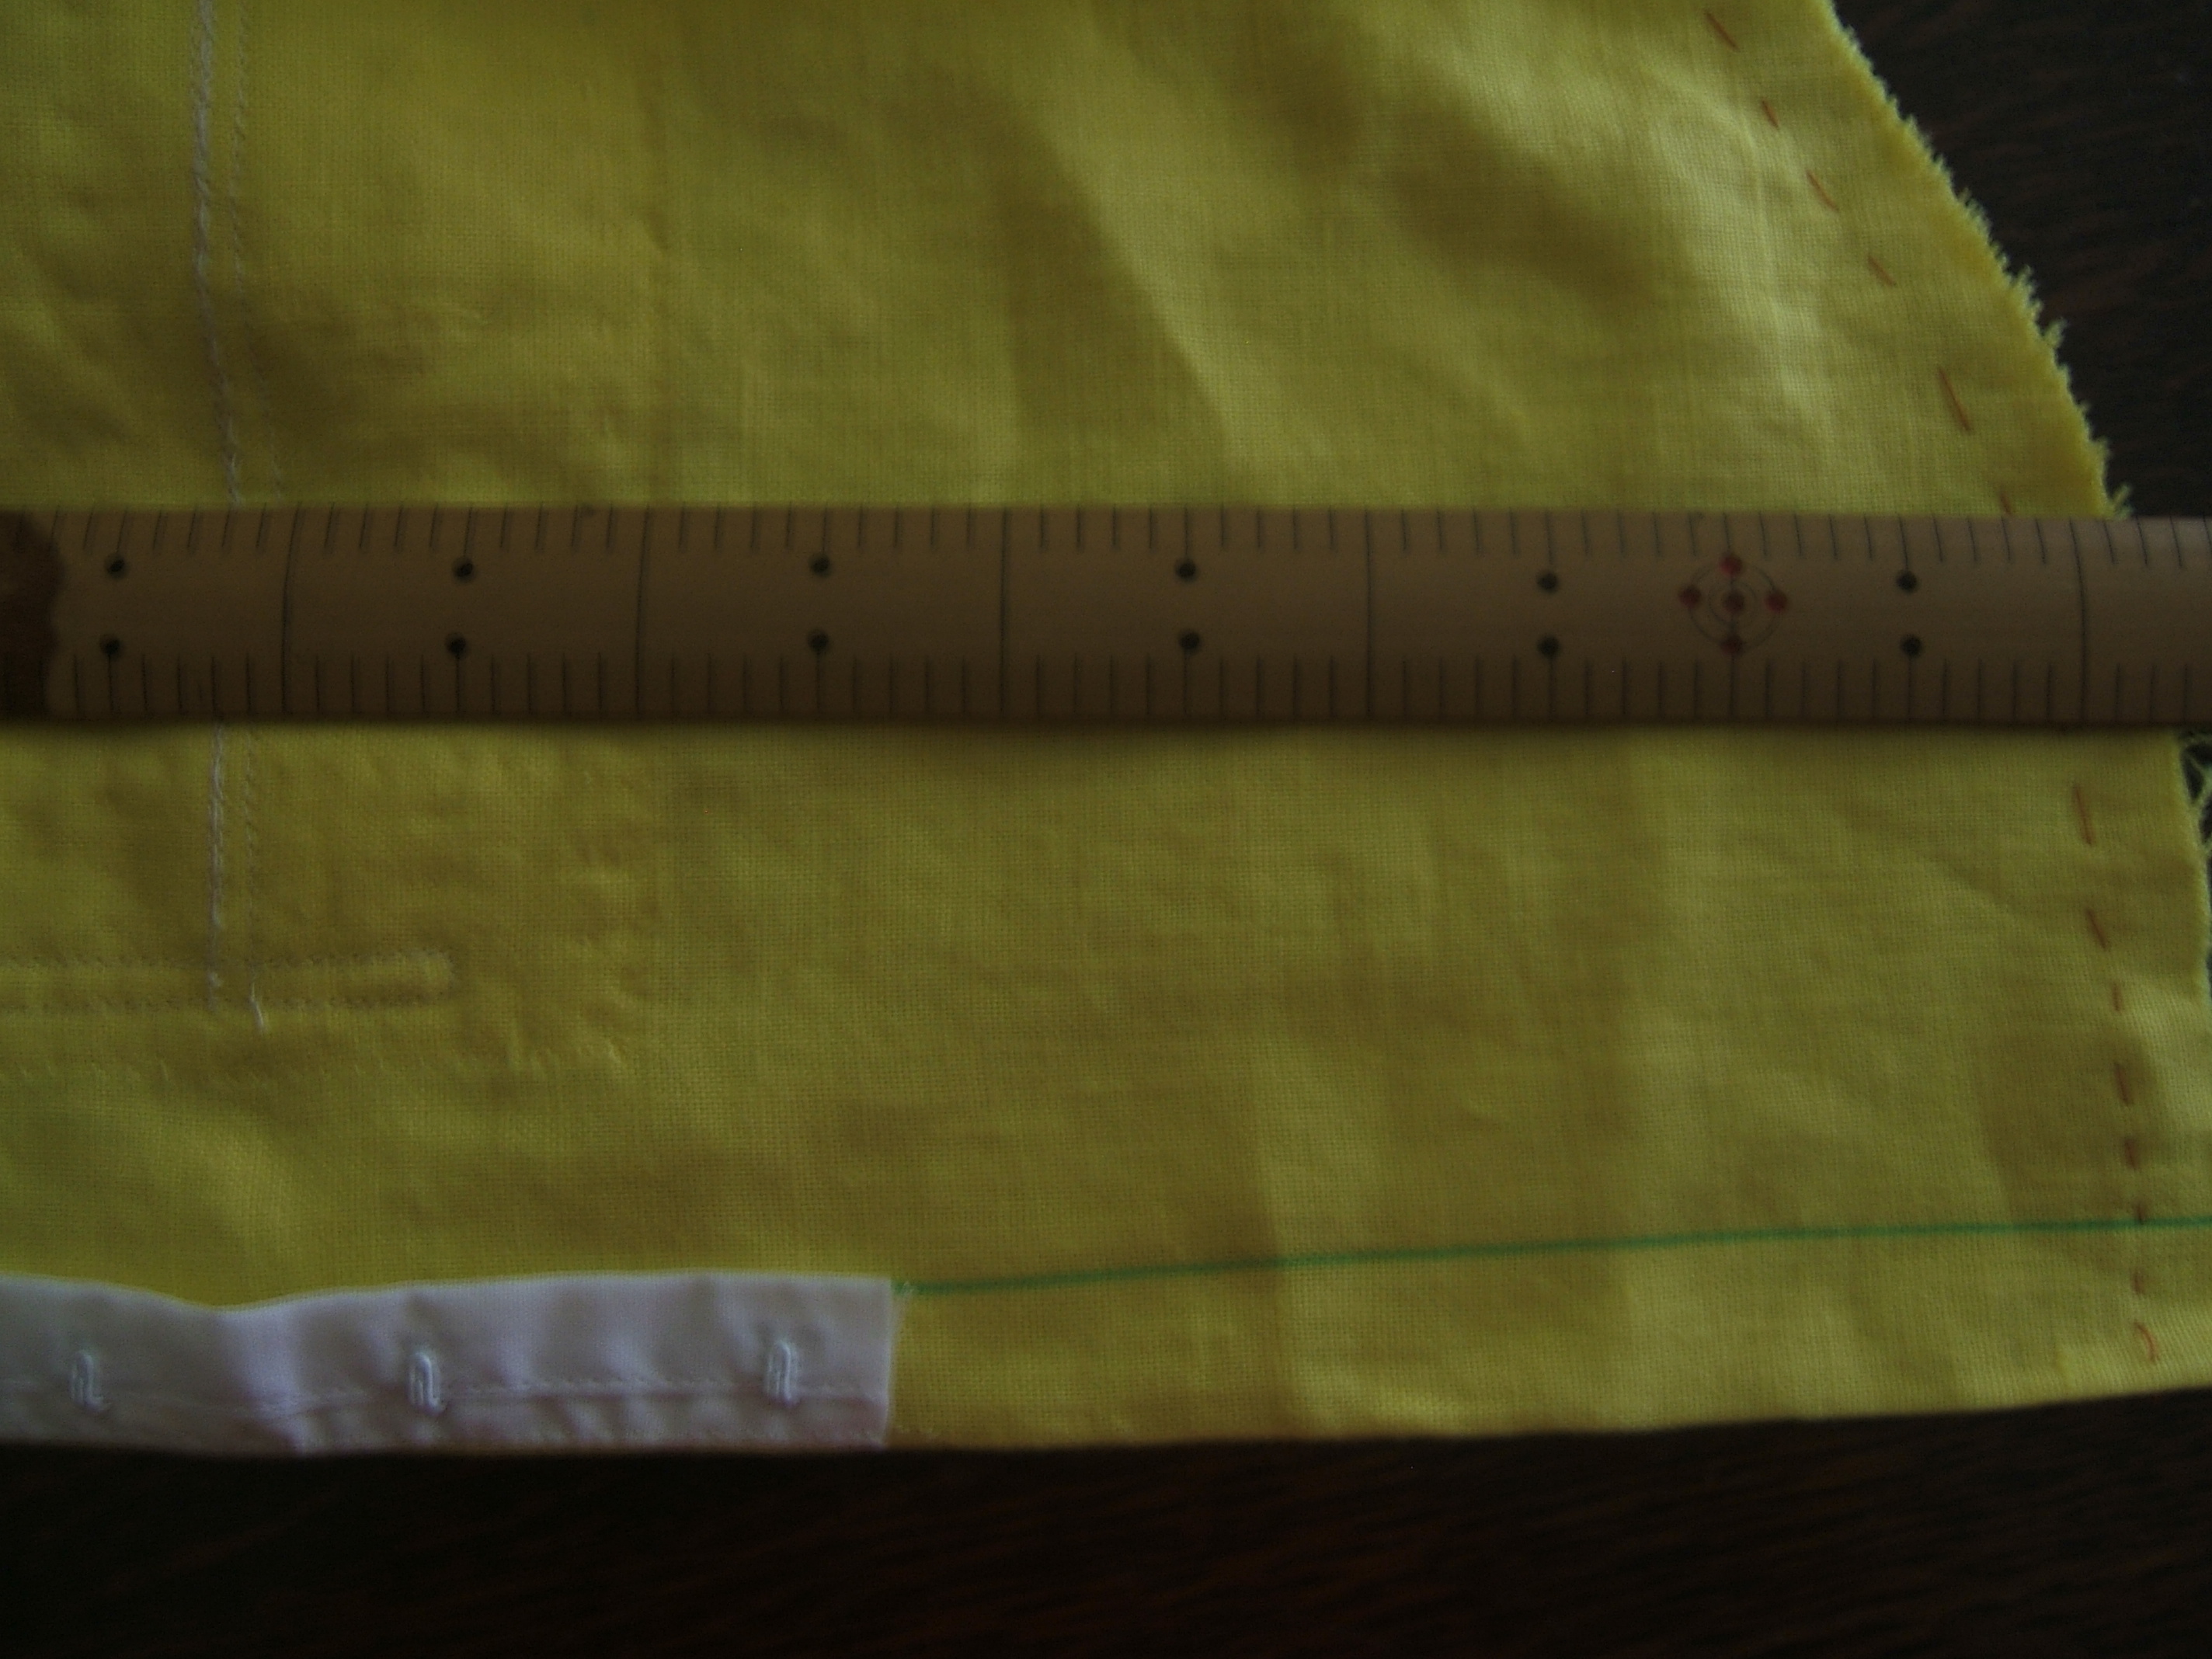
First I finished sewing the hook tape on. Here the stitching line is marked with blue wash-out pen. I went outside for the next two pictures; not much sun comes through the windows when it's raining.
When the hook tape was secure, I hooked the eye tape to it, pinned the eye tape to the left front, unhooked the tape, and studied it. Then I unpinned it and marked a blue line where I thought the edge of the yoke should come.
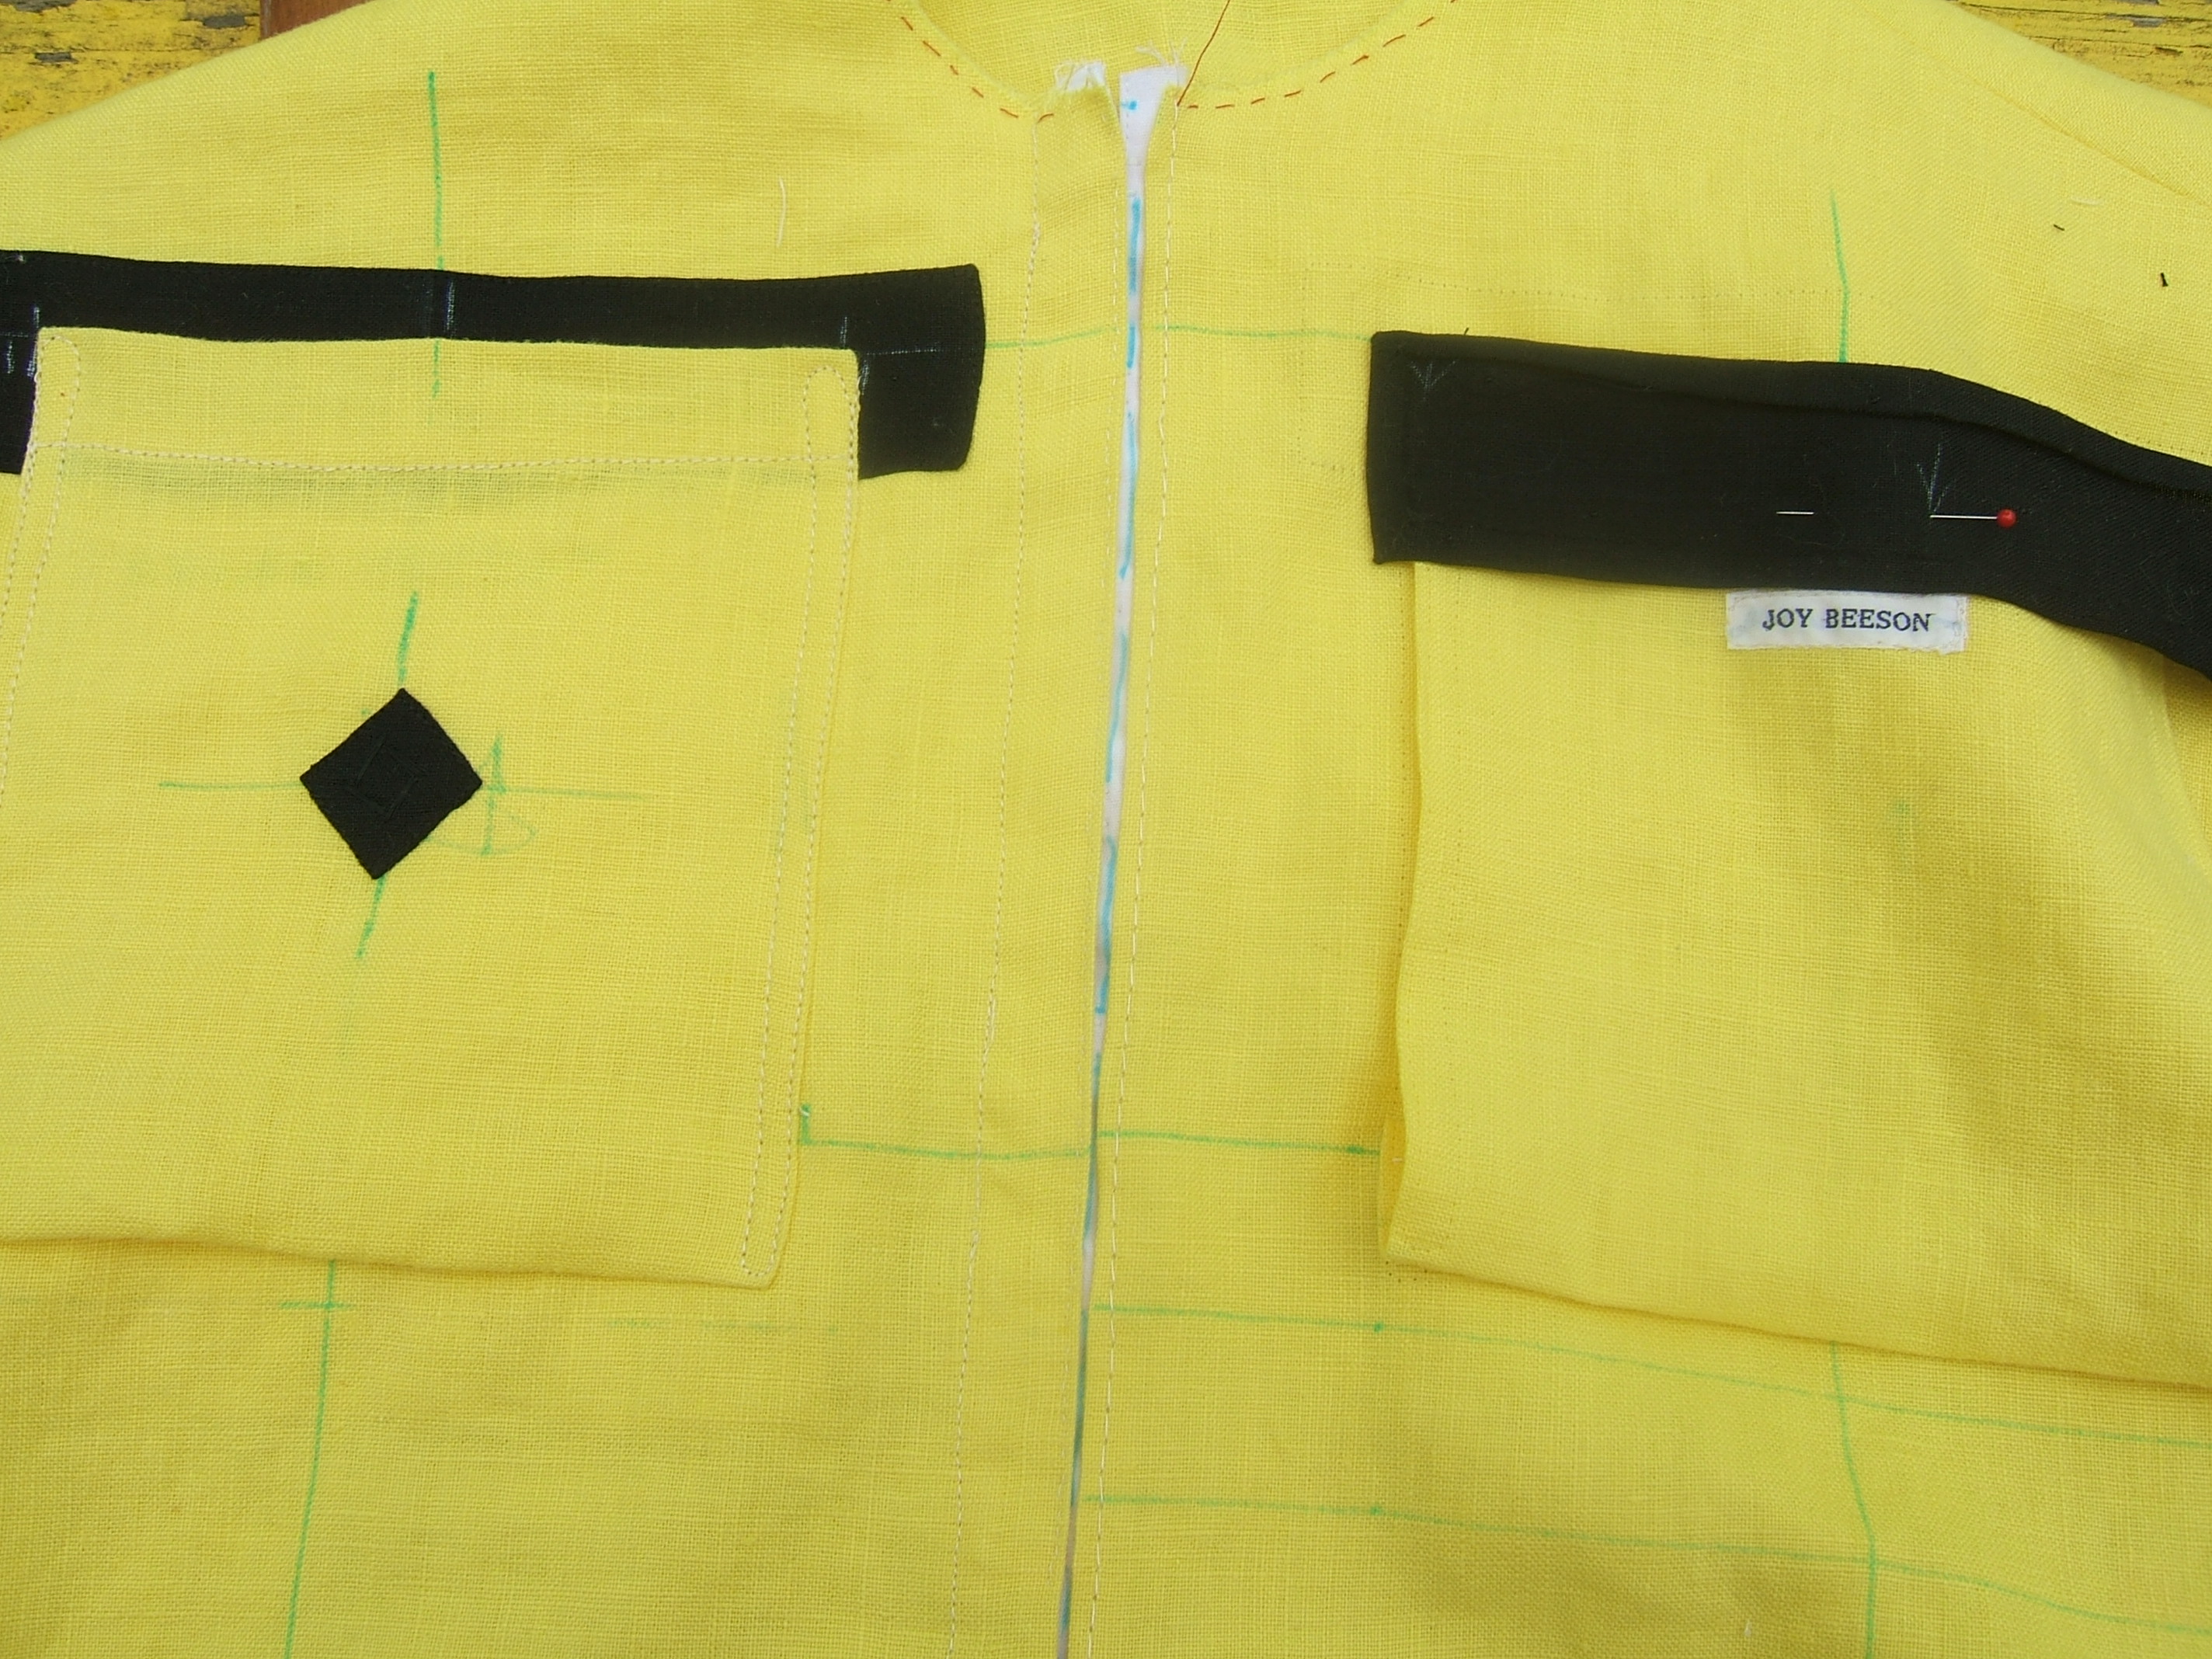
Then I re-pinned the tape to the yoke and machine basted. I need to move the edge to the left, and pay more attention to the match marks. At five stitches to the inch, the basting was easy to take out even though I didn't unbalance the tension.
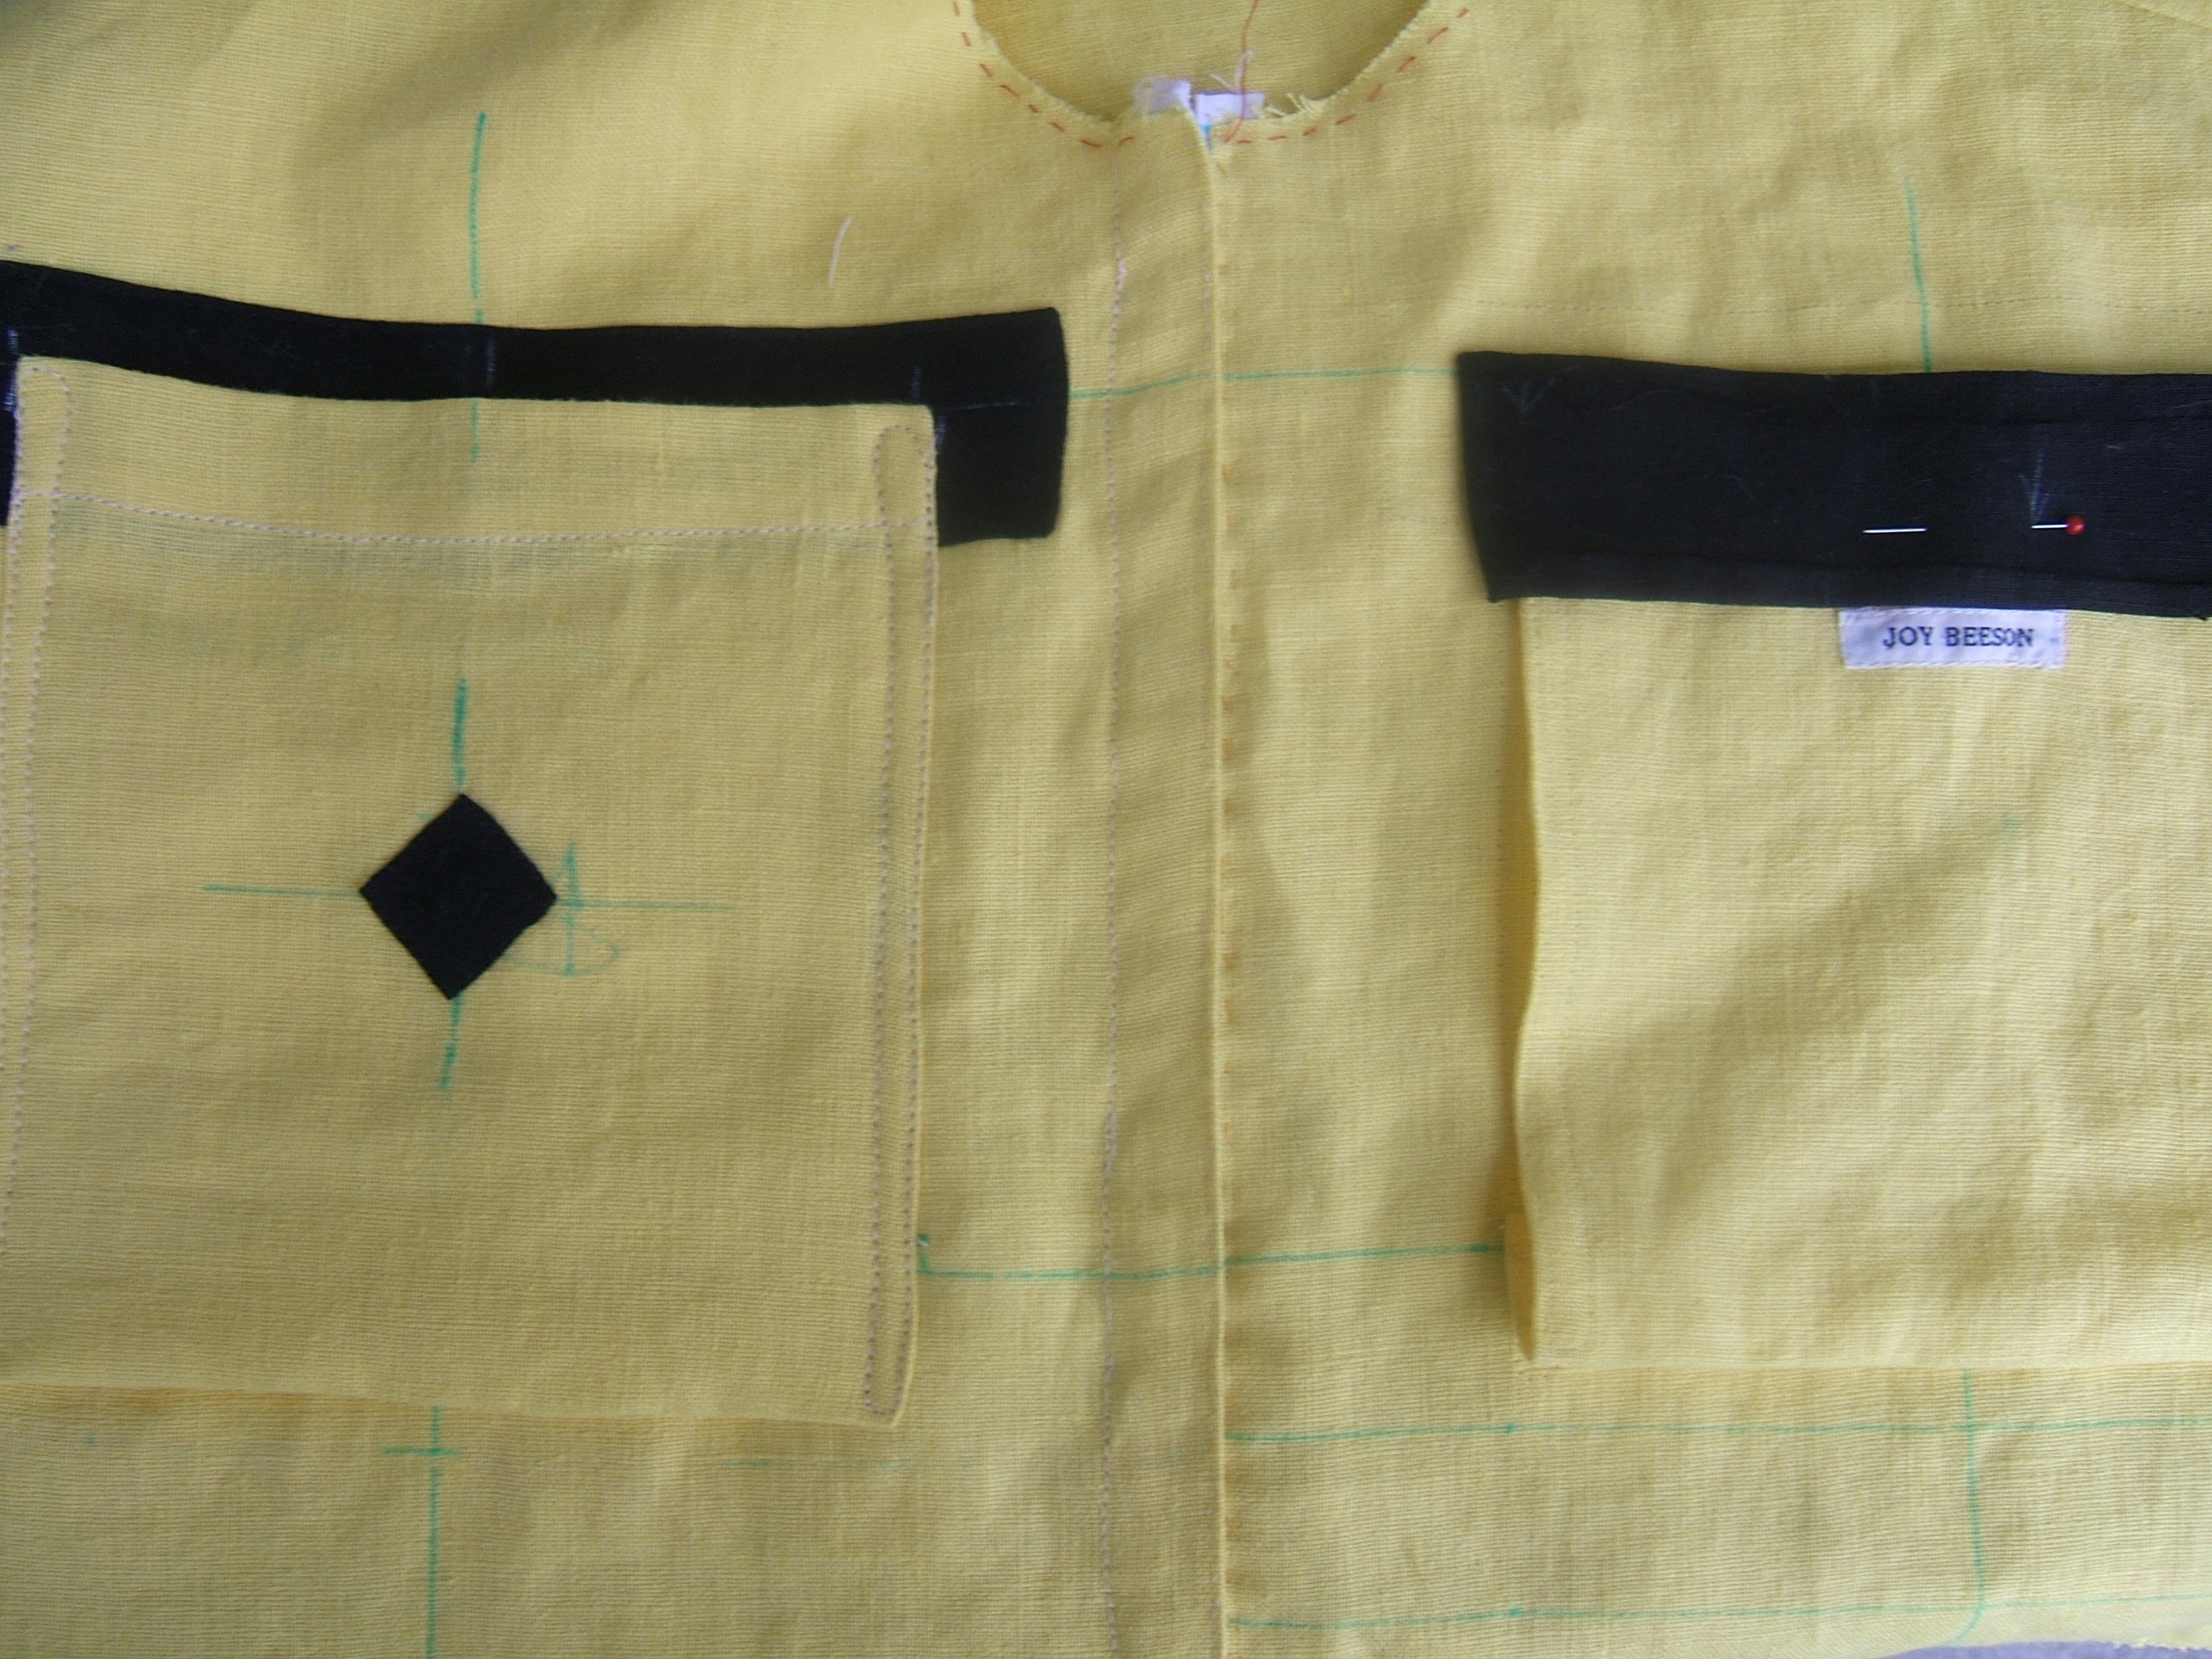
That's more like it. This time I used the stitching on the eye tape as a guide, and basted by hand so that I could fine-tune the match marks. The basting stitches are hard to see because I used yellow thread. On maximum magnification, you might be able to see one of the jogs where I stitched around the wire eyes.
At that point it was time for supper, so I switched to processing photographs and plan to spend the rest of the evening reading the morning paper and Usenet. Surely machining one side of the tape and hand-sewing the other won't take so much time that I can't sew the collar on tomorrow.
Should I sew the sleeves on before or after slip-stitching the yokes together? I think there are advantages to being able to open the front all the way. I have to sew the back on before the sleeves, of course. The back yoke is narrower, so part of each armhole is on the back.
Somewhere in the files I dismiss stay-stitching contemptuously, but several times I have thought it fortunate that I basted around the neck-hole of the yokes.
First step is (sorry, Al) to open the curtains. Then I marked the continuation of the stitching line. Next is to drag the chair I'm sitting on into the bedroom.
And now, for the first time, it occurs to me to wrap the collar around my neck. It fits.
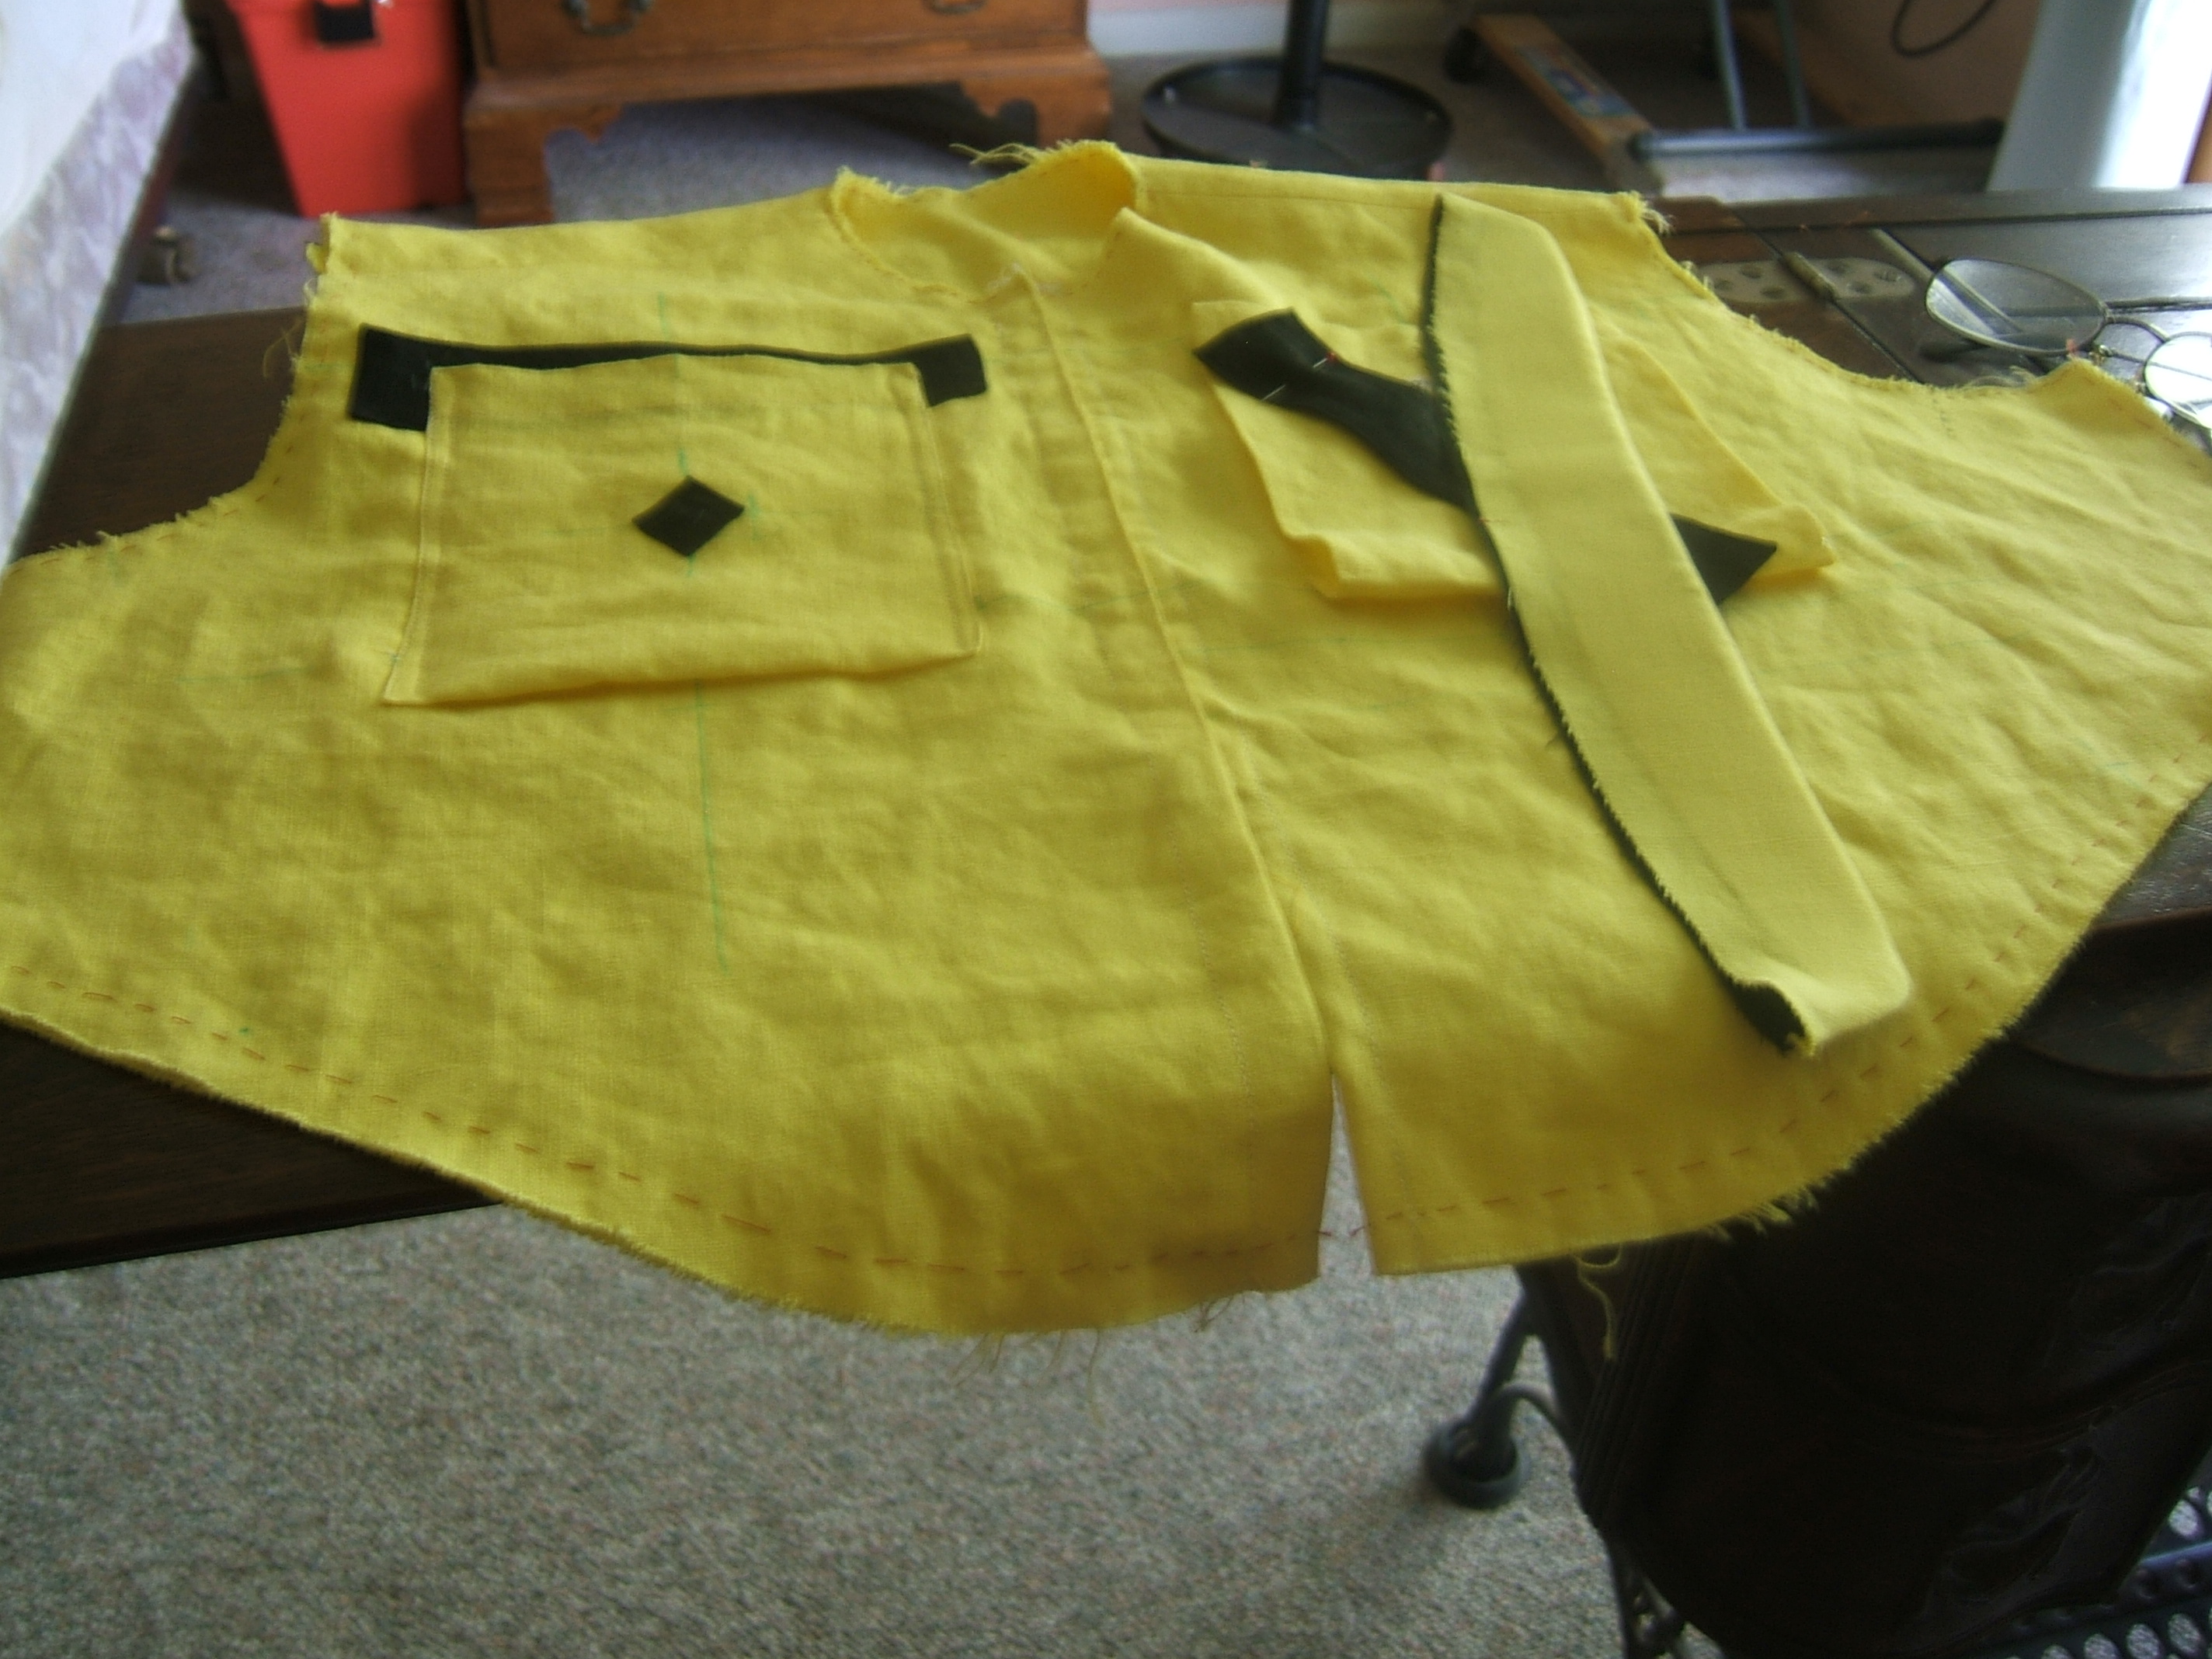
So I sewed the eye tape on. Well, I sewed the machined side. I didn't want to waste intelligent time on hand sewing, so I sewed only the top inch of the other side, then attached the collar.
I am, so far, really liking the effect of interlining the collar with Super Crisp instead of linen. I'm not sure how I'll feel when I start to sweat — but the lining is linen.
This worked really well: when I wanted to sit outside after supper, I had pre-planned and thoroughly basted hand sewing to do.
When I finished sewing the eye tape on, I didn't want to go back inside just yet and the seam ripper was right there.
No, not more pocket unpicking. I took out the basting around the neck hole and the basting I'd put in before machining the collar seam. Then I noticed that the collar lining ought to be mitered at the corners and I had some black basting thread in the snack bag of hand-sewing tools.
To make a long story short, I sewed the fold of the collar instead of pressing it, and when the light failed I'd pinned the lining into place and had made a start on hand sewing it. Since there are a lot of layers in the seam, it should be easy to keep the black thread from showing on the outside.
When backstitching the eye tape, I had to stab stitch around the wires. At one point I had to put the needle in behind where it had come out on the back — uh, outside; I was working on the inside, of course — and when I came up, I had to put it in ahead of where it had come up. So there is one backstitch that's in backward, or upside down, or something.

And I finished the collar this morning. As I was chortling happily about being able to hang the project up between work sessions, I realized that it looked much nicer on a suit hanger than on someone squeezed out of shape trying to take a selfie — and it wouldn't have taken six shots to get the shirt into the picture.
Not to mention that a hanger doesn't have wattles.
I began this morning by re-reading the instructions for attaching the back (near the top of the diary for the curry jersey), but it will be much easier to re-do the pockets before adding the back and sleeves, so I went out onto the front porch to finish picking the pockets off.
While picking off the pocket trim, I pulled vigorously on a thread without first putting down the seam ripper, and cut a hole in the yoke, front and center and not in a spot where I can embroider a flower and say "I meant to do that.".
After much thought, I plan to sew a very small patch on the inside with ecru 100/6, then sew a slightly larger patch on the outside with ravellings.
I eyeballed a patch for the outside first, which turned out to be an inch and a half precisely, which will make it an inch square when the edges are folded in. Then I marked the inside patch an eyeballed half inch smaller, which turns out to be a bit under an inch and an eighth square.
Now it's naptime, so I pinned the patches to one of the pockets — they would be really easy to lose.
I panicked enough when I got up to come in and realized that one of the pocket trims had blown away. Luckily, my spouse distracted my attention, and with the panic broken up, I could see the black trim lying on a patch of black dirt.
Another trick for finding things is to leave the room and come back in again.
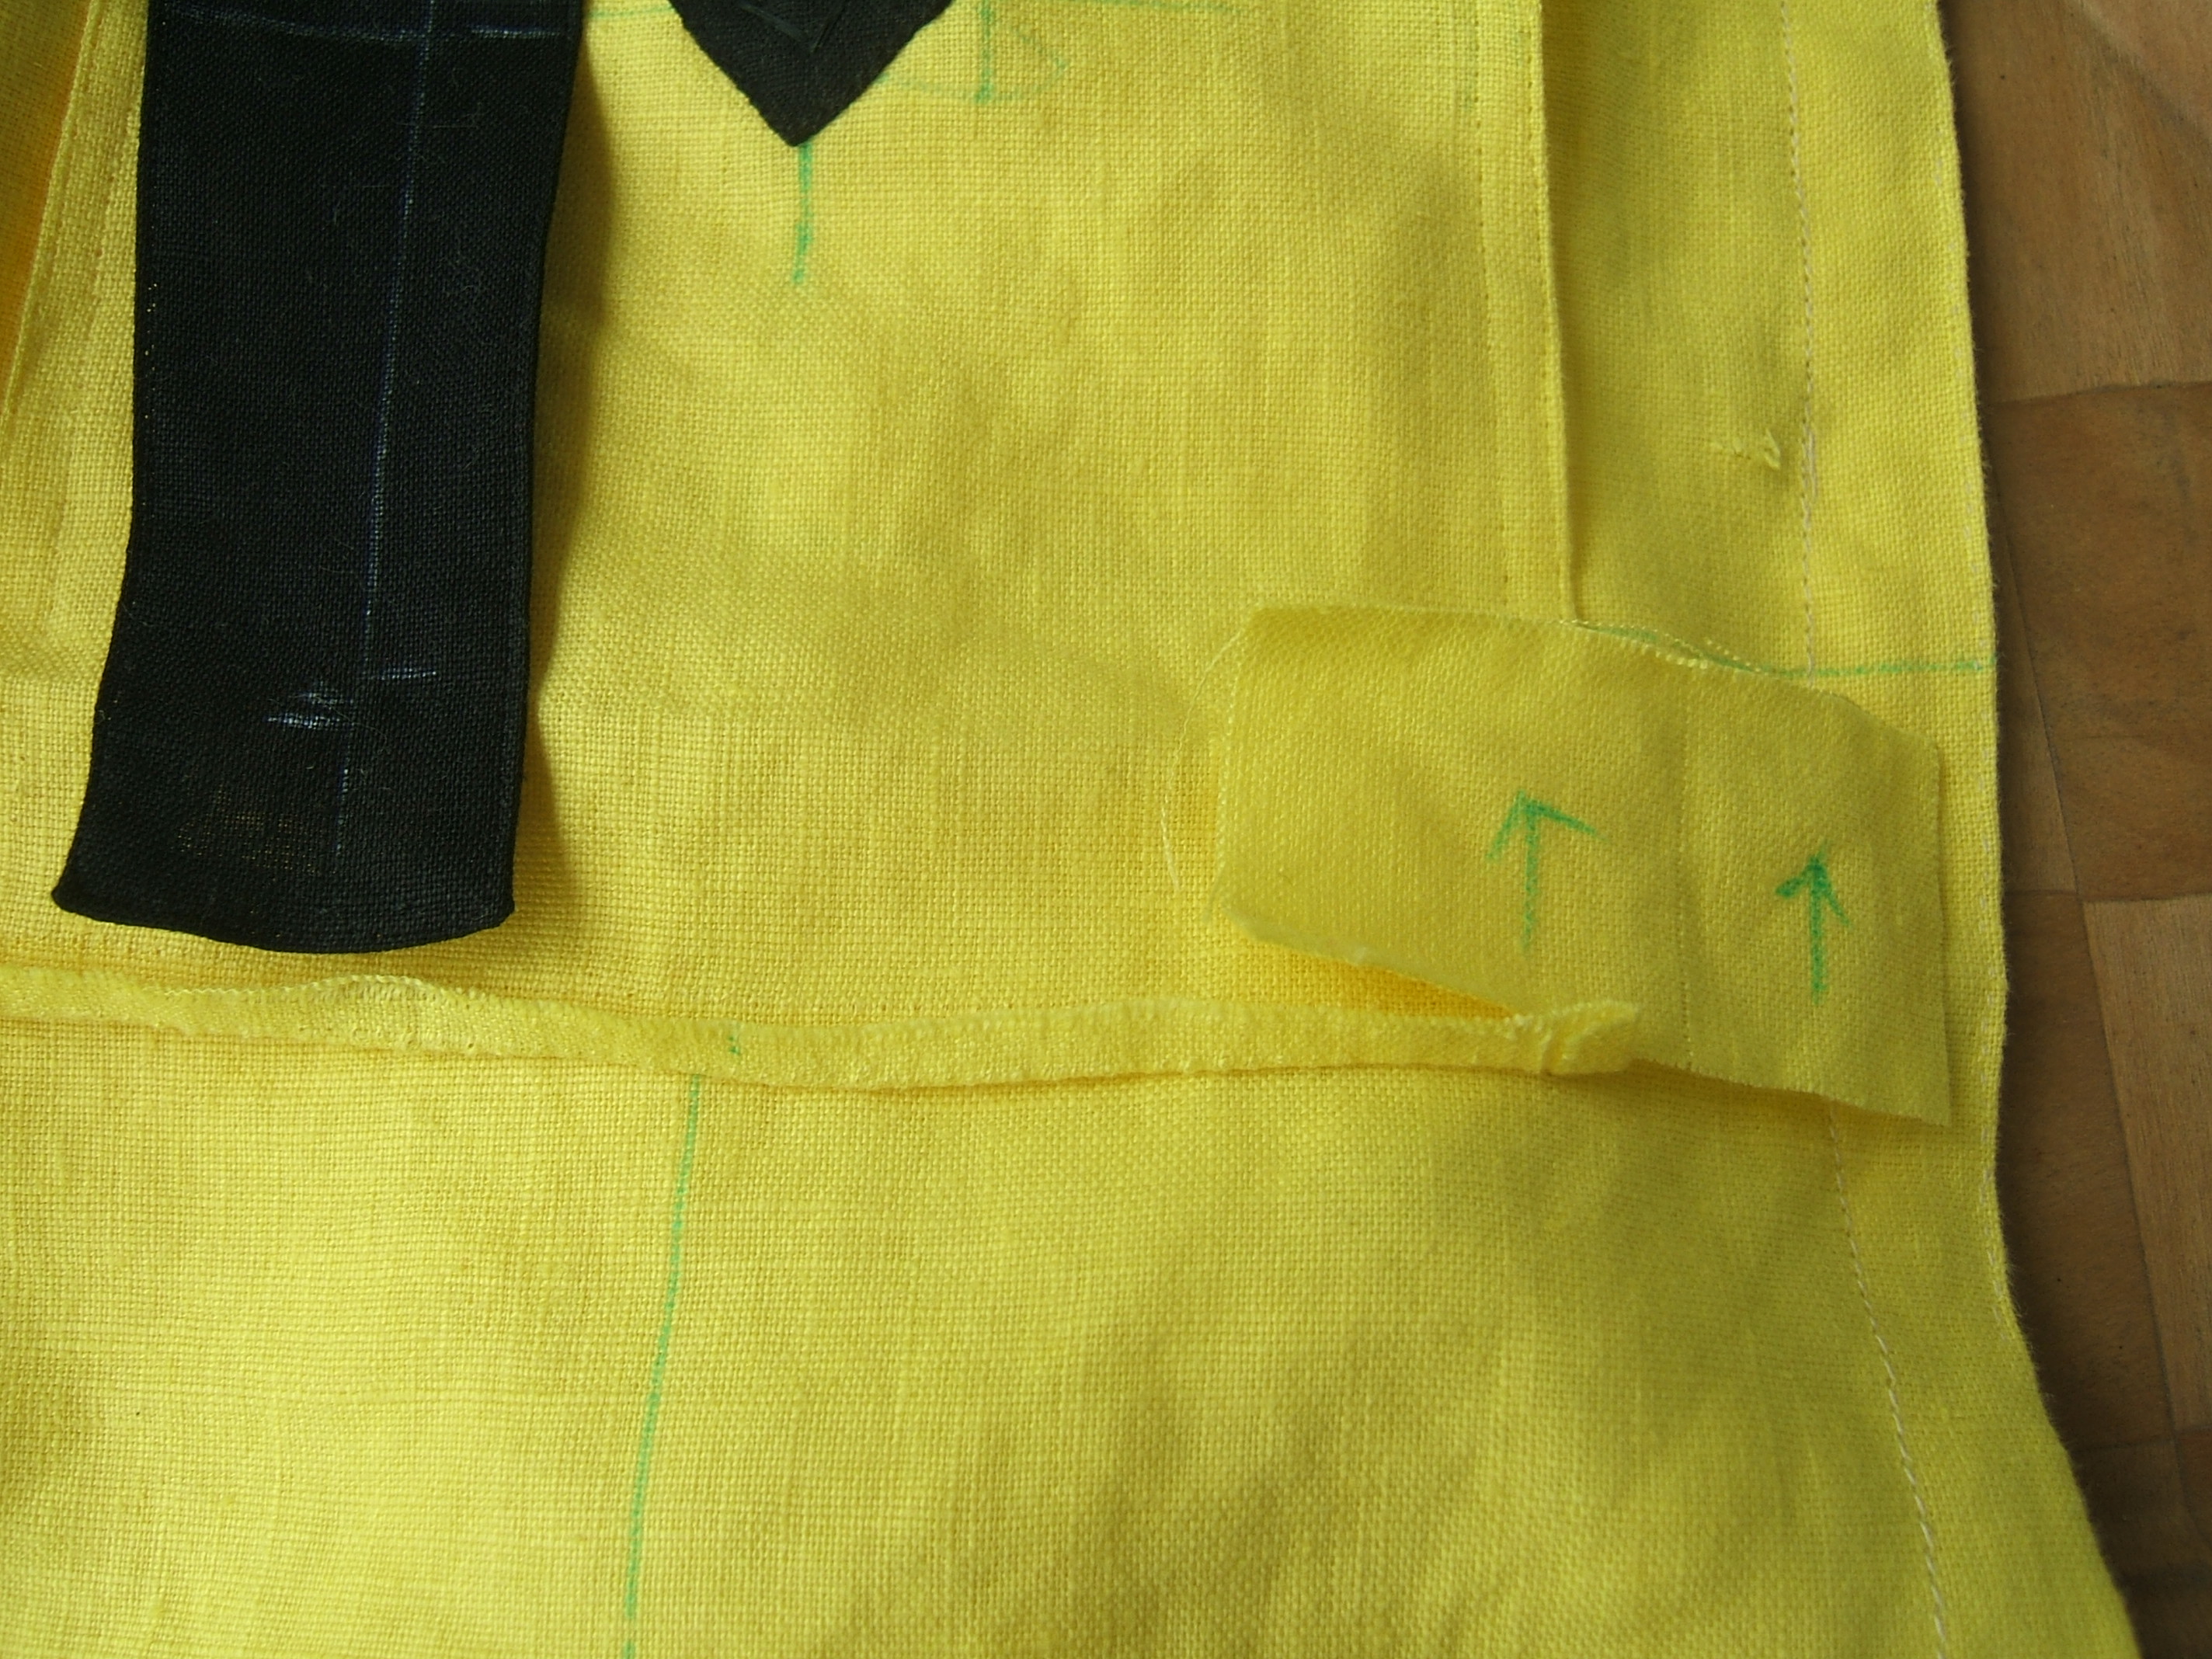
I plan to make the patches octagonal by folding in the corners just a tad more than is needed for a miter.
The pocket trim is missing again. I held it against the pocket, then laid it aside while I looked for a stainless-steel pocket ruler to mark where to cut it. It has to be within arm's reach of the ironing board.
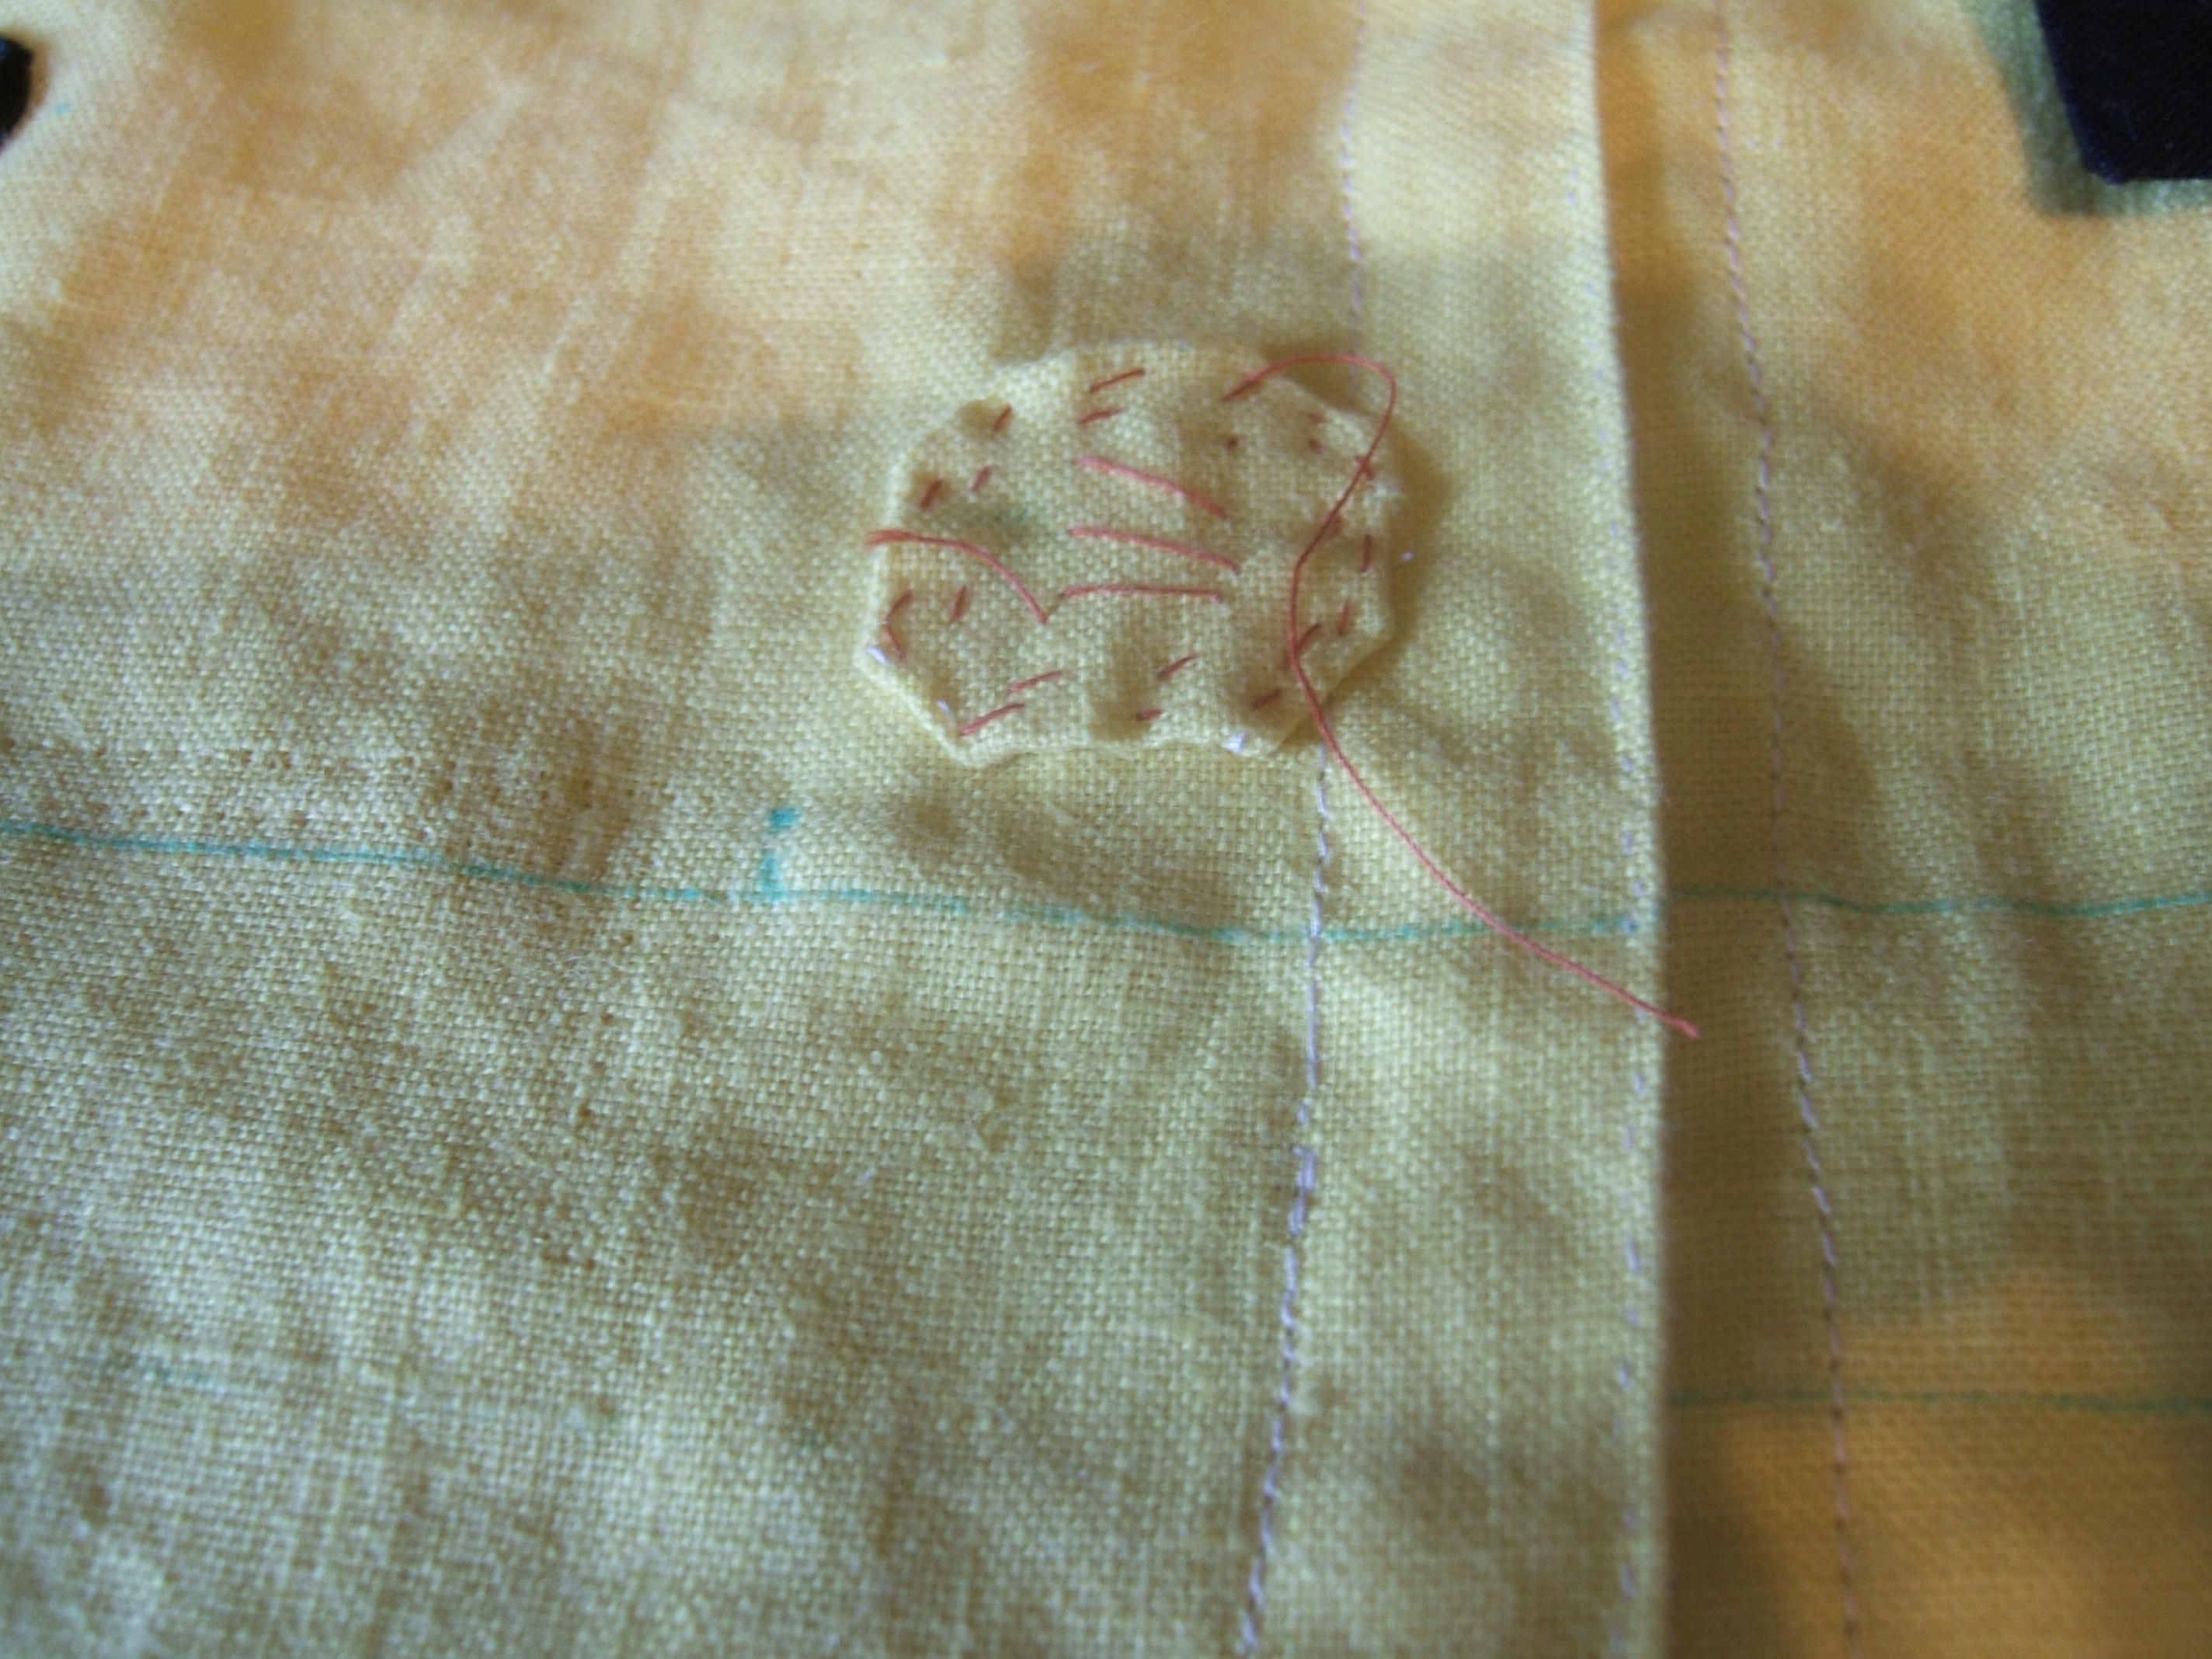
I always need something to keep my fingers out of the food, so I took the yoke, patches, a ball of ecru 100/6, a spool of basting thread, and my bag of hand-sewing tools to Sunday's barbecue. I got back to snacking sooner than expected because I'd forgotten ravellings for sewing on the larger patch.
But it will hold nicely until I feel like sitting on the front porch, so I'm proceeding with sewing on the pockets. The pocket trim has to go on before I sew the sides of the pockets, but I can sew them at the bottoms.
The blob of black in the upper left corner is the snap for the phone pocket. The irregularities above the blue line are places where stitches were picked out.
Bottoms sewn. I had thought it would take two rows of stitches instead of three because the edges were already folded, but it turned out that sewing in the easing took so much concentration that I couldn't cover the raw edges. At that, I had to cut a stitch to release a pleat. So I pulled out the easing thread and stitched a toe width from the fold before stitching the fold.
Now my sure-fire missing piece detector is being deployed. I have cut a new pocket trim by the modified pattern —I had folded out half an inch— and I'm about to baste the folds.
When it's done, I'll modify the non-missing trim to match it.
⁂
I've found a new virtue of the "Two-Sided Craft Mat". When the trims were done I wanted to leave them under a weight overnight, and I could see through the mat that the folds were in the right position. I covered the mat with the plywood I use for an iron rest, then set a bricked battery on it.
I basted the trims on the front porch after supper, and didn't want to go back inside when they were done, so I finished the patch. Because the thread is poor, and my refusal to stab-stitch made the stitches far apart, I went around three times: once at the very edge, once a little inside, and once aiming for an eighth of an inch from the edge. The thread drifted apart frequently. I knew from the beginning to cut short pieces, but it took me a while to remember to put only an inch through the eye of the needle, and I don't think I knew before that one should pause at intervals to push the needle down another inch and pluck off the worn lint.
Also, it's a very good idea to end a thread when you still have plenty, lest it break and leave you trying to hide half an inch of fluff. I threw a lot of thread to the wind.
Continue to Part Two of 2019
Back to Part One of 2018
Back to Part One of 2017
Back to Part One of 2016
Back to Part One of 2015
Back to Table of Contents
Back to cover page, which has a list of my
other sites