
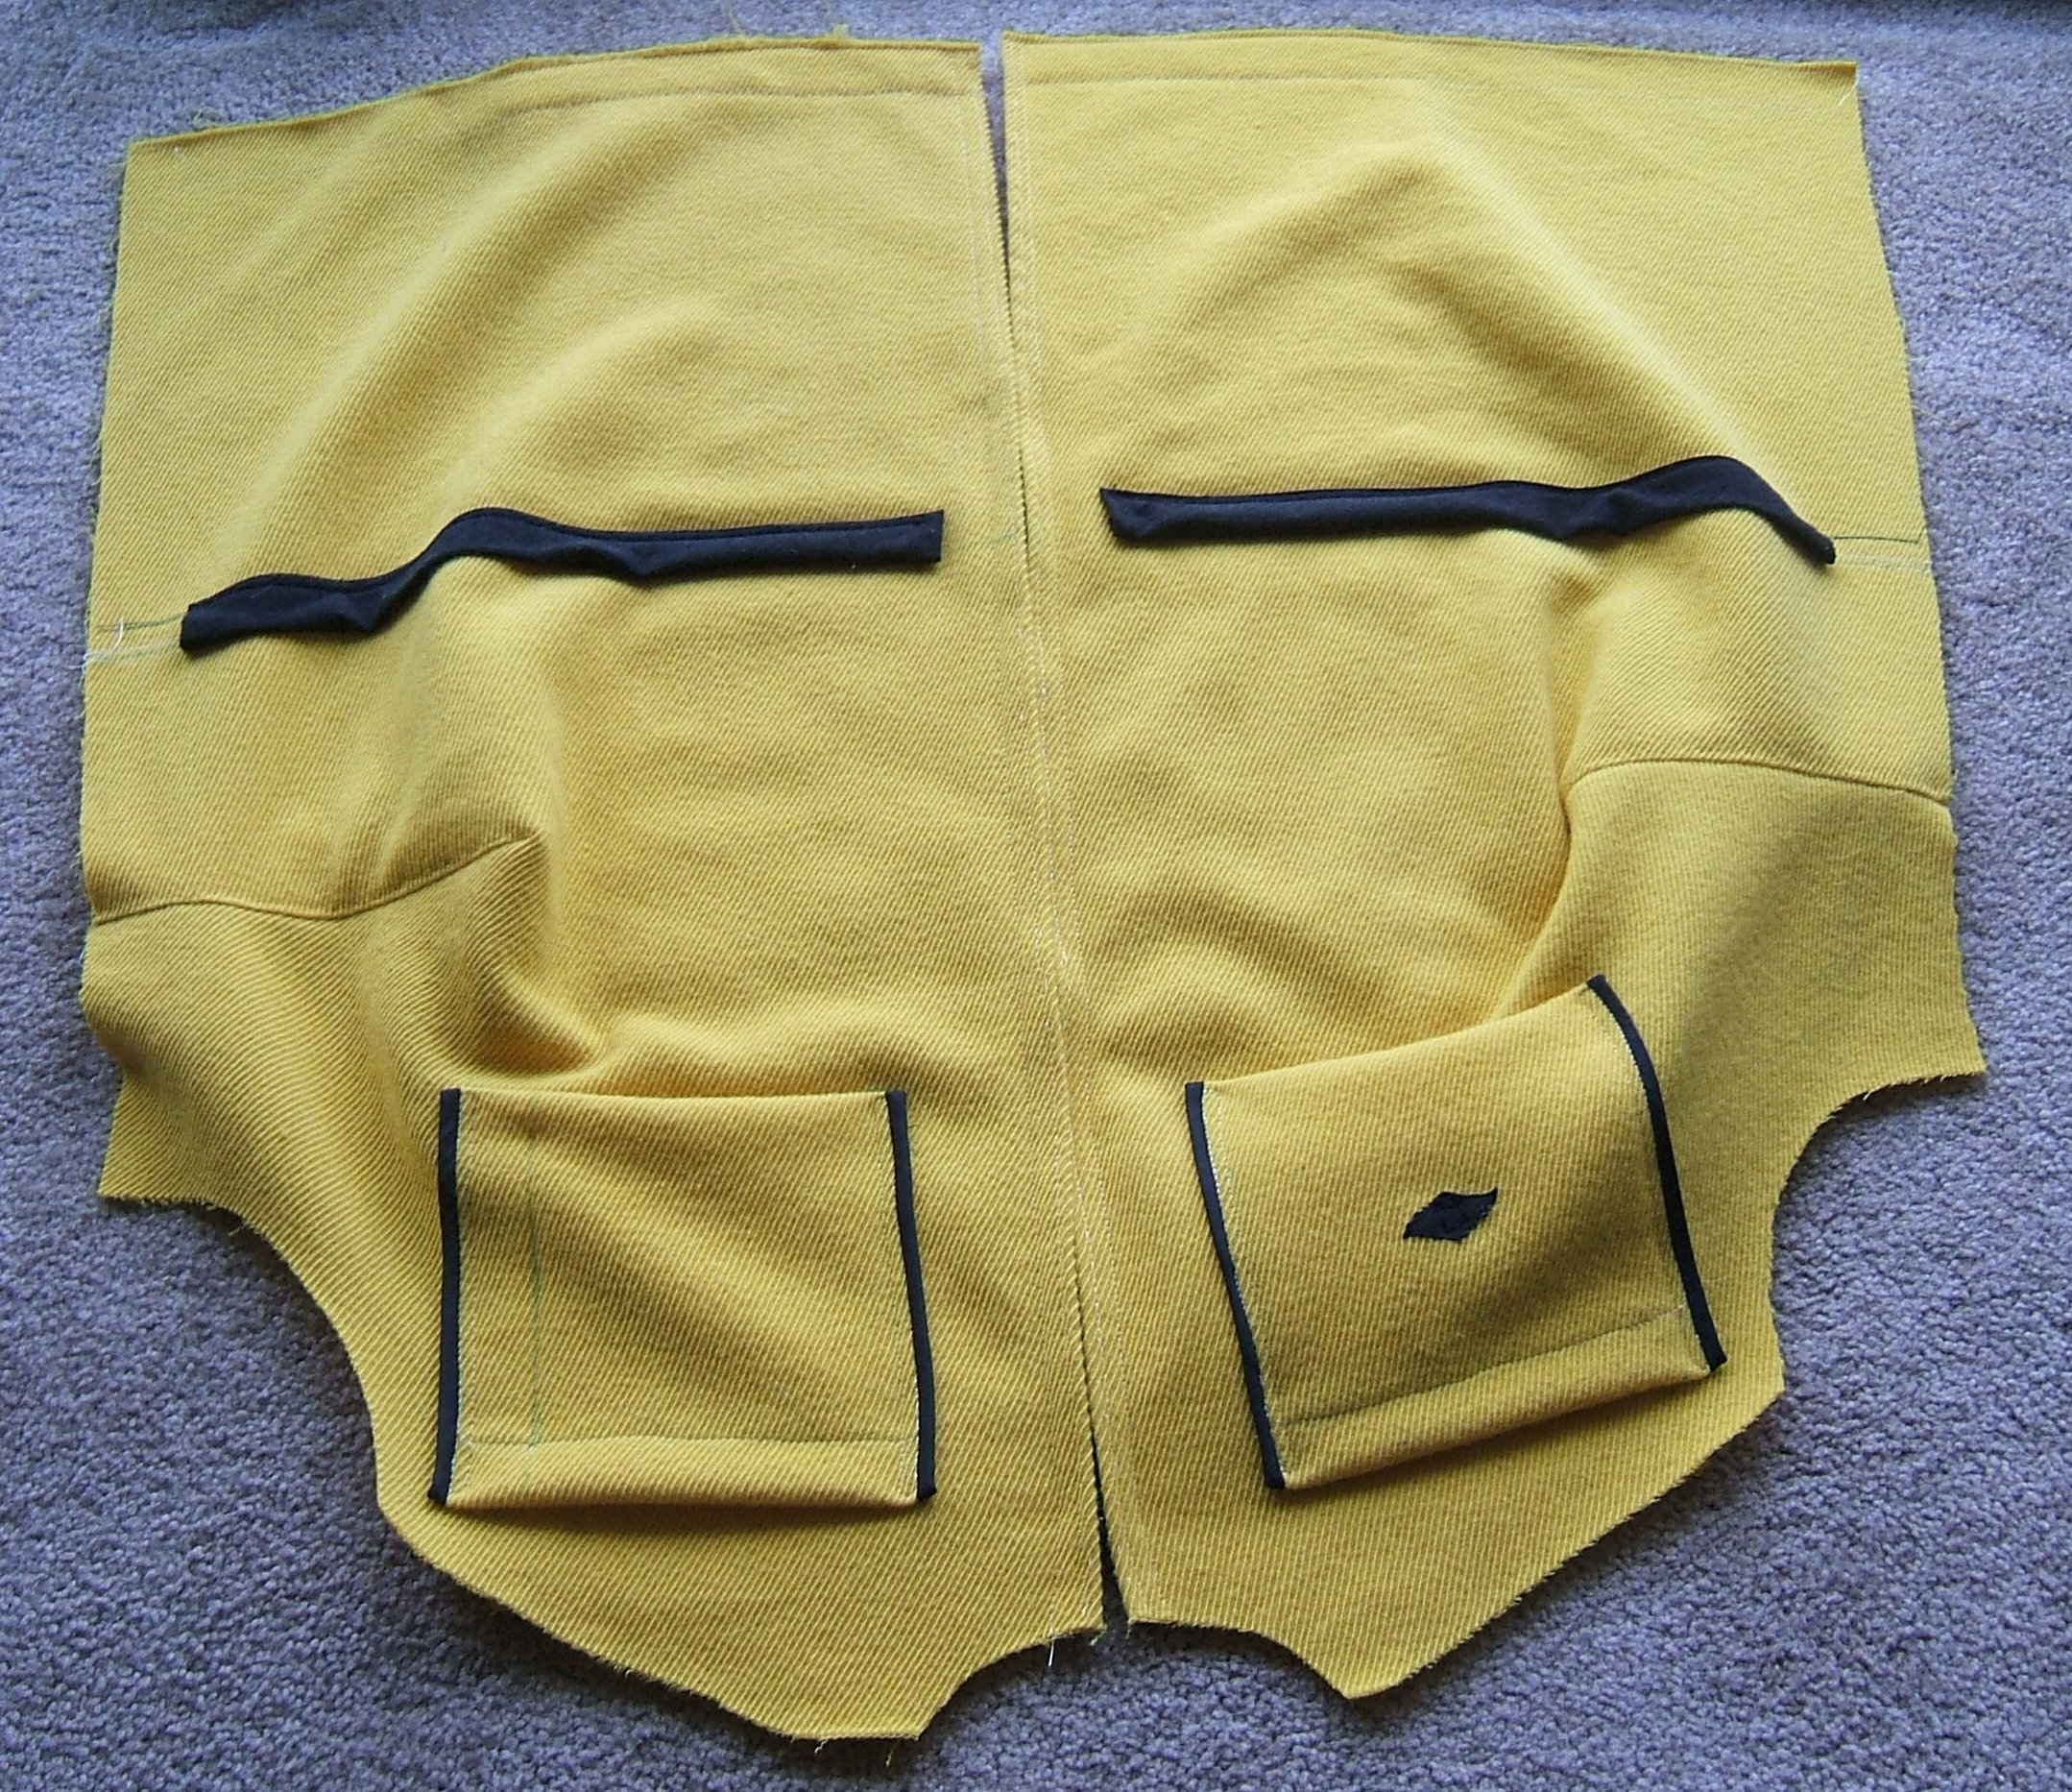
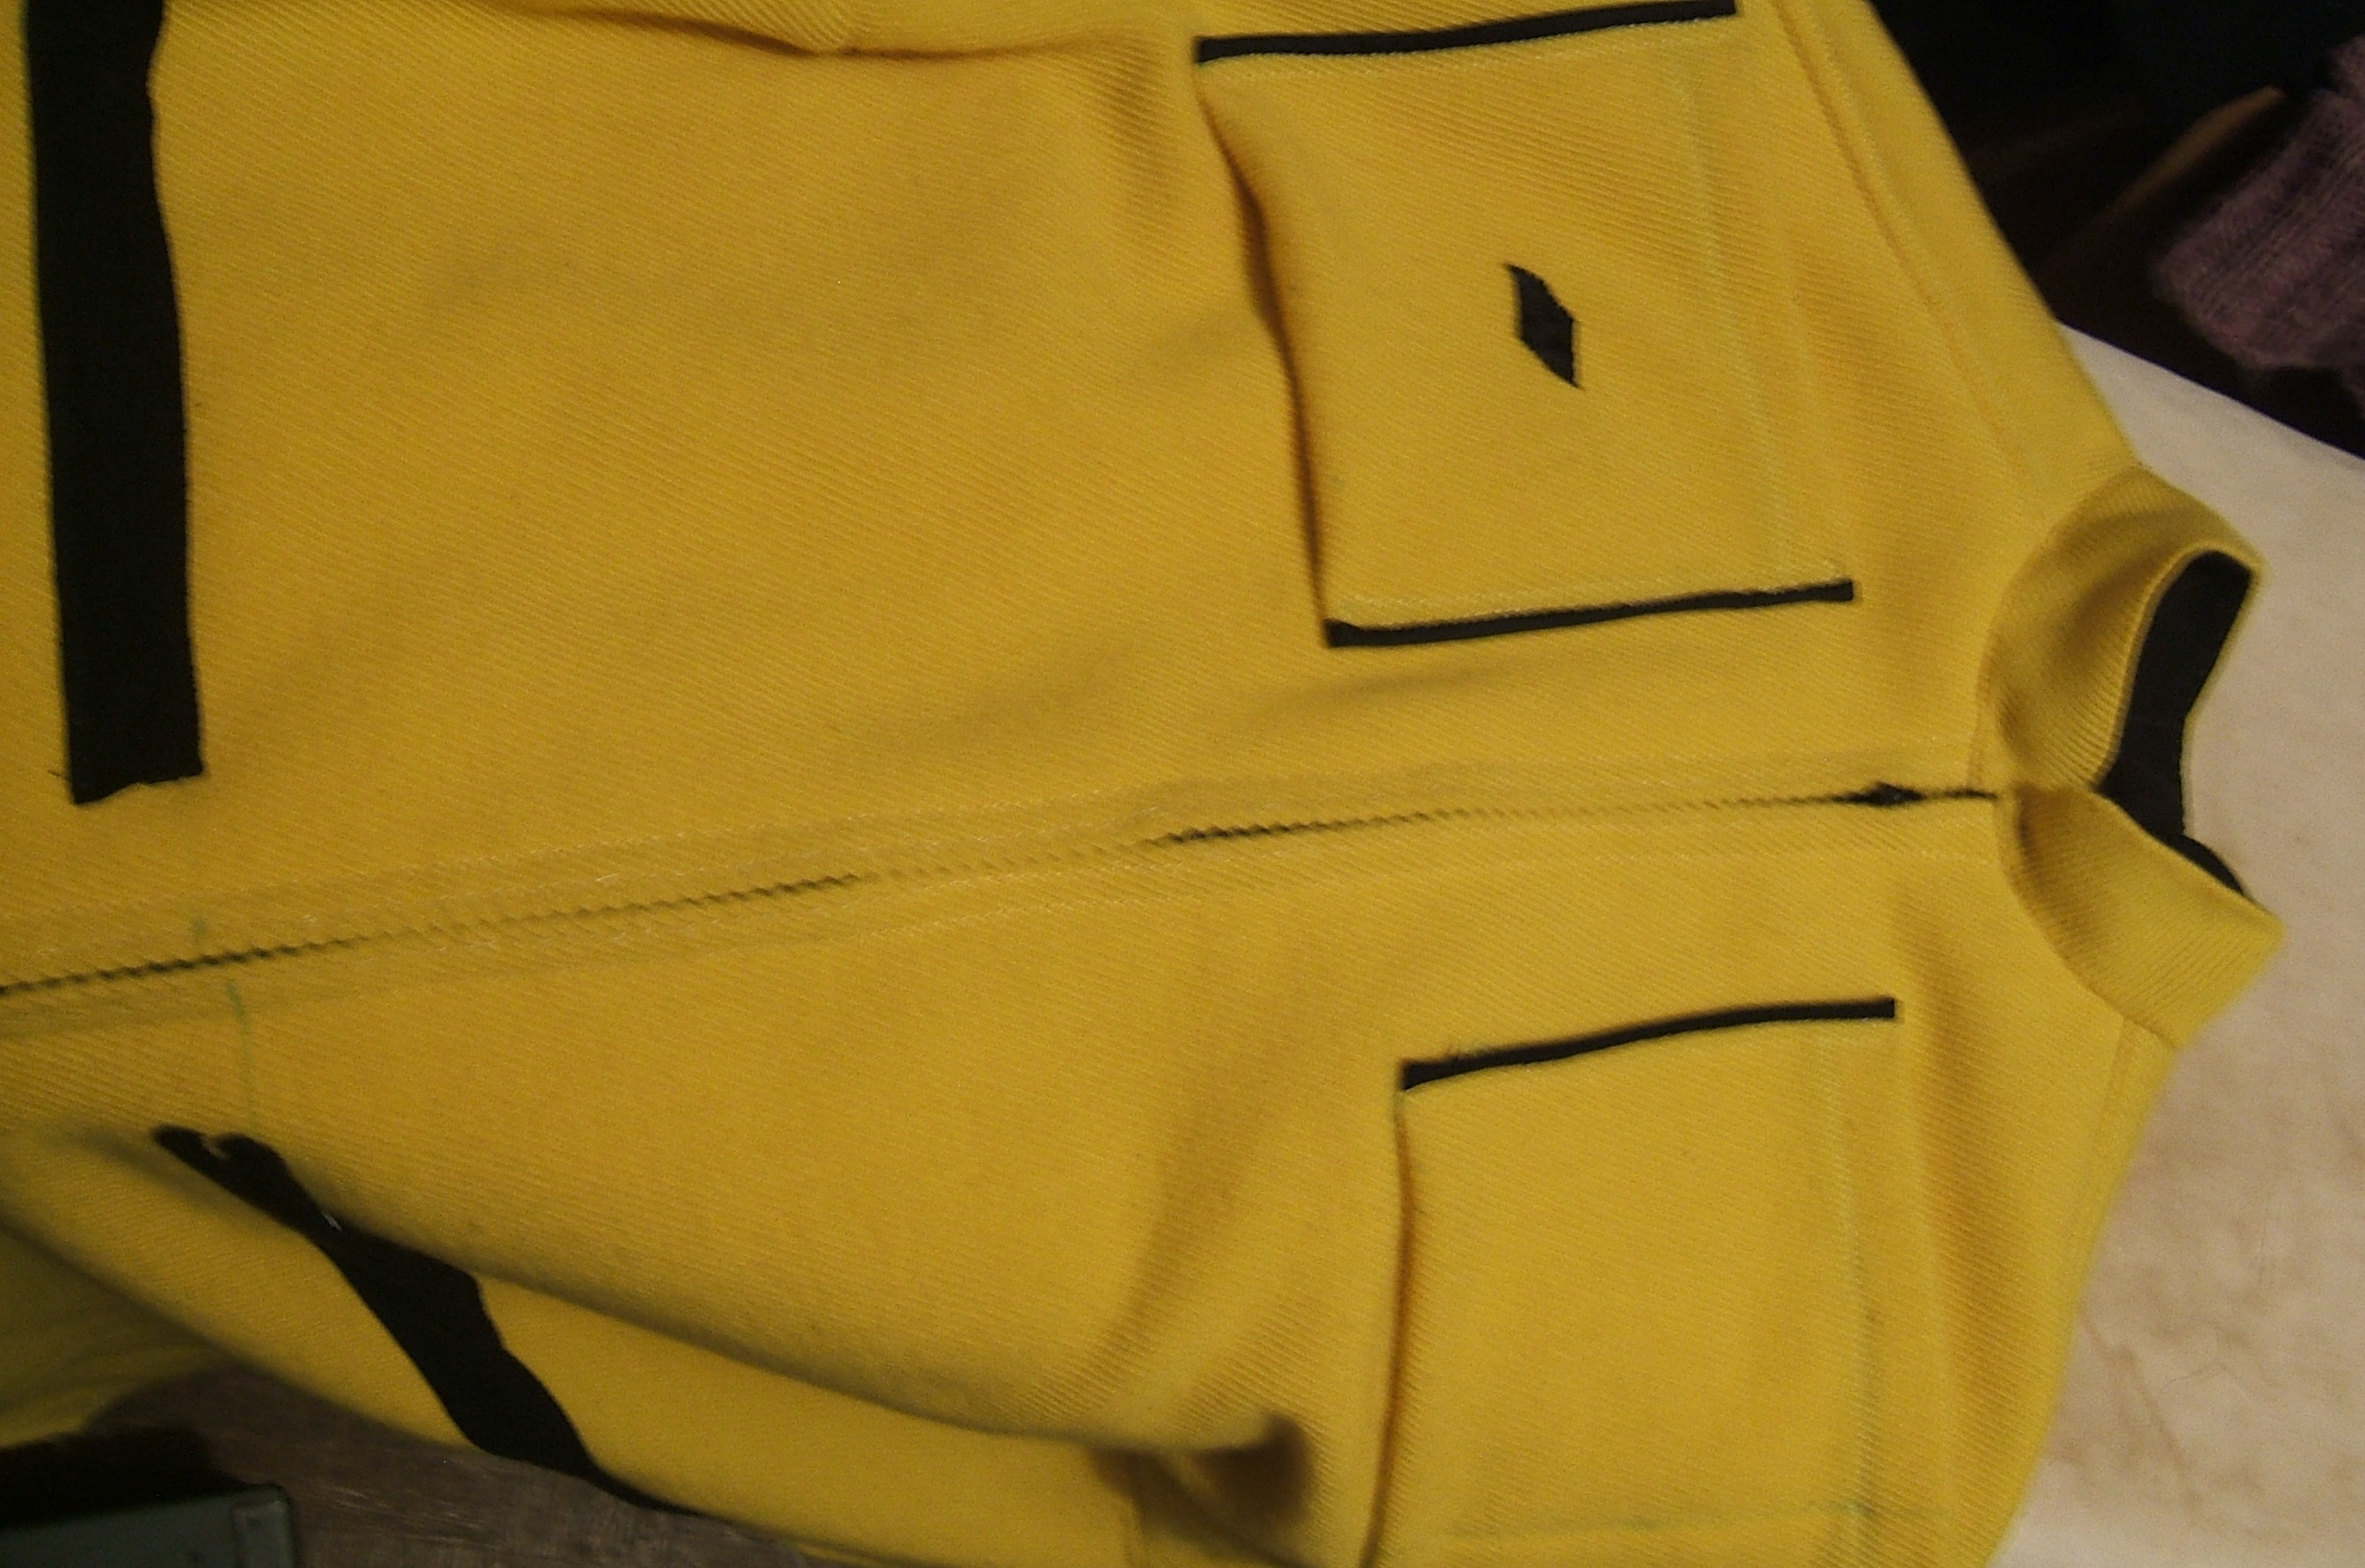
I found some black grosgrain ribbon in the synthetic-tapes box and cut off two pieces at a slant. I meant to have two strips with bias ends, but I goofed a bit when cutting the second one and made a rhombus. So I decided to put a diamond-shaped ornament on the outside of the pocket.
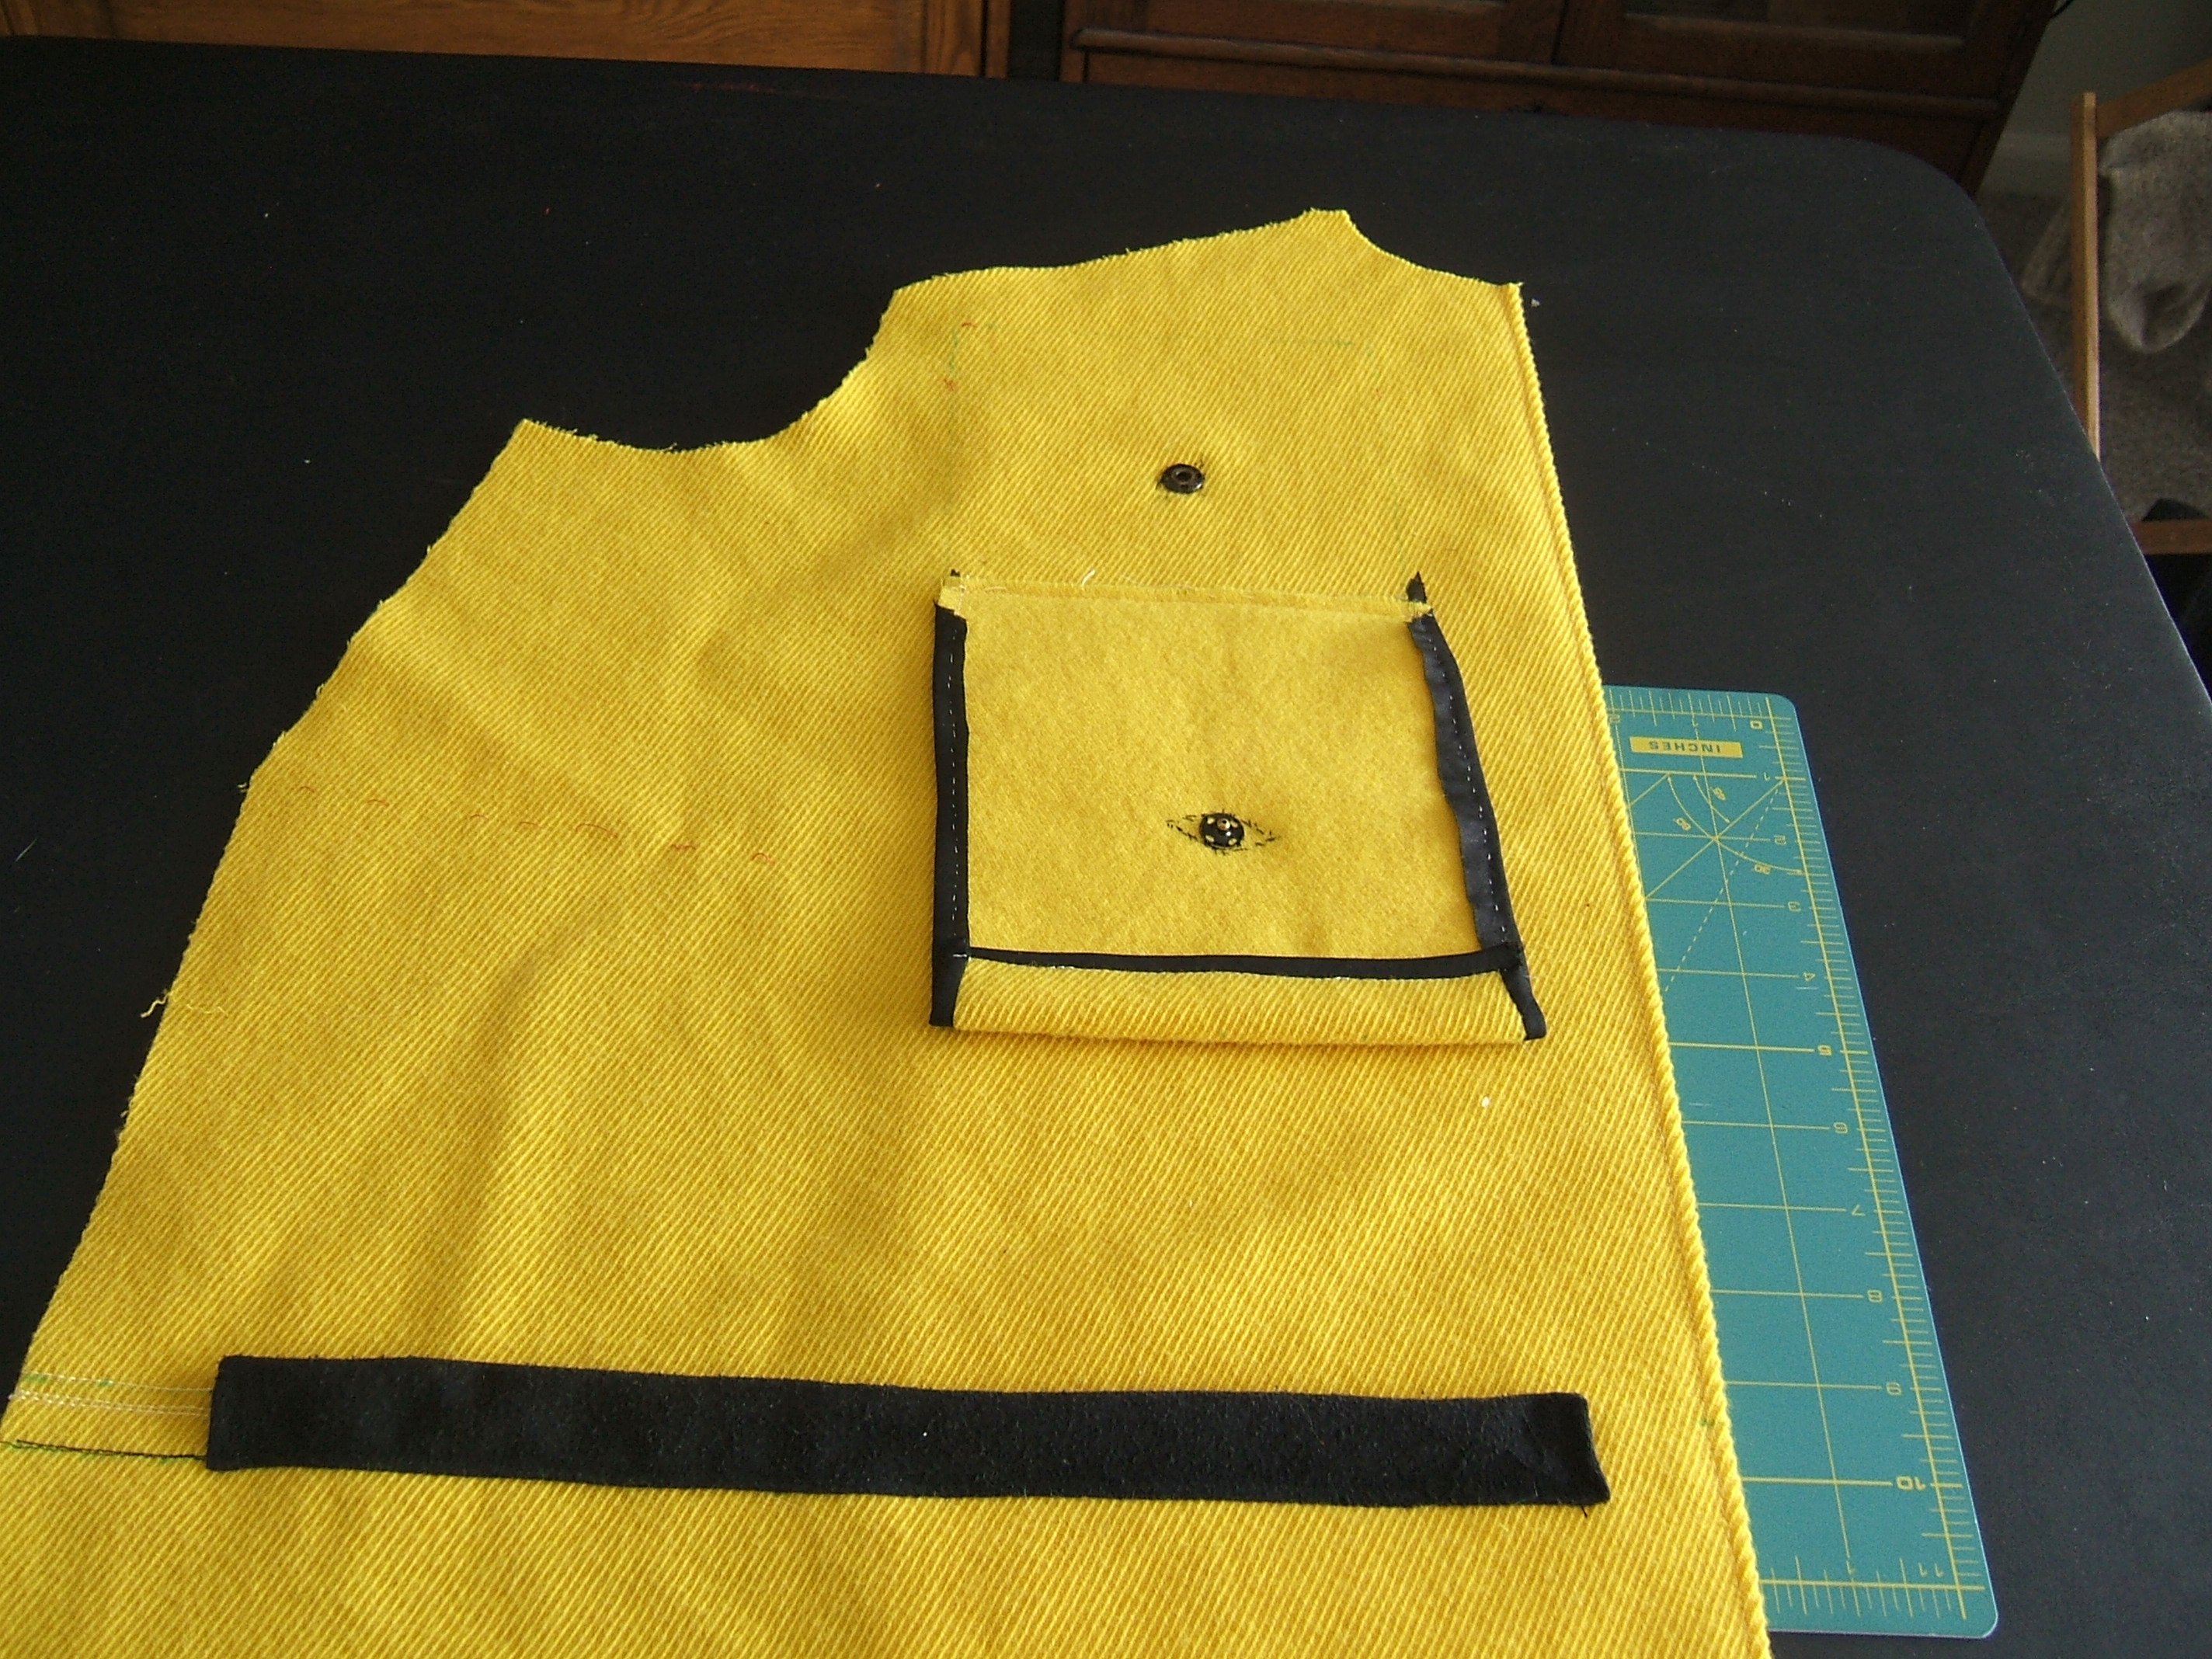
After positioning the rhombus with the aid of my
stainless-steel pocket ruler, I reflected that I
didn't have a picture of the ruler for the Tools
file, and took one:
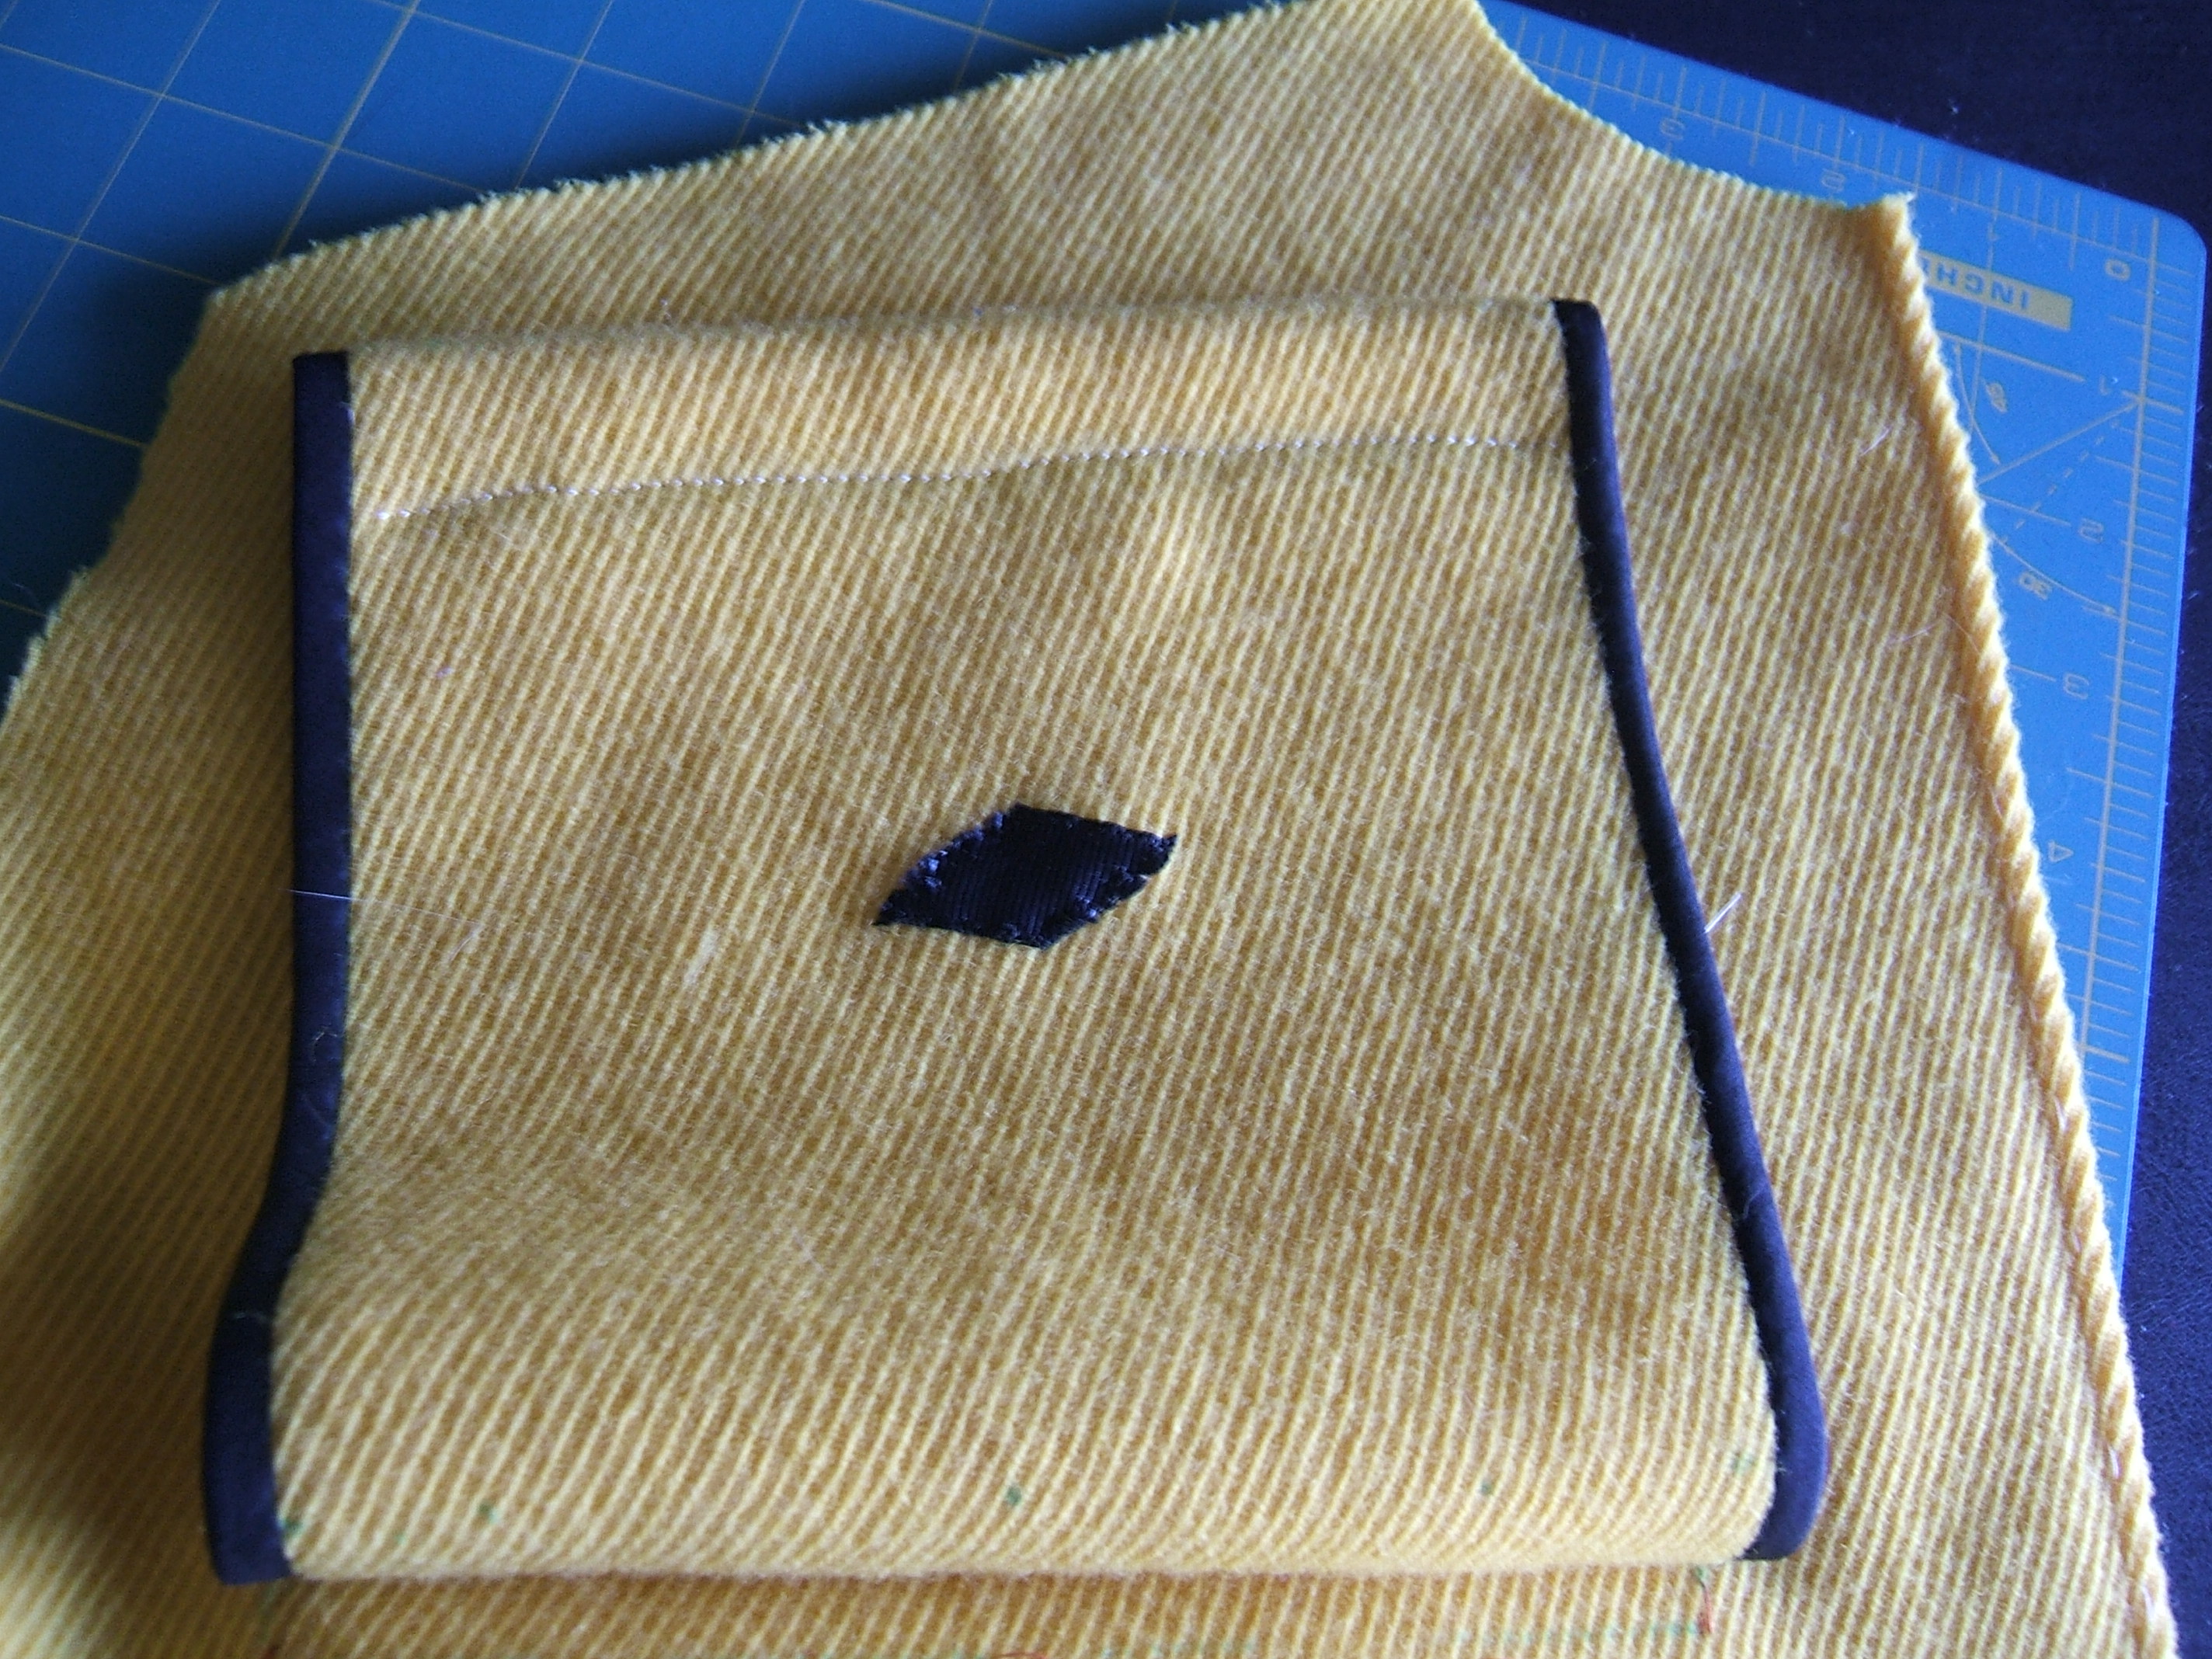
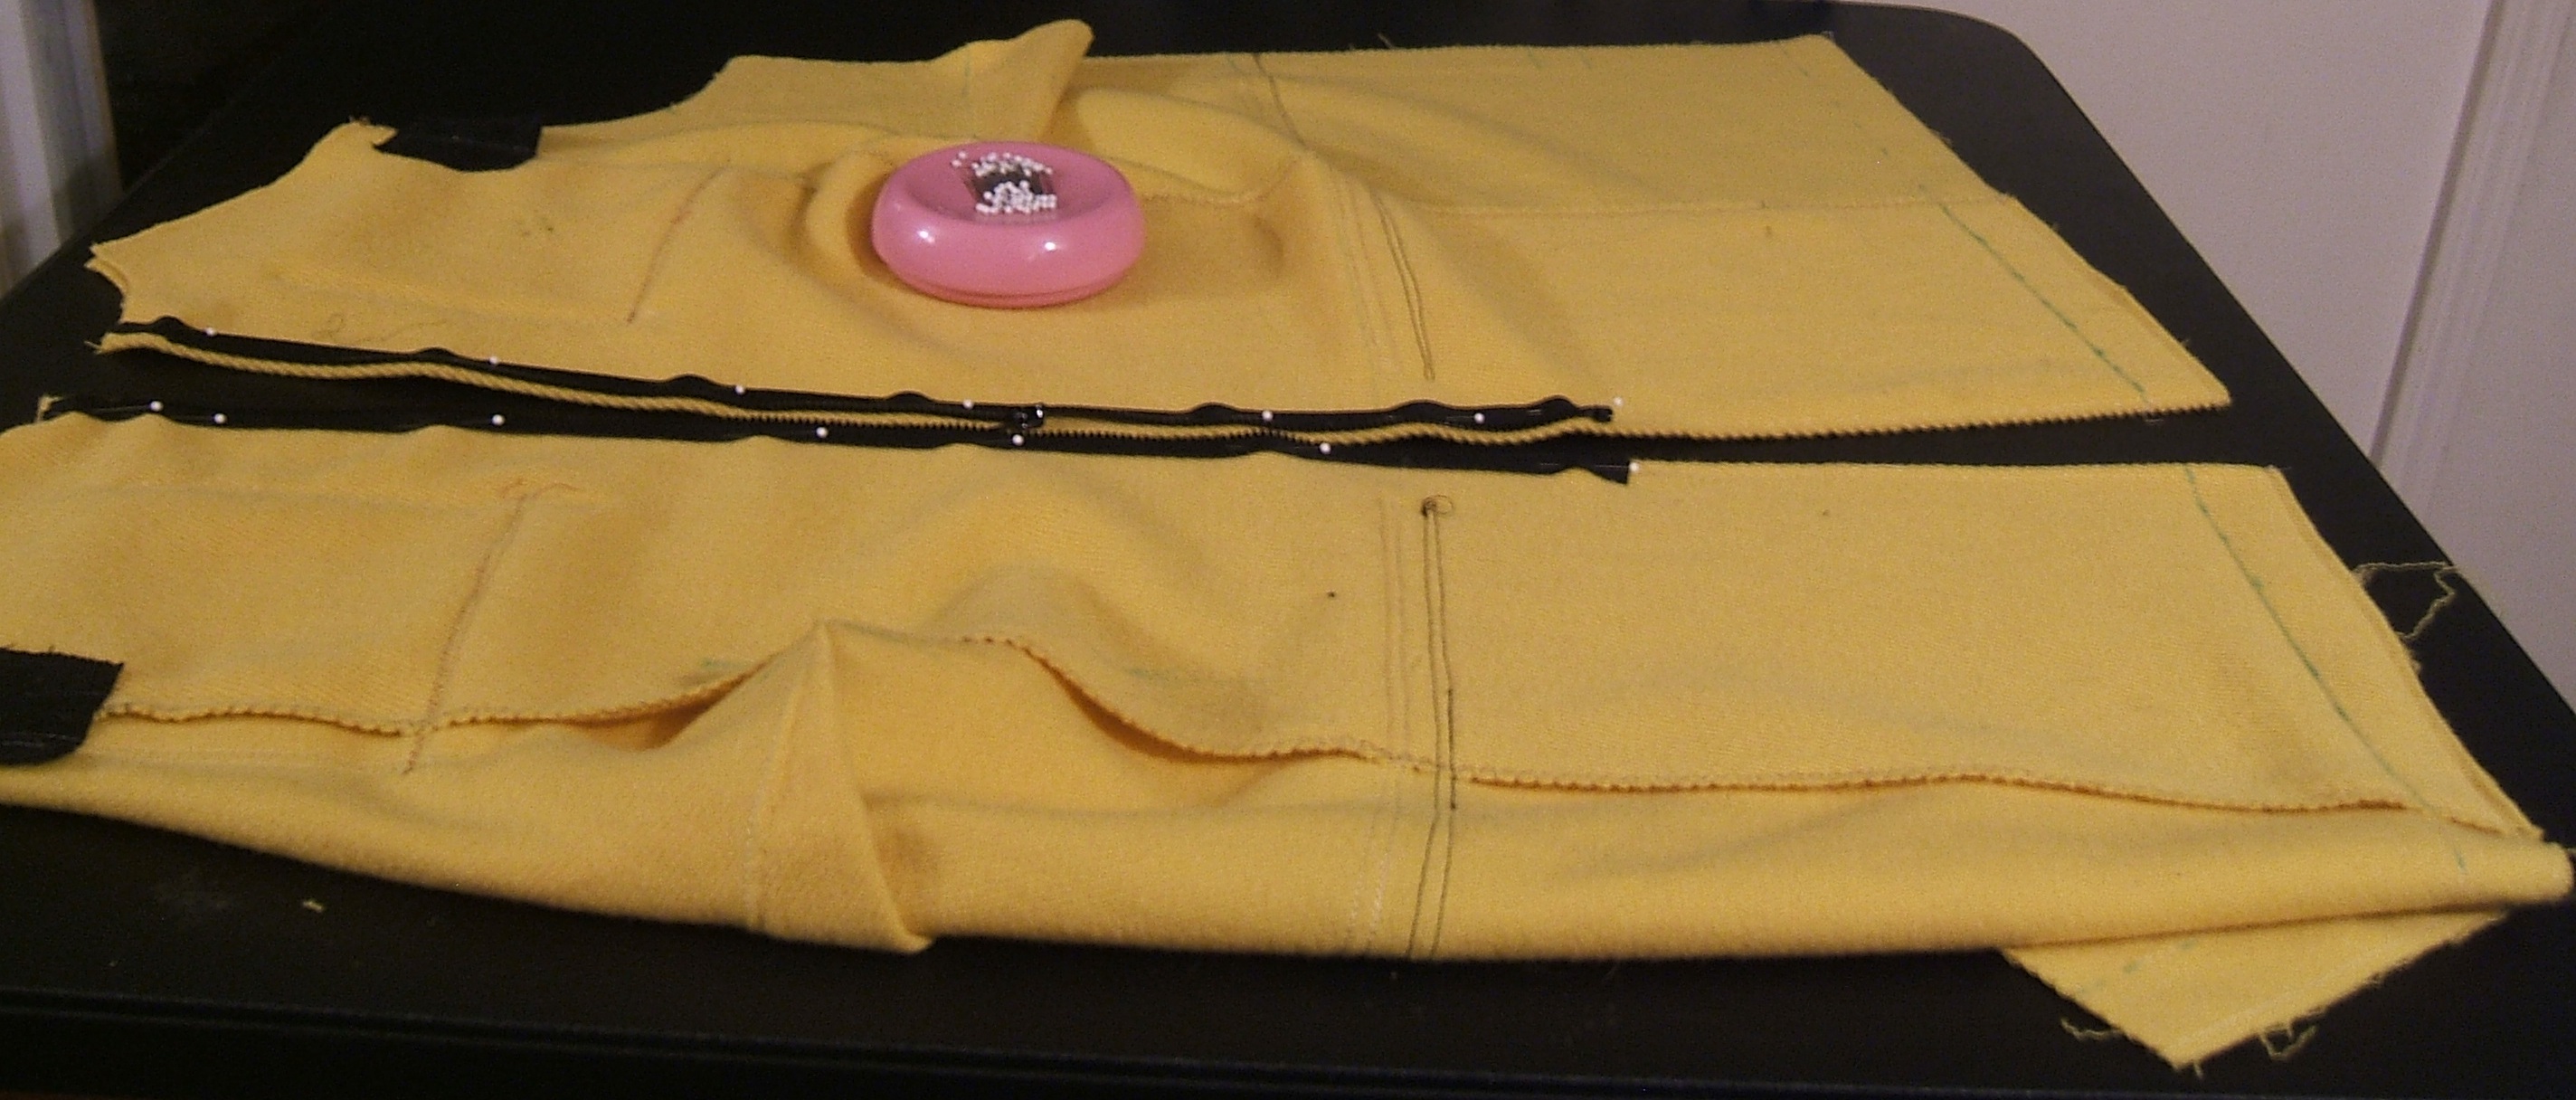
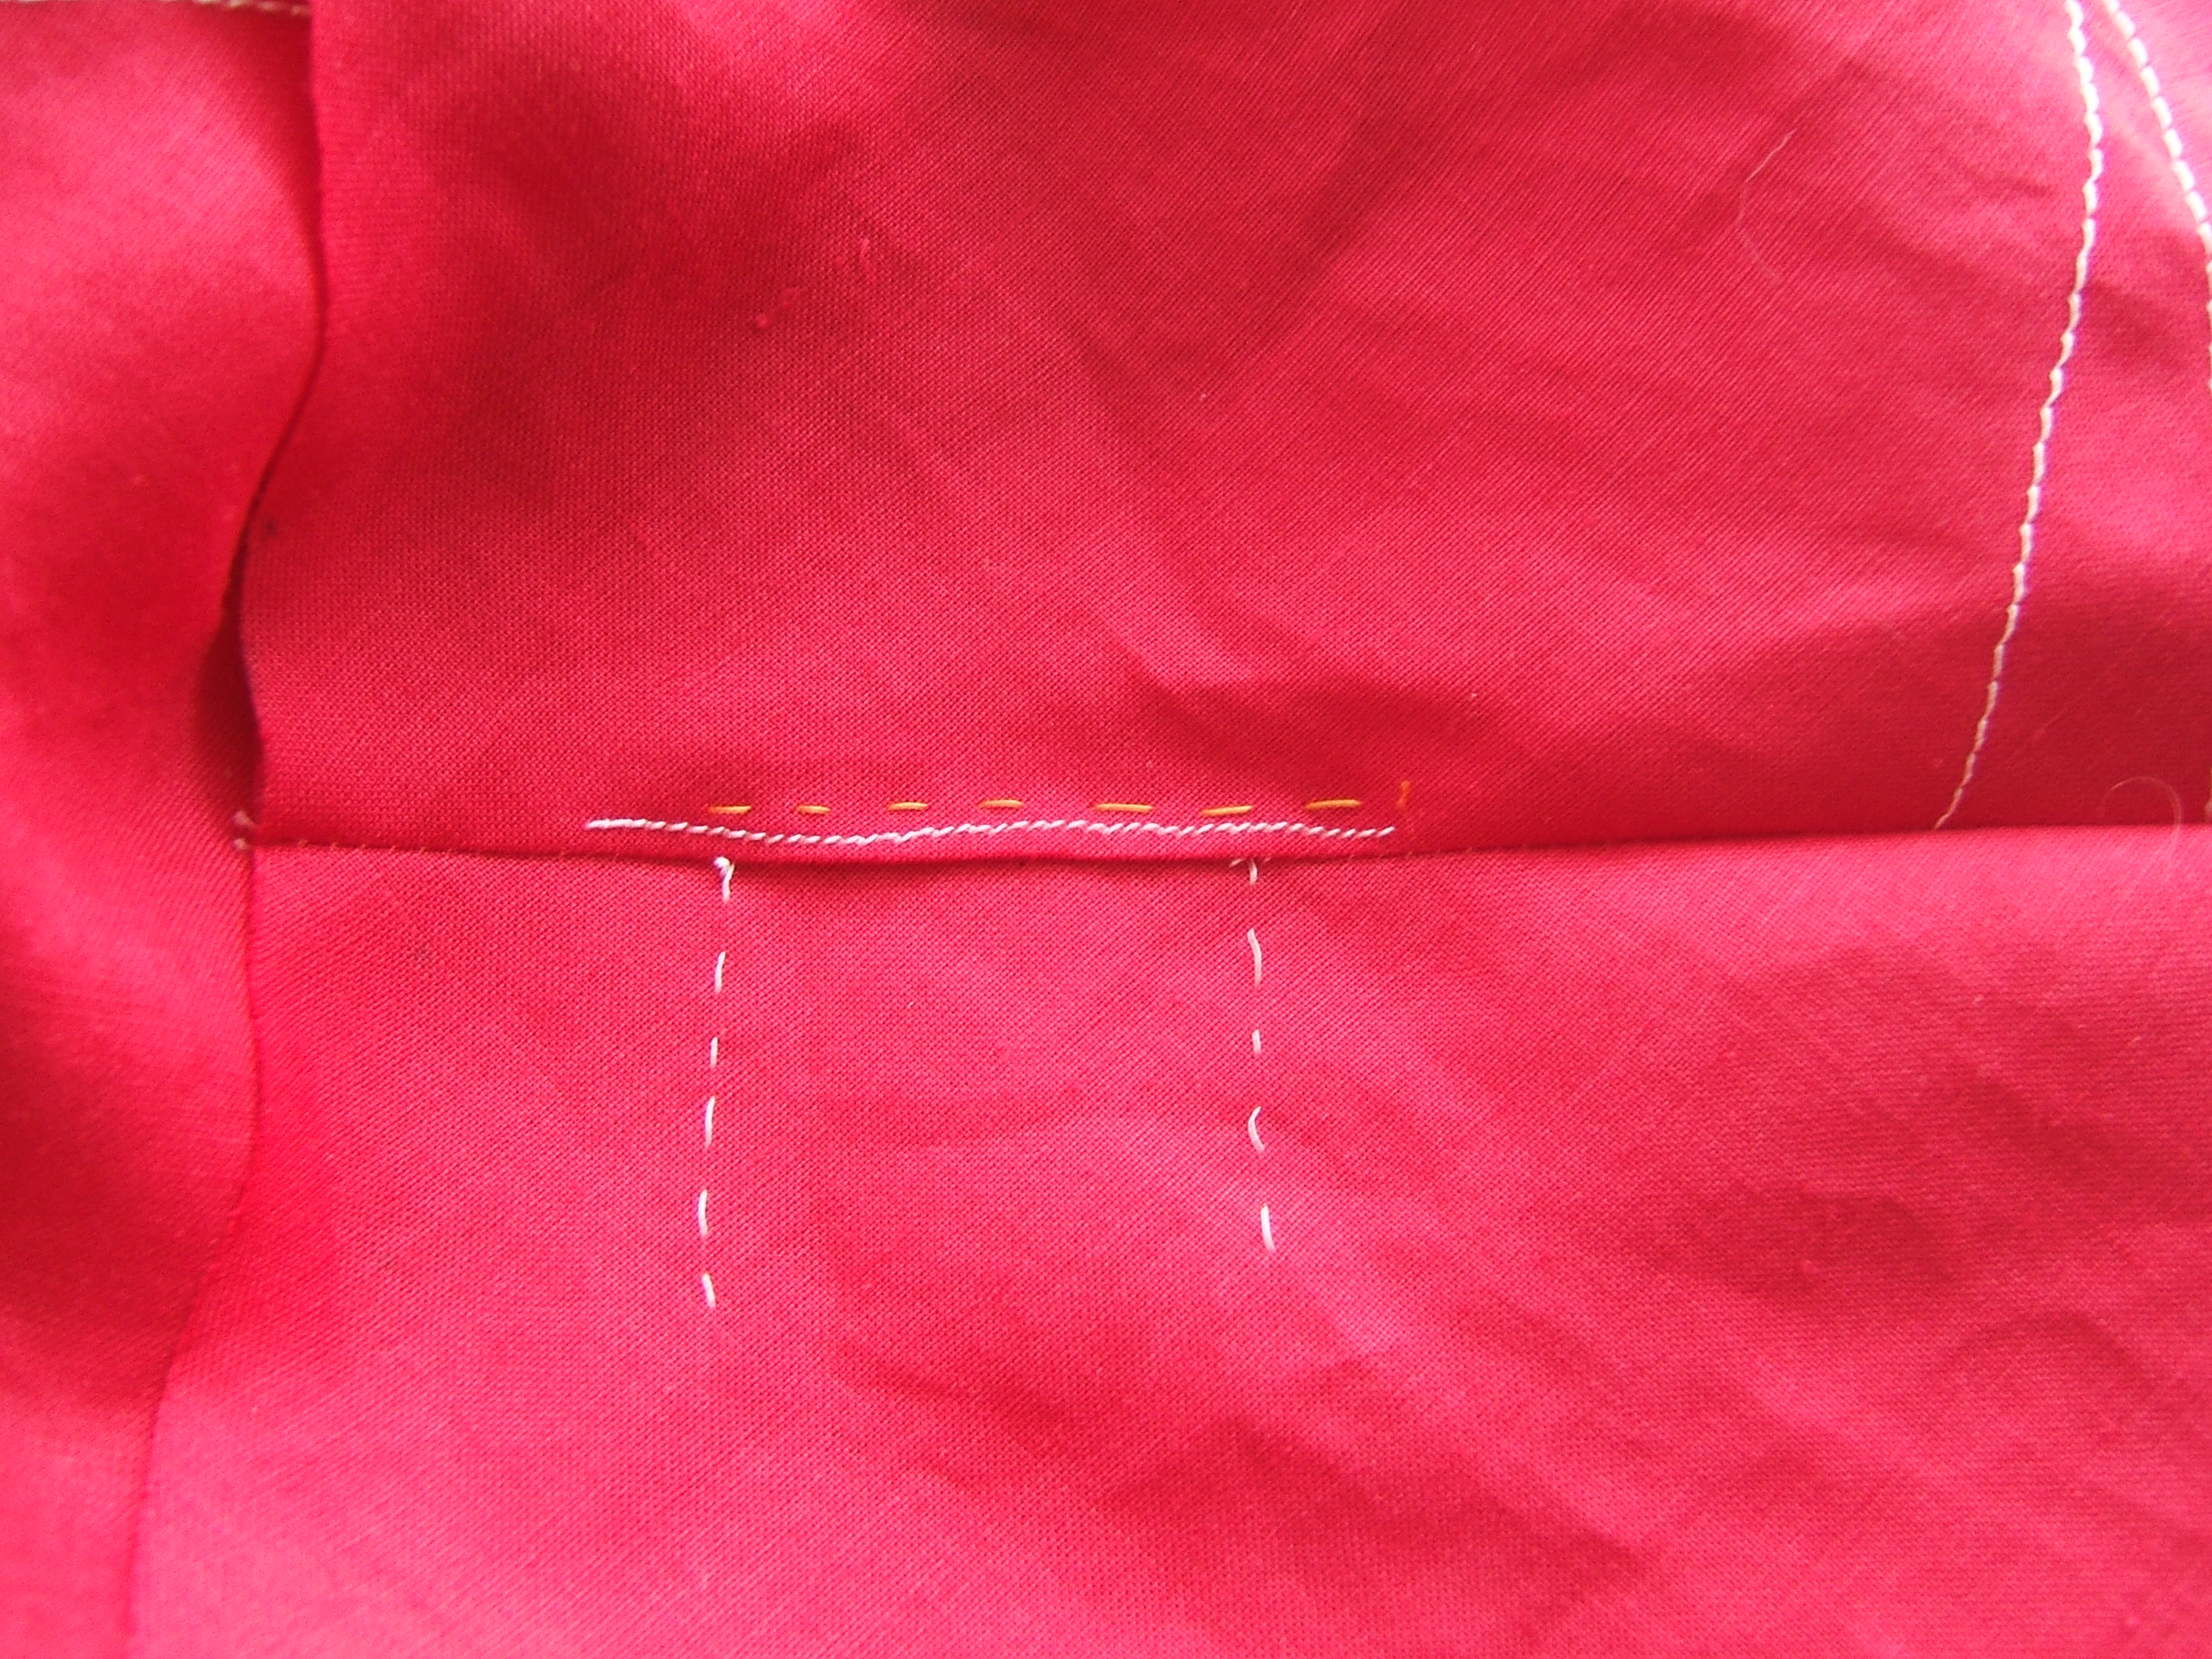
I stuck a pin through the snap with the pocket folded into position, then separated the layers and drew around the pin with a wash-out marker. Then I separated the layers to mark the other side to show where to put the other piece of ribbon, and realized that I was marking on the back of the front, not the back of the facing. Hey, between the facing and the front is the right place to put interfacing!
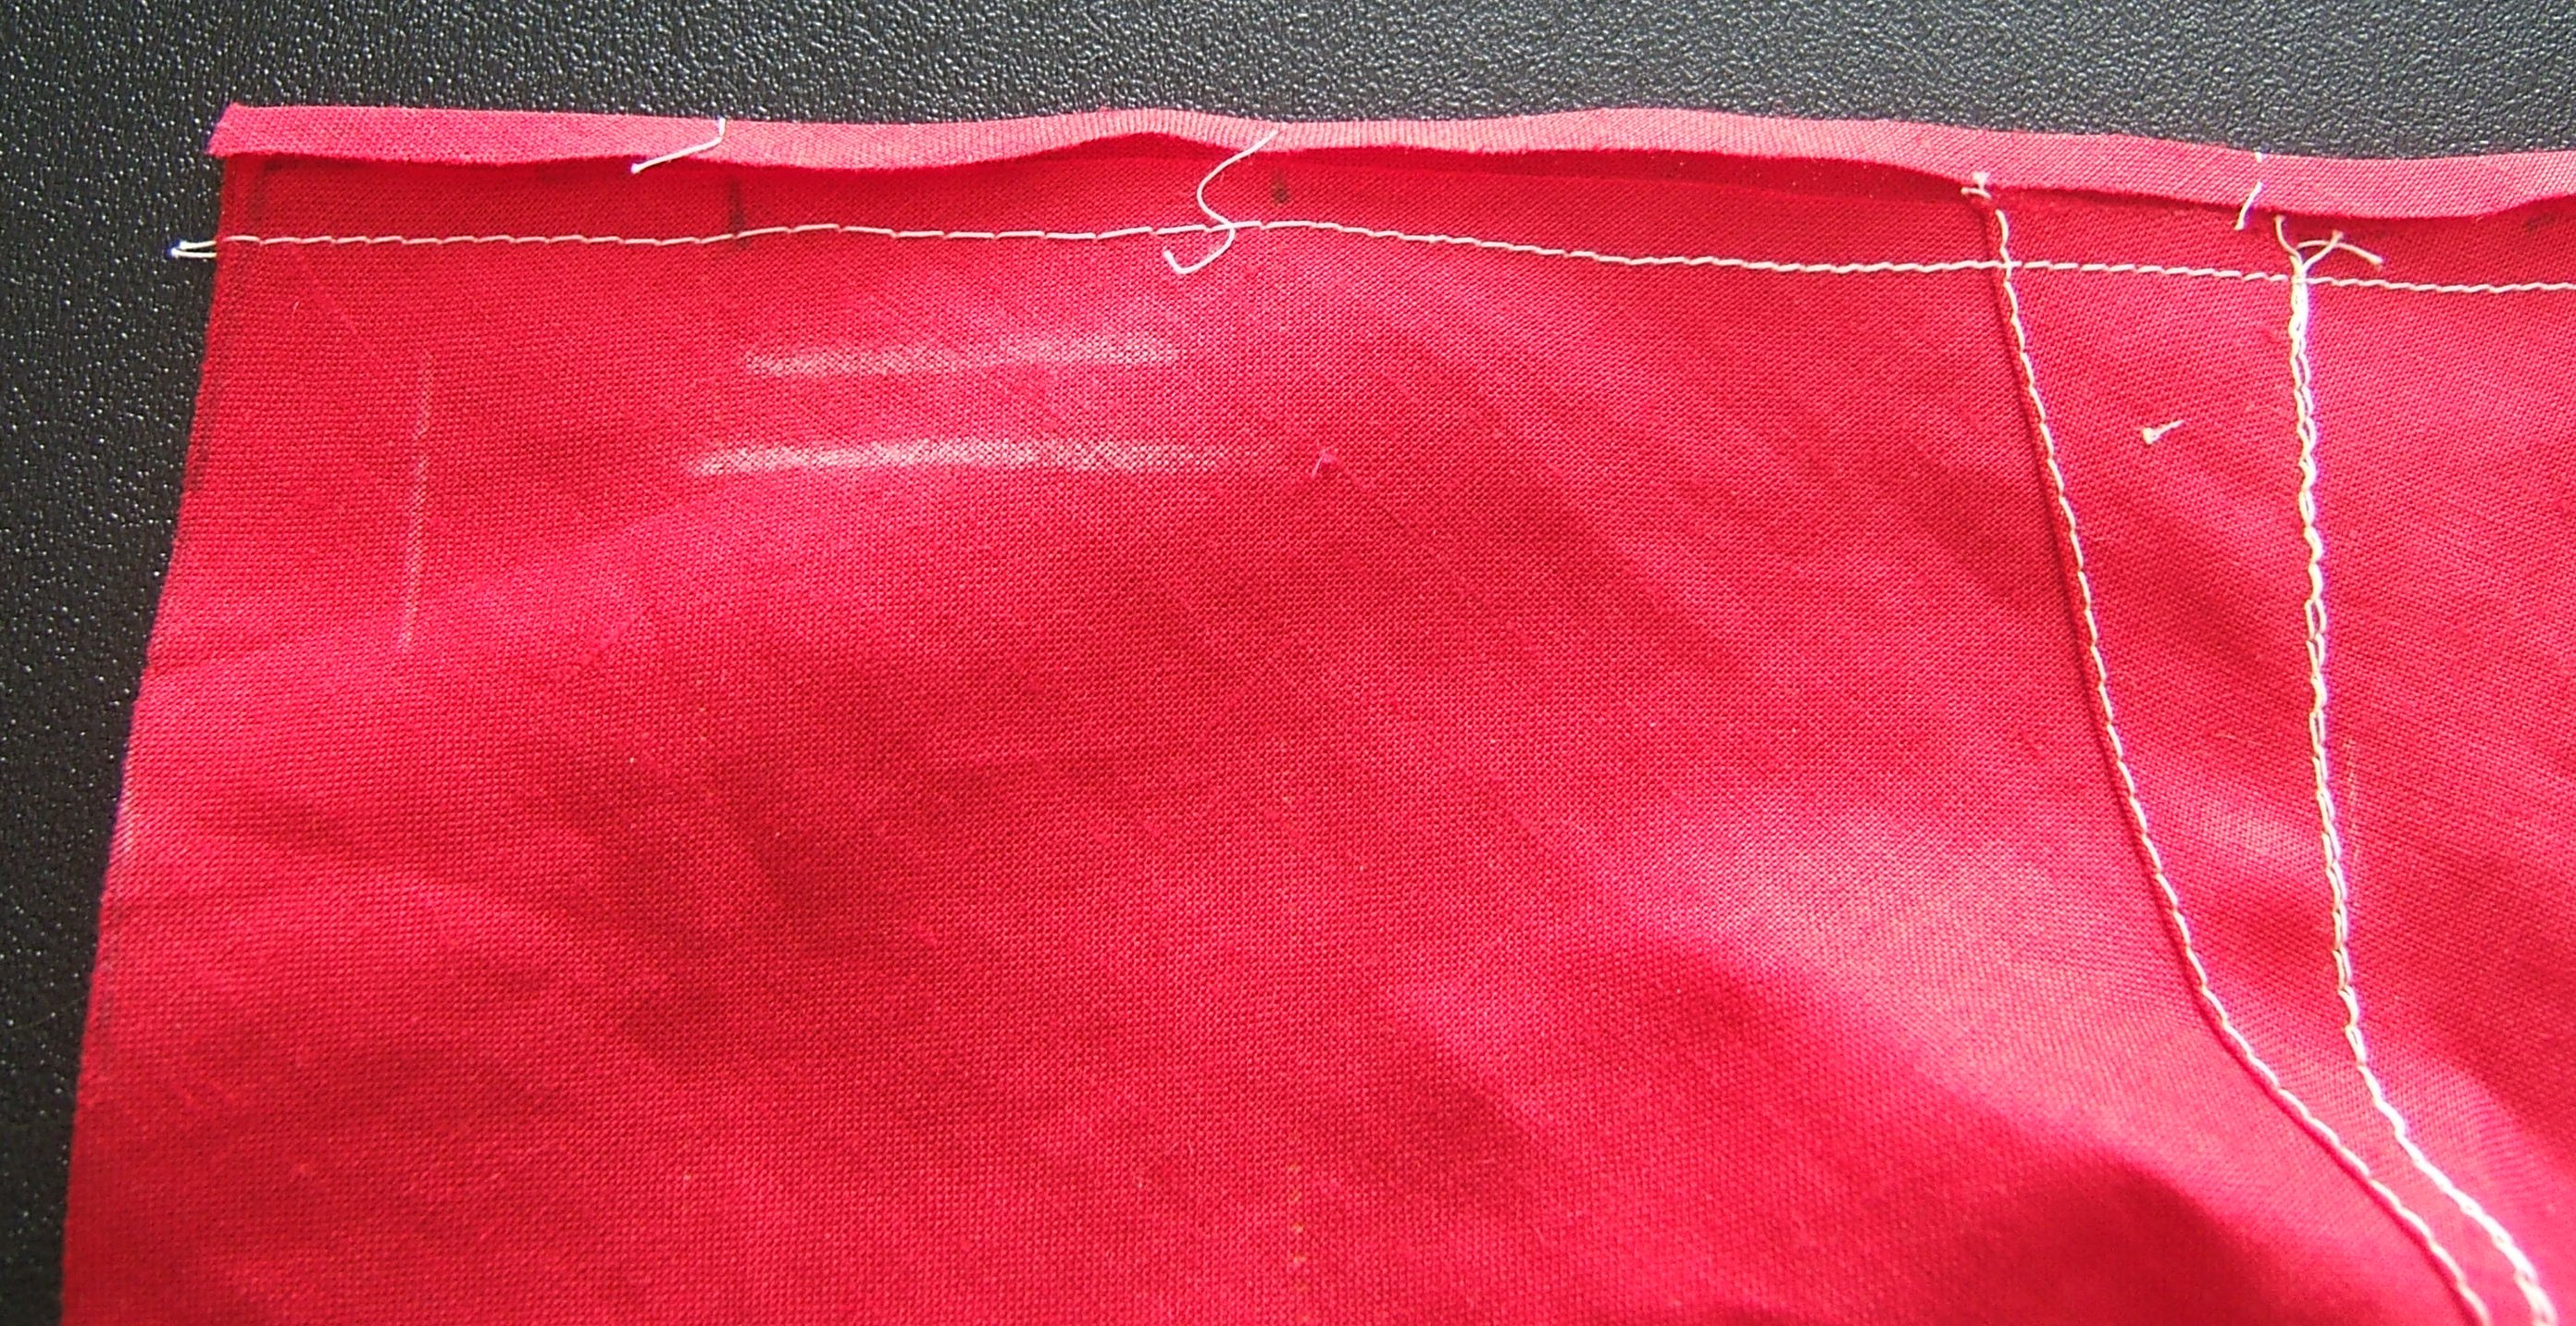
This piece was slightly larger than the other (and a good thing that was! I barely managed to hit it with the snap.) so I sewed it as originally intended, with the selvages horizontal. Since it is to be between layers, I didn't worry much about the raw edges fraying. I tried to keep the stitches on the inside of the pocket as short as possible, to minimize the probability that they will wear through.
I considered sewing the other half on the same
way as the first — and maybe I should have,
so as to catch a big bite of that soft wool
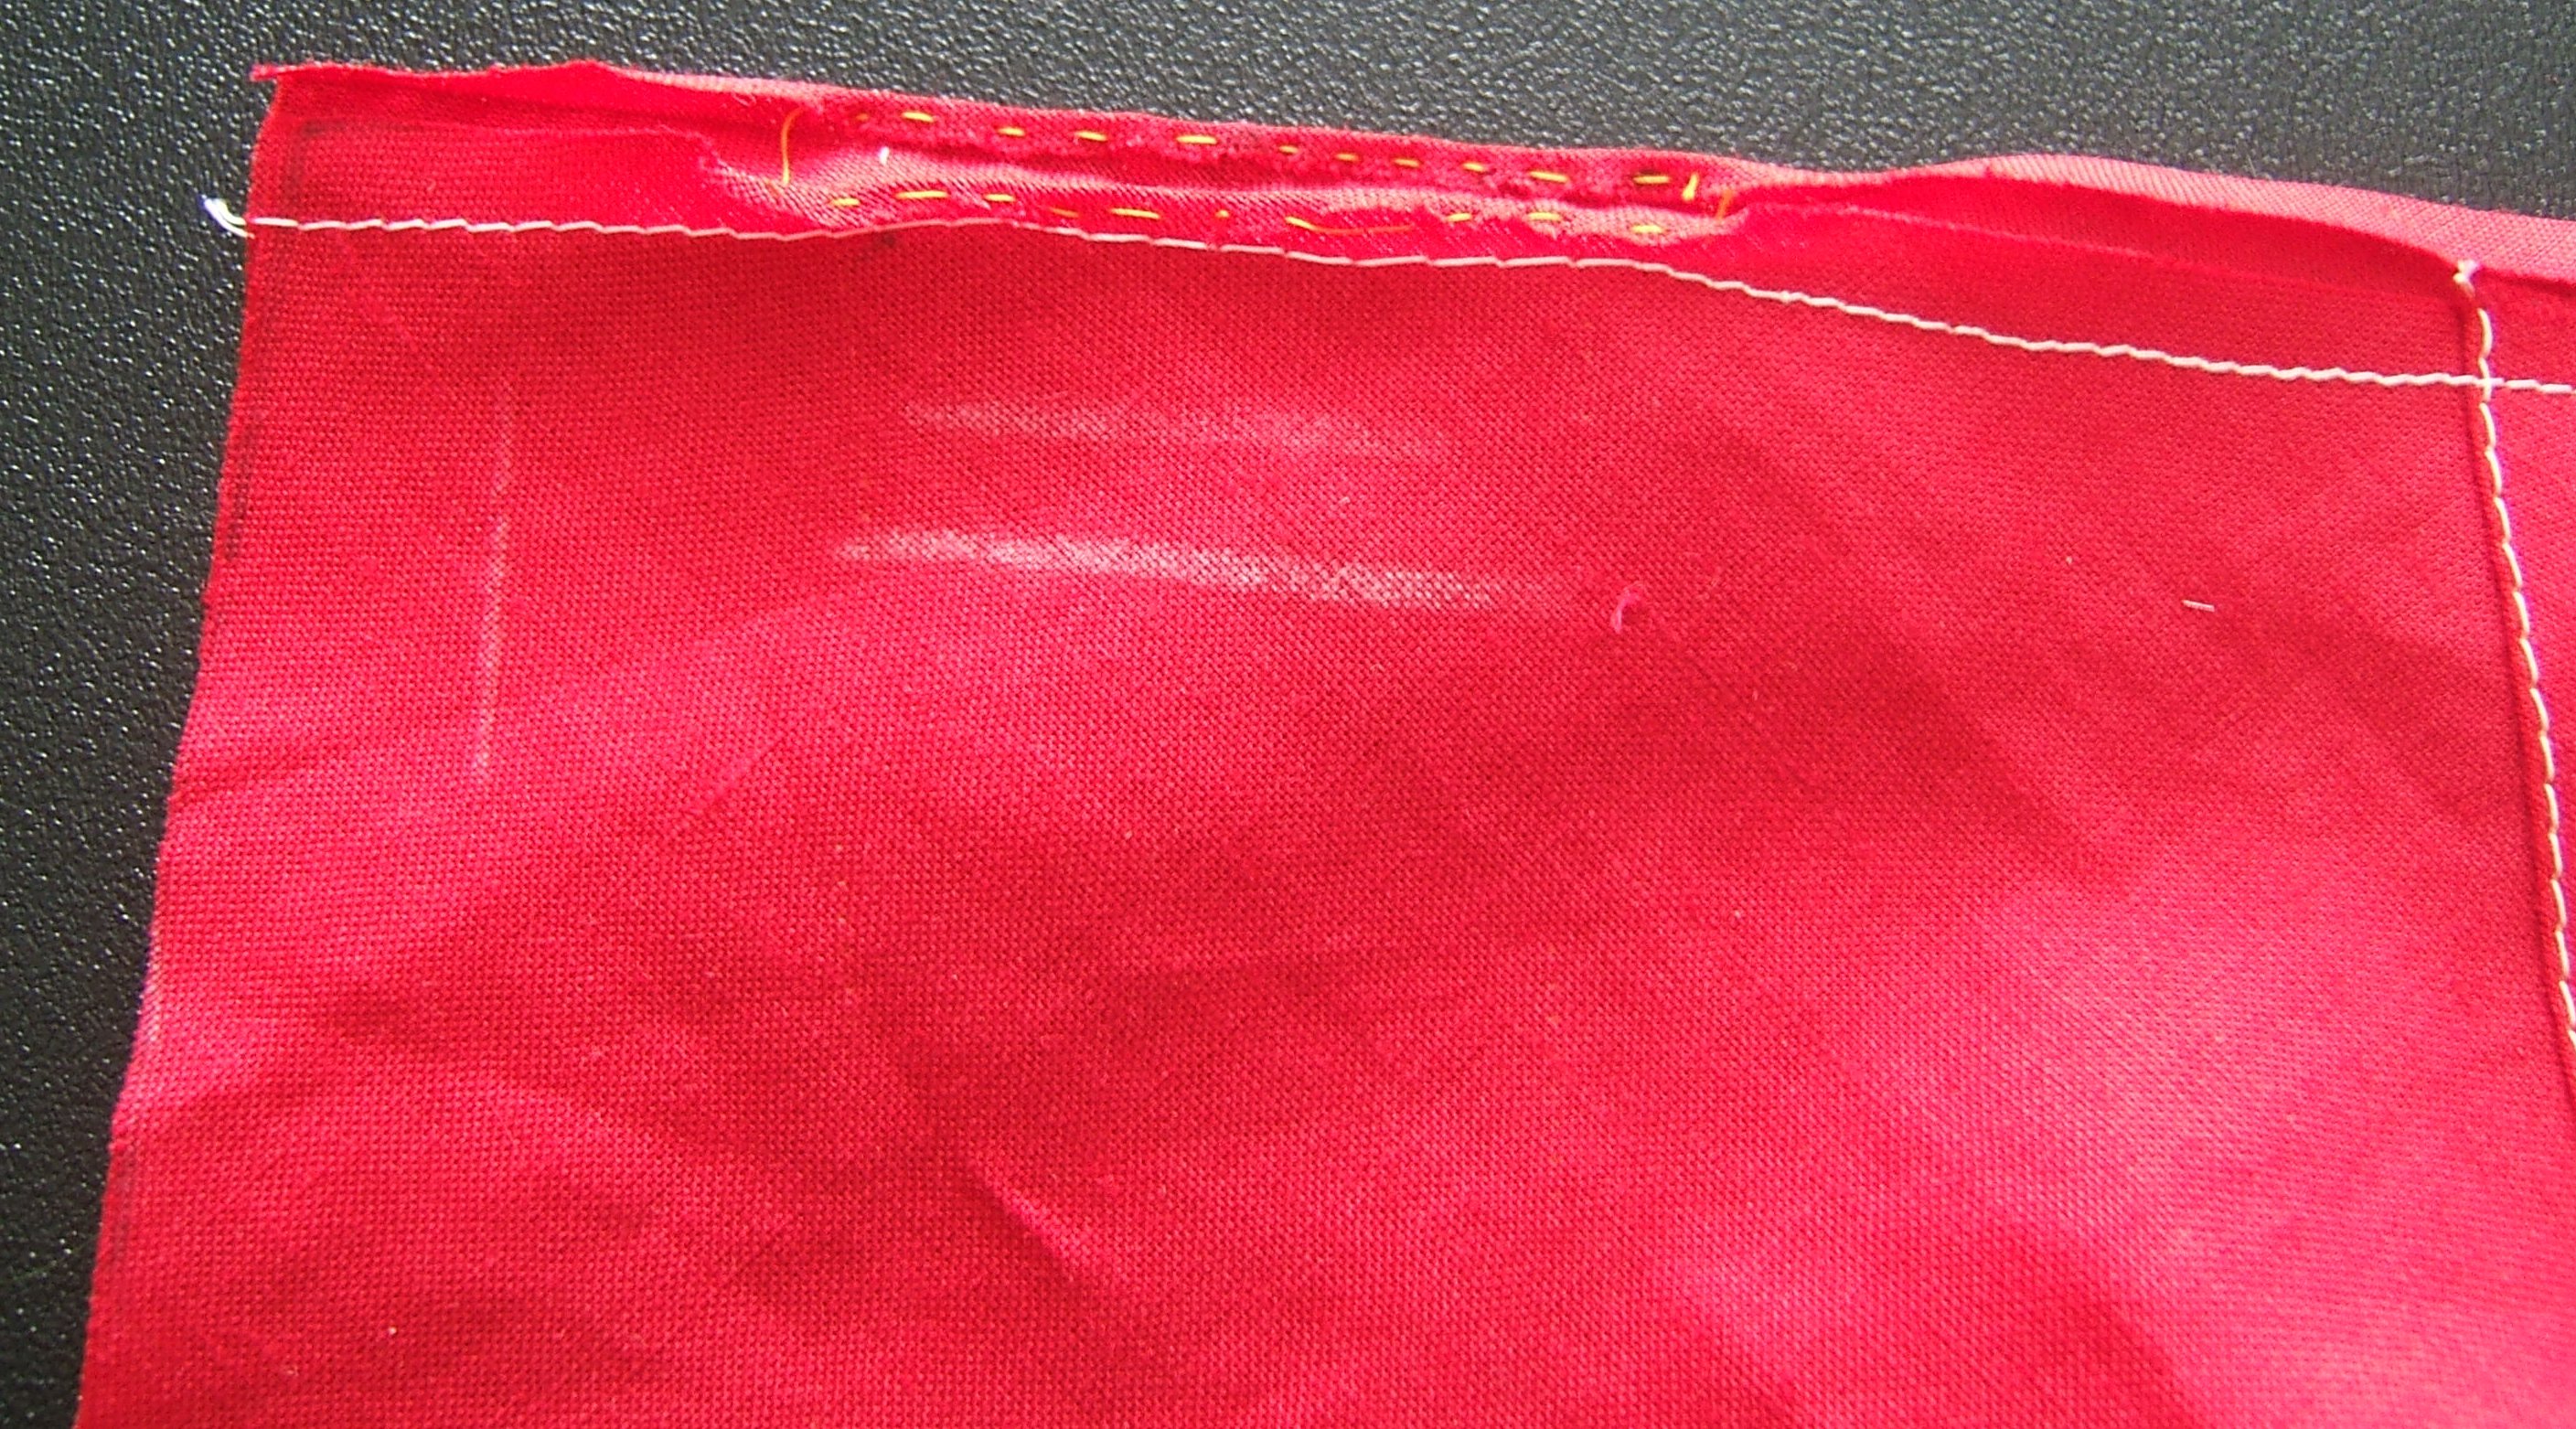
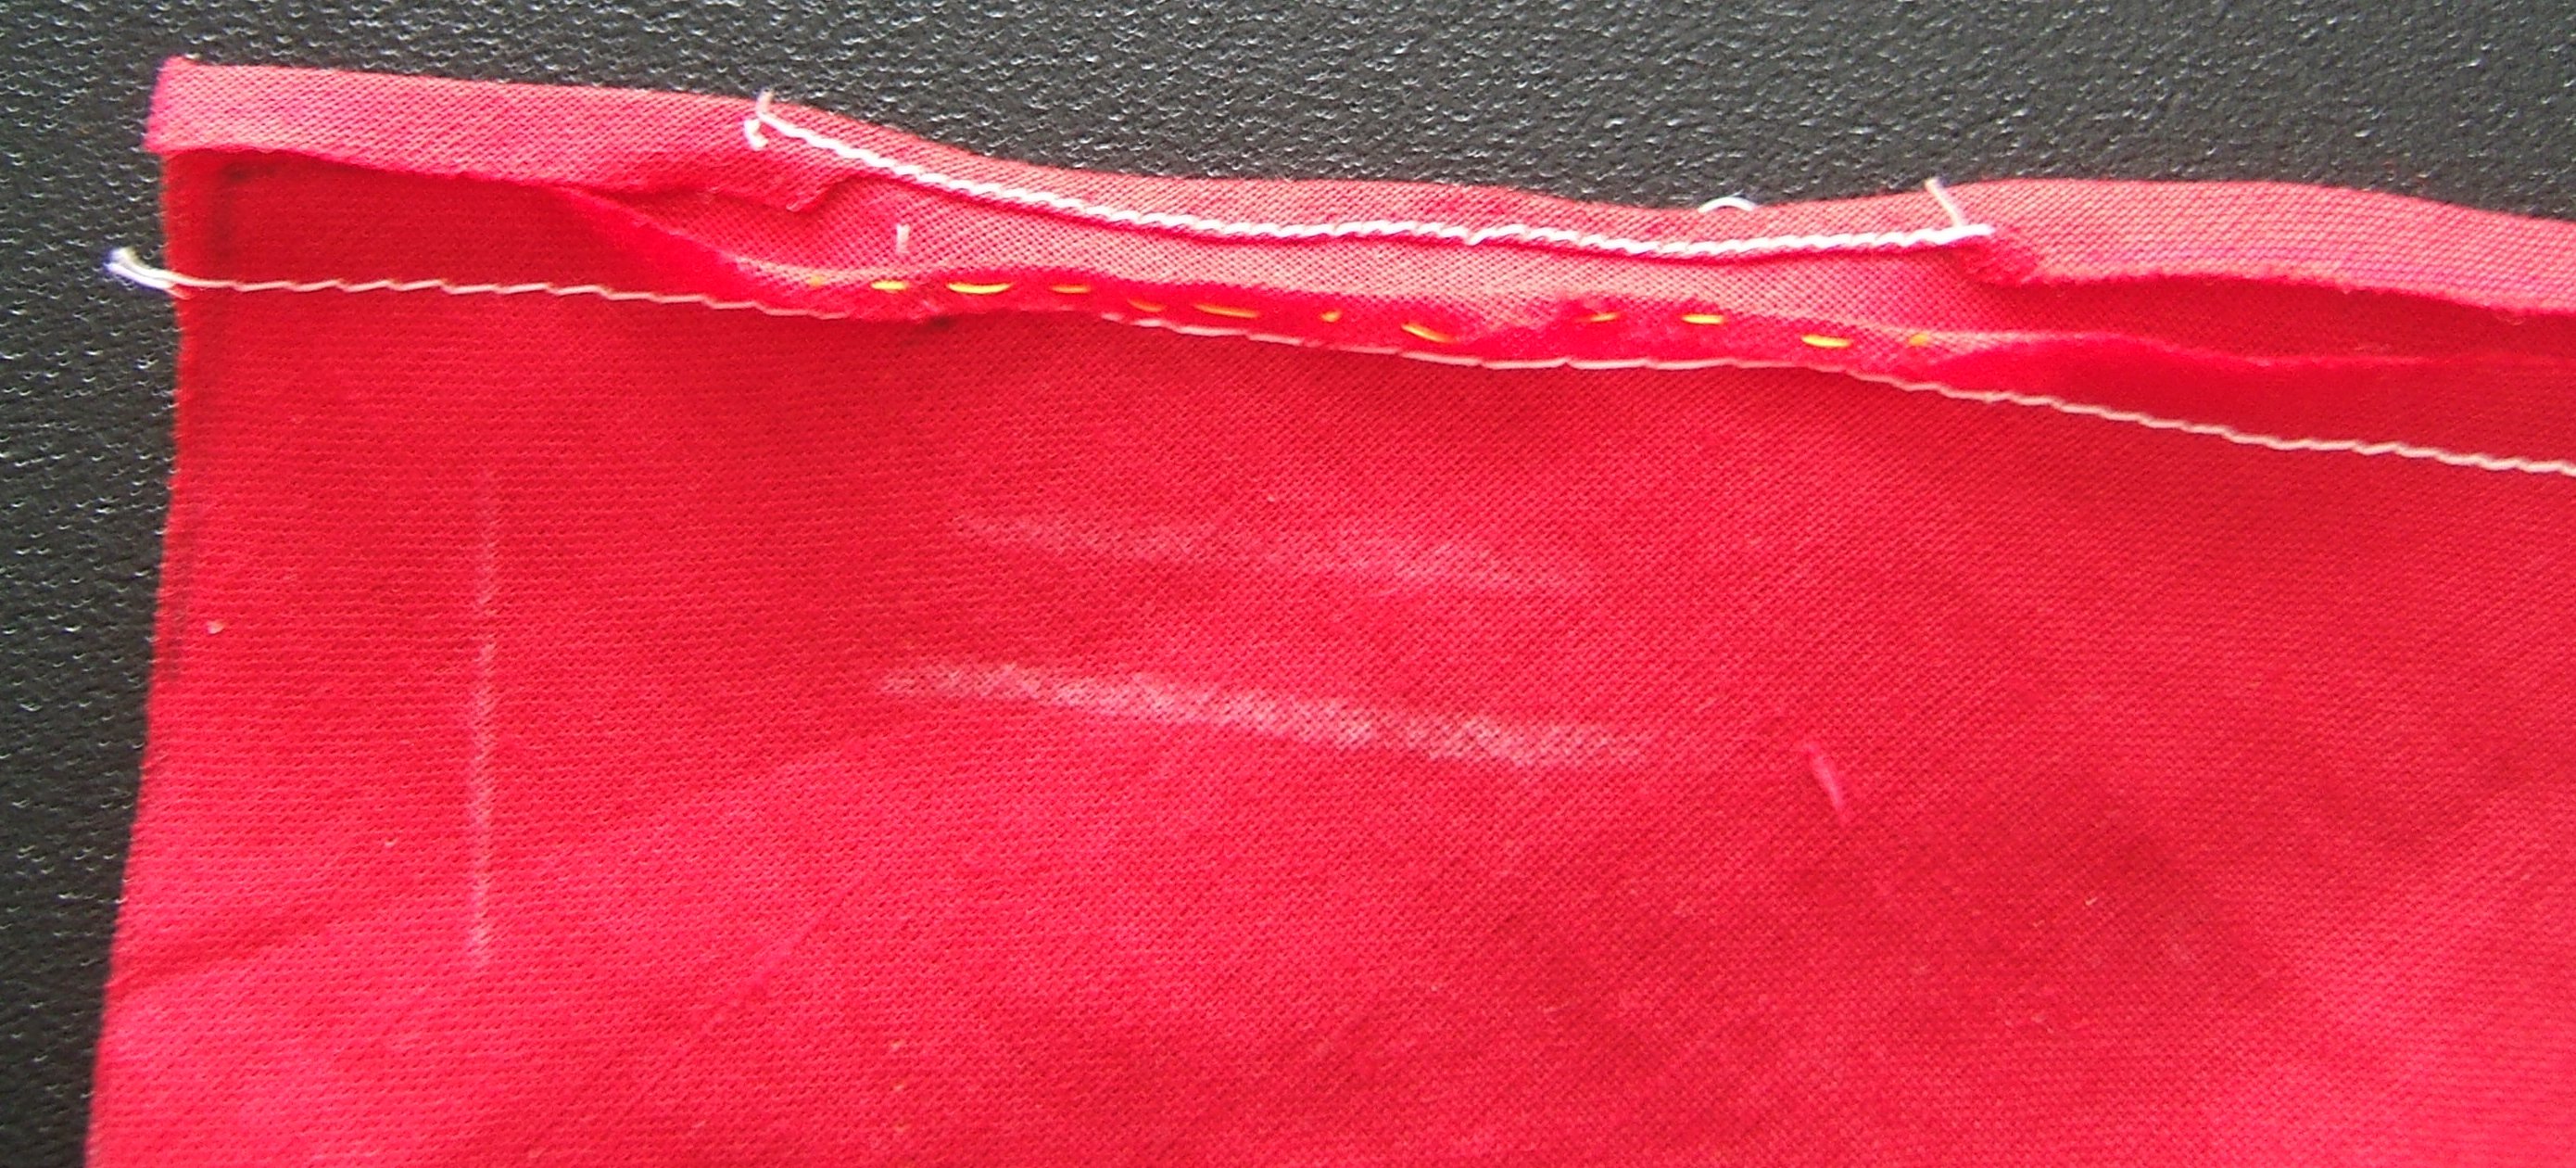
— but I did it as I would sew a snap to the
doesn't-show side of a snap-front shirt: I
sewed each hole individually, and went between
layers (with a backstitch half-way along) to the
next hole.
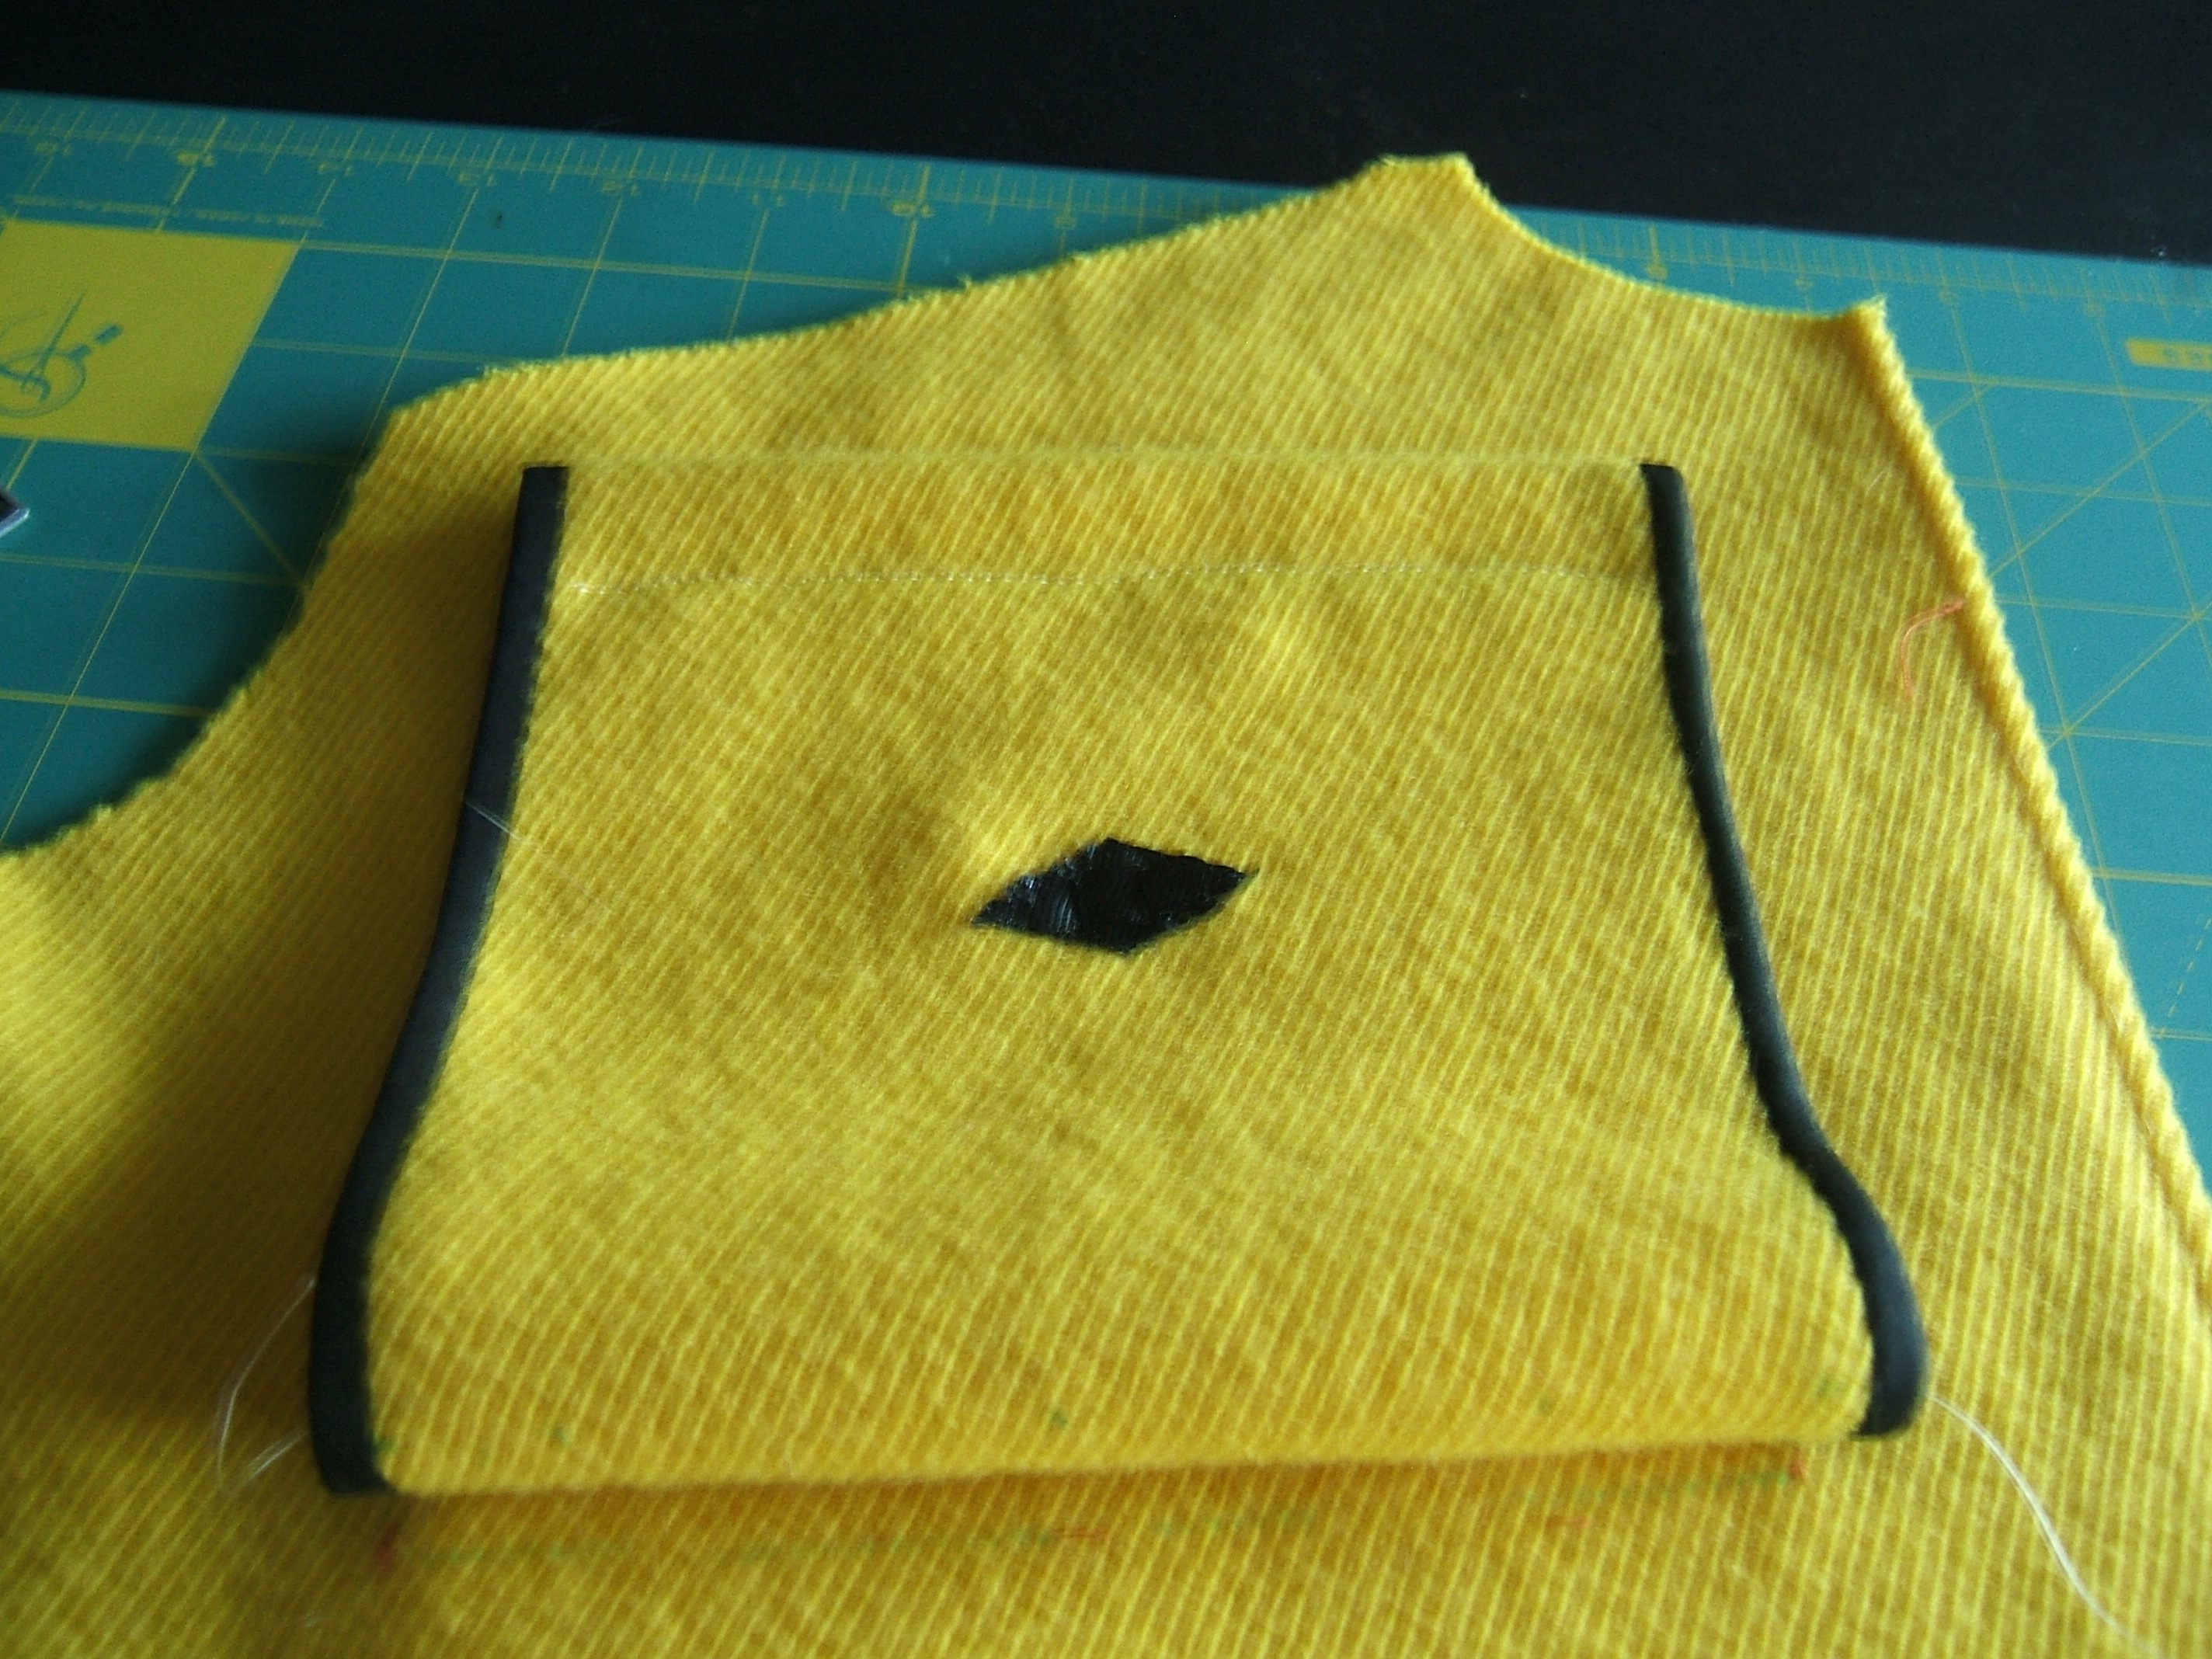
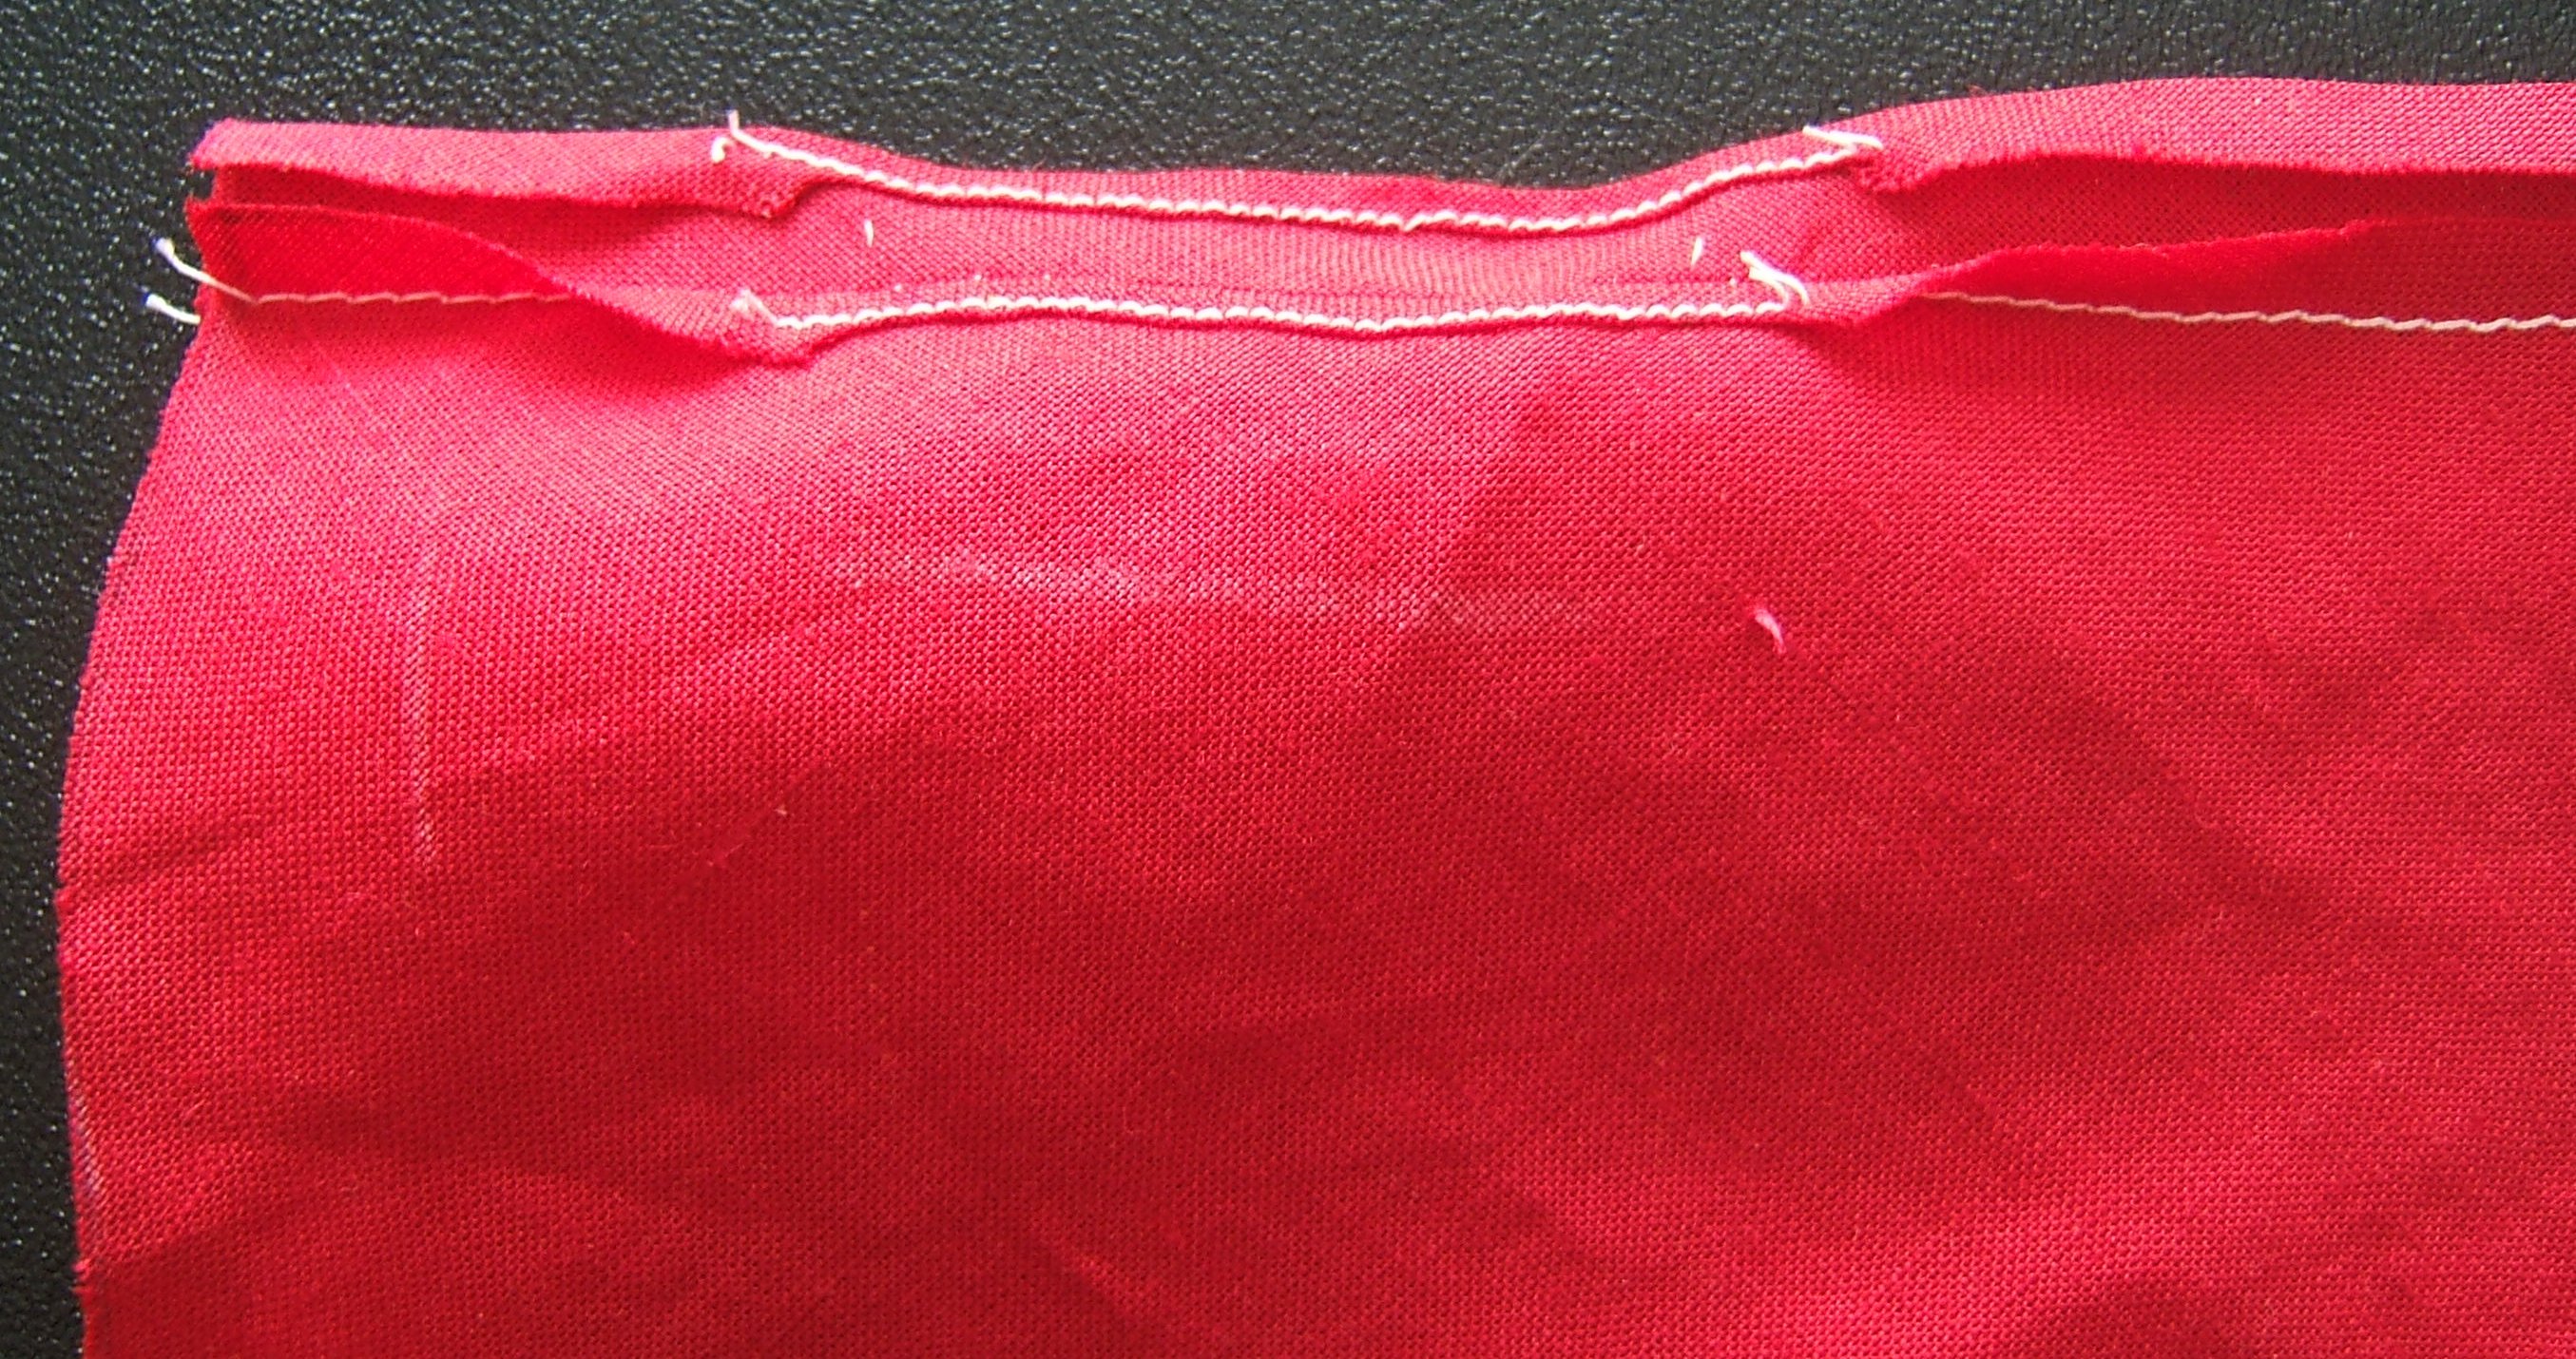
Taking the pictures made me realize that I'd forgotten to zig-zag the raw edge that will be inside the pocket. Do I use the black #50 silk that is already on the Necchi, or re-thread with the size A silk I used for the other zig-zagging? I think I'll wait for daylight to decide.
I might yet hand-sew the name tag tonight.
Or maybe on Sunday. I meant to sew it to the front pocket, off center to allow for the pencil pocket, but when I went to fetch the name tag I found it already pinned in position to the back pocket, and sewed it where I found it. On third thought, I rather like the idea of having my name on my front left pocket, like a uniform.
I threaded my needle with 100+ by mistake for #50, and used it anyway. Came to think that using weak thread on soft fabric was a good idea anyway: less likely to tear instead of ripping if it meets undue stress. And 100+ is less visible.
I went around twice with very small back stitches. I hope I never want that label off!
bottom snap on raw-silk shirt
I wanted to wear the shirt to the Great Wall tonight.
After getting back from the restaurant, I re-threaded the Necchi and zig-zagged the raw edges of the front pockets. I confess to back-tacking! I didn't want the ends to come unsewn before the pocket-attaching stitches covered them, and the covering will prevent any strain on the backtacks.
And I didn't back-tack much.
I think my first chore today will be to cut and straighten rectangles for the sleeves, because the front is going to be ready to sew to the back Real Soon Now, I'll want the sleeves and collar right after that, and it takes freshly-straightened pieces a day to dry. (Only a few hours, I'm sure, but with wool, feeling dry is no sign that it is dry.)
Off to draw a thread. I've already embroidered another arrow, so that there will be one on each sleeve after I cut the rectangles.
⁂
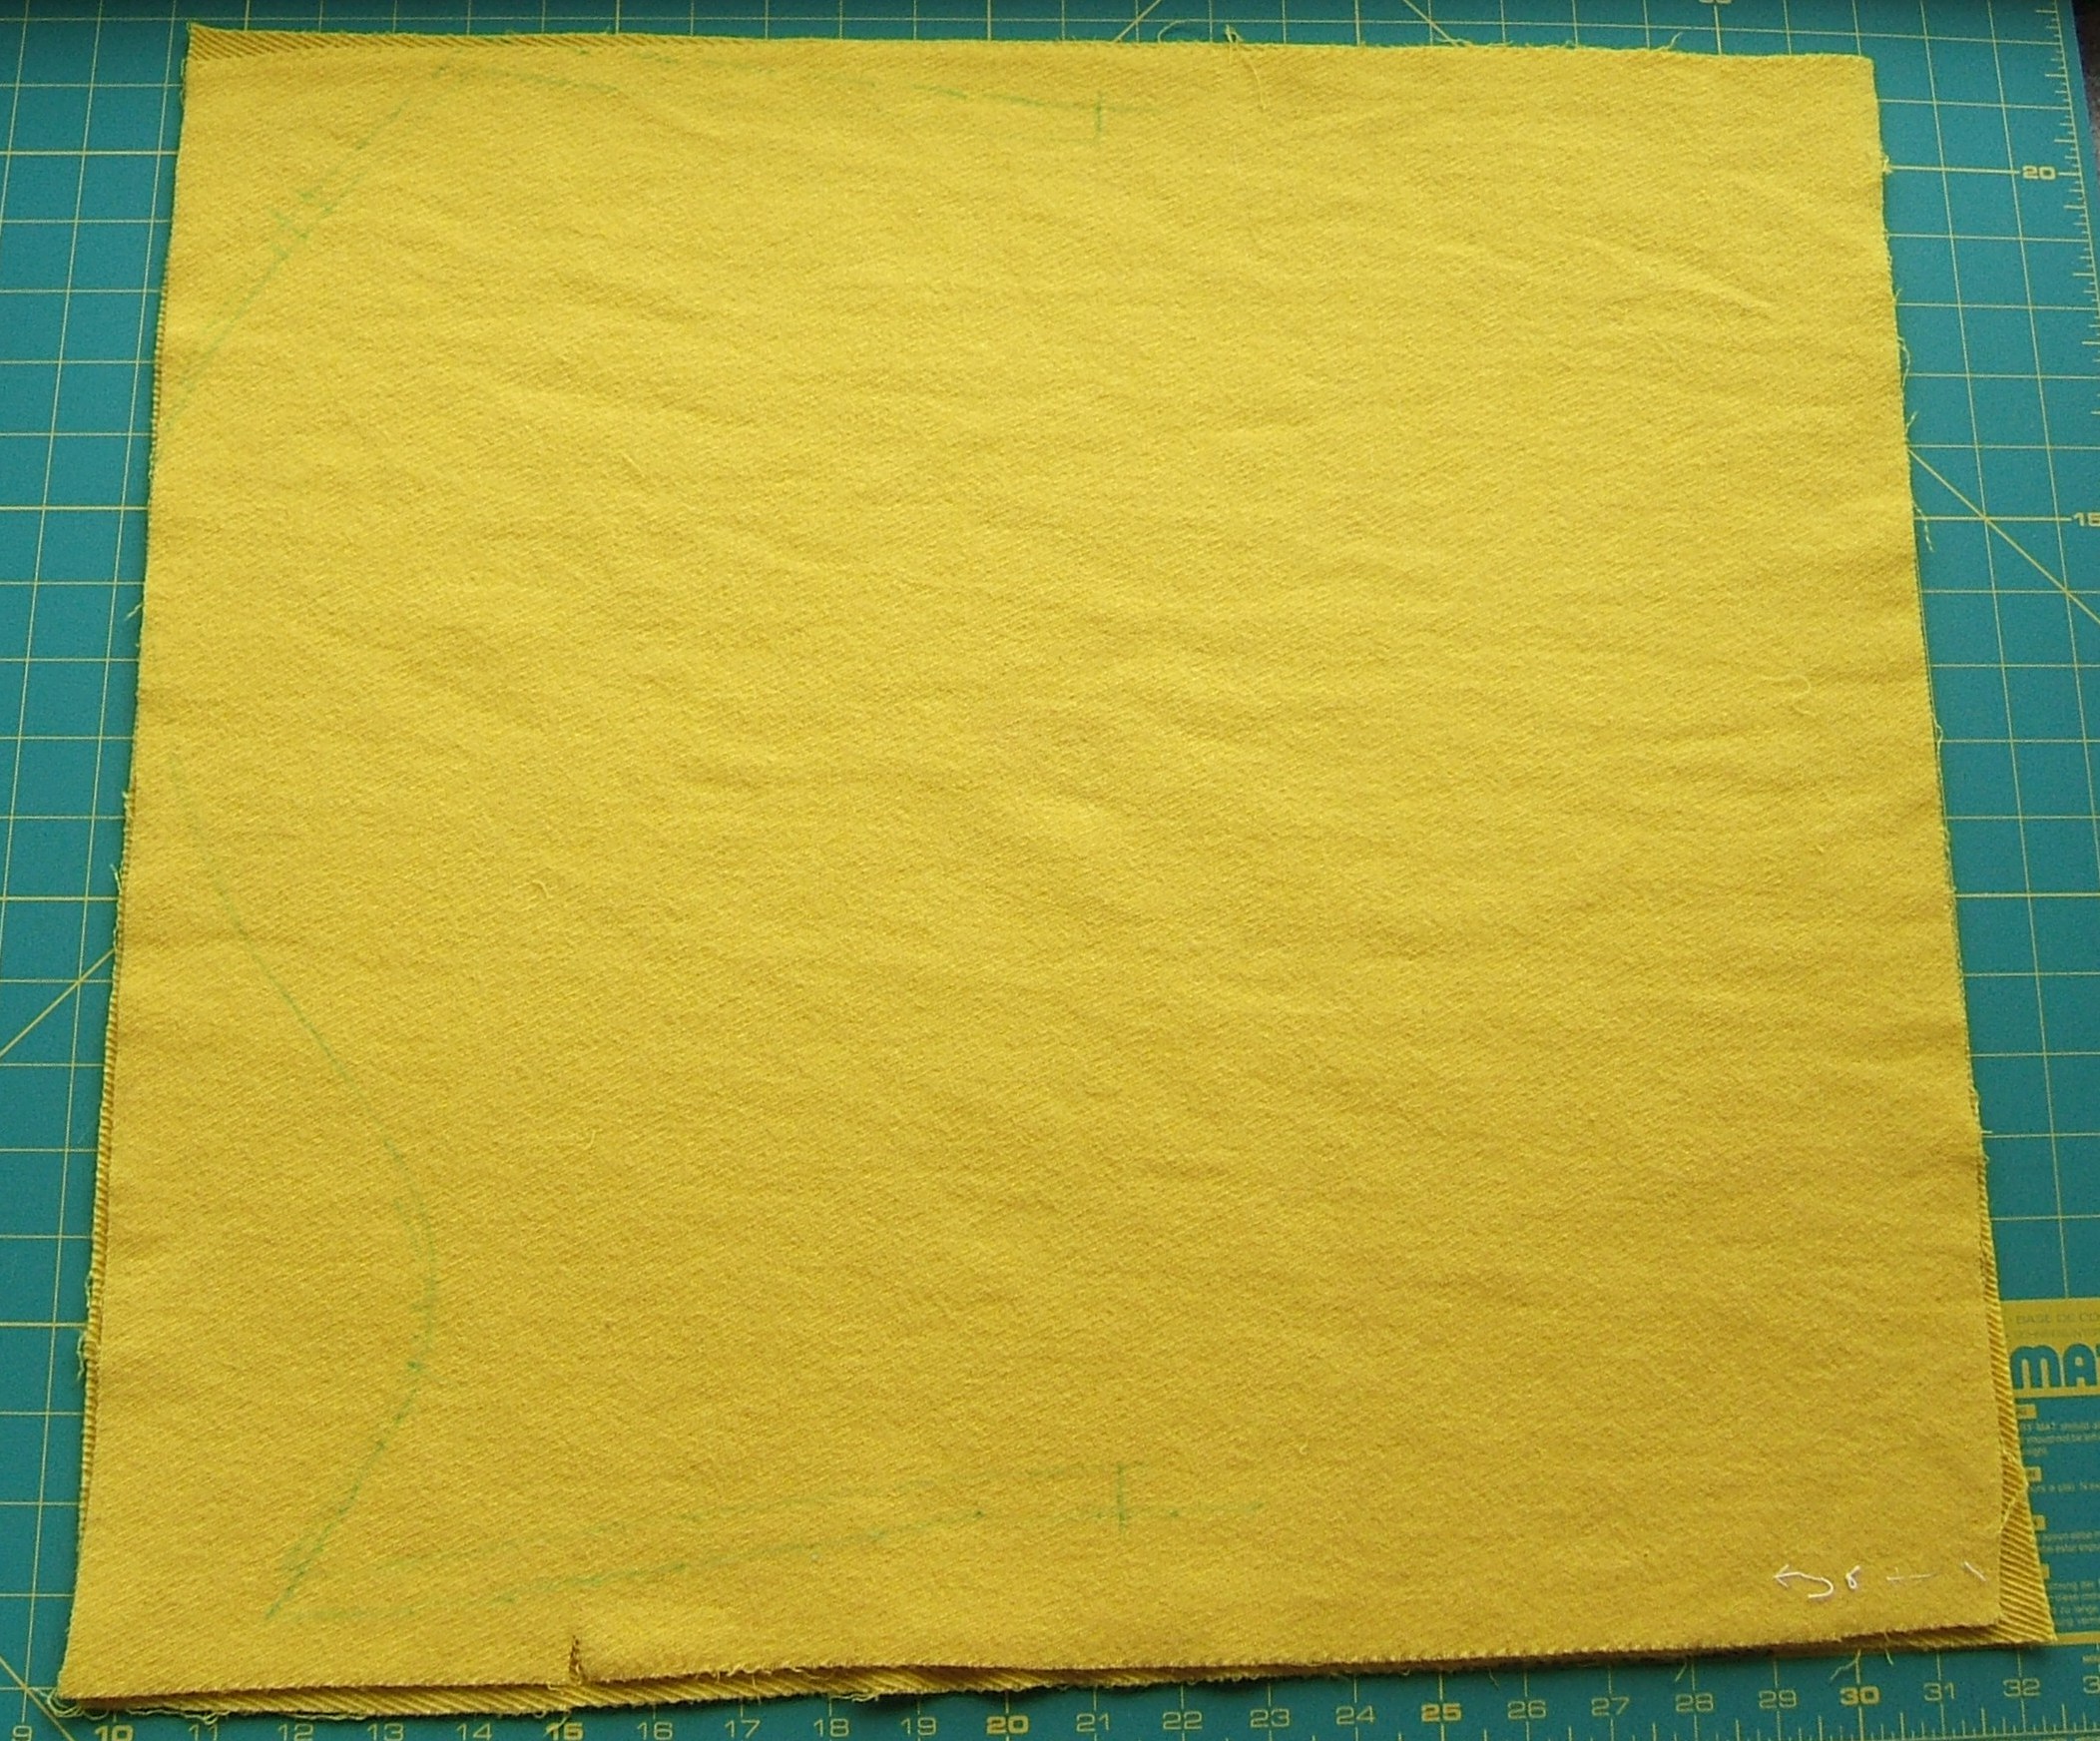
I was all set to try the translucent mat over white paper, but it turned out that the drawn thread was more visible over the green mat than over white paper. Duh, yellow makes more contrast with green than with white. The lengthwise thread was more visible on the twill side than on the wrong side, other way around with the crosswise thread I'm just beginning to cut.
Oddly, the lengthwise thread was plain as day from a distance, but vanished utterly when looked at through my magnifiers. The crosswise thread doesn't fade, but it doesn't get any plainer either.
After cutting along the straightening thread I drew many weeks ago, I'll need to draw a crosswise thread to cut this rectangle into two sleeves.
⁂
In retrospect, the differential visibility is predictable: The ridges on the right side are composed entirely of warp threads, so a missing warp thread makes a gap in the ridges, but the ridges bridge over missing weft threads.
I marked the midpoint of the edge with wash-out marker on one side and a snip on the other. When a thread drawn from the snip reached the other side, it was a scant quarter inch from the blue mark. For fabric this wonky, that's perfect.
On both warp and weft, I had to draw two threads to make a line I could see.
I'll cut along the thread I just drew, then wet one of the pieces on the grid side of the cutting mat before my nap.
On the other hand, it's one o'clock in the afternoon. Several incidents have proven that I'm not as smart as I think I am at one o'clock.
I cut yesterday afternoon, and I'm finally beginning to straighten. Before straightening, the pieces are 22 1/2 inches long on one side, 23 inches long on the side where I cut the selvage off, twenty-one and a scant quarter inches wide at the top, and 20 1/2" wide at the bottom, as measured by my cutting-mat grid.
⁂
Now it's 23" on one side, 24" on the selvage side, 23" at the top, 22" at the bottom, and as square with the grid as it can be at those measurements.
So I'll move it to the other card table, lined up with one corner, and do the other piece.
⁂
The first piece has one arrow in the middle. This piece has two arrows in the corner. Dry, it measures 20" at the top, 20" at the bottom, 22" on one side, and 22 3/4" on the selvage side.
⁂
Now it's 21 1/8" at the top, 20 3/4" at the bottom, 22 1/4" on one side and 23 1/2 on the selvage side. I plan to allow it to dry on the grid, because I can use the smaller cutting mat for the collar.
⁂
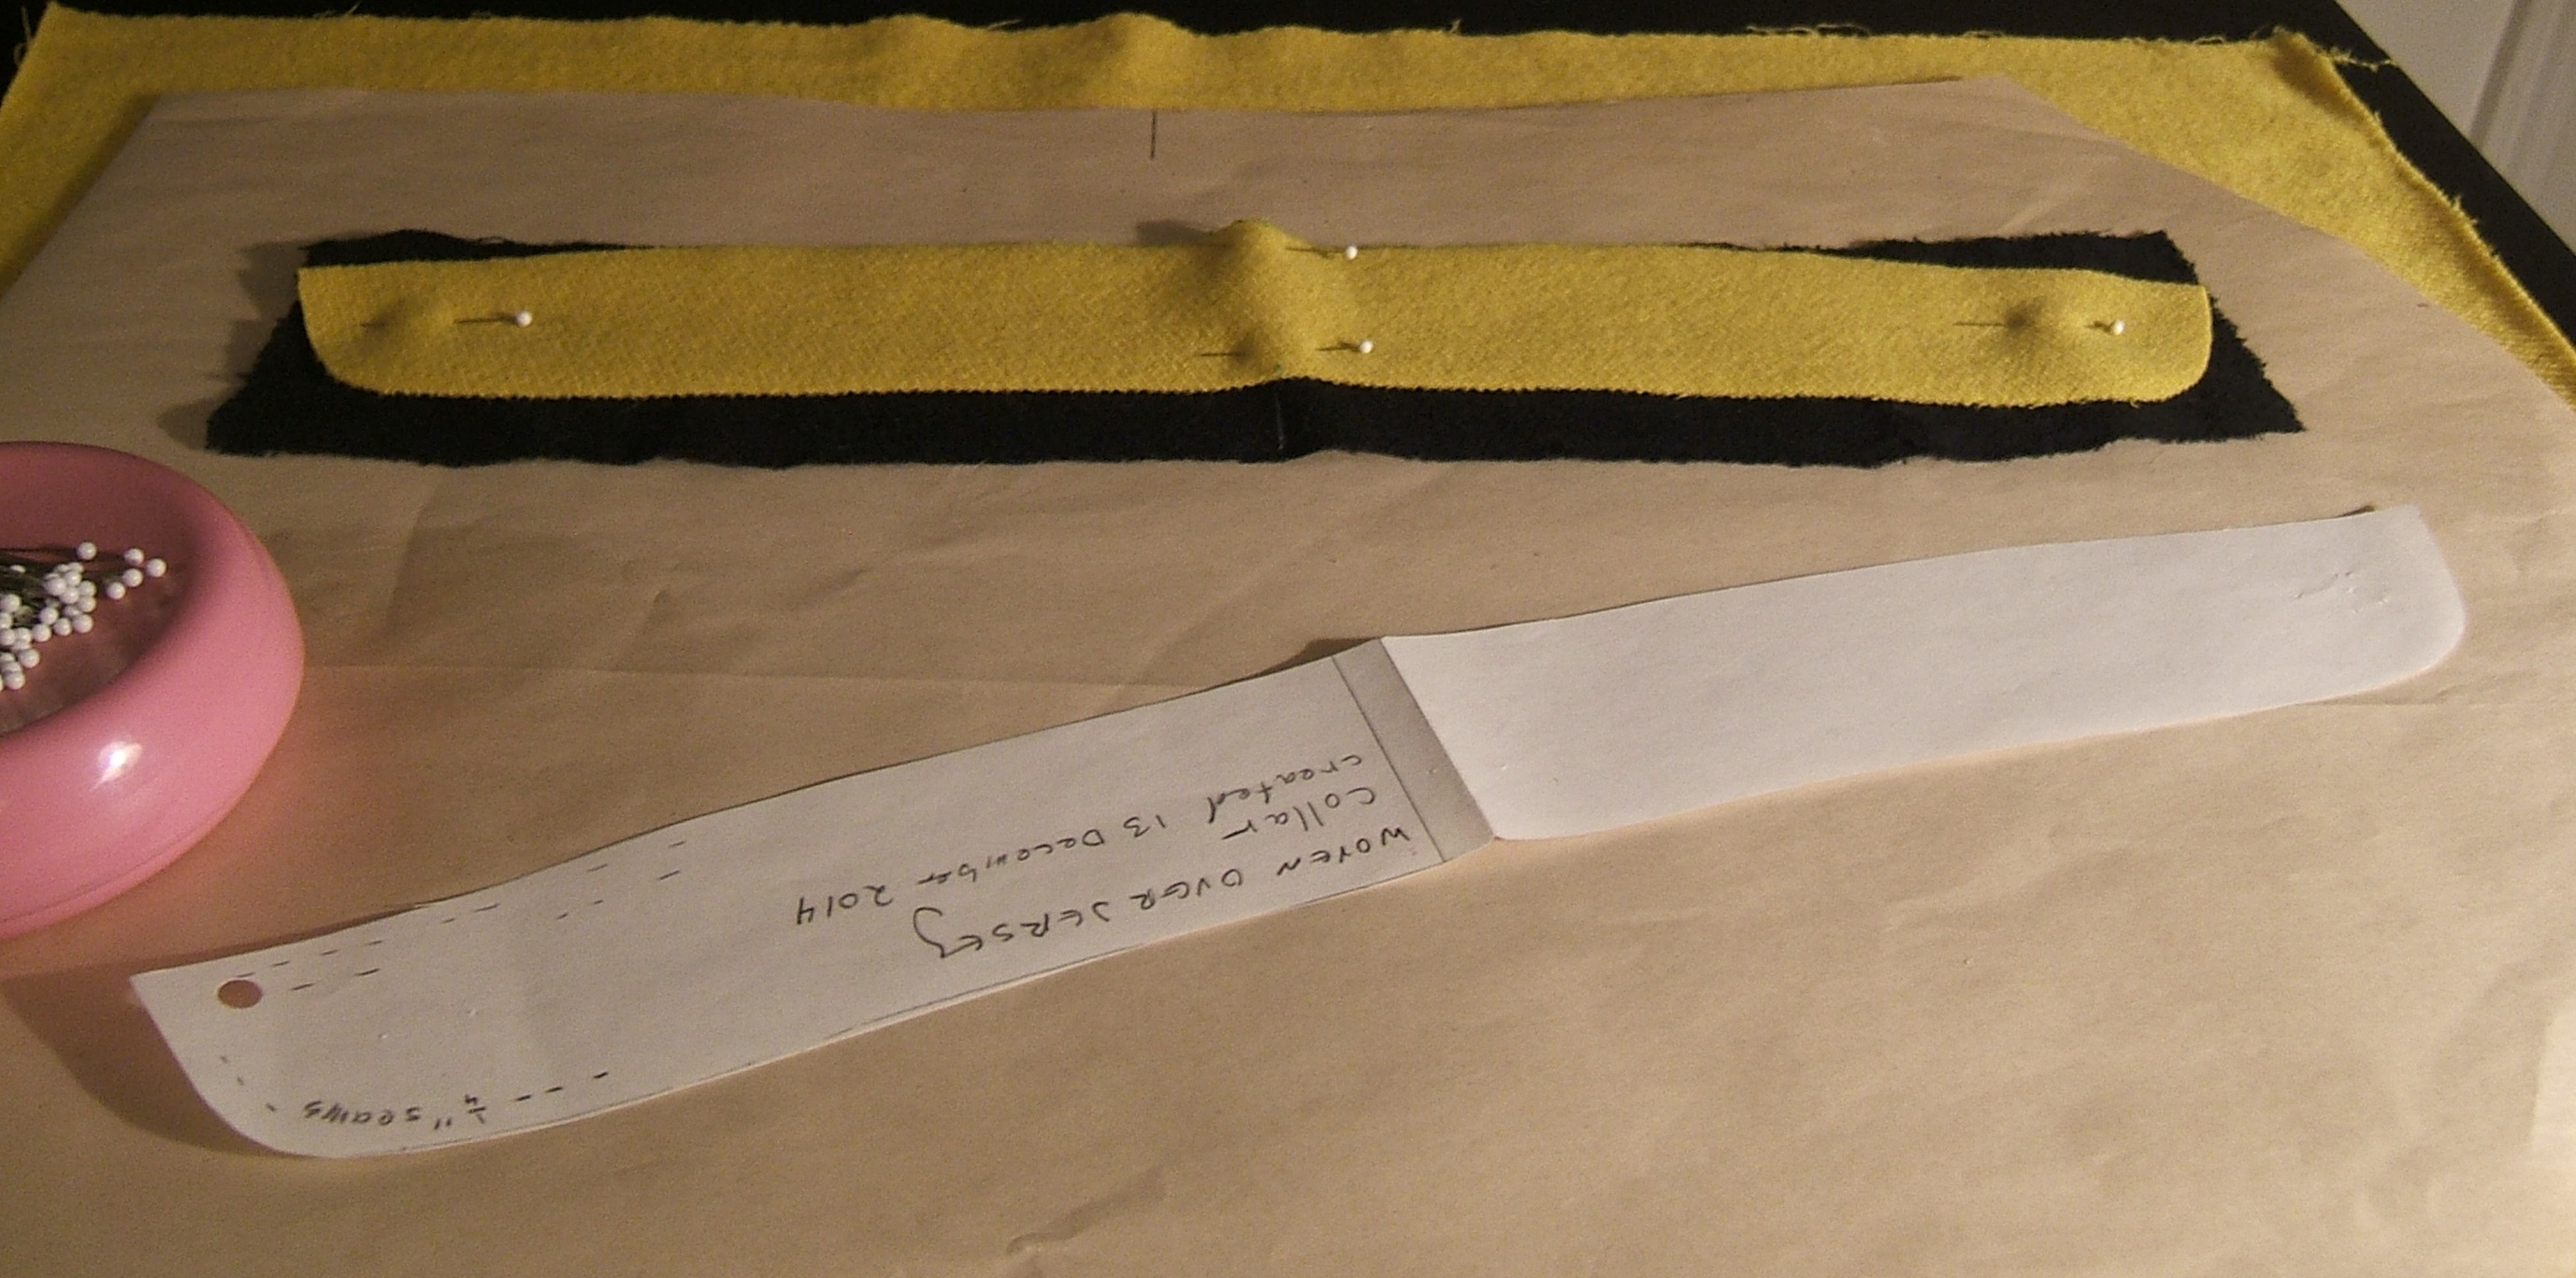
I laid the collar pattern on a scrap, measured one inch beyond the end of the pattern, and made a snip. After separating this piece, I plan to cut it as long as possible — which will be less than the width. I'm cutting with the length of the collar on the crossgrain so it will be on the same grain as the body.
When this jacket is finished, I'm really, really
going to try to avoid washing it!

This collar is really on the same grain as the neck. And it looks as though I won't need to get out the smaller cutting board.
⁂
It was difficult at first to see the line I was cutting along, then the dime dropped and I turned it so that the light shone across the groove instead of along it.
In the piece I cut off, the straightening thread is insufficiently visible, and I'm going to have to draw another.
⁂
The collar piece is 17 (and a scant) 1/2" across the bottom, 17 1/2" across the top, 5 1/2" long on the arrow end, and 5 (and a scant) 1/2" long on the other end.
FLW: straightening this piece should be
easy.
But I'm puzzled and slightly-concerned by the slight mottling; patches appear to be dry even though I have soaked them.
I wonder whether the Reader's Digest still has a feature called "Famous Last Words"? I haven't read Readers' Digest since before they stopped putting the table of contents on the cover.
I have intended from the beginning to straighten the sleeves a second time after they are thoroughly dry.
It nap time.
⁂
After supper, I sewed the front pockets on. Left the darts and the pencil pocket for later.
Darts sewn, and (in lieu of pressing) hand-topstitched with ravellings I had preserved. To my surprise, the ravellings are at least as good to sew with as Medici, and I'm pretty sure they are all weft threads. The warp threads strike me as weaker, which seems very odd.
I'm pleased with the topstitching; the fabric is quite flat on the back; machine topstitching a seam in such thick fabric almost invariably stitches in a welt on the back.
I backstitched from the base of each dart to the tip, then back again a tad farther from the fold. I floundered around a lot with the first dart, then stitched strictly guided by the ridges of the twill, to keep all stitches in the valleys where they didn't show. Stitches were two ridges long near the side seam, then I switched to one stitch in every valley as the sharper angle at which the seam crossed the ridges made wider valleys.
I figured I'd be ready to sew the fronts to the back at this point, but realized that the zipper will be easier to install if I do that first.
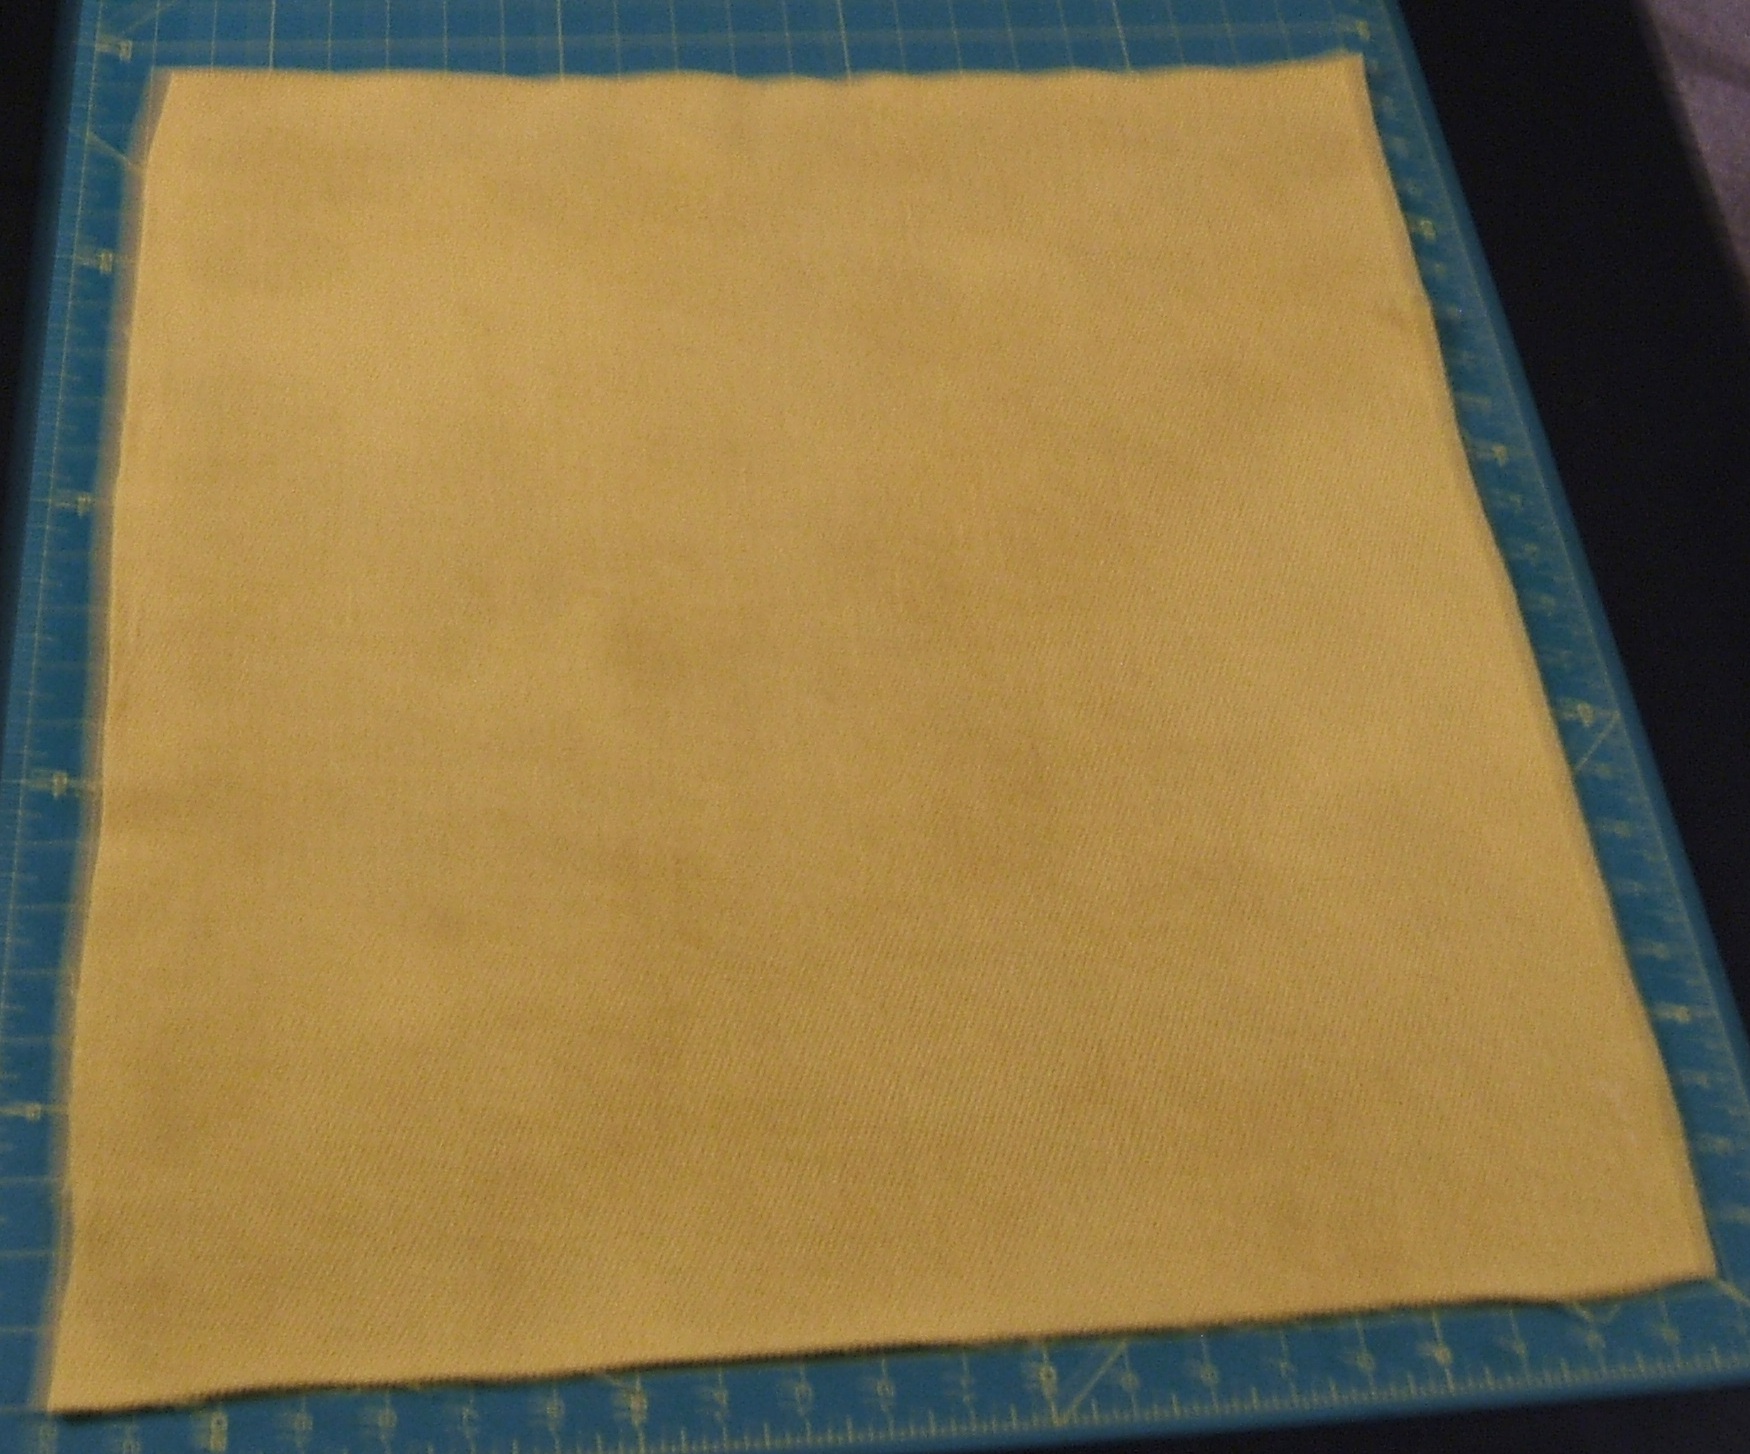
Also cut out the collar, and tore off a rectangle of raw silk to be the collar lining. Cutting stalled when I couldn't find my nonce pencil. It turned up in the mug where it belongs, which is where I looked for it first, but by then I'd been distracted by a non-sewing chore.
Could have made a second pass at straightening the sleeve rectangles, but didn't. I must remember to add half an inch to the sleeves to match the half inch added to the side seams. Forethoughtedly, I marked this enlargement on one of the pieces so I don't have to remember how much. But did I enlarge the back too? I can compare the pattern to the cut piece before cutting the sleeves.
I don't plan to cut the sleeve extension until the sleeves have been set in and the side seams sewn up.
I pinned the zipper to the fronts. I intend to start at the neck, edge-stitch along the zipper, and continue off the hem, then run a second line a toe-width from the zipper teeth.
I hooked the pinned zipper together, and discovered that the right side, from zipper-bottom to raw edge, is a quarter inch longer than the left side. I briefly considered unpinning the zipper and squashing the wool a little bit more, then decided to live with it.
I spent most of the morning on Roomba-related tasks, such as changing the sheet and cleaning the cat box. But now all the stuff we piled on the White while the Roomba was working has been put away.
I sewed the zipper this afternoon


Today I straightened the other sleeve.

But it was dark before I was done with the washing, so it hasn't been sewn yet.
The sleeve pieces are straight enough that I can cut both sleeves at once and have no worry about cutting two left sleeves. (Mem: double-check that the right sides are together.)
I note that cutting the sleeve wider will make the front side of the seam longer and the back side of the seam shorter. I may deal with this by just sewing a notch and trimming it off before setting in the sleeve. Oh, errr . . . I set in the sleeves before sewing the side seams; there will be no notch, only disparate lengths. I can draw the cutting lines on the fabric, then shift the pattern and draw new cutting lines, as in the pivot-and-slide method of pattern making.
I intend to cut by the pattern only as far as the notches marked on the sleeves, then draw threads to mark the remaining cutting lines.
I picked the hong-kong binding off the back shoulders this morning. I'd done such a neat job of sewing it on! I can use the same silk to bind the front shoulders, but need to press it first.
Also done in the morning: darning the zipper on Dave's down jacket. It was very difficult because of the tough tape and the cramped working space: I spent a lot of time backing the needle out of the down!
And the zipper still doesn't work. There is no way to firm up a loose tooth.
Replacing that zipper would be a big hairy deal, and the jacket is well worn — but down jackets are very expensive . . .
⁂
In the afternoon, I pressed the bias I'd picked off, sewed it to the shoulders of the front, and did a beautiful job of basting the first shoulder.
Was about halfway through the other when I noticed that a patch of raw edge wasn't being hidden under the tape. Pulled out the basting (which was running stitch in #100 silk), picked out the machine stitching, basted the raw edges together (with the thread I'd pulled out of the tape) so they would stay lined up, re-stitched the tape. I'd left the White set up, but this wasn't why I thought I might need it again.
Put fresh thread in my needle and started to re-baste. About three-quarters of the way through, I noticed that I'd basted in a wrinkle, picked back, re-did it. Almost done, I saw that a patch near the beginning was loose and not quite caught in the basting, which meant that the shoulder seam would miss it altogether. Finished anyway, puzzled a while, then undid the basting from the beginning back past the loose place. The light was rapidly fading even though it still lacked half an hour of sunset and the ground was covered with snow, so about halfway through hiding the end inside the thick wool, I knocked off for the day and cooked supper.
Glycerin on my fingers was a great help.
Somewhere in there, I sewed the collar and cut it out.
I'm giving serious thought to hand-stitching the crease in the mock-fell shoulder seam with ravellings, then making the second row from the back, guiding on the "ditch" of the binding. The yoke seam of the back, done entirely by machine, is fine, but this seam is front and center.
After supper, I processed a couple of pictures for this file and installed them. Is that worth an entry in WebLog?
I've finished repairing the hong-kong binding on the shoulder seam. Can this be it? Am I ready to sew the back to the front?
Dallying, I cut out the lining of the collar, just a tad bigger than the collar to grade the seam. I used the nonce-pencil dots as a guide at each end.
For further dallying, I'm stitching the crease of the collar with a ravelling. This allows me to ease out the pleats that want to form in seam allowances at the curve. I'm working from the silk side, to allow me to leave a uniform thread of the wool showing. The thickness of the fabric requires spaced back stitch to make stitches of a reasonable length — I hope I never want these stitches out!
For an inch at the start, I sewed the collar only, and plan to do the same at the end, so that I can split the collar to fit over the neck. I originally planned to sew the crease in the lining separately, but silk — particularly raw silk — is less springy than wool, and I think that leaving it pinned until time to split will set the crease.
I intend to sew the collar on by machine, then hand-hem the lining to the inside of the shirt, then quilt the whole collar with ravellings, which should be invisible on the outside and make a striking pattern on the inside.
⁂
My fingers were going numb when I finished the first needleful of ravelling, so courage! — let us set up the machine.
⁂
It's beginning to look a lot like a jacket!
⁂
Creases in both collar and shoulder seams stitched, and I have only one skein of ravellings left. But I saved the strips cut off to straighten the ends, and the weft thread is the better thread.
When I took down one thread, I deemed it too long, fearing that it would wear through before being used up, and tried to break it in half. I couldn't break it with my bare hands, so I used the whole piece and it worked just fine.
I think they are weft threads; they are all crinkled when I start sewing. But the remaining skein looks rather long; perhaps I collected it when I cut off the selvage?
I had been thinking that I'd bind the sleeve edge when I set in the sleeves, but that is all in one piece and the armhole has two seams in it: the shoulder seam and the yoke seam. These seams wouldn't bend at all well. I think I'll bind the armhole; there will be only a quarter inch of seam allowance on the sleeve head; it should be easier to ease out the ripples than it was on the sharper curve of the collar. And I can pin it backed off from the basting line by a millimeter, which will make the curve gentler.
Oops! When I started to pin the collar to the jacket, I discovered that all this horsing around had stretched the neck. But I sewed the White's maximum-length stitch around the neck, gathered it up, smoothed it out, and then had to stretch it a bit to fit the collar.
I'll hand-baste the collar, to make sure the finished edge of the collar and the finished edge of the front stay lined up.
⁂
Oops. When sewing the collar on, I left ends to thread into a needle: three inches on one end and four on the other. I need at least six.
Oh, well, I'll manage — I always do.
I meant to leave the gathering stitches in, but they showed in spots, so I picked them out. The hand-basting was 100+ silk, so even if it shows, it won't show.
I'll sew the crease in with 100+ too. I
could have sewn the ends of it with the tails, had
I left a proper length.
Collar looks pretty good, so far. Ends tucked in, crease basted, I've started to fold under the raw edge of the lining and pin it in place. I think I'll leave hemming the lining until after I quilt the collar.
In the morning, I sewed bias tape to the armholes, then trimmed ravels off the armholes to get ready for basting "in the ditch".
I pinned the tape about a millimeter from the raw edge, which should make the tape two or three millimeters narrower on the back and eliminate all risk of the edge of the tape poking through the seam. After sewing the collar on, I had to go around the seam with the eye end of a coarse needle to pull the tape back inside, then push the needle around with the eye on top of the tape to tuck it back into the seam.
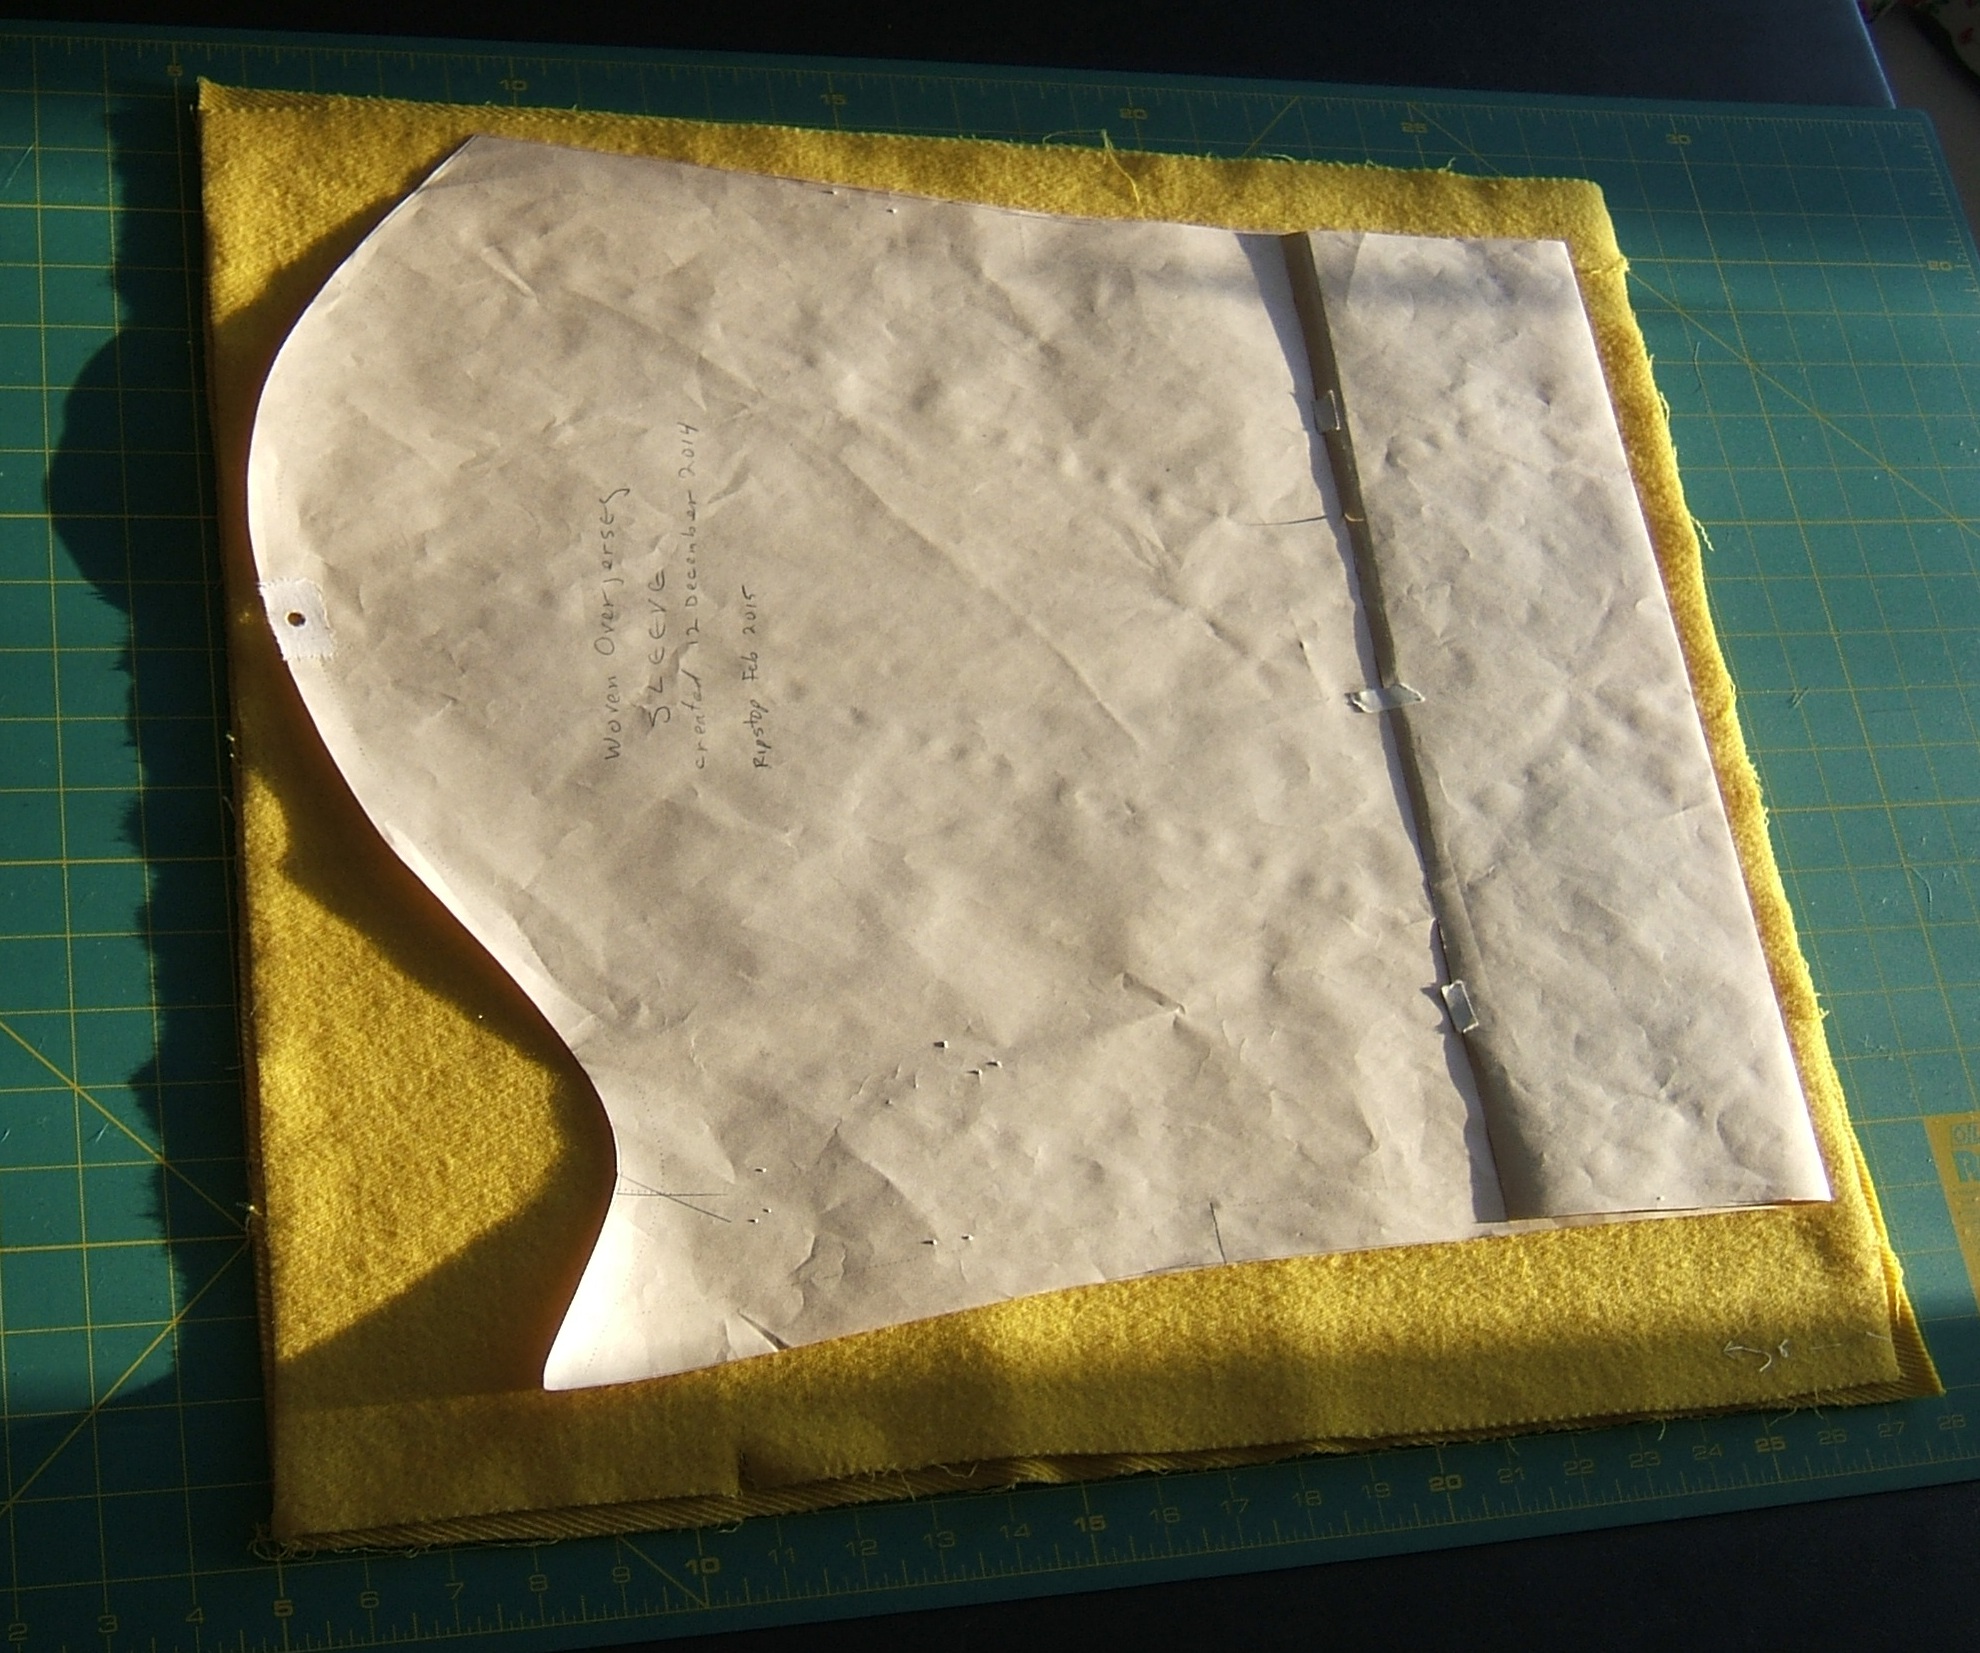
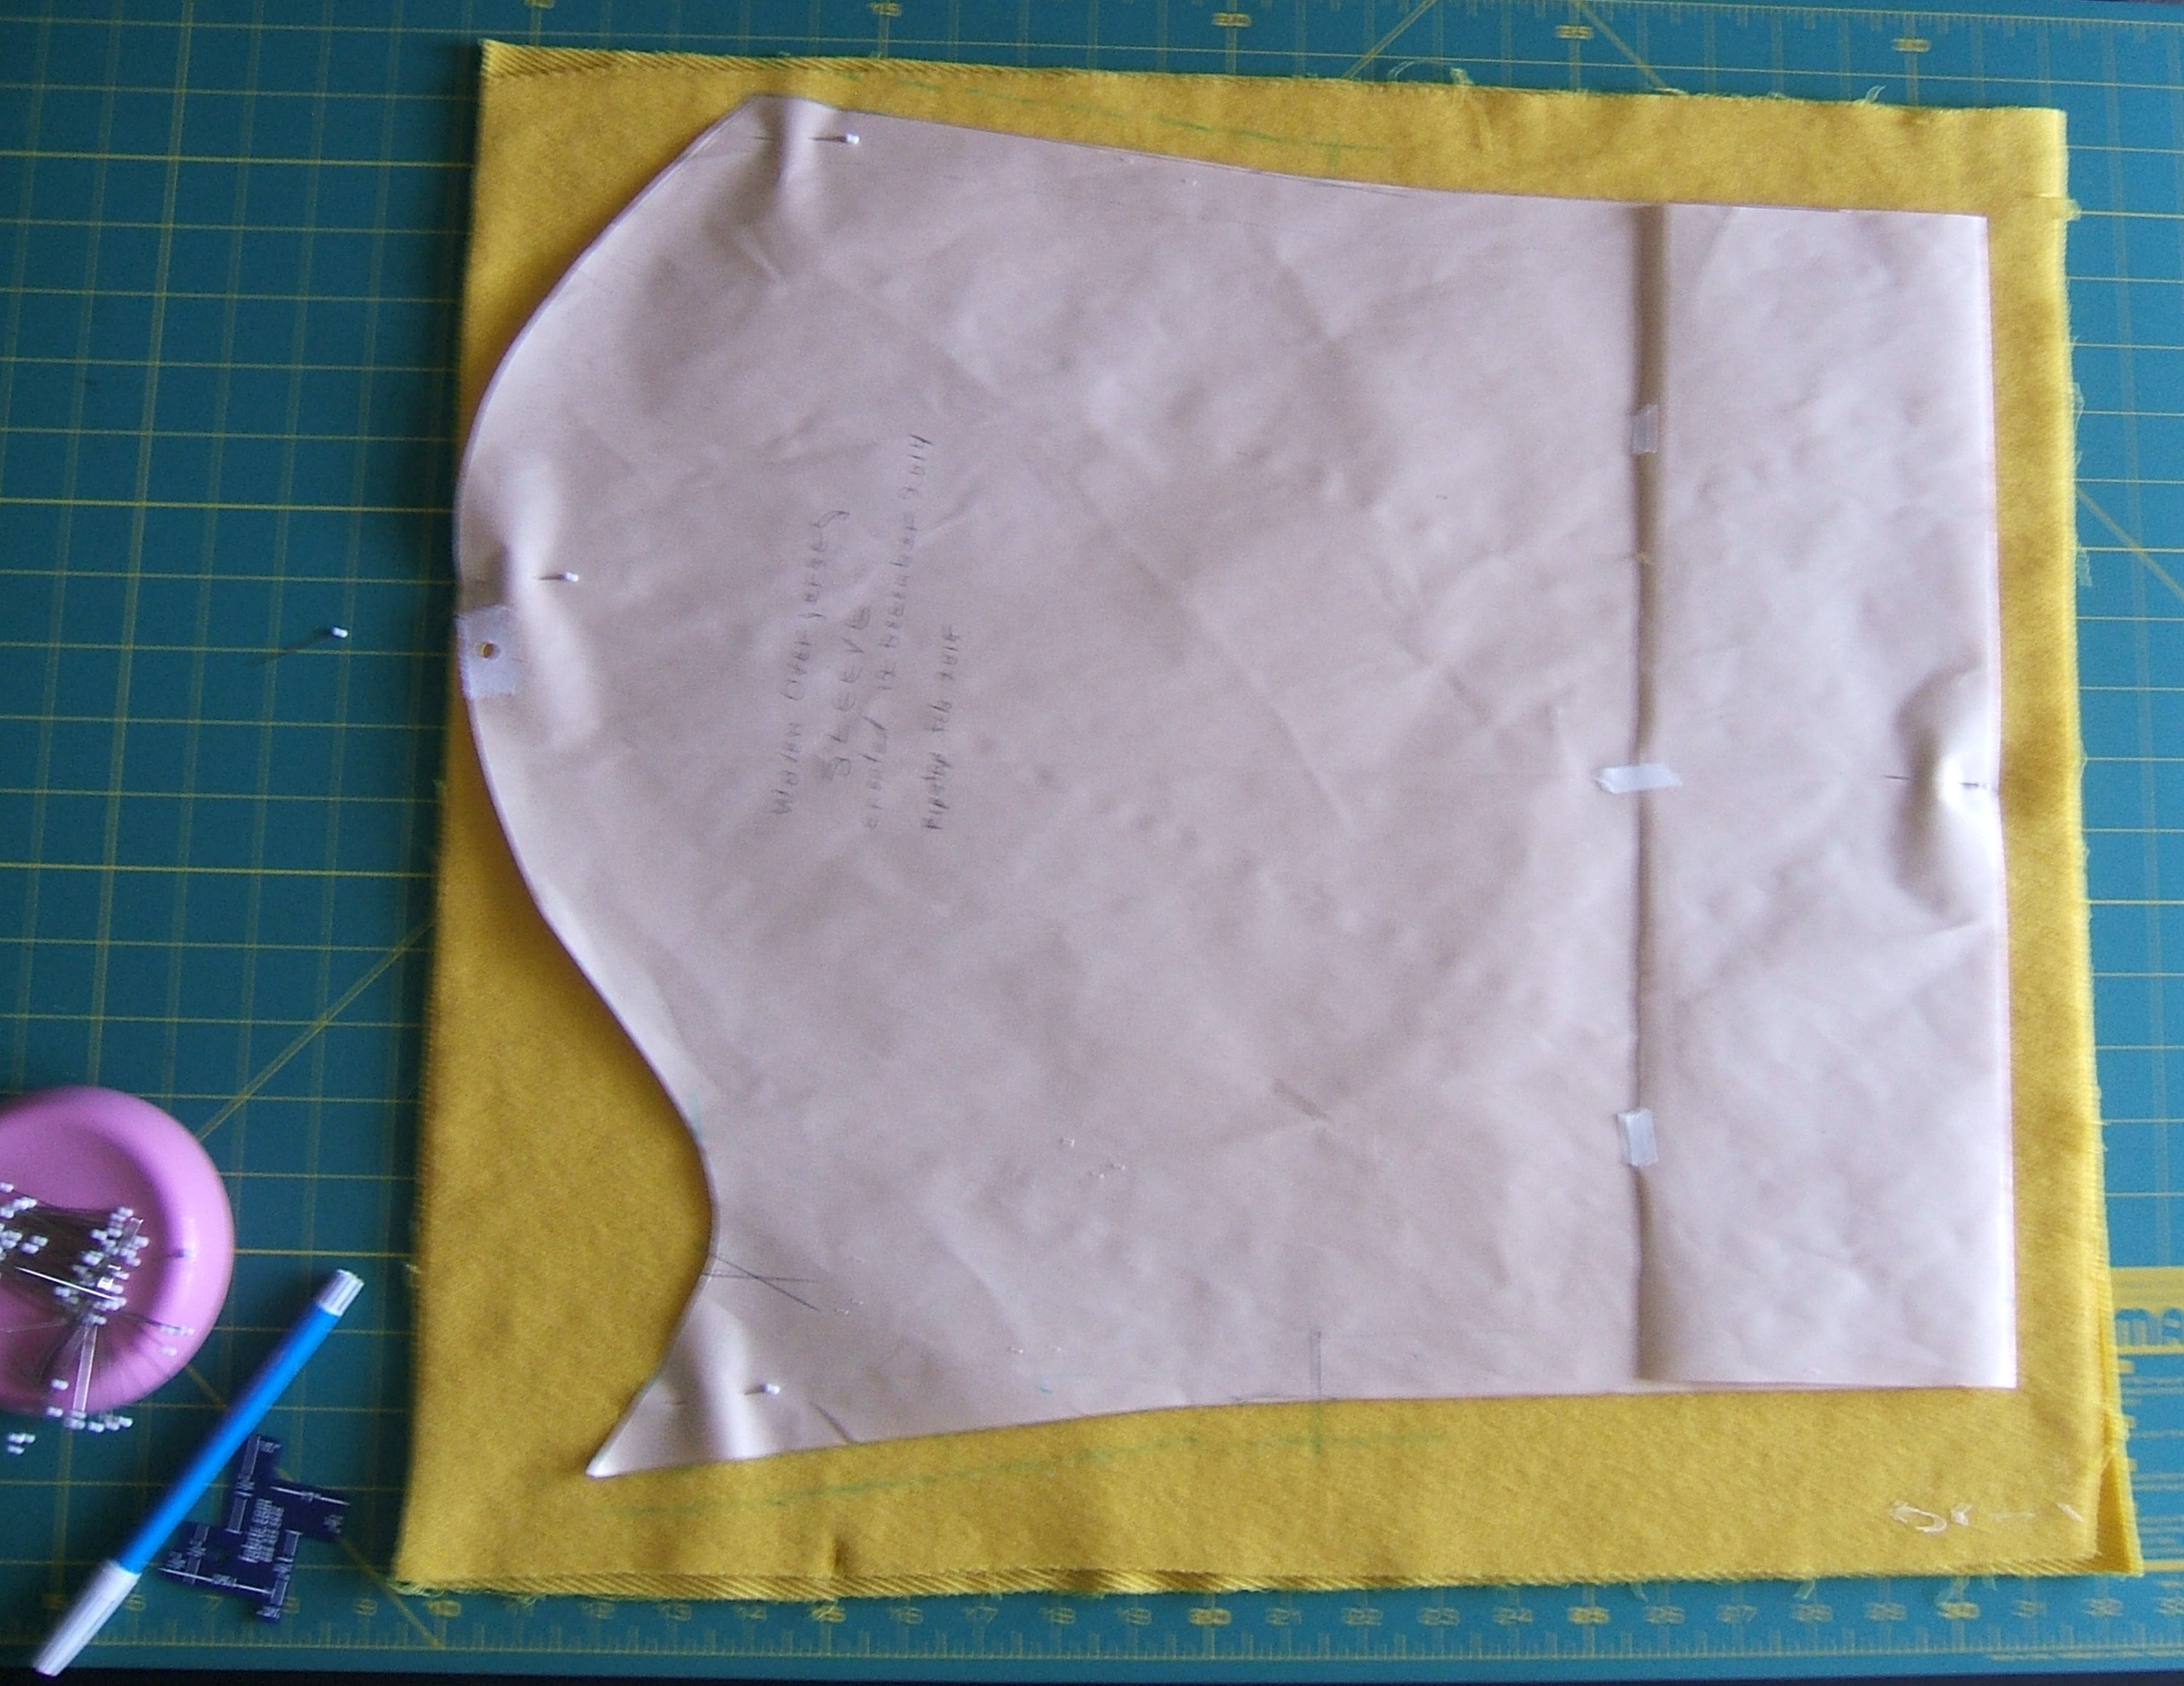
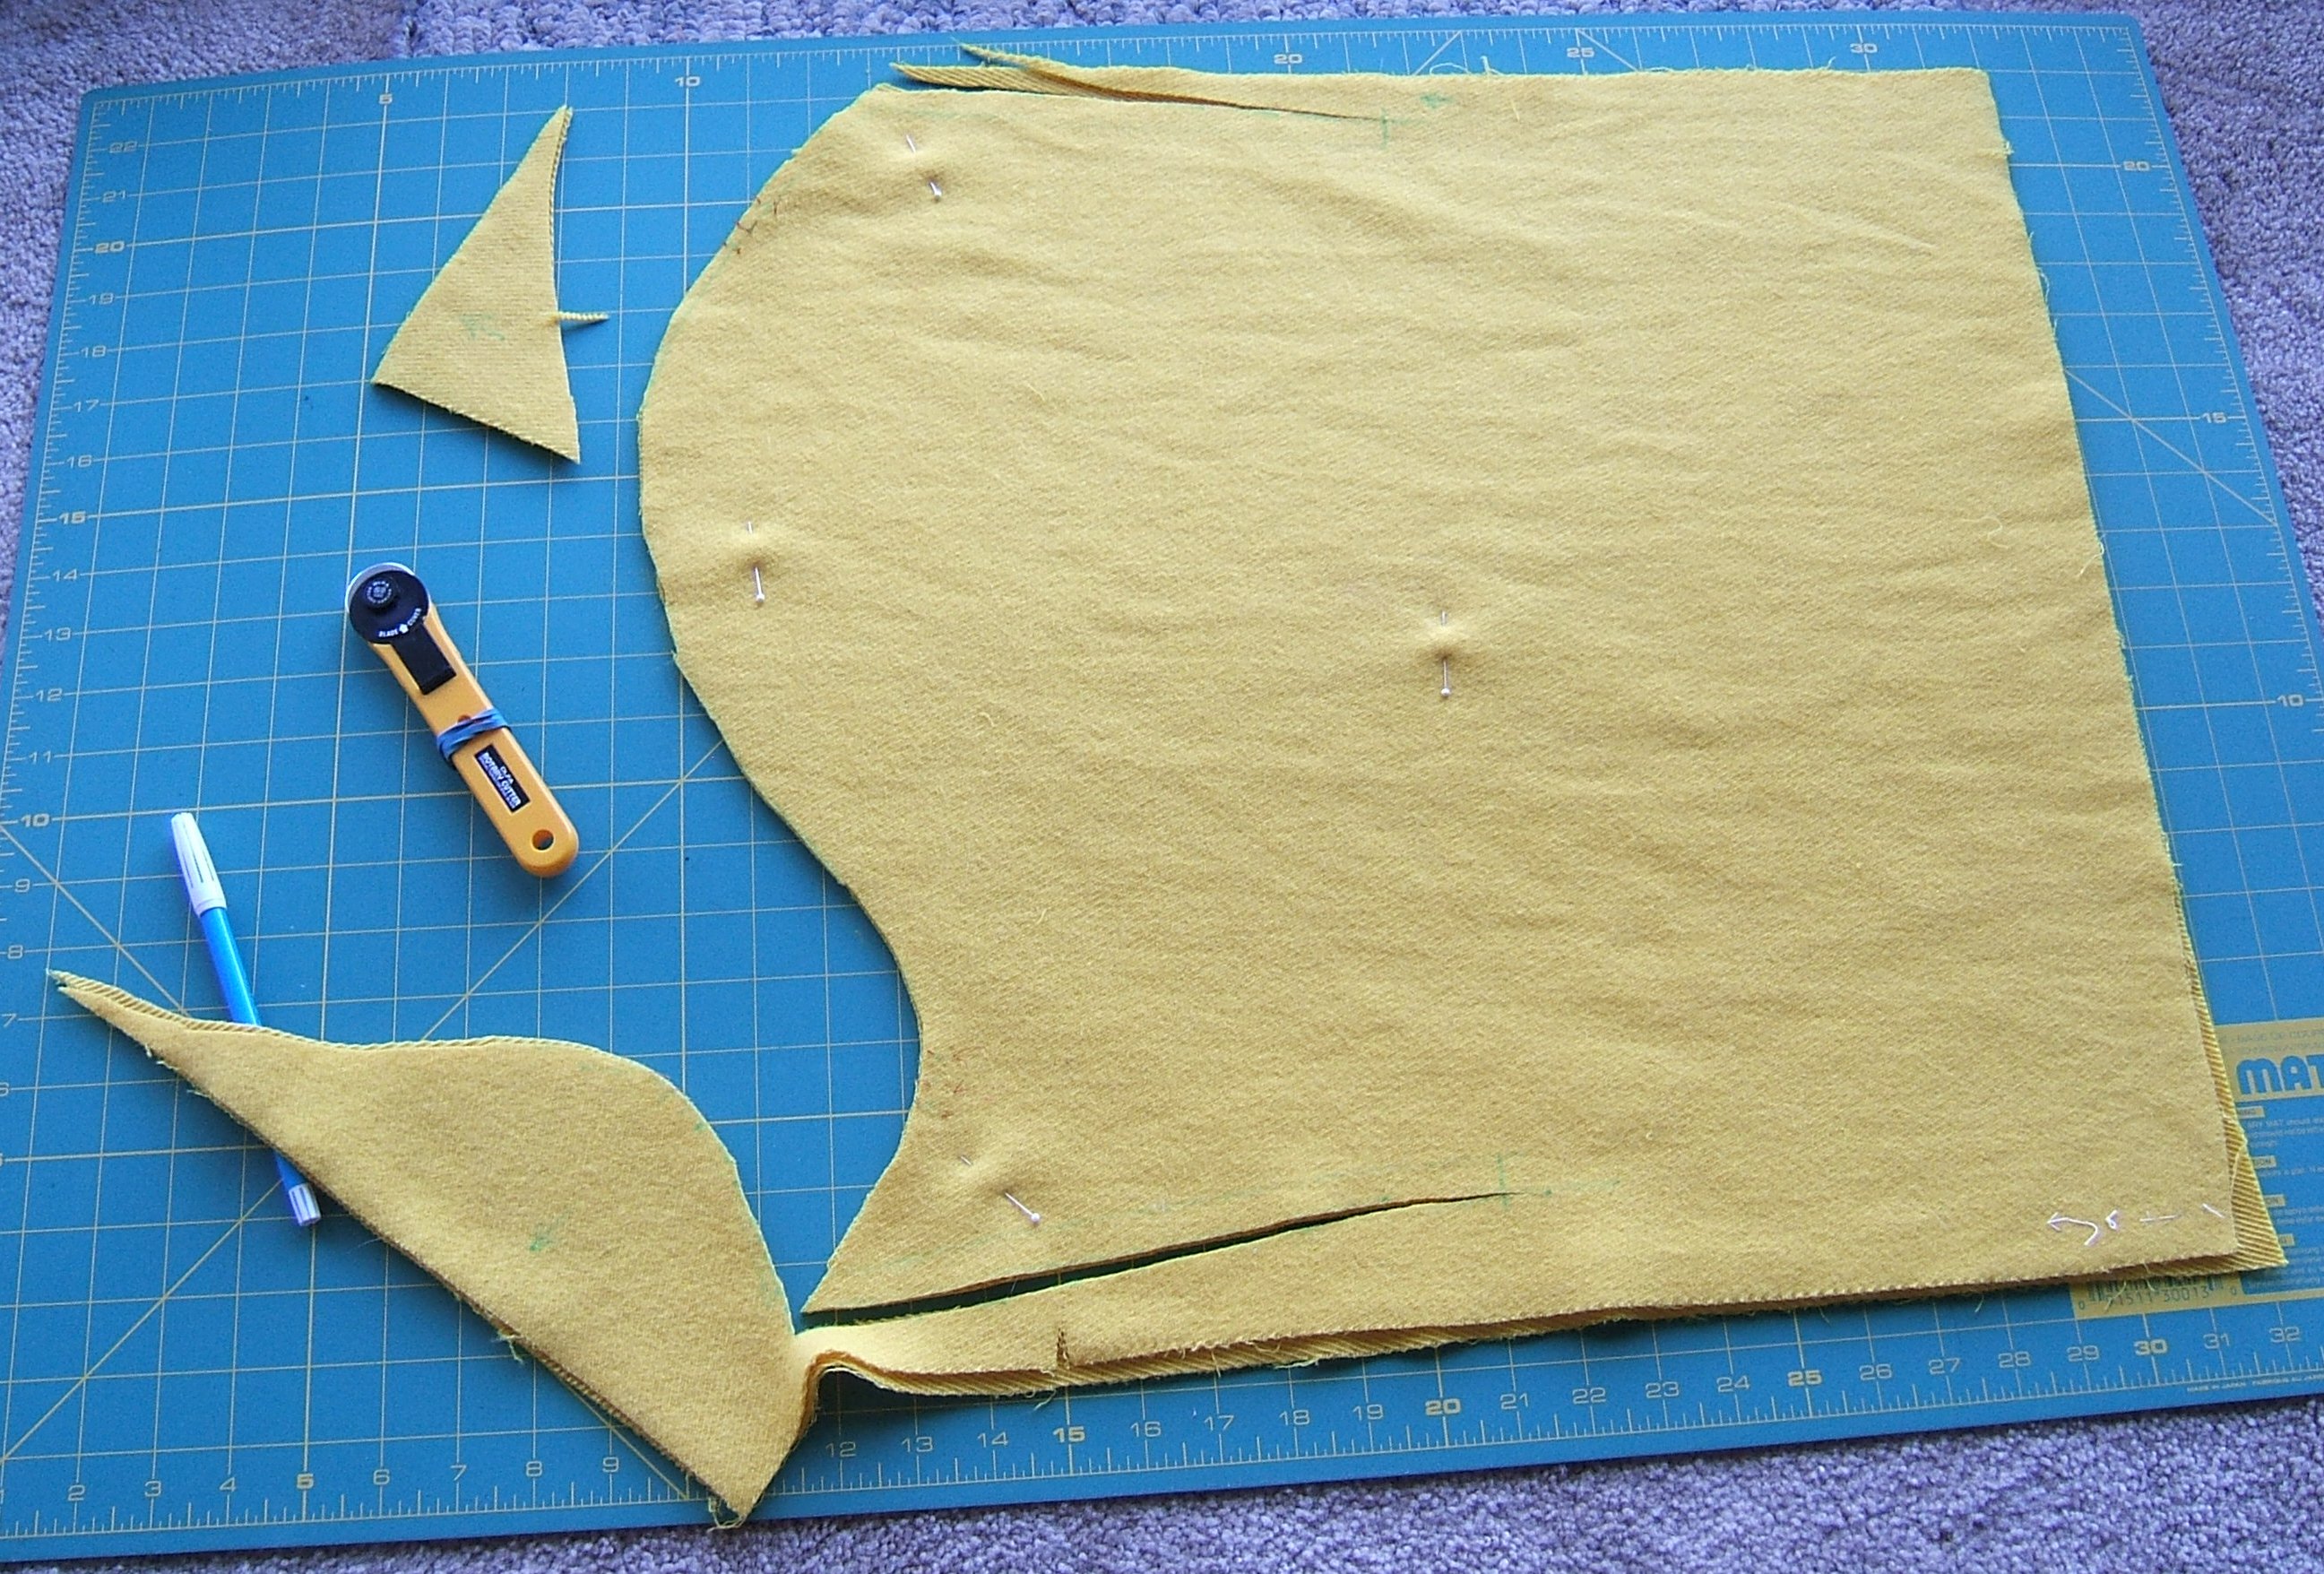
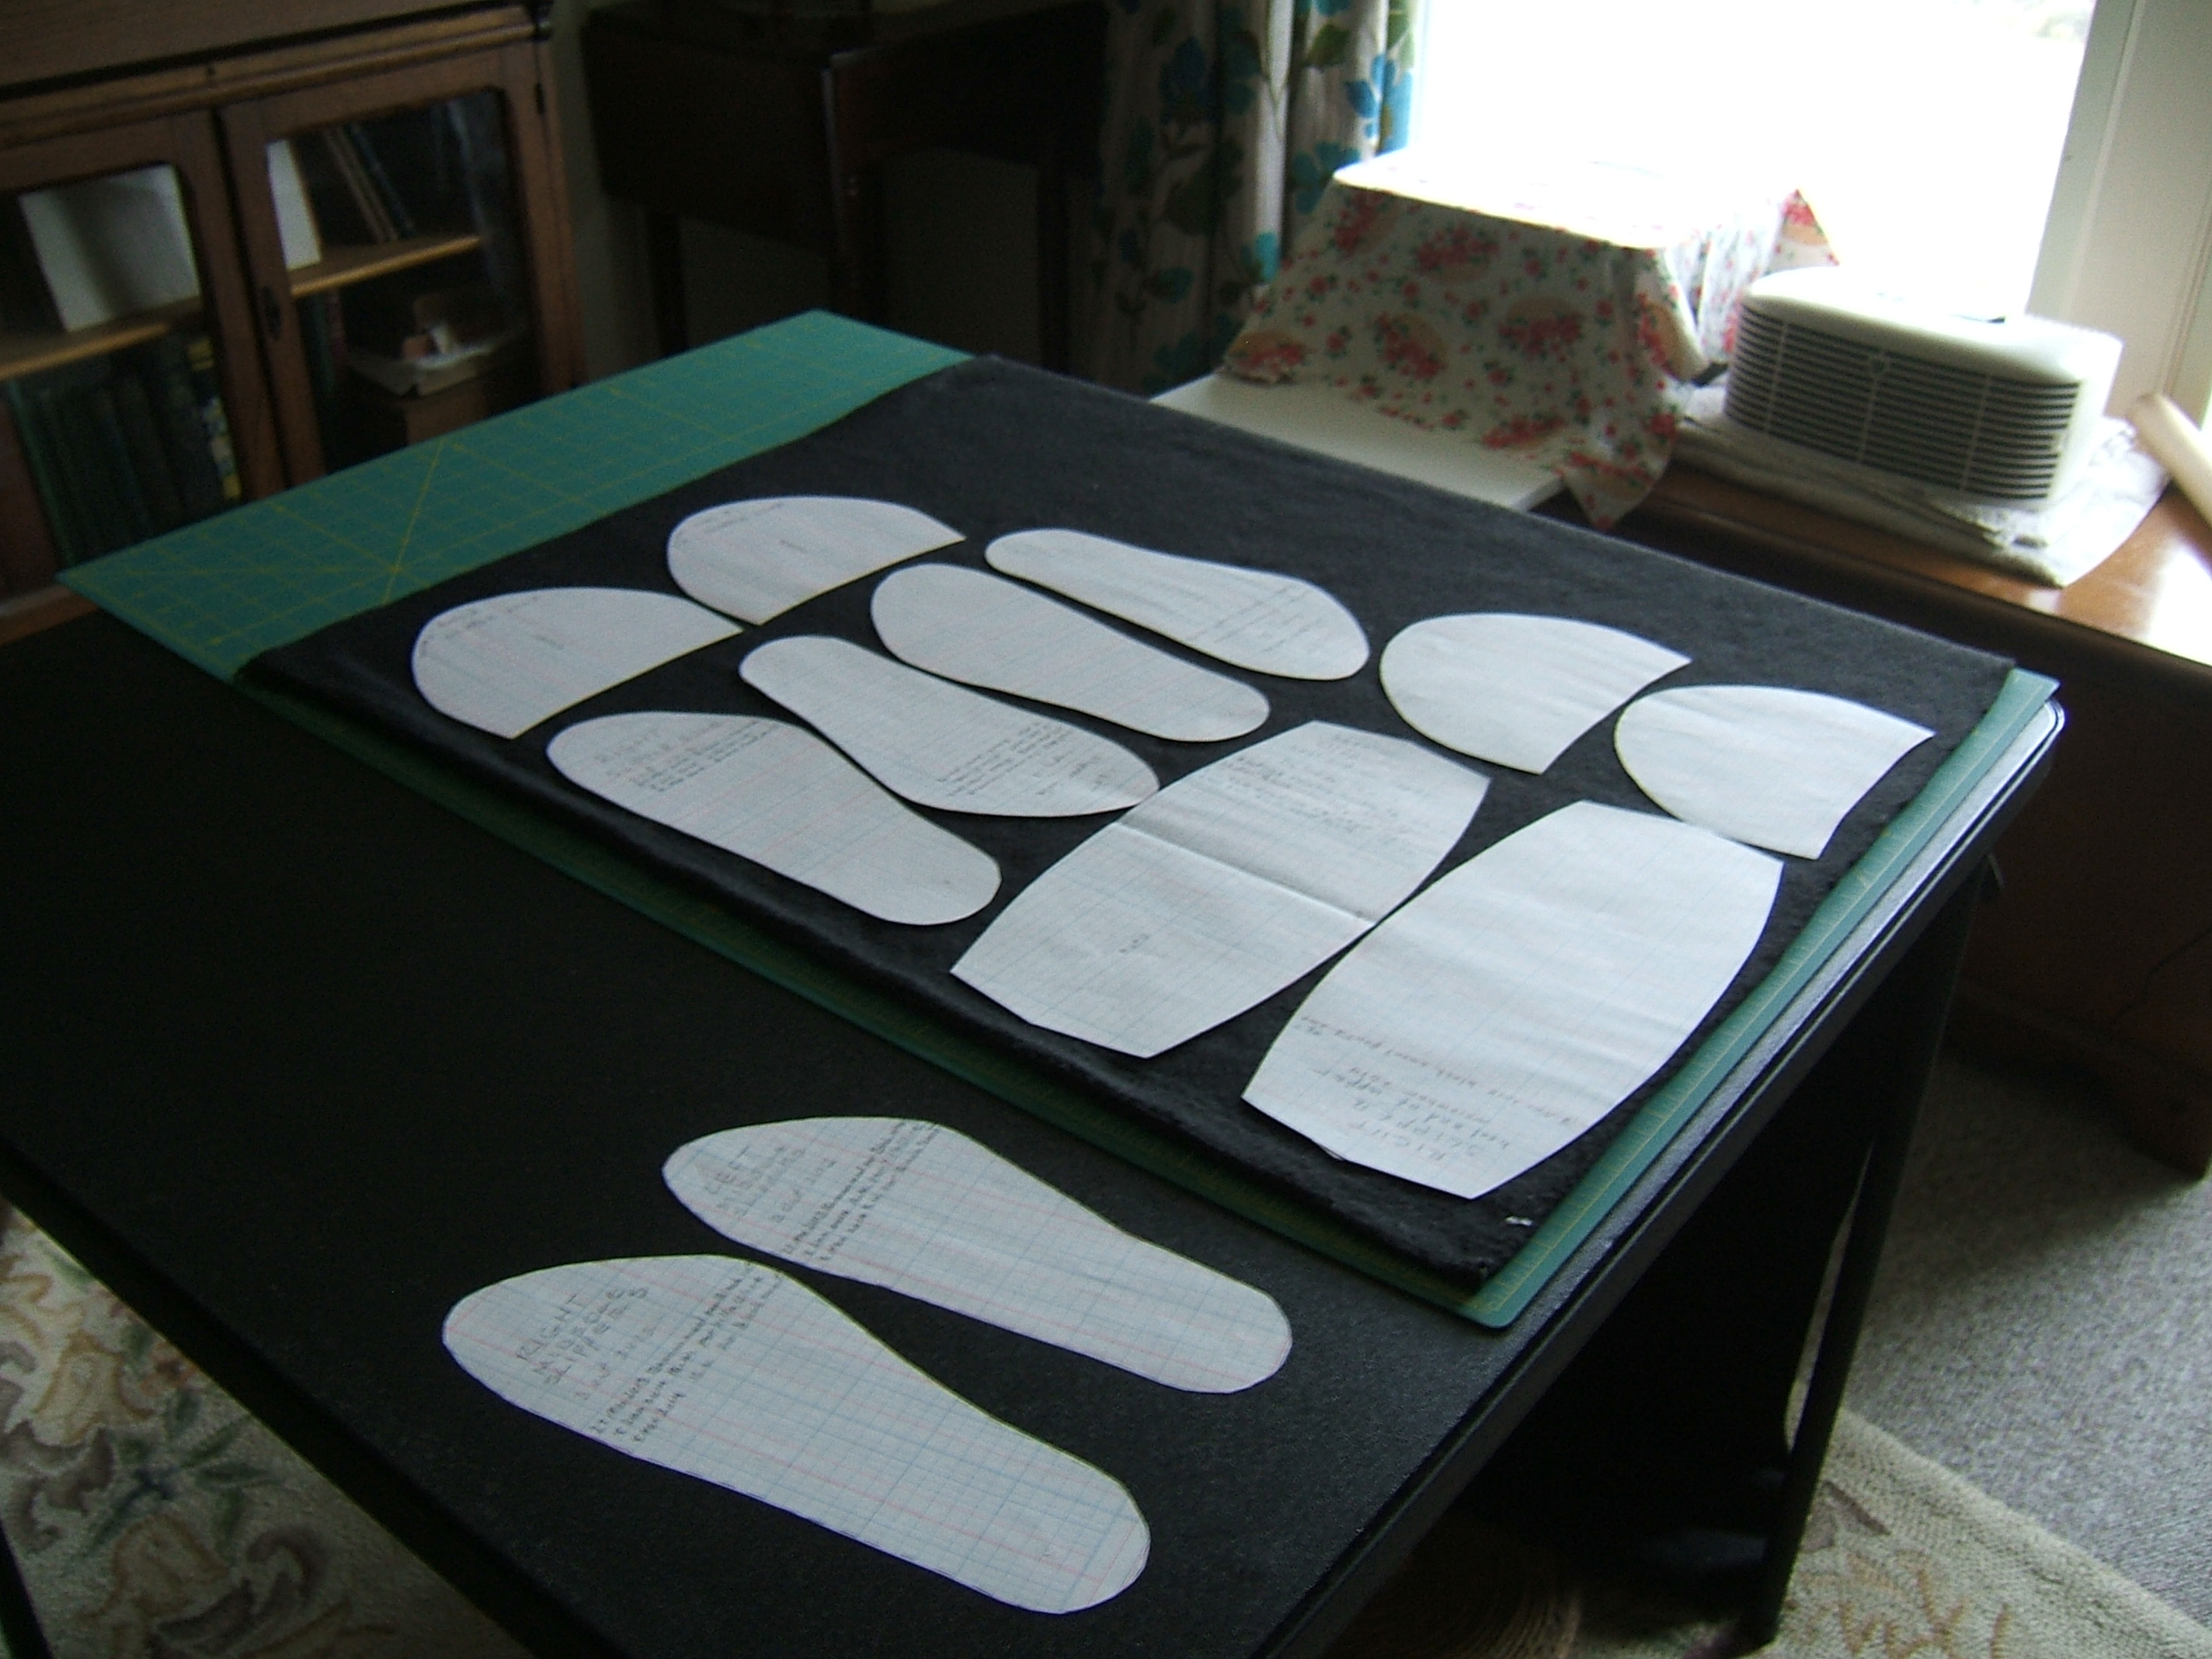
Since basting is something I can do while stupid, I next studied the sleeve pattern and drew around it with a wash-out marker:
There is room to cut the sleeves a good inch longer than the pattern. The extensions may end up looking like cuffs that I'd have needed to put on so the elastic would work. And black cuffs don't show dirt, so I had black cuffs on all my Jones Cyclewear jerseys, with a black neckband to make it a little less obvious. Not to mention avoiding "ring around the collar". (Those commercials were as memorable as the ad agency promised: to this day, I refuse to buy that brand of laundry liquid. It really does get out ring around the collar, but so does Tandil.)
⁂
After my nap, I unpinned the pattern, shifted it to match the notches and new cutting lines, drew the new corners, and took another picture:
Somewhat to my surprise, the new lines blended themselves into the old ones with no effort on my part. Sliding the pattern didn't make nearly as much difference as drawing an extension would have.
darn small hole in back of purple
sweater
After hunting for my gray 100+ for a while, I concluded that I bought only one spool of gray, and it's #50. I should have put the packing slip into the box with the spare spools of silk.
But white 100+ silk worked just fine. I ran it inside the yarn for the most part, and sewed broken yarn to adjacent stitches. I think I did manage to draw the broken ends together, or at least closer. It shows very little, and I think it will stand the strain.
I had to darn it today, because I need to go on
the Sprawlmart tour tomorrow and my new jacket
isn't ready.


I must put "make a new caddy" on my to-do list. The fabric that it's made of is only slightly stronger than a premium paper towel, and the design doesn't suit DH. (Not to mention that he just asked me to repair it yet again.) I have a number of stout cotton scraps that would do nicely.
Found two more holes in the purple sweater while taking it off, one in the neck-cuff and one in a wrist-cuff. I think the wrist can be darned. The neckband hole is larger, and the neckband pushes my chin when it's folded three times, so I think I'll "repair" that one by picking the broken yarn out all around, then unravel enough from the cut-off piece to bind off the exposed stitches.
Both armhole bindings are basted, and I've resumed pinning the free edge of the collar lining. But I think I'll unpin it and make another pass of sewing the allowances of the wool flat. Then permanent-baste the lining edge with black silk — 100+ or #50 yet to be decided — before quilting the collar with ravellings.
Two-line correction tape is too wide to make a quilting guide. I shall cut a strip across six-line tape.
⁂
After my nap, I attached the sleeves — the second one by artificial light after supper — then watched a piece of Star Trek while back-stitching the collar seam with ravelling.
And the free edge of the collar lining is turned under and pinned. More hand work tomorrow.
Chirp chirp, twitter twitter: when I knocked off for lunch, I put the jacket on a hanger!
I tried it on first; it looks as though the sleeves are long enough, needing only enough raw silk to make an elastic-compatible cuff. Time to mark the pattern pieces and put them back on the nail, but I'm not at all sure how I managed to reach that nail when I put the pattern up there in the first place. I'm pretty sure that it involved our lovely stepladder/step-stool.
As predicted, I spent the morning in the rocking chair, but there were some adventures along the way.
My first act this morning was to look in all the places where I'm apt to abandon a spool of thread, then I looked in the two places where silk thread belongs: the lower-right drawer of the White and a box in the paper drawer under the Necchi. Then I took down the two boxes of Tire thread from the reserve shelf and got out the last spool of black 100+. Perhaps I bought only one spool of that; I should have kept the packing slip.
Just checked: I didn't keep the packing slip for the half-dozen balls of ecru 100/6 on that shelf either. They are in the shipping box, but it doesn't have "Holly Van Sciver" on it. Or my address either. But it does have a rough spot where one of those transparent envelopes has been ripped off; I presume that the address and return address were on a packing slip in the envelope.
I used the moustache scissors I keep in the arm of the futon to stuff a wool scrap into the hole of the spool to make a pincushion, used the scissors to remove the shrink wrap, and stuck one of my #10 crewel needles into the spool's pincushion.
There are only four needles left in the packet. I must buy another one the next chance I get. But I don't remember where I got those. I don't think it was Lowery's, but I'd better check when I go in to buy a belt for the jacket.
Then I sat down to sew down the collar lining, and after putting the needle into the fabric, noticed that there was no thread in it. I had a long piece with the tails nearly equal, how could it fall out? The needle had been threaded when I took it out of the spool's pincushion, so it had to be within arm's length, but extensive searching failed to find it. I feel like grumping that I should have used #50, but the same accident befell a piece of size A silk in the dentist's waiting room once. Well, not quite the same accident: I cut the thread, then dropped it while trying to thread the needle.
I got the collar basted with no further incident, save that I broke the delicate thread while trying to tuck in an errant seam allowance at the corner. Finally opened the corner out and folded first the allowance that had been folded second, and that got things in line.
But while re-threading the needle while doing the final stitching with ravellings, I noticed a pin on the floor, and after picking it up, noticed that the needle was no longer in my hand. Once again, extensive searching, did not turn it up. I blew the dust off the powerful magnet kept on the fridge in the garage and swept that around, moving my chair and the scratching post: still no needle. And that one was perfect for ravellings, not to mention that it might not be Roomba that finally finds the missing needle.
I wasn't quite done with the collar at lunch time, but I'd run out of thread. So I left the replacement needle on the magnetic pin dish and ate, and was about to type a worry that it might get bumped and hide itself under the pins when I got up, fetched it, threaded it, and left it stuck into the paper of ravellings pinned to the curtain.
I think the replacement needle is harder to thread than the one that I lost. Sews just as well, though.
⁂
The show on TV tonight was tolerable, so I finished the collar and got the sleeves ready for the second row of machine stitching. (I plan to sew it from the wrong side, ditch-stitching along the binding.)
I'd intended to hastily running-stitch the crease into the armhole seam, but spaced backstitch is the only way such thick fabric can be sewn. Still went reasonably fast. As before, I kept all the stitches in the valleys between the ridges, though a time or two I skimmed the needle under a ridge.
repair caddy on armchair Don't
recall when I did that. Do recall making a
cobbled-up job of it.
In the morning, I sewed the armholes, cut a strip of bias tape off the china silk, pinned it to a side seam, sewed it wrong, and cut another strip of bias tape.
I had pinned the tape on with the wool showing, then sewn the tape with the silk showing off the side of the presser foot, and the wrap-around was hopelessly too narrow at all points.
In the afternoon, I picked the tape off the side seam, re-pinned it, pinned tape to the other side seam, sewed the tape on, discovered that I'd run out of bobbin thread at the top of the pockets.
I didn't deem the thread left on the spool sufficient to wind a bobbin, so I took the last spool of white #50 out of the box on the reserve shelf. I'll need to put in a Superior Thread order fairly soon; I think I'll get a spool of King Tut to try it out.
So I filled the bobbin and re-stitched from the top of the pocket to the hem. Then I found that the tape was not by any means going to wrap, except for the part between the bottom of the pocket and the hem. Two layers of wool jacketing are a healthy eighth of an inch thick, the fold at the bottom of the pocket is three layers thick, and at the hem we have three layers, plus the nylon tab on the end of the elastic, and there's three layers of china silk in the binding on the edge of the casing too.
So I cut the stitches at the bottom of the pocket and pulled them out. I'll re-stitch that section with an eighth-inch allowance, which will make the fold-down a quarter inch wider, and I think that that will do it.
But I'll do that tomorrow — or the next day if I come back from my ride tired.
I'd better darn the hole in the bottom ribbing of my purple sweater tonight, though, since I have nothing else to wear. I don't care if the hole in the neck ribbing gets bigger, since I plan to pick it out all the way around.
It was a gorgeous day, and I stayed home to sew. I've forgotten the forthing and backing of the morning, but the side seams are now ready to pin.
Except that I'm going to have to run an easing thread into the front, where the rectangle I cut it from was stretched out into a point that I couldn't pat back. At least an inch of stretch, but this fabric eases easily.
I just hope the back on the other side doesn't need to be eased!
After the laundry, I had time to sew the side seams. Or I would have had time.
I lengthened the stitch, put in easing stitches, pinned the seam, and had a good start when the White began to act very oddly: the drive belt had broken.
I'd noticed something sparkling yesterday, observed that it was the connector, and I'd cheerfully gone back to sewing without pausing to reflect that the connector had not been in the habit of sparkling. The sparkle was the metal showing through where it had cut the rubbery plastic. And I made it cut the other end while trying to re-install it.
Well, I have a pair of needle-nose pliers that fit neatly in the groove between the barb and the partition. (The connector is a small rod with a ring around the middle that fits against the ends of the tubing, and a barb on each end that must be forced into the tubing.)
The pliers made short work of slipping the unintentionally-cut end onto the connector, the more so because this time I cut where the barb had cut, instead of cutting off the bit that had been stretched over the barb.
But I just couldn't force the other end onto the connector. I didn't dare attempt to hold the connector with the pliers, as they would force the barb through the plastic again. Finally I took the belt out entirely and put it back beside the big pulley instead of over it, so that I'd have lots of belt to work with, and wound the gap up through the hole to above the deck so I could see what I was doing, then stuck one jaw of the pliers into the end of the tube to stretch it, and at last I got the belt back together.
I wound the belt back onto the pulley by means of the handy-dandy notch molded into the pulley for this purpose, then finished stitching the seam, but didn't have time, light, or energy to start the other. (It was already dark two hours before sunset, and it was time to prepare supper by the time I got the belt back together.)
With any luck at all, I'll have this jacket to wear when the weather lifts on Wednesday — on the other hand, I've decided to hand sew the crease into this long seam to make it easier to top-stitch.
Whoosh, if it's this hard to hand-sew inside the sleeve, what's it going to be like running this through the machine?
Easier, I suspect.
I had to stab-stitch at the seam crossing in the armpit, the exact spot where it's hardest to work on both sides of the cloth. At least I was almost through it when I ran out of thread.
And re-threading took the last ravelling out of the paper pinned to the curtain. I've selected a narrow scrap and taken it to the rocking chair.
Ravelling-pressed the crease in the second side seam last night, and now I'm setting up the White to do the last bit of top-stitching. This time I remembered the trick of putting the tube on the machine in the position I want it to be when I'm finished, then pulling the seam toward me under the needle until I'm at the beginning, but I decided that it would cause more trouble in the easy part than it would save in the sleeve.
I'm top-stitching from the wrong side, trying to ditch-stitch along the binding.
⁂
I used the back-it-in trick after all. A little after I'd passed the armpit, I saw the raw edge of the binding peeking out because I was sewing it rumpled. So I picked out that part of the seam and basted the raw edge so it wouldn't crawl out again — using 100+ so I wouldn't have to take the basting out.
And proved that my original decision had been correct. When I backed the sleeve into the machine, I just barely made it to the armpit.
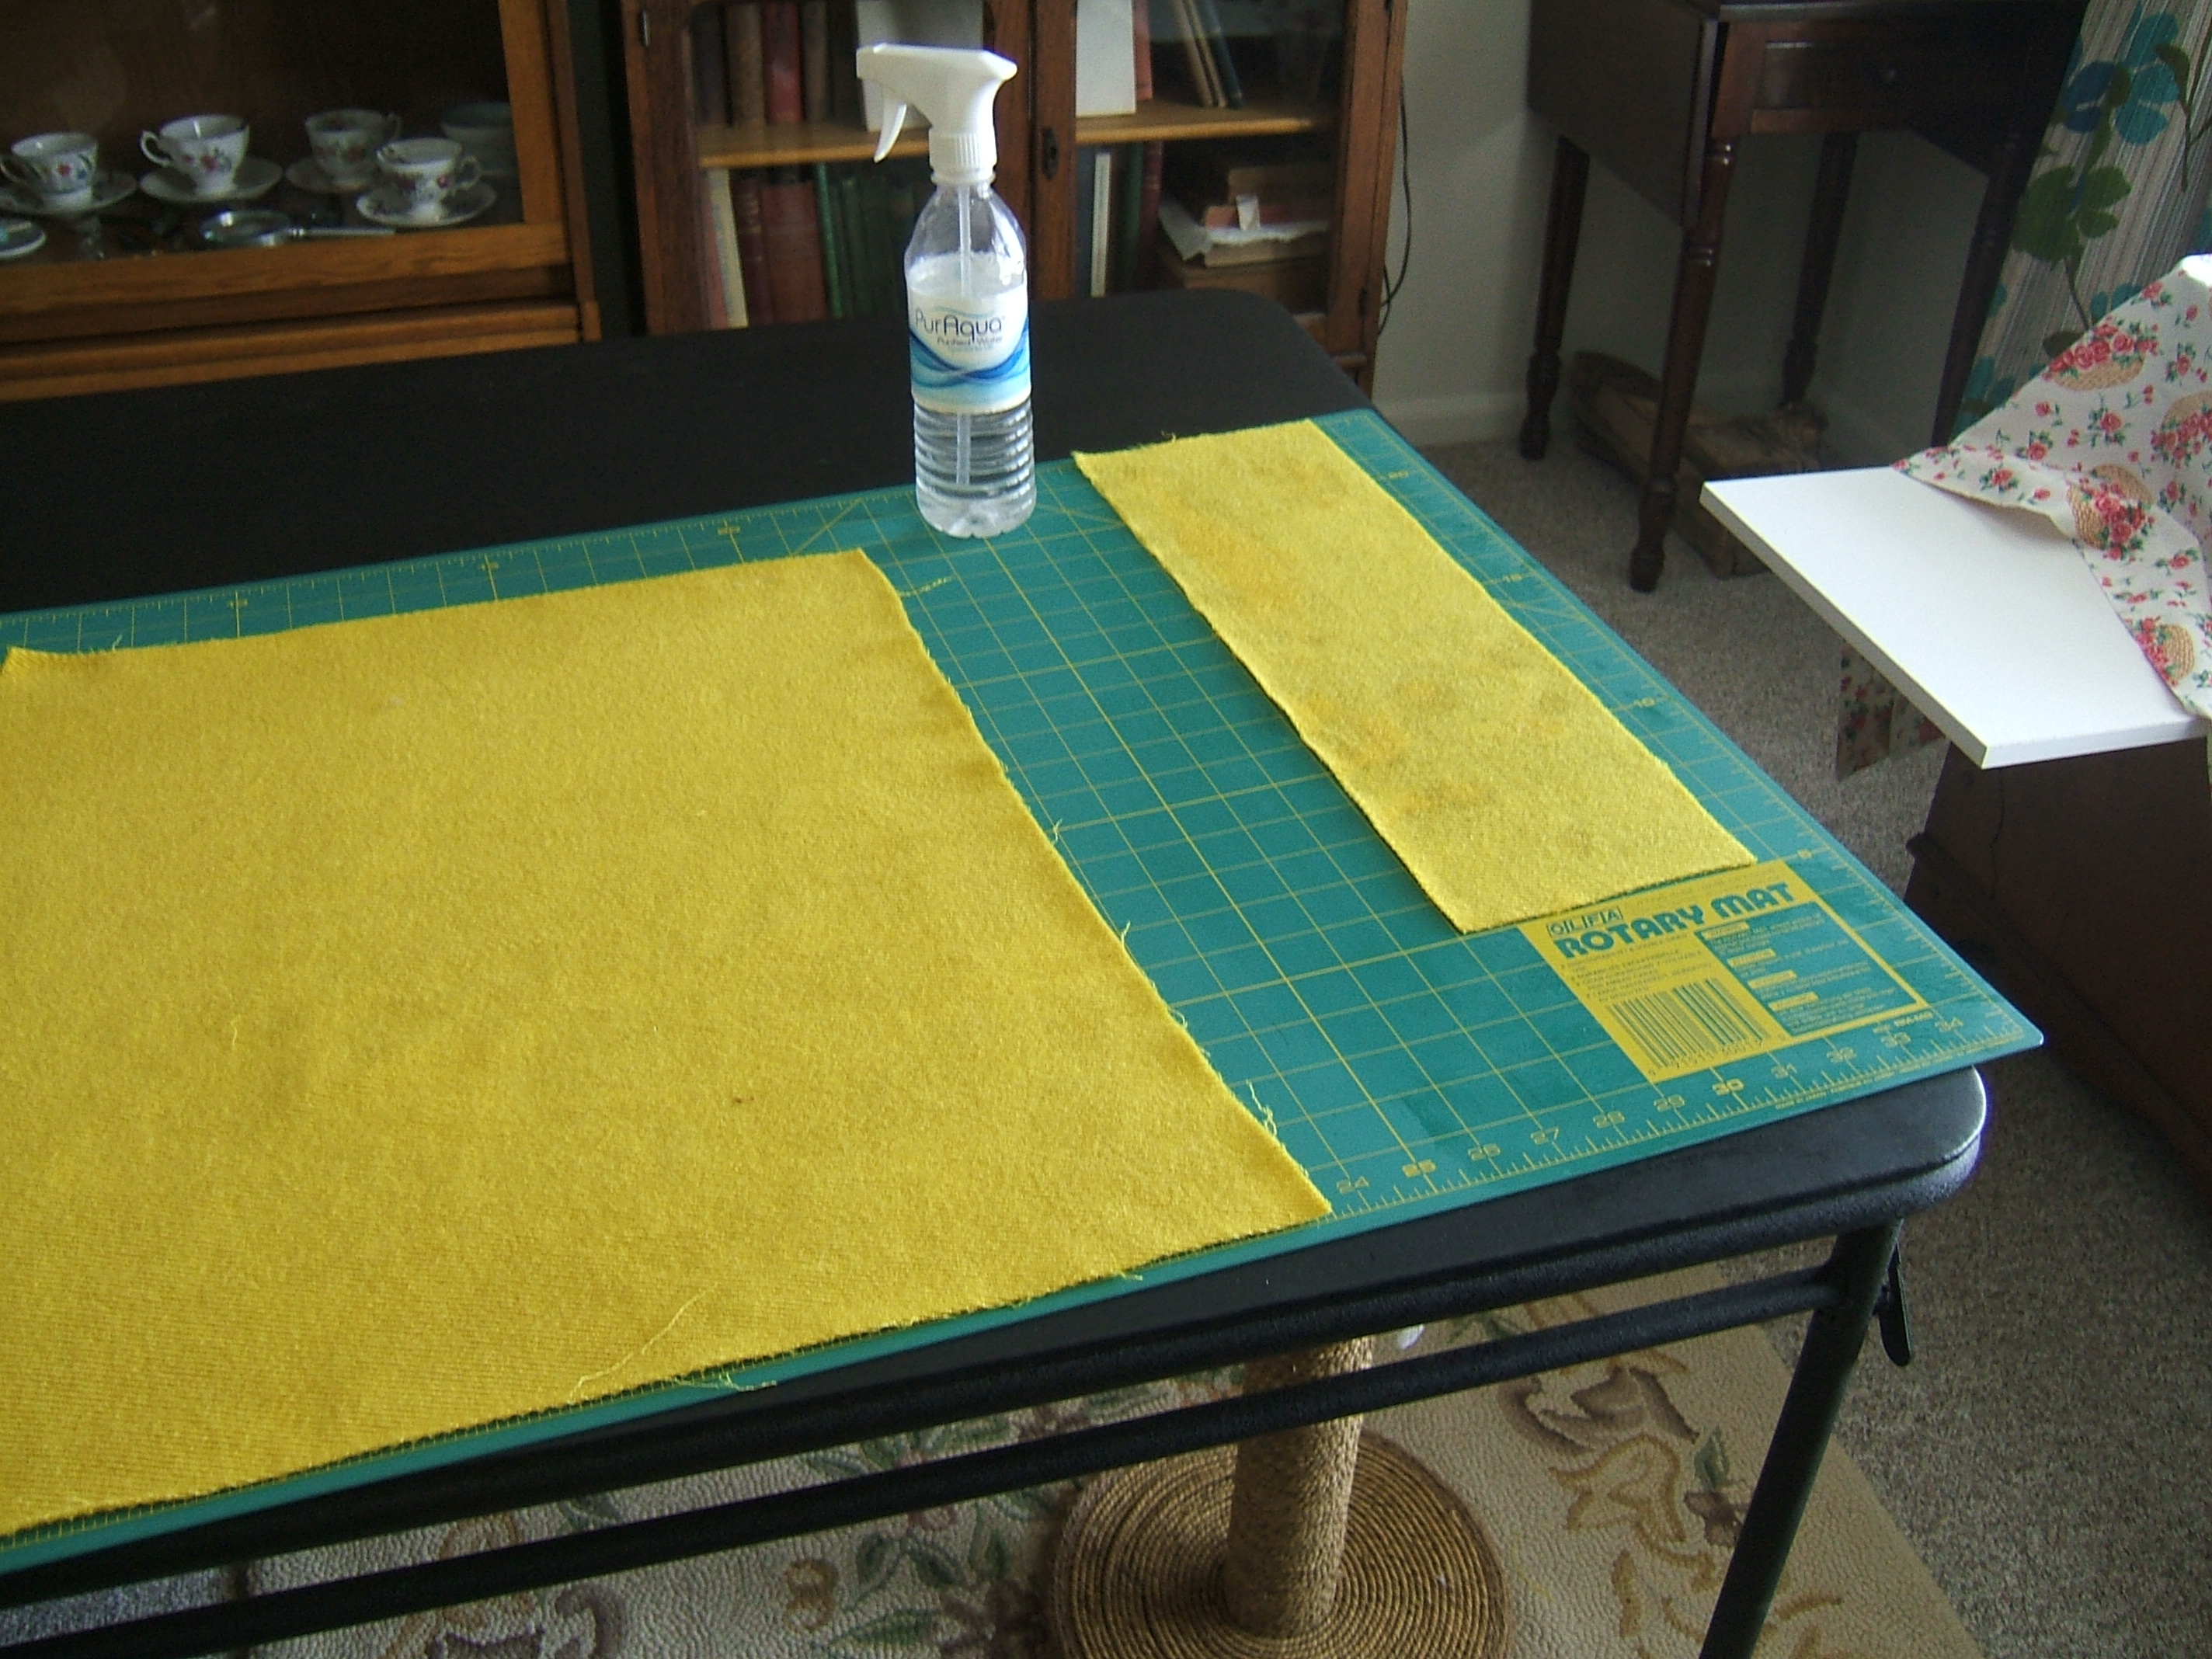
Then I got down my raw silk and measured the sleeves: a tad over eight inches flat. The biggest scrap was sixteen inches long. That doesn't allow for seams, but it would be a good idea to ease the sleeve onto the cuff anyway. But I'd be putting the long grain around the cuff, and I prefer that the long grain run the same direction as in the sleeve. Doesn't really matter when the fabrics are so different, but then the cross grain is said to gather more easily. And <very small type>I need that scrap to make a pouch for all the smaller scraps.</type>
So I tore a four-inch strip off the main piece, laid it on the ironing board, sprayed it with water, ate lunch, and mean to press a quarter inch to the wrong side before I take my nap.
⁂
Make sure there's a link to the new book
reviews I should check
that book out again and finish my review sometime,
but I don't think I'll put it on the to-do list.
⁂
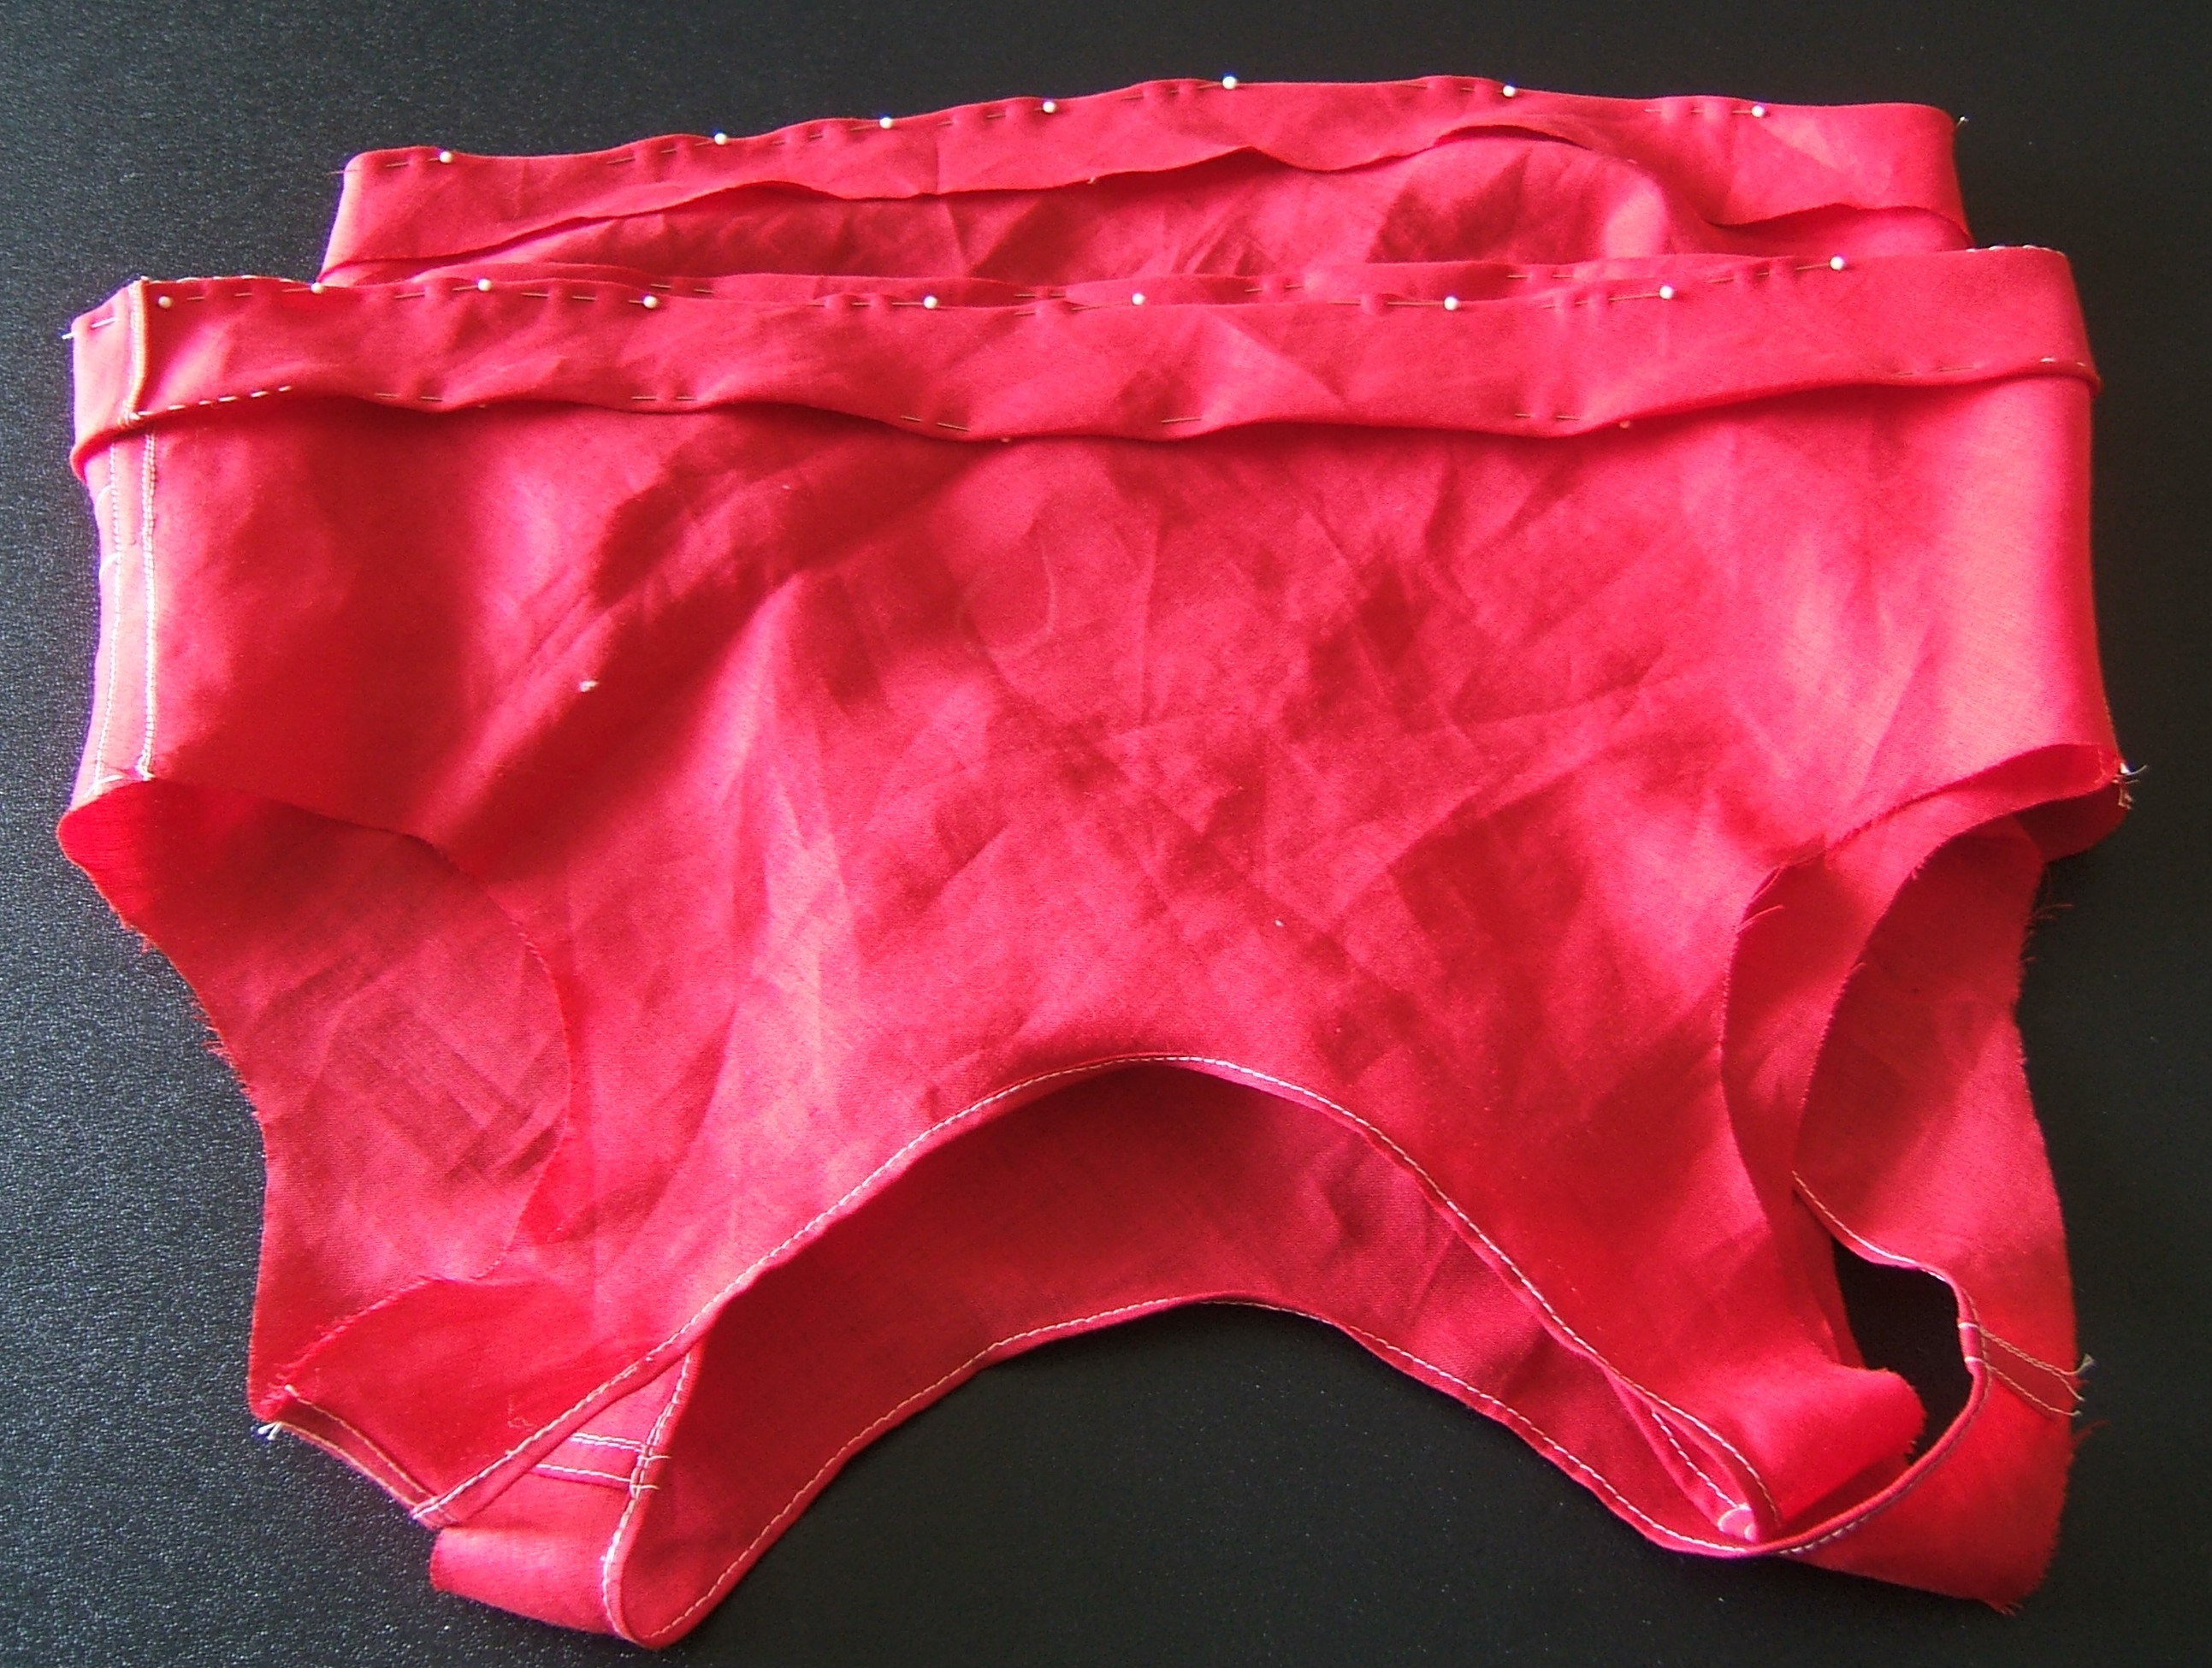
What do you know, given sufficient motivation, I can sew after dark, and black on black at that. More by-guess-and-by-golly in there than I like, but the sleeves are done except for putting in the elastic, and I'm almost through pinning a freshly-cut strip of silk bias to the hem.
But at eight O'clock I became quite sure that I can't have this jacket to wear tomorrow, and knocked off for the day. I may go to Lowery's and buy the belt anyway.
Huh. It's been quite a while since the last pressing of the cuff? casing?, and the iron is still hot enough to hurt if you lay your hand on the soleplate.
Having put away the iron, I think I'll fold up the china silk and put it back into the box. I'm not going to want any more tape for this project. Then I'll take the windbreaker's belt out and measure it and mark my shopping list.
I didn't take it all the way out, just out of the front casings so that I could straighten it, because I thought it would be a pain putting it back. But this morning, planning to take the windbreaker with me when I ride to the fabric shop, I discovered that with that slick fabric, all I needed to do was to hold the casing vertical and drop the bodkin in. It's heavy enough to pull the ribbon through.
Then I dropped the bodkin while attempting to pin it to the curtain, and may not be able to find it until Roomba day when I move everything.
Pays to grouse in public! While typing that, I thought about what I heard when it fell, then pulled the footlocker away from the wall and looked under the bookshelf, and there it was! It fell a yard sideways while falling four feet down.
Would you believe that I cut *eight inches* off the length of the pattern? But I cut the fabric one inch beyond the pattern, and the black silk extends an inch and three-eighths beyond the wool.
I think that tearing a three-inch strip of silk instead of the four-inch strip would have sufficed. And a narrower band would have looked nicer, but once the elastic is in, it's not going to matter much.
I wrote "1 7/8 yd" on the shopping list, but when I got to the check-out,I asked for two yards. I suspect that a similar decision is how I happened to have that little scrap of ribbon that I made the snap reinforcements from.
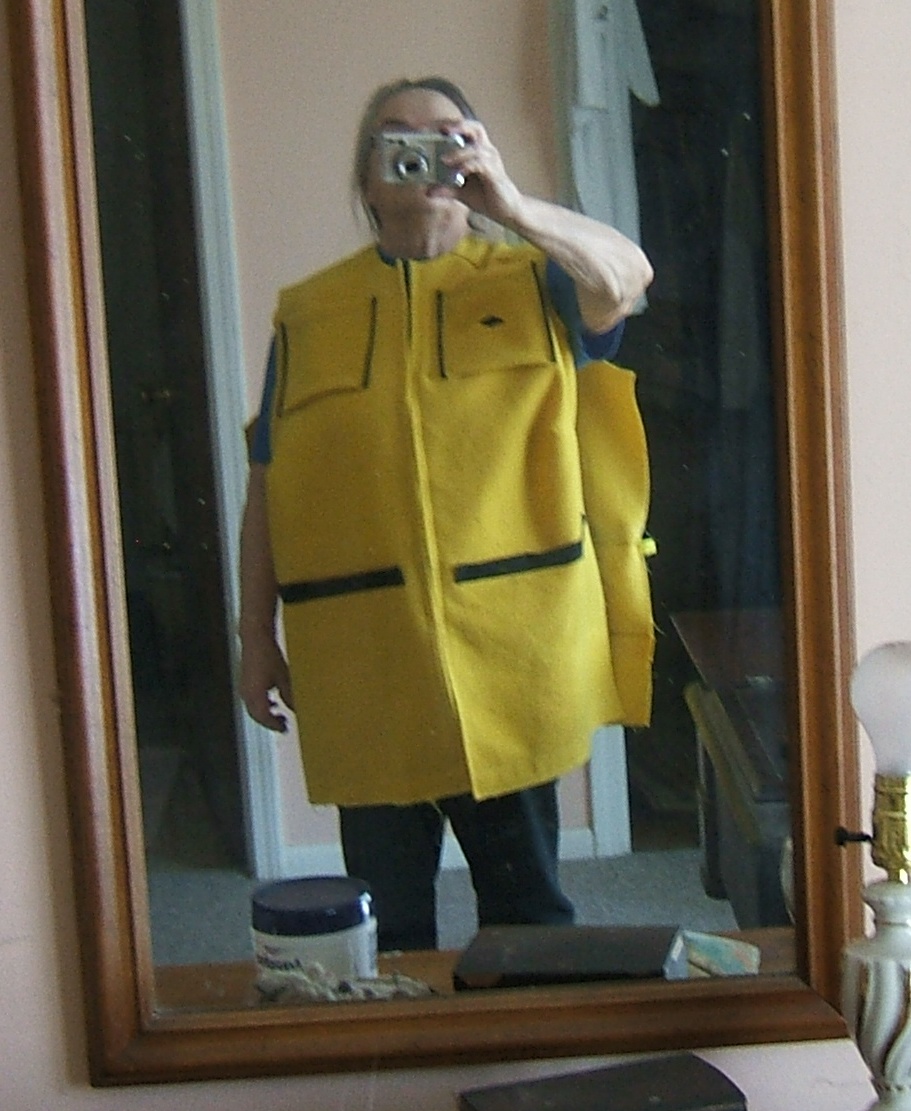
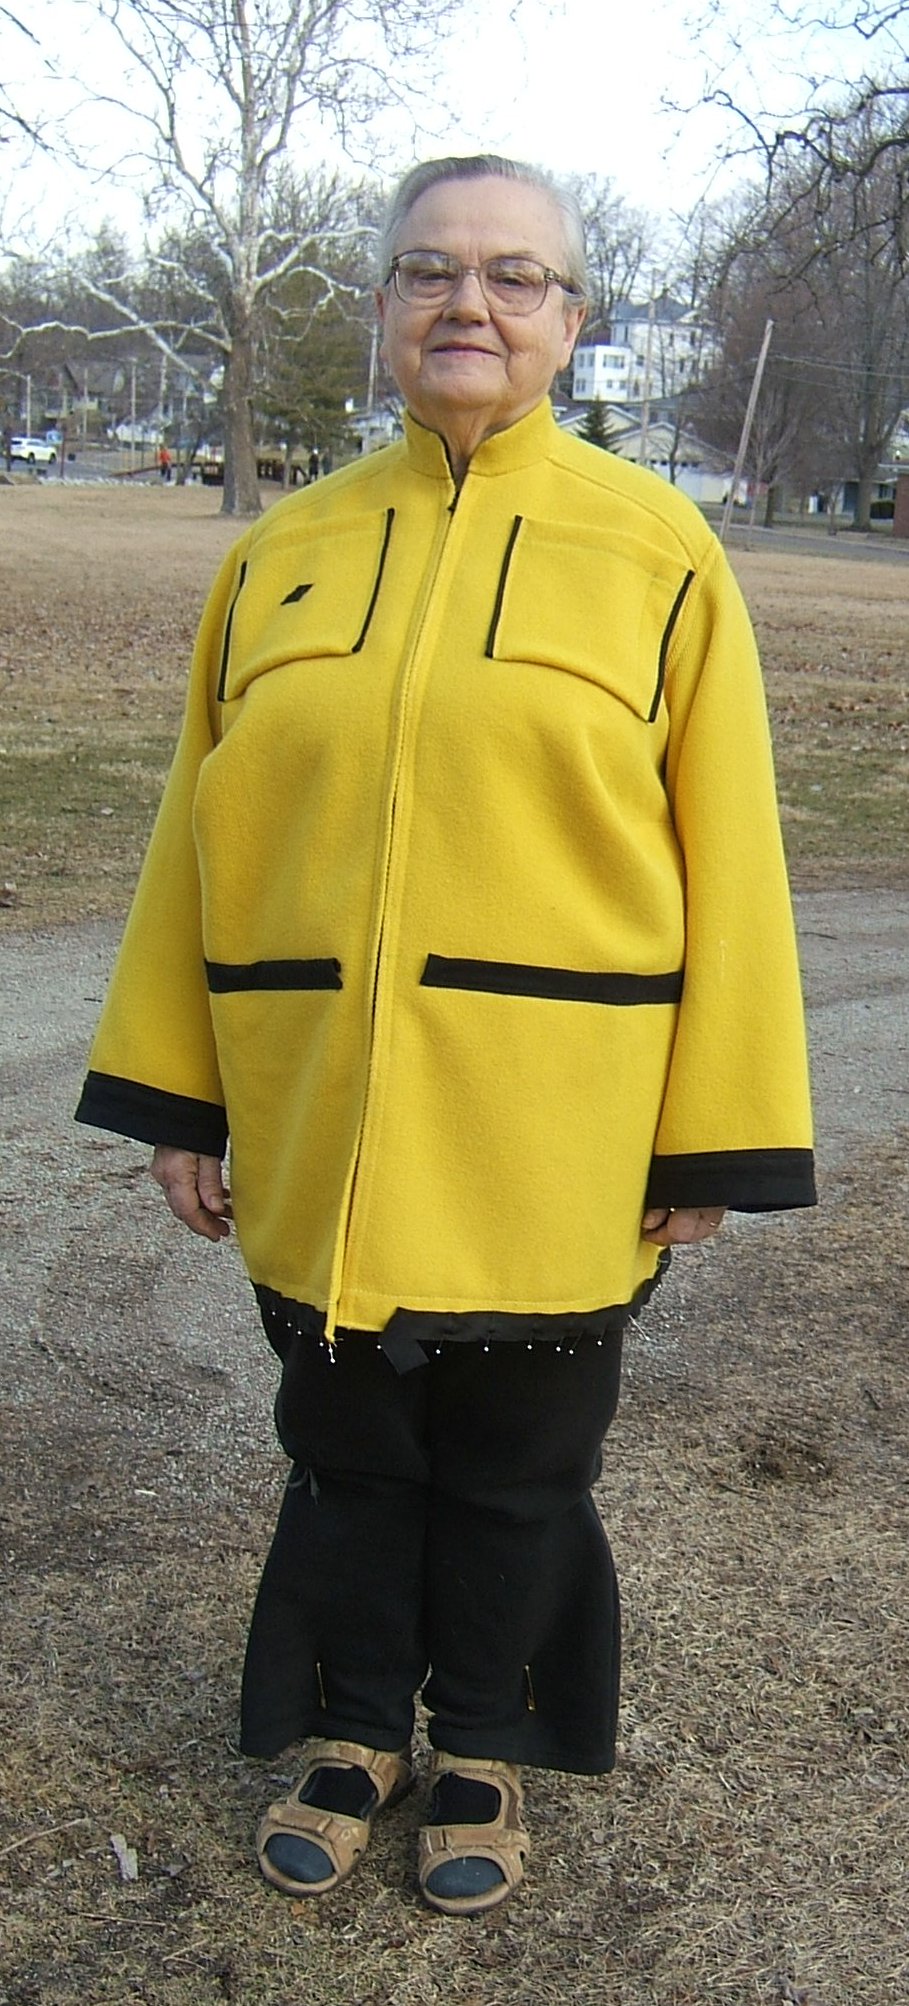
I was about halfway through putting on bike clothes when I had the picture taken. Then I went downtown and had a passport picture taken before buying the ribbon. Missed my nap, so no sewing tonight.
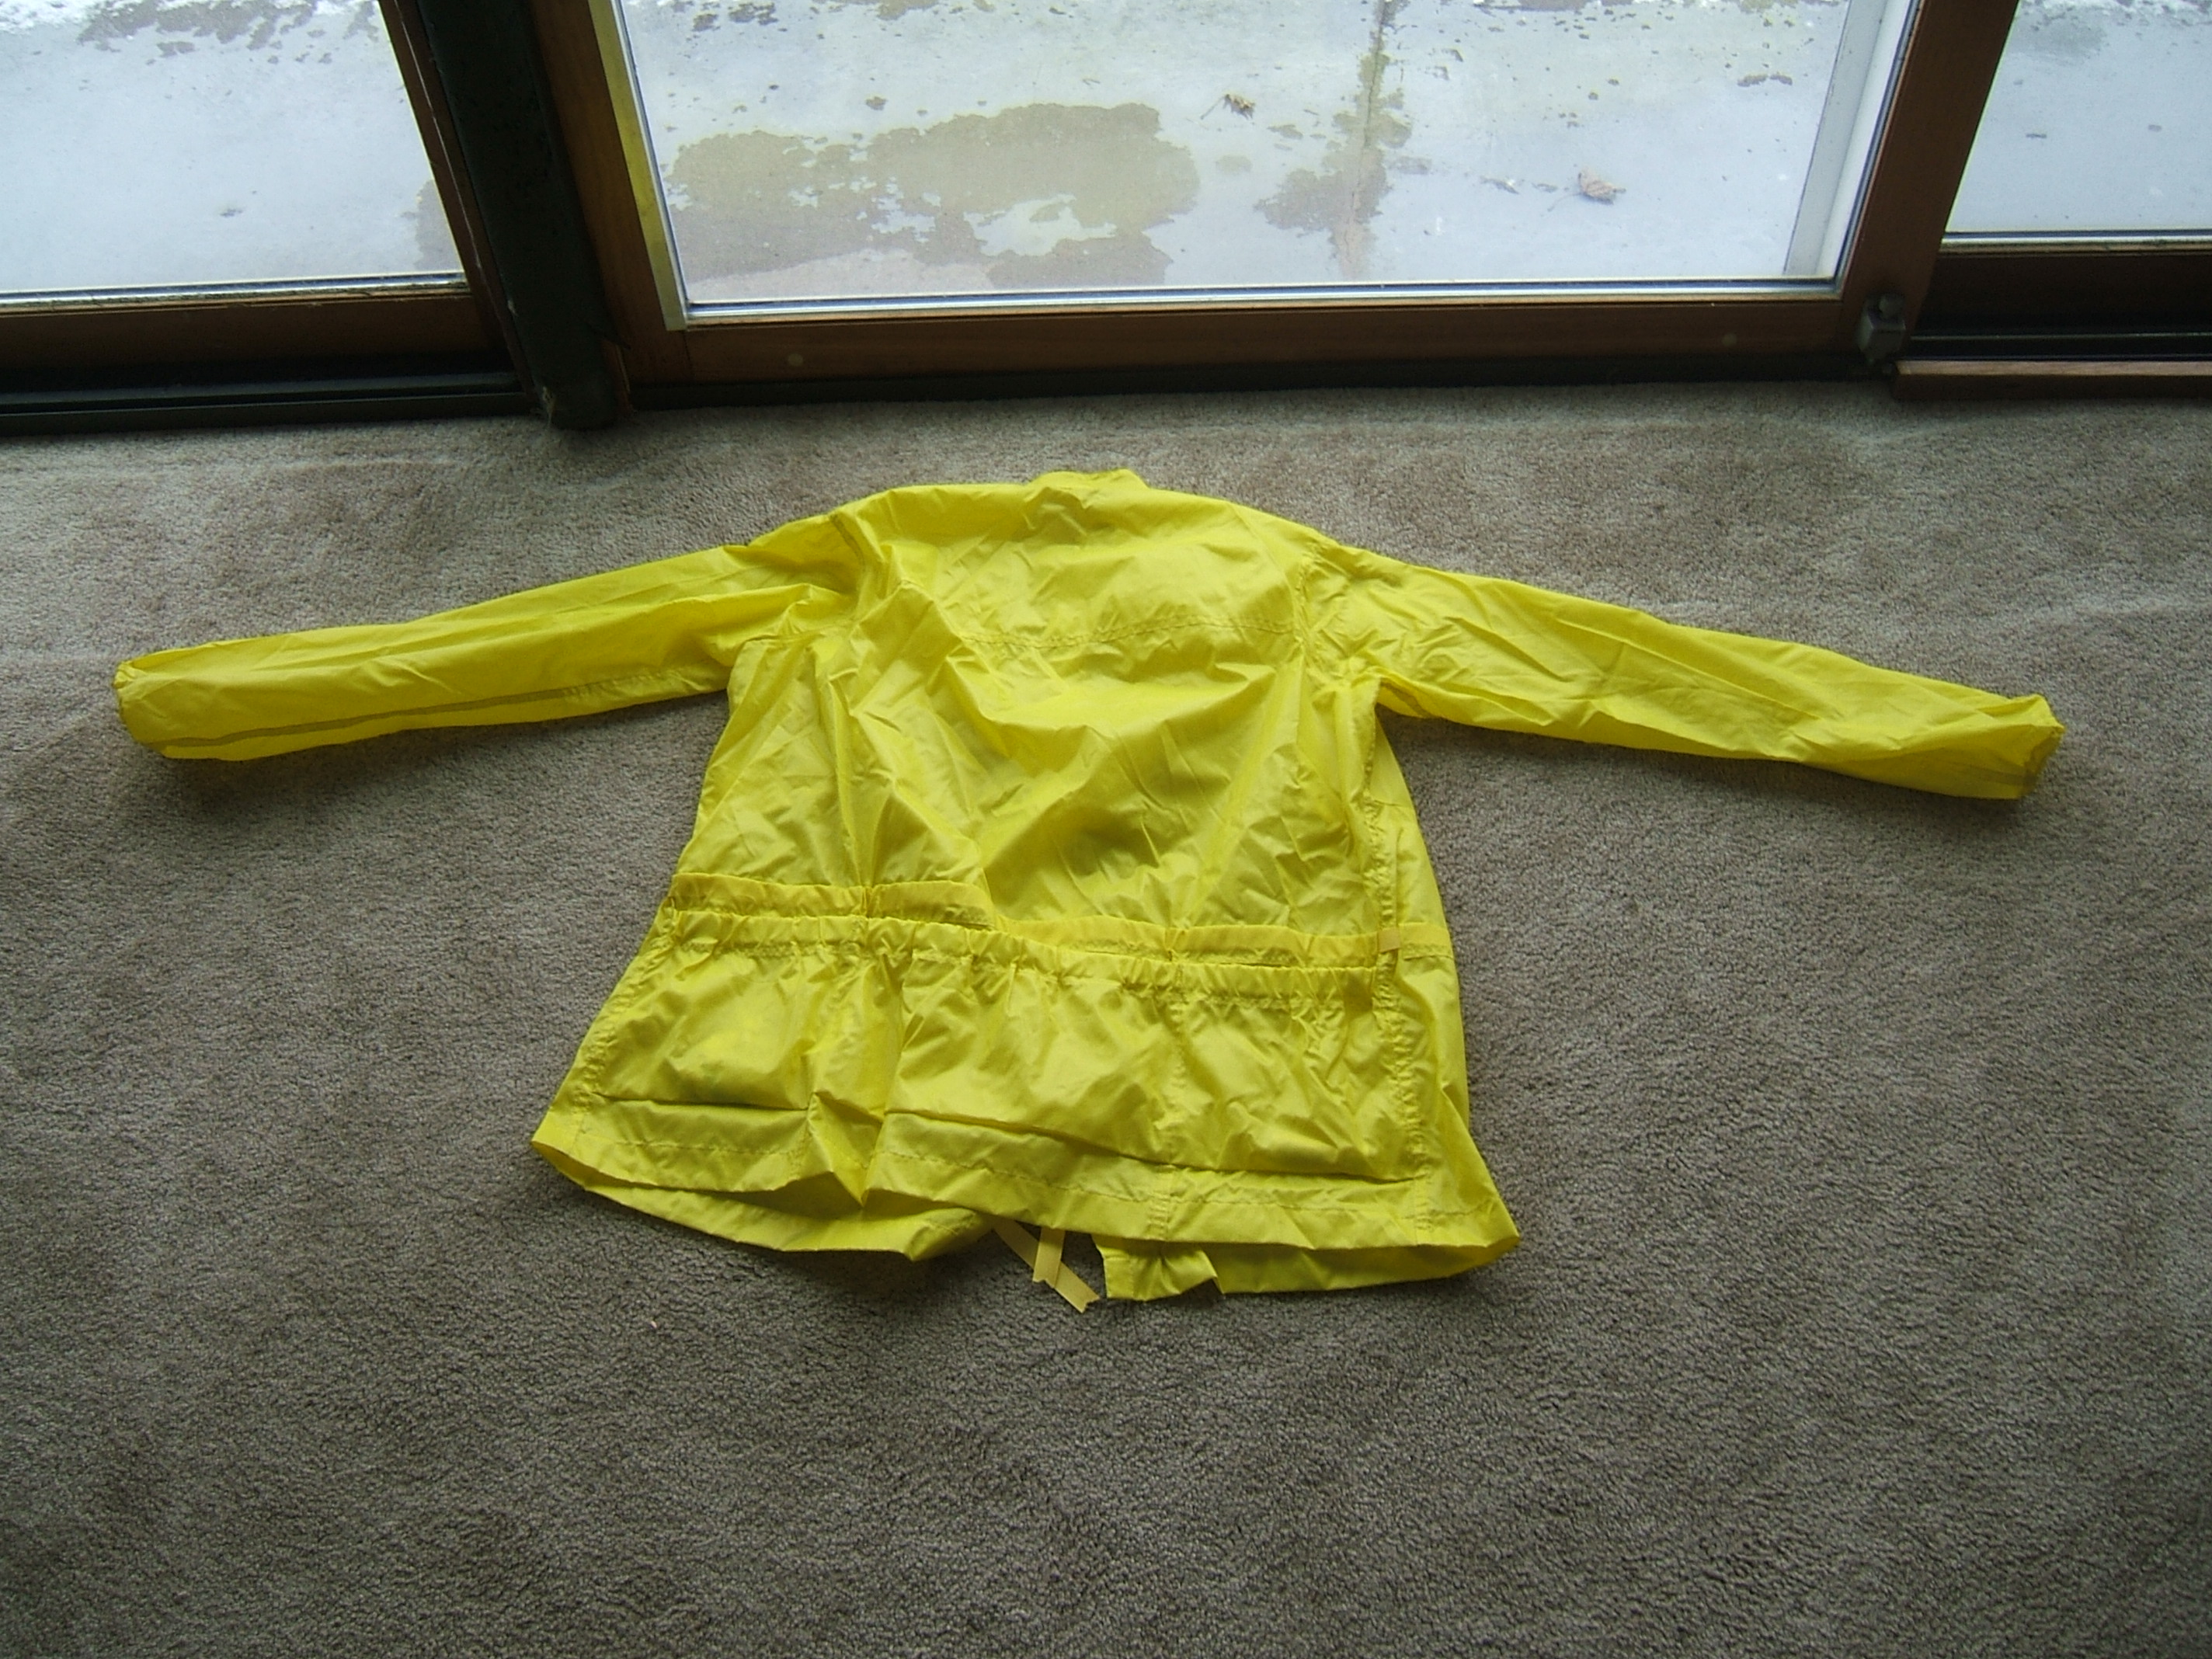
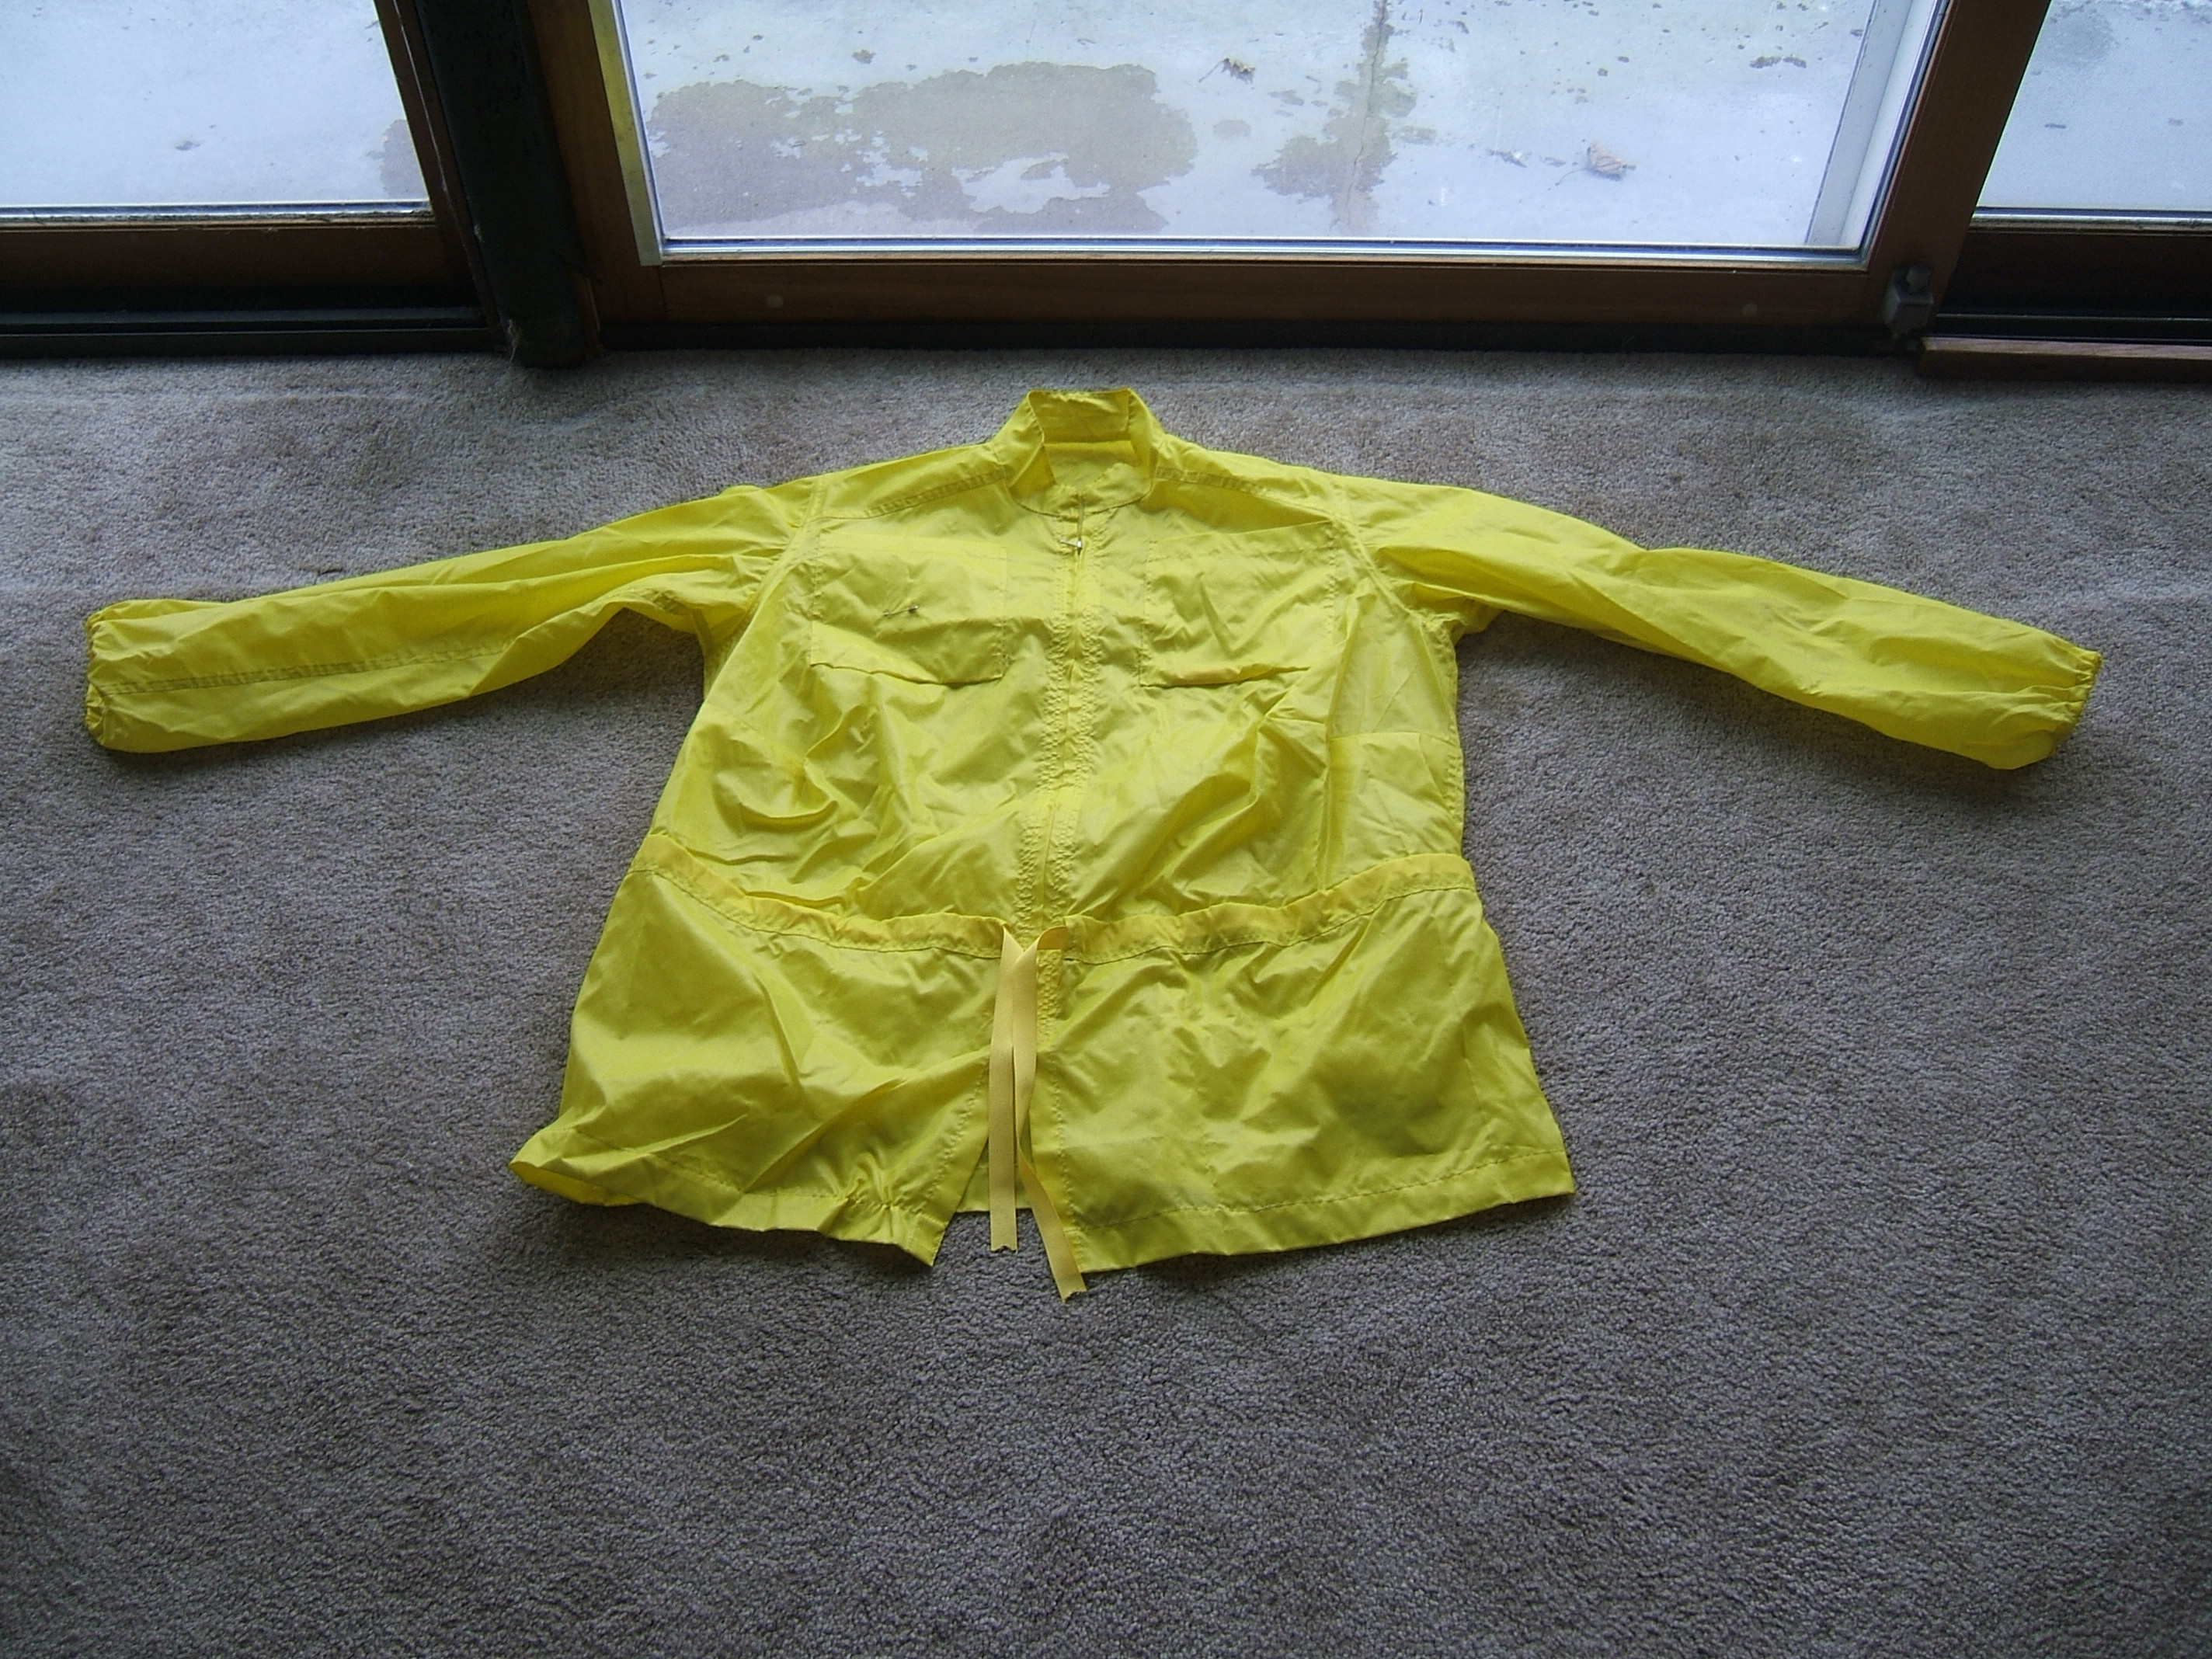
Wool jacketing overjersey
At long last the hem is in. No elastic in the wrists yet, but it isn't supposed to be very cold tomorrow and there are definitely no bugs, so I'm going to wear it anyway.
If I ever make this again, I'll move the casings three inches higher and make it three inches shorter.
I could make it up in linen as a spring/fall jersey.
After I make at least a half-dozen bras. I have only two left, and one of them is on its last legs.
AAAAAGGGGGHHHHH!!!! Preparing to put the jacket on, I slipped a pencil into the pencil pocket — which is on the SIDESEAM EDGE of the patch pocket, not the side next to the zipper!
Fawchunately, I'm carrying a notebook that includes a pencil today, so I won't have to rassle the golf pencil out of the pencil pocket.
Put the jacket on and chickened out of wearing those gaping sleeves without elastic.
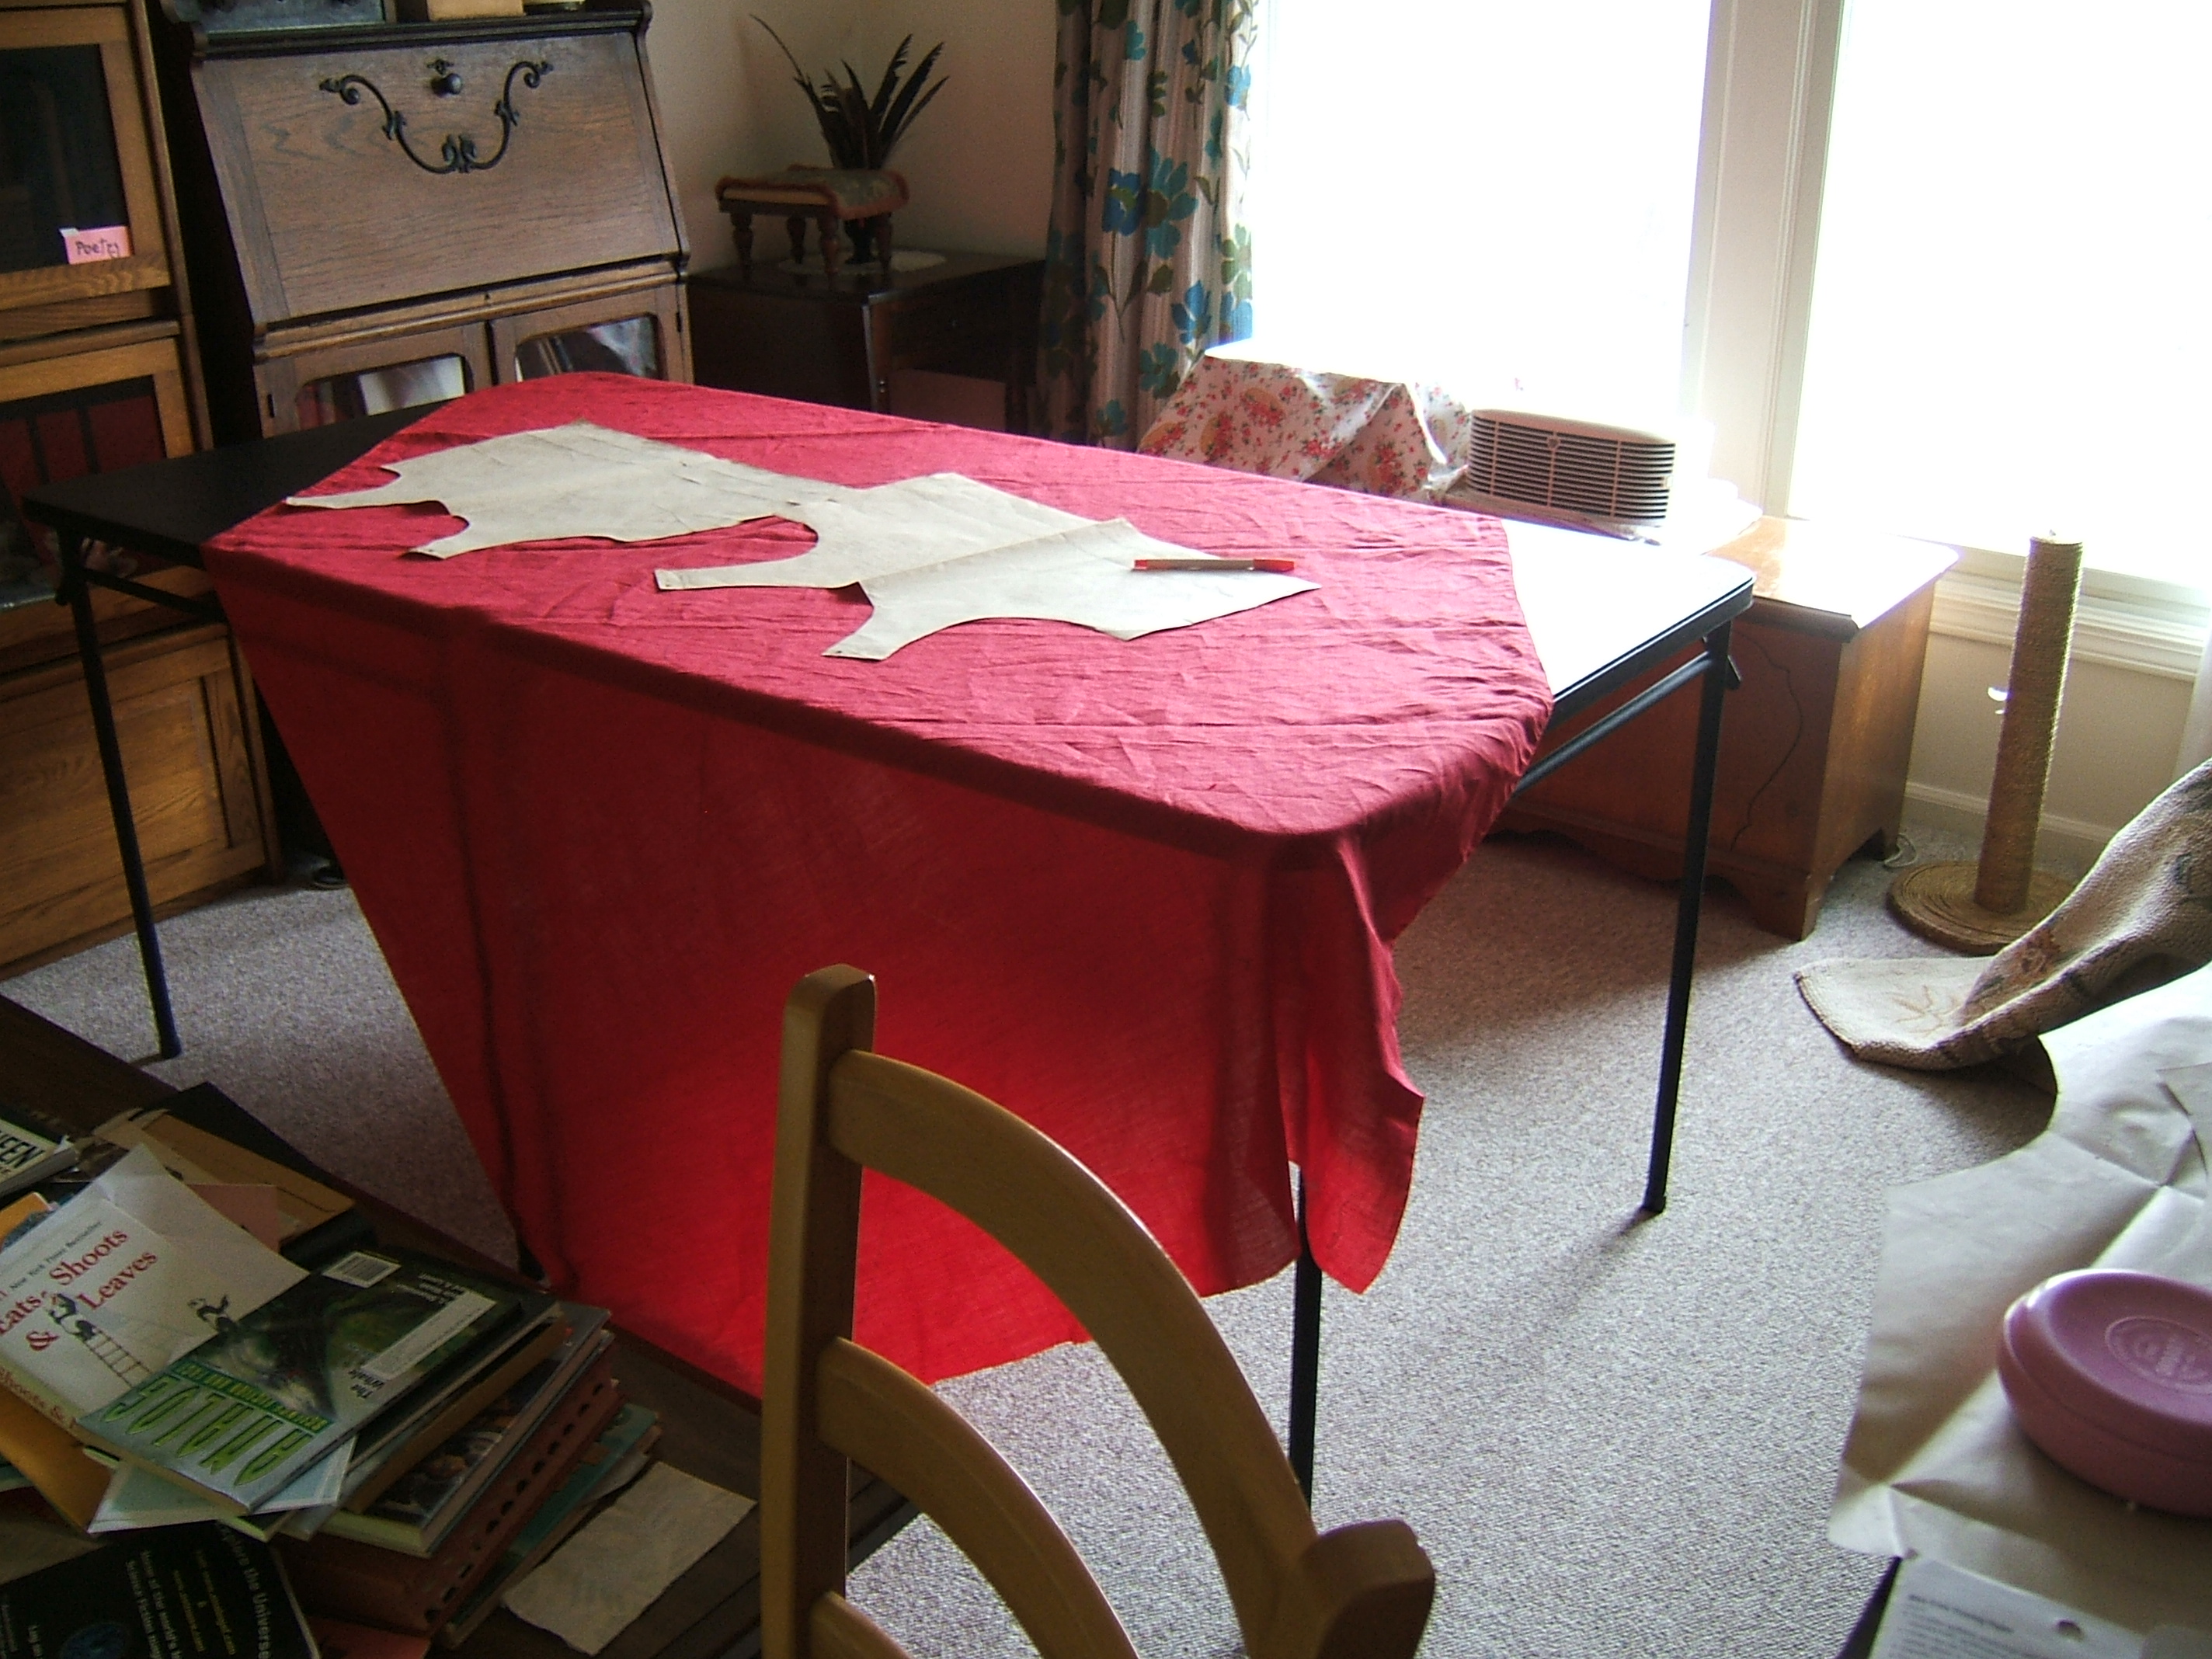
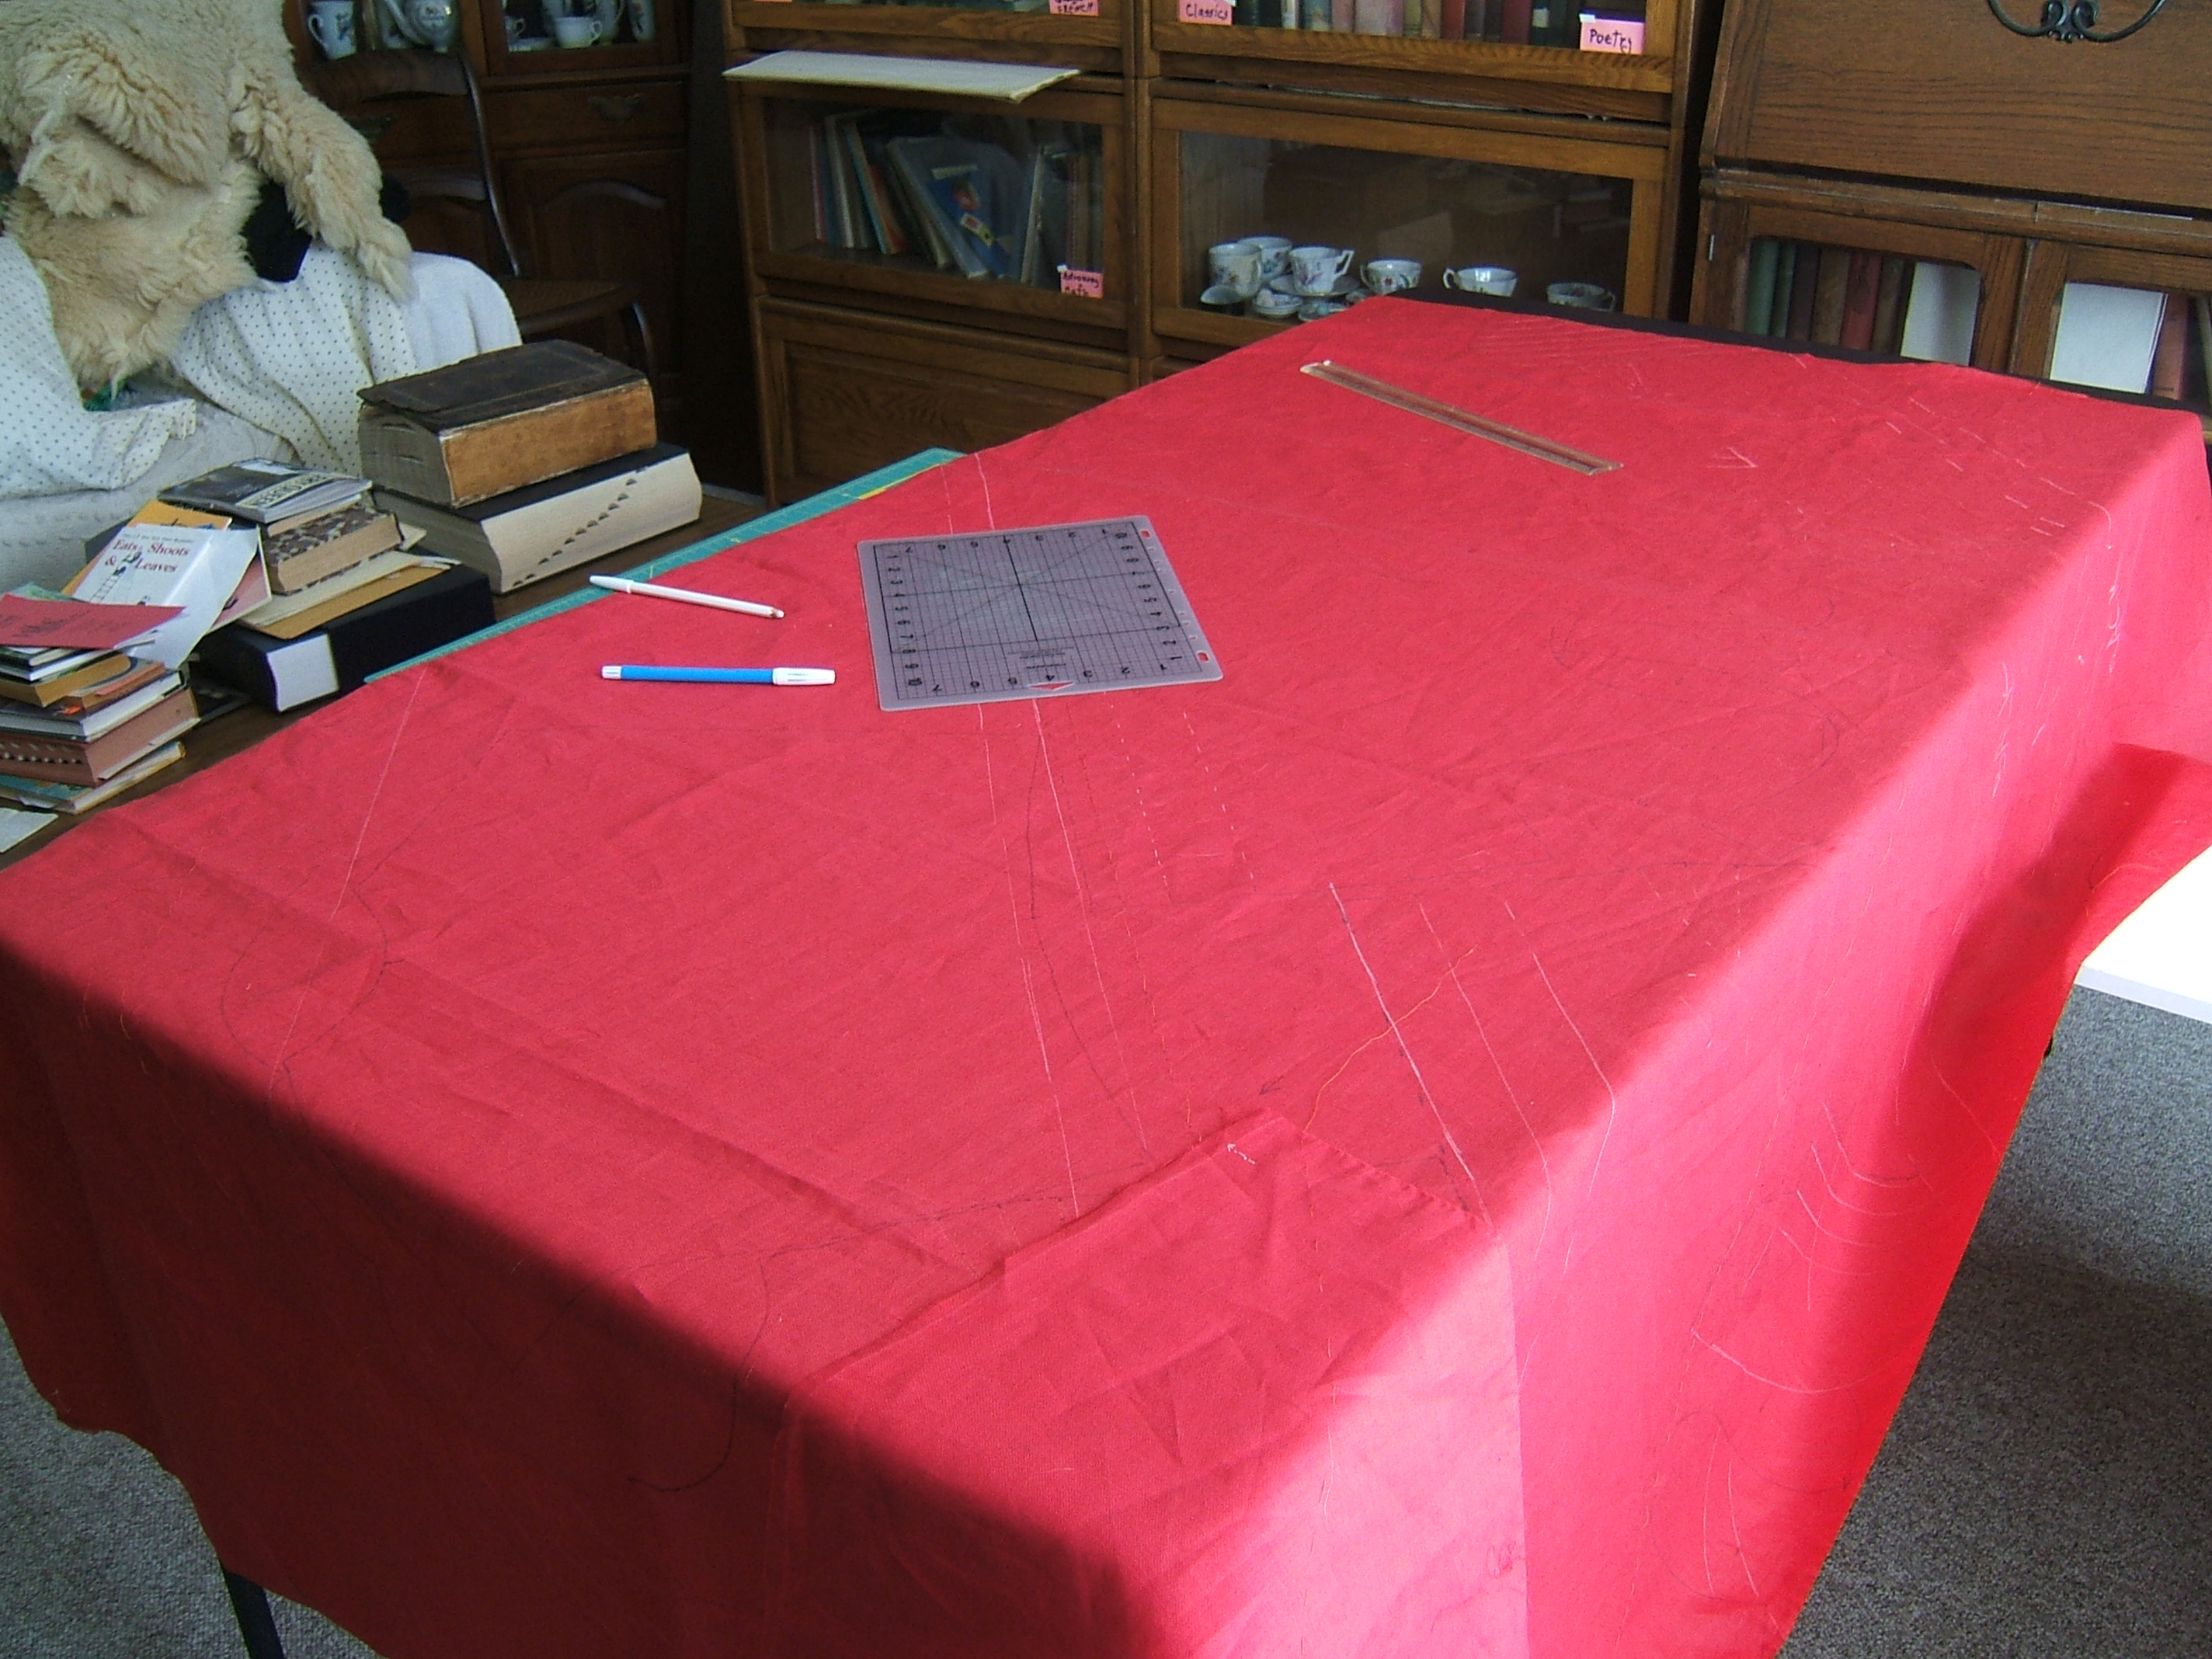
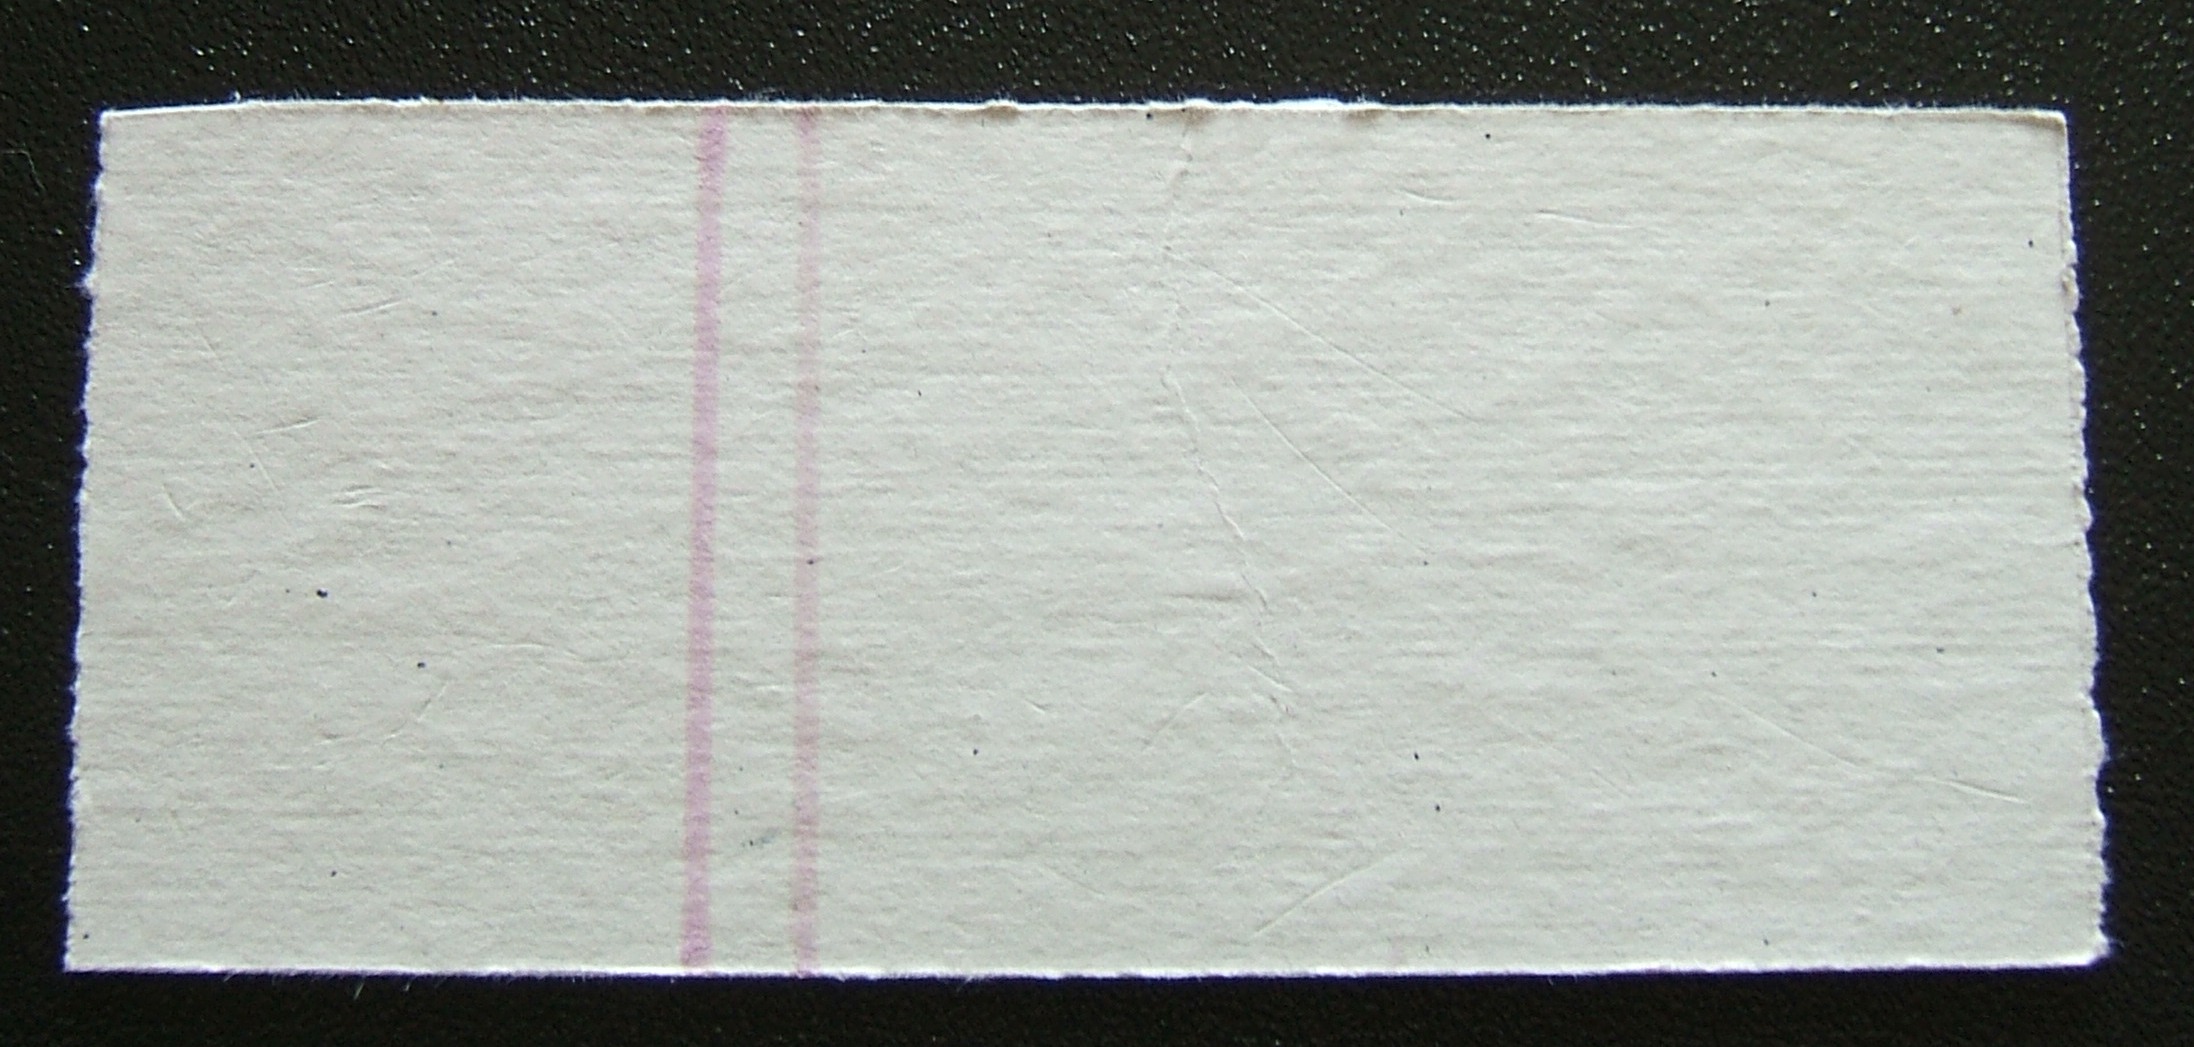
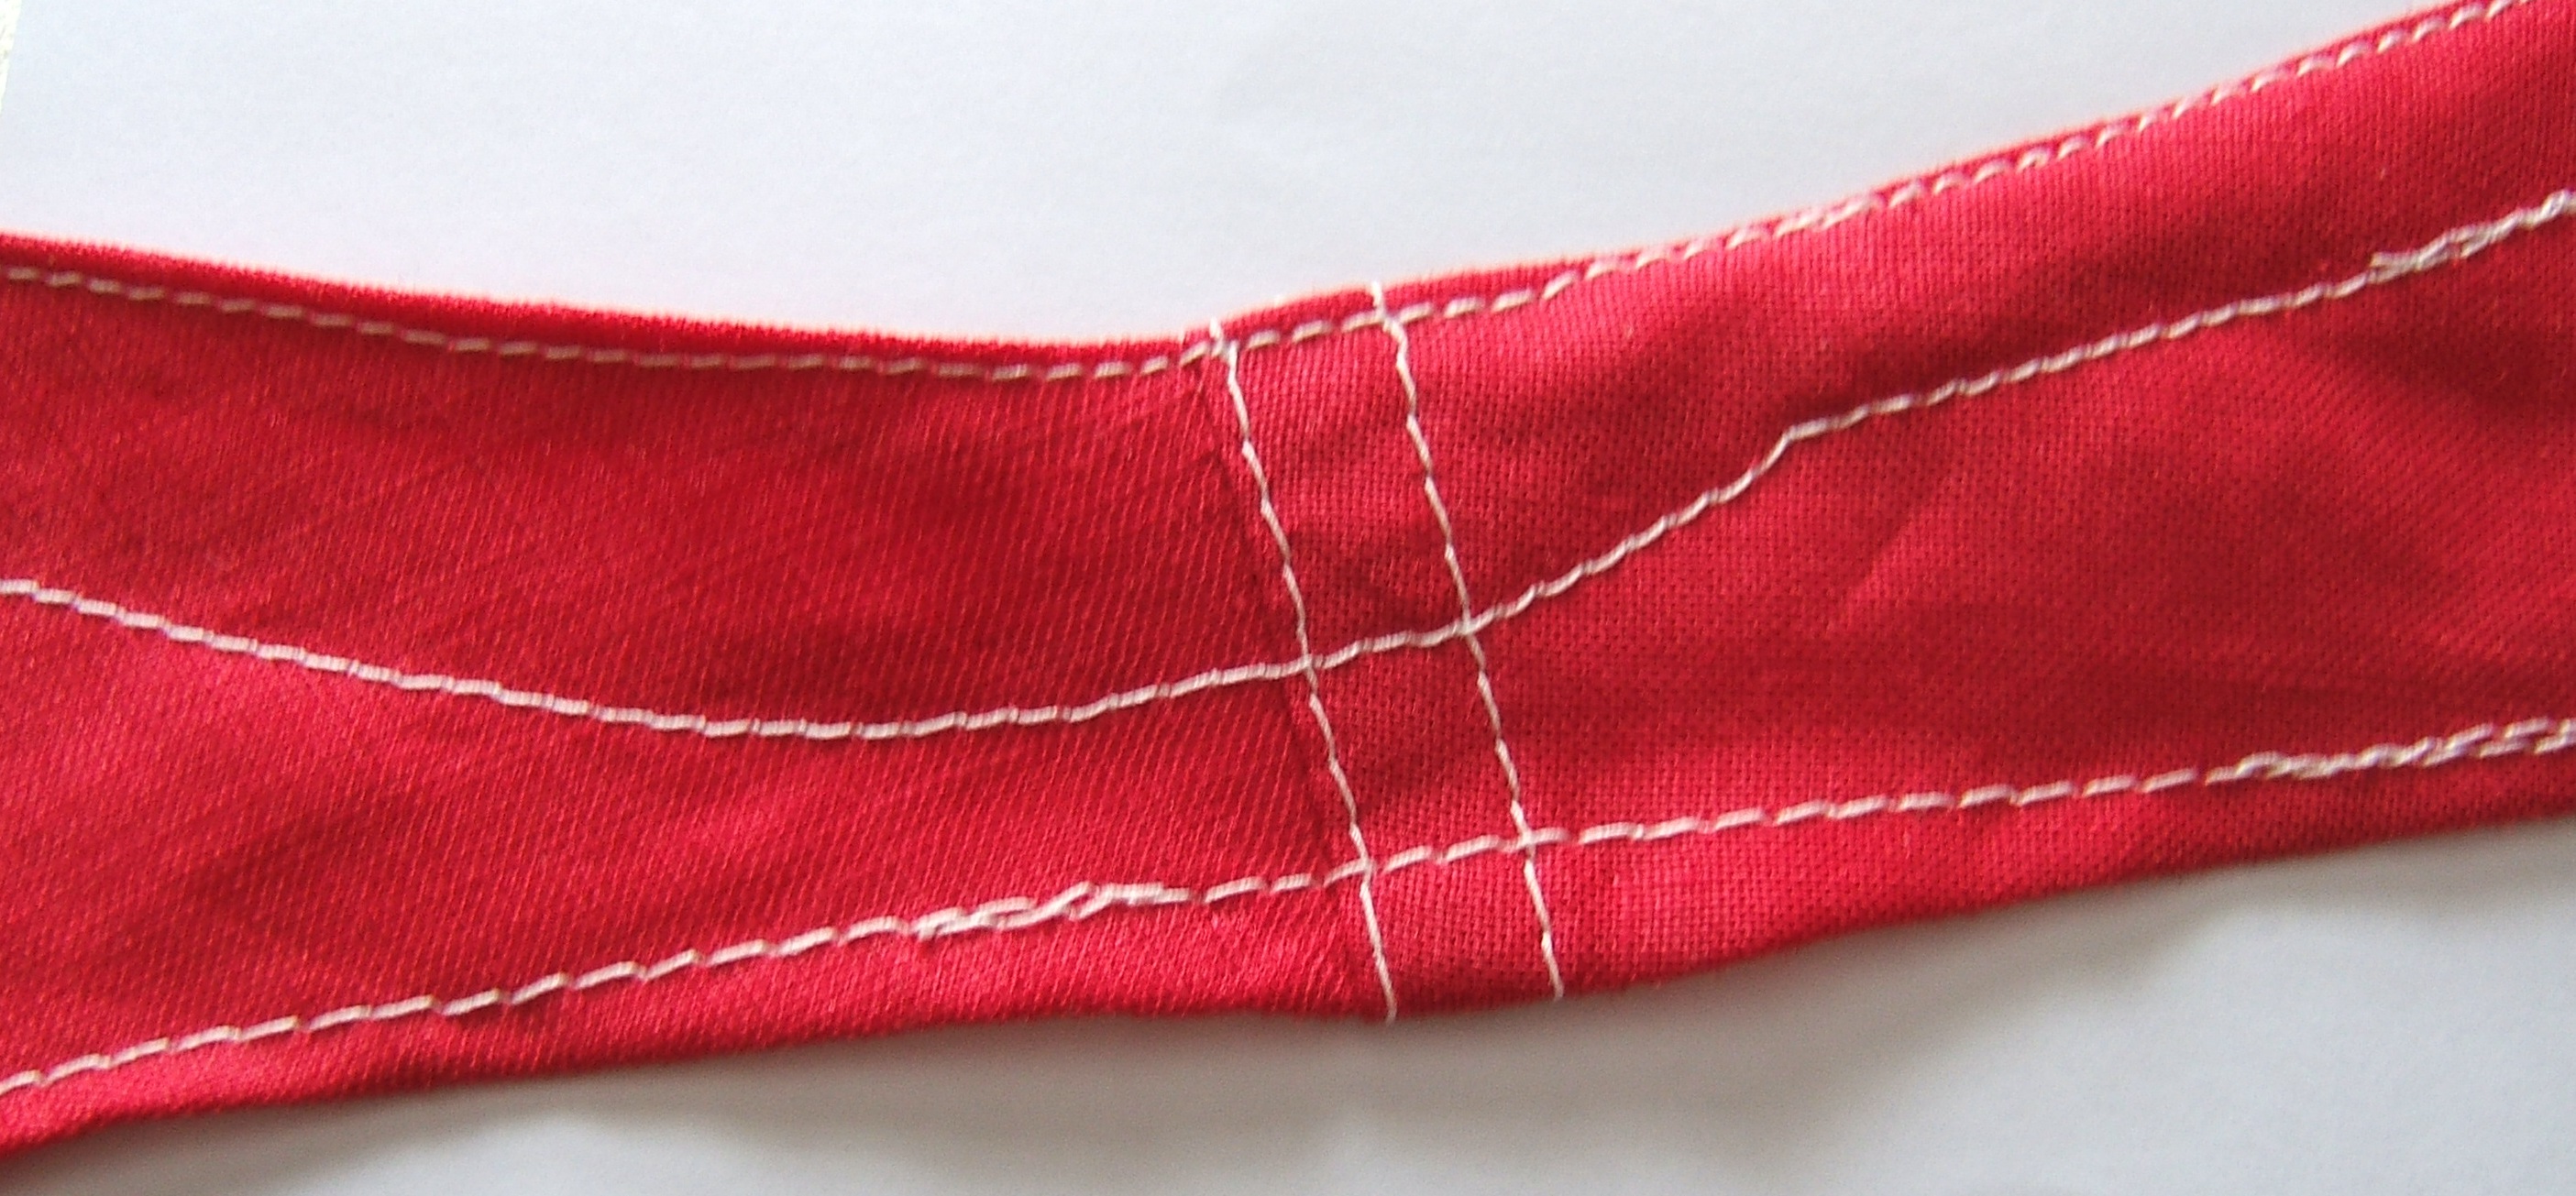
Between loads of wash yesterday, I set up both card tables and spread out my red ramie. It wouldn't lie flat enough to cut, and I was afraid that I'd absent-mindedly dampen it and erase the bias lines (and I'm not 100% sure that ironing won't fade them), so I basted along two of the three bias lines. This has the additional advantage of making the bias lines show on the right side — I don't think I'll do anything from the right side, but one never knows.
So the first chore today is to mark the third bias line. I'm dipping the needle under every blue dot, watching carefully that it's lined up with the other blue dots. I drop the bobbin of basting thread onto the floor so that it can unwind easily as I sew.
There isn't too much junk on the ironing board, and most of it has clear belonging places.
Double take at the small kitchen-type cutting board, then remembered that I had used it as a plate to eat crackers while reading Usenet last night.
⁂
Thread-marked the third bias line, noticed that logic required four bias lines, went hunting for the fourth (in a way that would turn up any other forgotten lines), thread marked it, and ironed the fabric.
That is, I rubbed an iron over dry fabric. I called that "pressing" as a teenager, but I'm trying to be good and reserve "press" for pushing the iron down without rubbing it around. This leaves me without a distinction between proper ironing of damp cloth and rubbing an iron over dry cloth. One can say "steam iron" if one is steaming as well as rubbing; logic would suggest "dry iron" for ironing dry cloth with a dry iron, but that has been taken for ironing without steam — one could "dry iron" damp cloth.
Then I tried the pattern on the fabric, and saw that the ramie is wide enough that it would be quite safe to cut the selvages off first. The selvages are ever-so-slightly puckered, so cutting out will be slightly more convenient without them, and besides, they are real selvages that can be saved to use as linen tape.
So I snipped three-fourths of an inch from each edge and drew out two warp threads. They were strong enough to pull out in very few pieces, which gives me hope for the durability of the bras.
Before ironing the fabric, I embroidered "this end up" arrows in each of the four corners. I noticed that thread on ramie is clearer than the pictures I took of working arrows on wool, so I stopped during the second arrow to make photographs for my tutorial on arrow embroidery. Haven't looked at them yet, but I used the "T" on the camera to look for focus and shake, and re-shot any that flunked.
I think that this set of pictures can stand on its own, without comment.
⁂
Afternap, I made "tutorial" into a link — and in checking it, discovered that the image links in the tutorial are broken. GRRRR!
⁂
The fabric is 54 1/2" wide. It measures a tad more than 53" from drawn thread to drawn thread. Within the margin of error, that's consistent with cutting 3/4" off each edge.
And it's 82" long, which is less than the length of my table, but it hangs over at the corners because the ends of the table are curved. The table is only 38" wide, but I think I can manage. Might bring in the card tables and close the table to the width of the fabric.
I got up early this morning, but I've had my lunch and it's pushing nap time and I'm just now ready to start work.
Partly because opening out the table involved putting napkins, grinders, shakers, and so forth onto the sideboard, and that involved sorting the stuff already on the sideboard, washing the top, and putting on a fresh towel, and dampening a rag to wash the sideboard reminded me that it's been weeks since I wiped the gaskets on the refrigerators and the freezer . . .
But I will cut off the selvages before I lie down.
⁂
I usually pull a drawn thread toward me over the 11" x 17" cutting mat, but since the table was already opened out, I arranged the selvage close to one edge, then scooted my chair and the mat along as I cut. I think this was worth opening out the table.
Then I measured the width of the fabric against the table and took out two leaves. Also put the drop-leaves down, so as not to crowd the kitchen while I'm cooking.
And now it's past time to lie down.
⁂
Didn't sleep, but got up rested, and drew a bra and a spare back on the fabric. I'll get at least three bras out of this piece. I plan to lay out everything before I cut anything, but I'm sufficiently confident that I'll cut on these lines to bother with the internal markings.
I couldn't get the white dustpaper to mark, and had to use yellow. I think it's time I bought a new package. The old package has given me so many decades of faithful service that I plan to burn it respectfully — but not until I'm quite sure the new one works!
I'm not even sure they still make dustpaper. <calls up Pale Moon on the other computer> Froogle says that Dritz still makes wax-free tracing paper, but now it's "double faced". I hope that that means that it's a sheet folded in half, like the old stuff, so that one can choose whether or not to mark the back of the pattern.
I converted the table back into an eating table, but left the two extra leaves in to make it quicker to set up tomorrow.
One card table suffices behind the cutting table, because there's enough difference in height to make it pointless to insist on fully-flat fabric on the supporting table. What hangs off the sides of the card table doesn't drag on the fabric that I'm working on.
I'm planning on a Tour d'Warsaw Saturday, and can get the dustpaper then — provided that I remember to put elastic in the wrists of my new cycling jacket tonight. I should have time to do it tomorrow, but planning on doing things at the last minute seldom works out.
I intend to cut out three pairs of slippers before I finish working on the bras: black fleece, to replace the shabby slippers I'm wearing to church, gray doubleknit wool, so I can wear my new gray dress, and "twinkle twinkle" cotton doubleknit to go with my Halloween costume. Wool doubleknit midsoles in all of them, probably the yellow "banana" wool left from making my too-tight wool jersey. (It shrank in the wash! I'm sure of it!)
The gray dress is so short I'll have to wear black tights with it, and black slippers with black socks look as though I had no shoes on.
Next Sprawlmart tour, I'll have to see whether I can buy gray tights. But I think gray tights with a gray dress would make me look like a comic-book character. On the other hand, it's a very dark gray.
That was easy!
Last night, I found a piece of black quarter-inch elastic that would go around my wrist a seam allowance more than twice, cut it in half, clamped one piece in my new bodkin, cut a stitch in the seam joining the ends of the cuffs of my new jacket, and forced the bodkin in. The ring holding the "tweezers" closed caught on the edge and had to be helped through, but the sew-on bodkins catch at the lump where the elastic was sewn; the new bodkin is clearly more convenient.
Got to where only a little elastic stuck out, looked around for a safety pin to keep it from pulling all the way in, went to the safety-pin stash on my dresser, selected two tiny brass-plated pins because I intend to put off sewing the elastic together until after I've worn the jacket a couple of times, went to the bottom-right drawer of the White and selected black polyester thread to sew it together with. I'm not sure when the light dawned and I put the thread back.
Worked the pins inside, tried the jacket on, all seems go — I intend to try wearing it tomorrow. Temperature is supposed to go up to 39F, so I'd better plan to bring it back in a pannier.
As long as I've got the elastic box out, lets get that wizard gown off my to-do list, and out of the hallway where I hung it so that I'd remember to do.
I could easily see the squares of white wrong side alternating with squares of black thread even without my magnifiers, but somehow I just couldn't pick up a thread, even with the magnifiers, without catching the fabric instead.
Eventually, I realized that the ends of the neckband had been sewn with white thread.
Once a stitch was cut, inserting the elastic was as easy as putting it into the wrists had been. First I held the elastic to the neckband and placed a pin in the elastic somewhat short of long enough to go around. I allowed the elastic to pull in ad libatum, since it was still attached to the roll. Naturally, it didn't come anywhere near to pulling the safety pin inside, owing to the length and width of the neckband, and the small amount that I wanted it pulled in.
Tried the gown on, got the pin caught in my hair taking it off, and had a time getting it loose without tearing out any of my rather sparse hair. Took it in three inches, got my hair caught again while putting the gown on, couldn't get it loose at all. Fortunately, my spouse wandered by just then, undid the pin, and put it back. I was careful to stretch the neck way out while taking the gown off!
This seemed about right, so I went back to the drawer for the polyester thread, cut the elastic off the roll, and sewed the ends together.
I didn't bother to mend the gap in the seam, since it is on the inside of the neckband.
Took a while to re-roll the elastic.
I'm quite pleased with the scheme of sorting my elastics into zippered sandwich bags. While hunting for the black quarter inch, I tossed elastic in all directions and nothing got tangled or out of order.
But today, it's time for my nap and I haven't even cleared off the table to resume marking the bras. But we aren't eating here tonight, so once it's cleared, I can leave it clear until breakfast.
⁂
But I can't sew tomorrow, so I'll fold the fabric and put it in the parlor before I go to bed.
I didn't mark any more pieces, but I did determine that I will be able to mark three bras on this fabric, and that I won't be able to cut a front for the spare back in the corner. And the spare back isn't big enough to cut even a front of the panties. I may piece panties just to avoid having yet another half-bra in the linen-scraps box. Or I may need that bit to cut bias tape.
Re-read my account of making the houndstooth bra; was surprised to find no mention of how much bias tape would be needed: I'd measured the pieces of tape in the bias-tape box directly against the armholes.
A use for my air-erasable marker: I can make registration marks on my patterns to line them up with the bias lines, and not have them hang around to confuse me later.
I finally got the pattern pinned in place, picked up the other marker, the marks were invisible in that light, got more light, the purple marks still weren't showing up as well as they had before … PURPLE!
I was using the other air erasable marker. What a close call!
Now it's time to try out my new dustpaper.
⁂
I thought that package felt thinner — there isn't any white!
And it doesn't show up on the fabric as well as my old worn-out paper does. I guess they don't still make dustpaper.
That account of buying it that I recall writing must be in the Banner. Here it is, on February 6:
Considering I was only out for the exercise, there was a lot of stuff in my panniers. I stopped at Warsaw Health Foods for baking powder, and bought some candy and eleven dollars worth of nuts. Stopped at Lowery; all I bought there was the dustpaper that I'd come for. (They call it "tracing paper", but it's really carbon paper.) After lunch, I stopped at Owen's West and bought some produce.
Dustpaper isn't packaged as nicely as it was the last time I bought some, and the sheets are considerably smaller. I may keep the old envelope to store the new paper in, so that it can lie flat. But I'm grateful and slightly surprised that one can still buy it.
[end quote]
By "not nicely packaged", I meant that they put it into an envelope even narrower than the sheets, clumsily folded. Looked like an improvisation by a hurried human envelope stuffer who had been given the wrong envelopes.
⁂
And when I put it away, I discovered that the folds that are supposed to be in the sheets aren't straight either.
I now have two bras marked on the fabric. After all the fussing and fuming while marking the front of the second bra, marking the back was disquietingly quick and easy.
But even with five lamps on, I couldn't see very well, so I'm going to wait until morning to continue.
There appears to be plenty of room for the third bra; I'm not so sure about the briefs. And the bias tape may need to be in short pieces.
The ladder has been in the sewing room for days, but I still haven't hung up the overjersey pattern. I'm seriously considering using it to make a summer jersey out of "honeydew" linen broadcloth, so I should get it commented while I still remember what I want to write on it.

Quote from today's Banner:
I used my dustpaper yesterday afternoon, and was very unhappy with the quality. They also cheaped out and didn't give me a sheet of white. Dritz used to be a good brand; must have been bought out by some management experts.
I wonder whether Clover makes dustpaper.
No sooner said than Froogled. Clover Chacopy Tracing paper, 12" x 10" sheets, *five* to the package.
[end quote]
When I was buying my dustpaper, I saw a purple sheet of self-removing carbon paper, and wondered "Who would want that?" Well, me, when I'm trying to make temporary registration marks on my patterns. But I'm still fuzzy on how it could possibly work, when a thin layer of pigment is fully exposed to the air.
With the fabric laid out on the eating table, I realized: I don't need to mark an entire bra, just a front to go with that spare back. Then there is plenty of room to cut the briefs.
For some values of "Plenty". Only the back needs to be pieced, and that seam will be near the waist.
Next is to find places to cut the crotch and the crotch liner with minimum disruption to the bias tape. Which is going to be in short pieces at best. I just measured the armhole at 21", times three is 62" — less than two yards, but I have to allow for short pieces that don't add up neatly.
But all seems doable, and I can take out the extra leaves and move back to the card tables Real Soon Now.
⁂
Project now back on the card tables. I wish
I could take a picture of the cloth laid out to
show the jig-saw puzzle I've made of it, but
Whoop! Whoop! Whoop! Two armholes per bra. I need four yards of tape.
But I think I'm going to get it.
It's fortunate that I have good light to cut along those confusing marks by.
⁂
I have marked out four fifteen-inch pieces on one scrap — that's sixty inches right there, and it's not the biggest scrap.
⁂
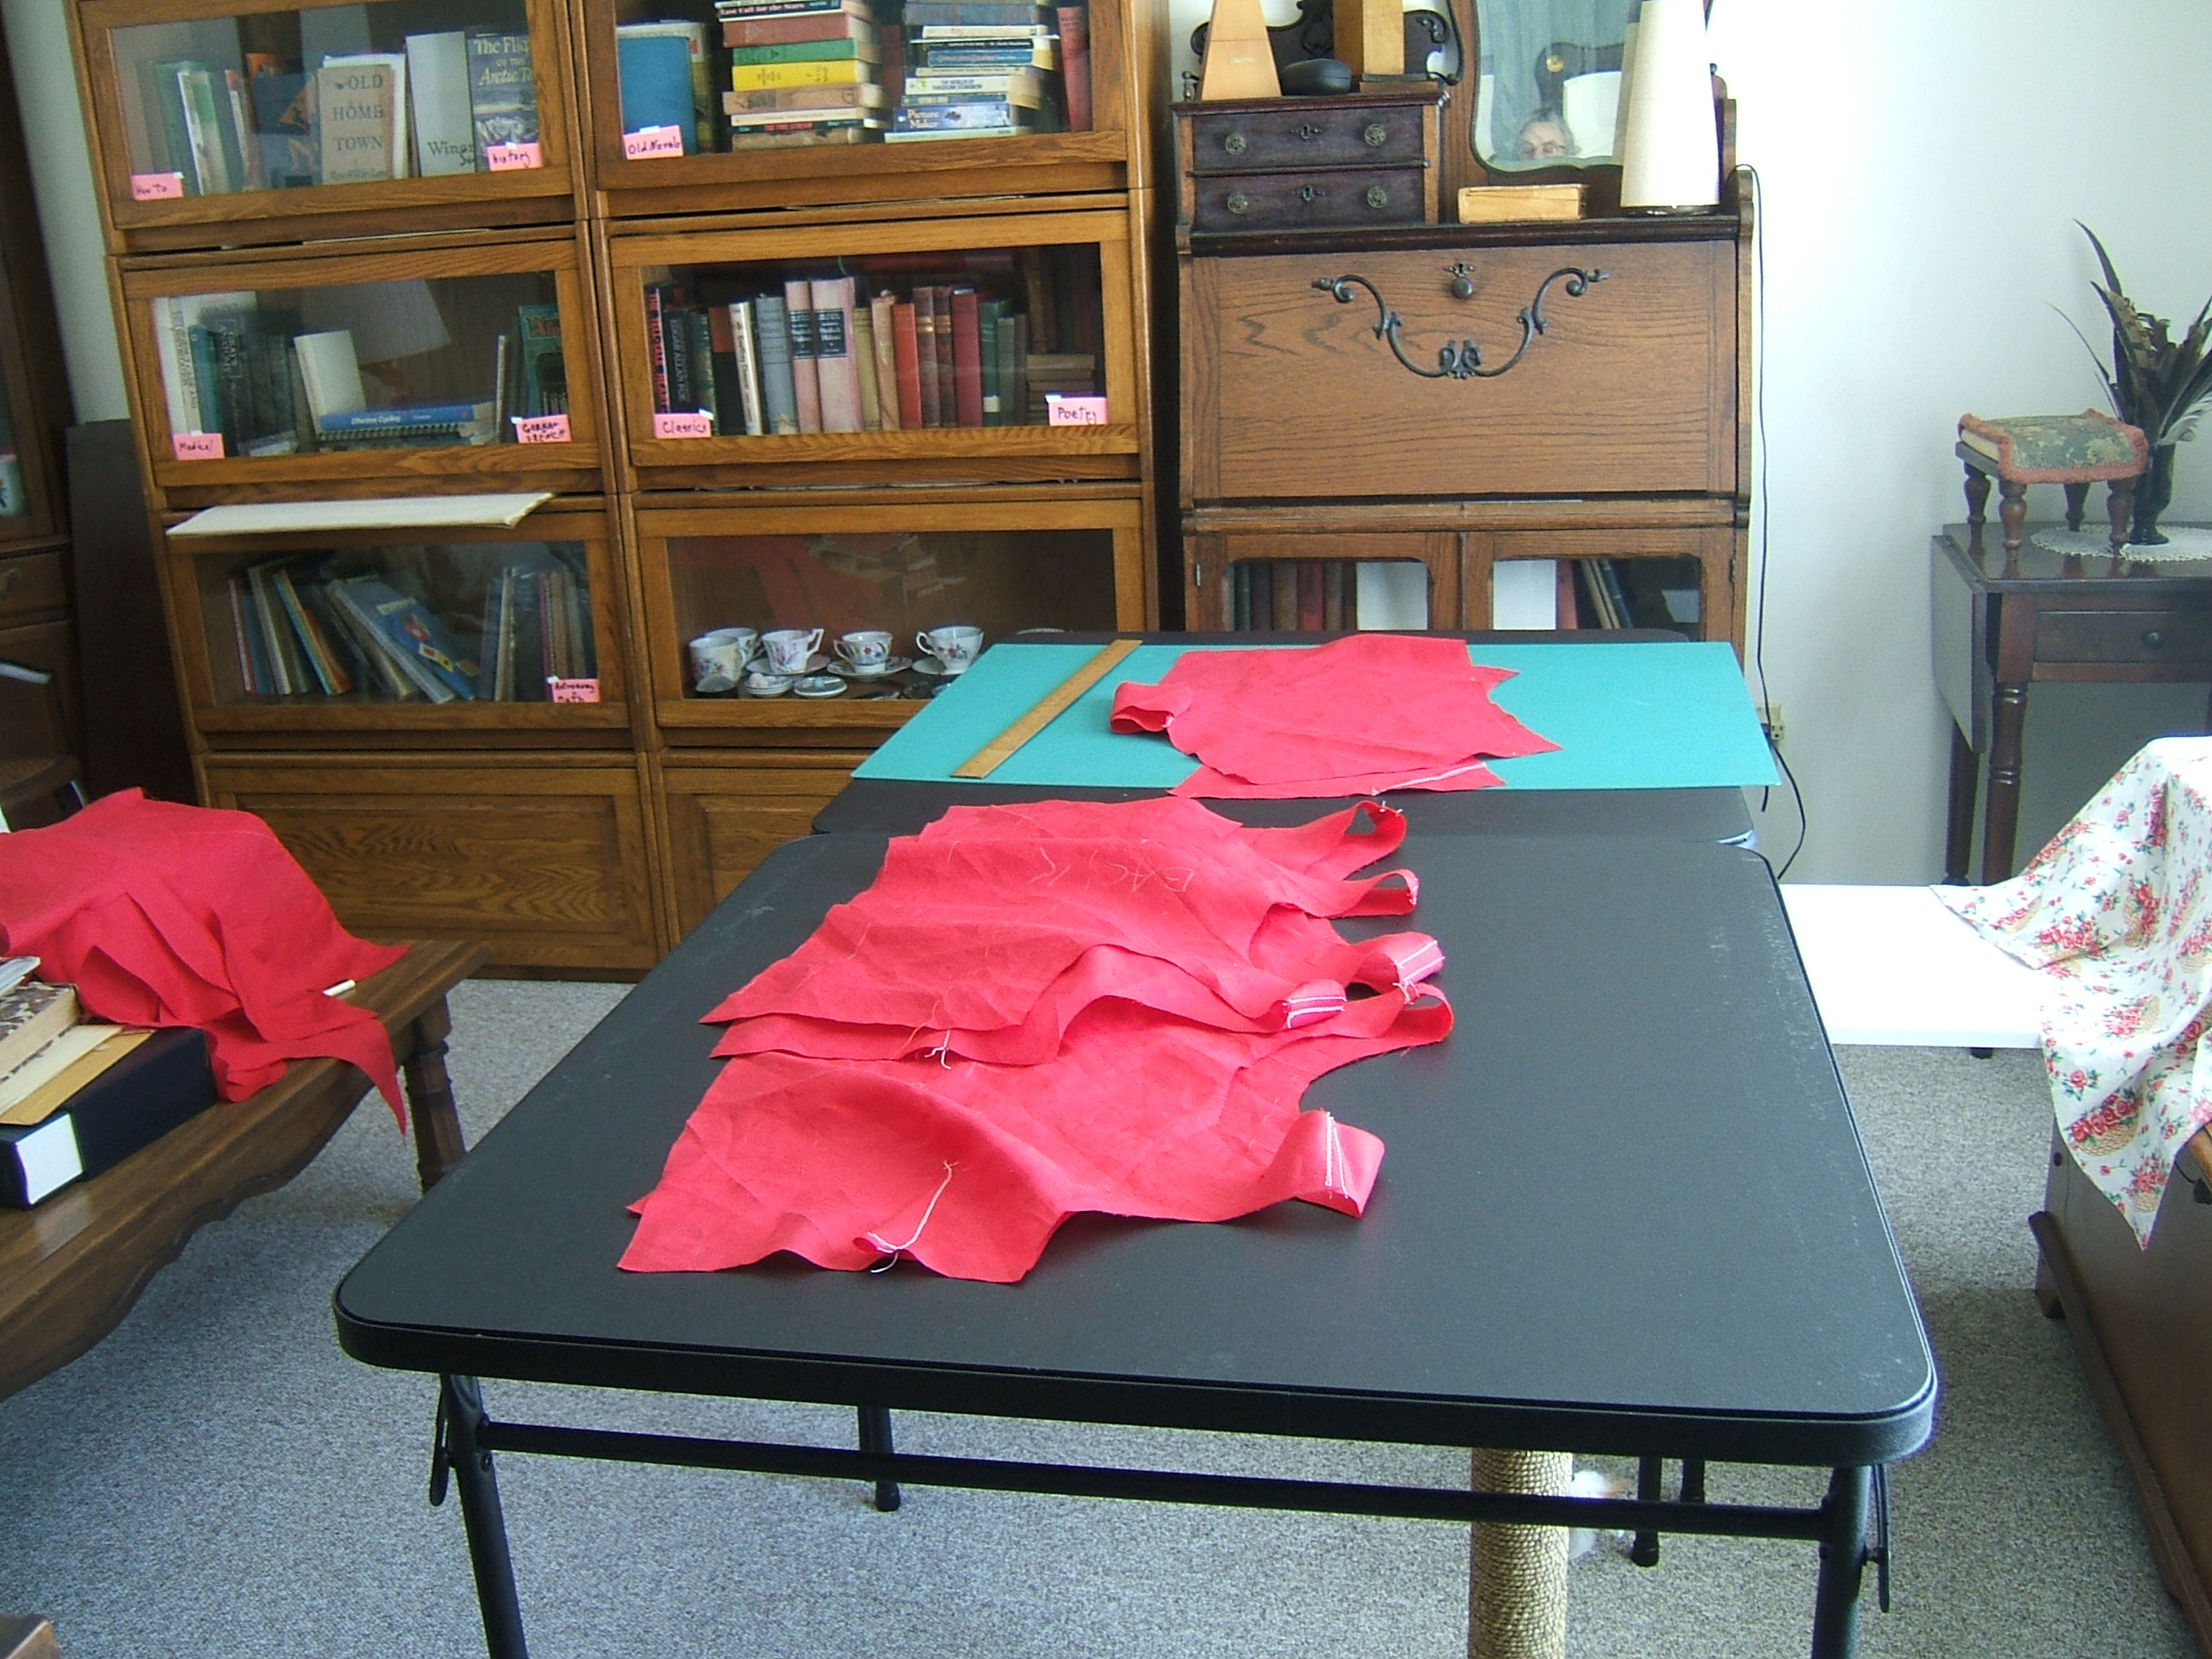
cut out red-ramie bras
I don't think I cut on any wrong lines. I did forget that I meant to piece the front of the briefs before cutting them out, but it's little more fuss to piece them after
I've marked the bras A, B, and C so that backs and fronts will have been cut in the same direction. Except for A; I think that the spare front was cut in the same direction as the spare back, but with the jigsaw all apart, I can't be sure. And at that point I wasn't being too fussy, as long as things fit in at the correct angles. The crotch of the briefs was cut at right angles to the crotch liner because that was the way they fit in among the larger pieces. And I cut the front and back of the briefs top-to-top, because that way they fit.
Removable markers are wonderful — at least when working on underwear, where I can cheerfully wait for the first wash to take the marks out. I'm a bit more restrained when I have to remove them before wearing. When marking bias tape, I measured inch marks from the wrong line, and wondered how I could mark them to avoid confusion before I remembered that I was using a Nonce pencil and could rub them off with a damp washrag.
I finally hung up the overjersey pattern and put the ladder away. I almost forgot to mark that I should shorten the next version; it will probably be next winter before I use the pattern again, so it was important to mark changes.
Began today's work by clearing the ironing board. My last pair of herringbone jeans had been on it since Monday or perhaps the Monday before; I ran out of sweat pants, put on the herringbone jeans, and a few minutes later threw them in the wash and hunted around for *anything* else; turned out that I'd overlooked a pair of sweats jammed between two other garments, so all was well. Today I marked the jeans "patch donor" and hung them in the stash, after several rounds of falling off the hanger and knocking the other two patch donors off their hangers.
The stash closet is packed really tight; I should sew something. There's a nice piece of silk, but it's too aggressive a print to wear to church. I tend to stand out no matter what, so I prefer colors that are a bit subdued.
Then I pressed the piecing seam of the briefs and the shoulder seams of the three bras, came in here to drag the sewing/computer chair to the White, sat in it, and read my mail.
The iron is still hot, so I probably haven't fiddled-faddled too long, but now I'm hungry and it is a reasonable hour for lunch.
⁂
Pieced the briefs. When I laid the pattern on, I saw that I'd guessed the size of my scrap really close; at one point, the cut-away was only an eighth of an inch wide. Then I attached the crotch and the crotch lining and turned my attention to the bras.
I'd sewed the shoulder seams of bra C before I remembered that I meant to sew the darts first. Sewing the darts with the back attached was so little trouble that I decided that I'd sew the shoulder seams in the others immediately after the first pass of top-stitching, and not wait to press the dart flat. But by the time I finished the darts in bra B, the light was so poor that I folded up for the night.
I'm making the darts like flat-felled seams: I sew the dart to one side, using fingers and the presser foot to form the crease, then iron the dart flat and edge-stitch along the other side. I pull the top-stitching threads to the inside and tie them together with a square knot.
Everything but the elastic is attached to each garment. I can say it's all finishing from here ;-)
Well, sewing on bias tape is finishing, right? That red pile on the dictionaries is the scraps, with the longest pieces of bias tape on top.
I trimmed the ends of the seam allowances on the shoulder seams of bra B and bra A.
I think my next step will be to sew the side seams of the briefs and the neck-hole hems of the bras.
Sewed the neck-holes yesterday, got the side seams of the briefs — up to the point where they need to be pressed as they lie — between loads of wash this morning.
As I was top-stitching across the piecing seam, I thought "Oh, arrgh, I forgot that I have ecru thread that wouldn't be such a brilliant contrast as this shining white." This was closely followed by the thought that if you have a contrast, it should be a brilliant, "I did this on purpose" contrast.
⁂
On my way to the sewing room intending to fill in fifteen minutes before time to slap burgers into the skillet by writing a few pointless posts to Usenet, I noticed that the westering sun was reflecting off the snow onto the White, so I finished top-stitching the darts. I needed the good light to tie the knots — particularly the part where I catch a loop of the bobbin thread and draw it through to the wrong side.
Started all the stitching at the point: that facilitated putting the needle down where I didn't have many stitches to undo. That also meant that I had to undo in among the crossings and knots at the tip of the bra, but that encouraged me to make the stitching stop precisely where it touched the other topstitching. Not perfect, but tolerable: many of them look like one row going out and coming back again.
Which will be undone when the knots wear off, but the bras will be rose-pink by then. I hope ramie holds up well under wear.
My old red bra will finish wearing out about the time I finish these three. I should cut out some more as soon as I deal with the slippers and make the remaining PFD cotton jersey into briefs. I'm pretty sure that I've got a piece of white linen around here someplace. There's nearly a yard of the cream linen I made my sheets from left, but it seems like a pity to get only one bra out of a piece that big. There's a bleached "sunset" linen-cotton blend that's a good color to wear under thin clothing — and a good weight to wear under warm clothing. And two yards of black "handkerchief" linen that's almost too nice to cut into.
More than half a century ago, two years in a "deep yellow" dormitory room left me with an abiding hatred of orange, but I do like light orange for underwear — it doesn't contrast with my skin when seen through clothing, and doesn't look as though it was meant to be skin colored. The "peach" that store-bought underwear is made of looks both obscene and dirty to me.
I think I did have a beige slip that looked pretty decent once. Gave it to Goodwill decades ago, if I did.
pressed brief side seams, sewed them, pressed bra side seams, hunted for bottle, thread marked, water-erasable didn't come off when steamed.
I don't think I'll bother expanding the notes for Tuesday's entry even though they aren't quite in the correct order.
Yesterday I had an appointment to get my teeth cleaned: no sewing.
Today I was pinning the side seams of the bras and fretting over whether I'd remember to lengthen the stitch when I sewed where the gap for the elastic is going to be, and would I baste exactly one gap per bra, and would I be able to find the basted places — the dime dropped and after pinning all six seams, I took a piece of chalk and made a conspicuous mark in three places.
⁂
In a further burst of brilliance, I sewed all the gap seams one after another before sewing any of the seams on the other side. This also allowed me to keep all three bras in a chain until all six seams were done.
Then it was time to press, so I hunted out my blue plastic measuring thing, sat down to pin the casings on the briefs — and began by folding the crotch over the crotch liner, then I worked in both directions eyeballing the width all the way.
After that I went around checking the even-ness, and pulling each pin out and putting it back to relieve any pinned-in strain while adjusting the spacing.
I did use the 5/8" tab on the measuring gadget to fold the waist casing. I belatedly thought of sticking all pins close to the fold so that the edge could arrange itself. Then I went around a second time filling in between the marked places and moving any mis-stuck pins to the fold. A third time to move the pins to the stitching line, and a fourth to relieve the stress.
Now if the setting sun holds out, the briefs will soon be all done except for inserting elastic and mending the gaps left for putting the elastic in.
⁂
In truth, the good light had gone before I sat down to write the above, but all I needed to see was the spot lit up by the headlamp I strapped to the sewing machine. Next question: was I smart enough to write on the pattern what lengths of elastic I used for the houndstooth briefs.
Nope. But the PFD ranged from 32 1/2" to 34" of cord elastic for the waists and all legs were 19" of 1/8" elastic.
So I cut 33" of cord elastic — had to open the new package, as all the scraps were too short — threaded it with my newest bodkin, and tied the ends in a sheet bend. The type of knot doesn't matter much with elastic, if you pull it tight enough to deform the elastic inside the knot.
Oddly, there are no scraps in the baby-elastic bag. I cut two 19" pieces, thinking of a cartoon in which a customer ordered a yard of elastic and Bugs Bunny, with a flourish, stretched it out on the ruler, cut it, and let it snap back to about six inches. I don't recall whether or not the customer accepted this behavior.
Hang the bodkin up, get the yarn needle down, oops that's two yarn needles, put one back onto the curtain.
Absent-mindedly put the bodkin in in the direction that sent it through the potentially-troublesome seams first while threading the first leg; did it that way on purpose for the other leg.
Since the elastic is flat, I gave very brief consideration to sewing it the way I sew quarter-inch elastic, then tied it in a square knot. A sewn join would have been easier to get inside the casing.
Now all that's needed is to sew up the gaps, but I've folded the White up for the night and I'm in no special hurry. I also need to pick out the thread markings — all except one embroidered arrow that I didn't notice was on the casing until I'd sewed its big messy knot inside. Better just to say "I meant to do that."
The only thread marking was the line basted along the line of dots I made with the "laser level" — the electric chalk line. This will not be the case with the bras.
Those briefs are now in my underwear drawer, and the four strips of bias tape are now two strips, pressed into four one-inch strips and lying on the piano with three other quadruple strips and one double strip.
I also pressed the side seams of the bras, but have done nothing so far about hemming the gaps. I think I'll sew the first pair of hems by hand and see whether that's easier than hemming by machine.
I'd better take pictures and notes, because I don't just offhand remember how it's done.
The double strip of tape is 29", the pieced strips are 41 1/2" and 23", the other three quadruple strips are 22", 16", and 14".
524" / 36 = 14 yards.
That doesn't seem right even though it's a maximum — each measurement is of the longest strip in the pile.
Checking, I placed the quadruple strips end-to-end and measured: three yards and eight inches. Call eight a quarter yard, multiply by four: thirteen yards. So I guess I do have that much.
Since I also have some red linen tape, I'm pretty well fixed for red bias!
red-ramie briefs
I thought of simply pinning the fold and stitching, but sticking a needle is as easy as sticking a pin — and a lot easier than ironing in a fold less than an eighth of an inch wide. Maybe if I had one of those soldering-iron shaped pressers in the quiltmaker department . . .
I put on my magnifiers and turned the handwheel to stitch as close to the fold as possible. It appears that one stitch was closer to the fold than was possible. That one zig won't hurt anything.
It turned out that finger-pressing the seam open was sufficient. But I'll have to hot press to one side before making the final stitching.
I think that I'll make the first top-stitching before pressing, as usual, changing to basting stitches in the gap, then U-turn the second topstitching into the first. Much easier than doing each side in one pass. But I'll still need to hot-press before the second topstitching.
So I think I'll get all the seams, solid and gapped, through the first top-stitching and then press all of them at once.
I spent most of the morning fiddling with the computers, but I did hem the other two gaps.
I need to press all seams as they lie; they've had time to unfold a little. After my nap.
Like, fr'instance, this morning. Before pressing the seams, I pressed the hemp-cotton jersey scraps and put them into the briefs box. I'd better order another piece soon; the scraps look like a lot, but only one piece is big enough to cut something, and that one is an inconvenient shape.
After pressing the seams, I pressed the folds out of the two longest pieces, which were the double piece and the longer of the pieced pieces, cut along the crease marks, and pressed a fold into one side of each piece. That makes six pieces, and I think that each is long enough to do an armhole.
I carefully selected the longest pressing rag, then discovered that it was better to press the creases in installments — some as short as half a foot.
Pressed and stitched the side seams, then pinned up the bottom casings.
I pinned the first fold close to the fold, intending to pull and re-use those pins when pinning the second fold, but I saw, as soon as I'd laid a second fold on the ironing board, that it would be better to pin this fold close to the fold too, then stitch that fold in and press as I removed the first row of pins.
I used all the pins in my pin dish pinning three first folds and two second folds. (Urge to photograph empty pin dish firmly suppressed.)
I thought that stitching the width of the toe from the fold on Bra C was a little wide, so I put a piece of correction tape on the needle plate for Bra A. That didn't make a significant difference, so for Bra B, I cut a notch in the tape for the feed dogs and moved it left. This was too far left, so I guided on the middle of the right feed dog. I think the white background that the tape provided helped.
I used the longer pieced pieces of tape for the last bra, which is bra A, and was surprised that I didn't use the seam. Then I noticed that I'd sewn the tape right side to wrong side, picked it off, and got a much smaller hoop than I expected. So before sewing the other armhole, I measured the tape: one yard 7 3/4". Then I measured the scrap: 19 3/4". According to my handy-dandy solar calculator, I used 24" of tape for the armhole.
The tape that I picked off went right back on the first time, with no need to re-arrange unintentional easing. When everything is stretchy, I didn't expect that.
Spent the whole morning filling out my medical history — and dating it March 3rd. The assistant said that it didn't matter.
Truncated nap and not a lot of lunch, so I was too hungry and stupid to press the bras and do the final stitching before supper, so I threaded a #10 crewel needle with white 100/6 and set to embroidering my monogram on bra B. (My monogram is a B with a curl at the bottom to turn its back into a J.)
I did a terrible job; the thread displayed a supernatural ability to tie itself in knots, and I had to untangle at least once for almost every stitch, which left me very little attention for making a pleasing design.
Embroidering the winged A I invented when I was a girl was less frustrating, but I'm no better pleased with the results. It's just as well that nobody will be able to guess what it's supposed to be, because it was never a good monogram — I not only don't use my middle name, I generally forget that I have one.
When I get around to bra C, I plan to embroider a lazy daisy. Unless I think of a way to make a design out of a C. Perhaps I'll make a fly-stitch C. That will be quick and easy if I can figure out what to do with the ends on the back.
Tie them together? Work the C on the flat-felled seam and begin and end with back-stitches inside?
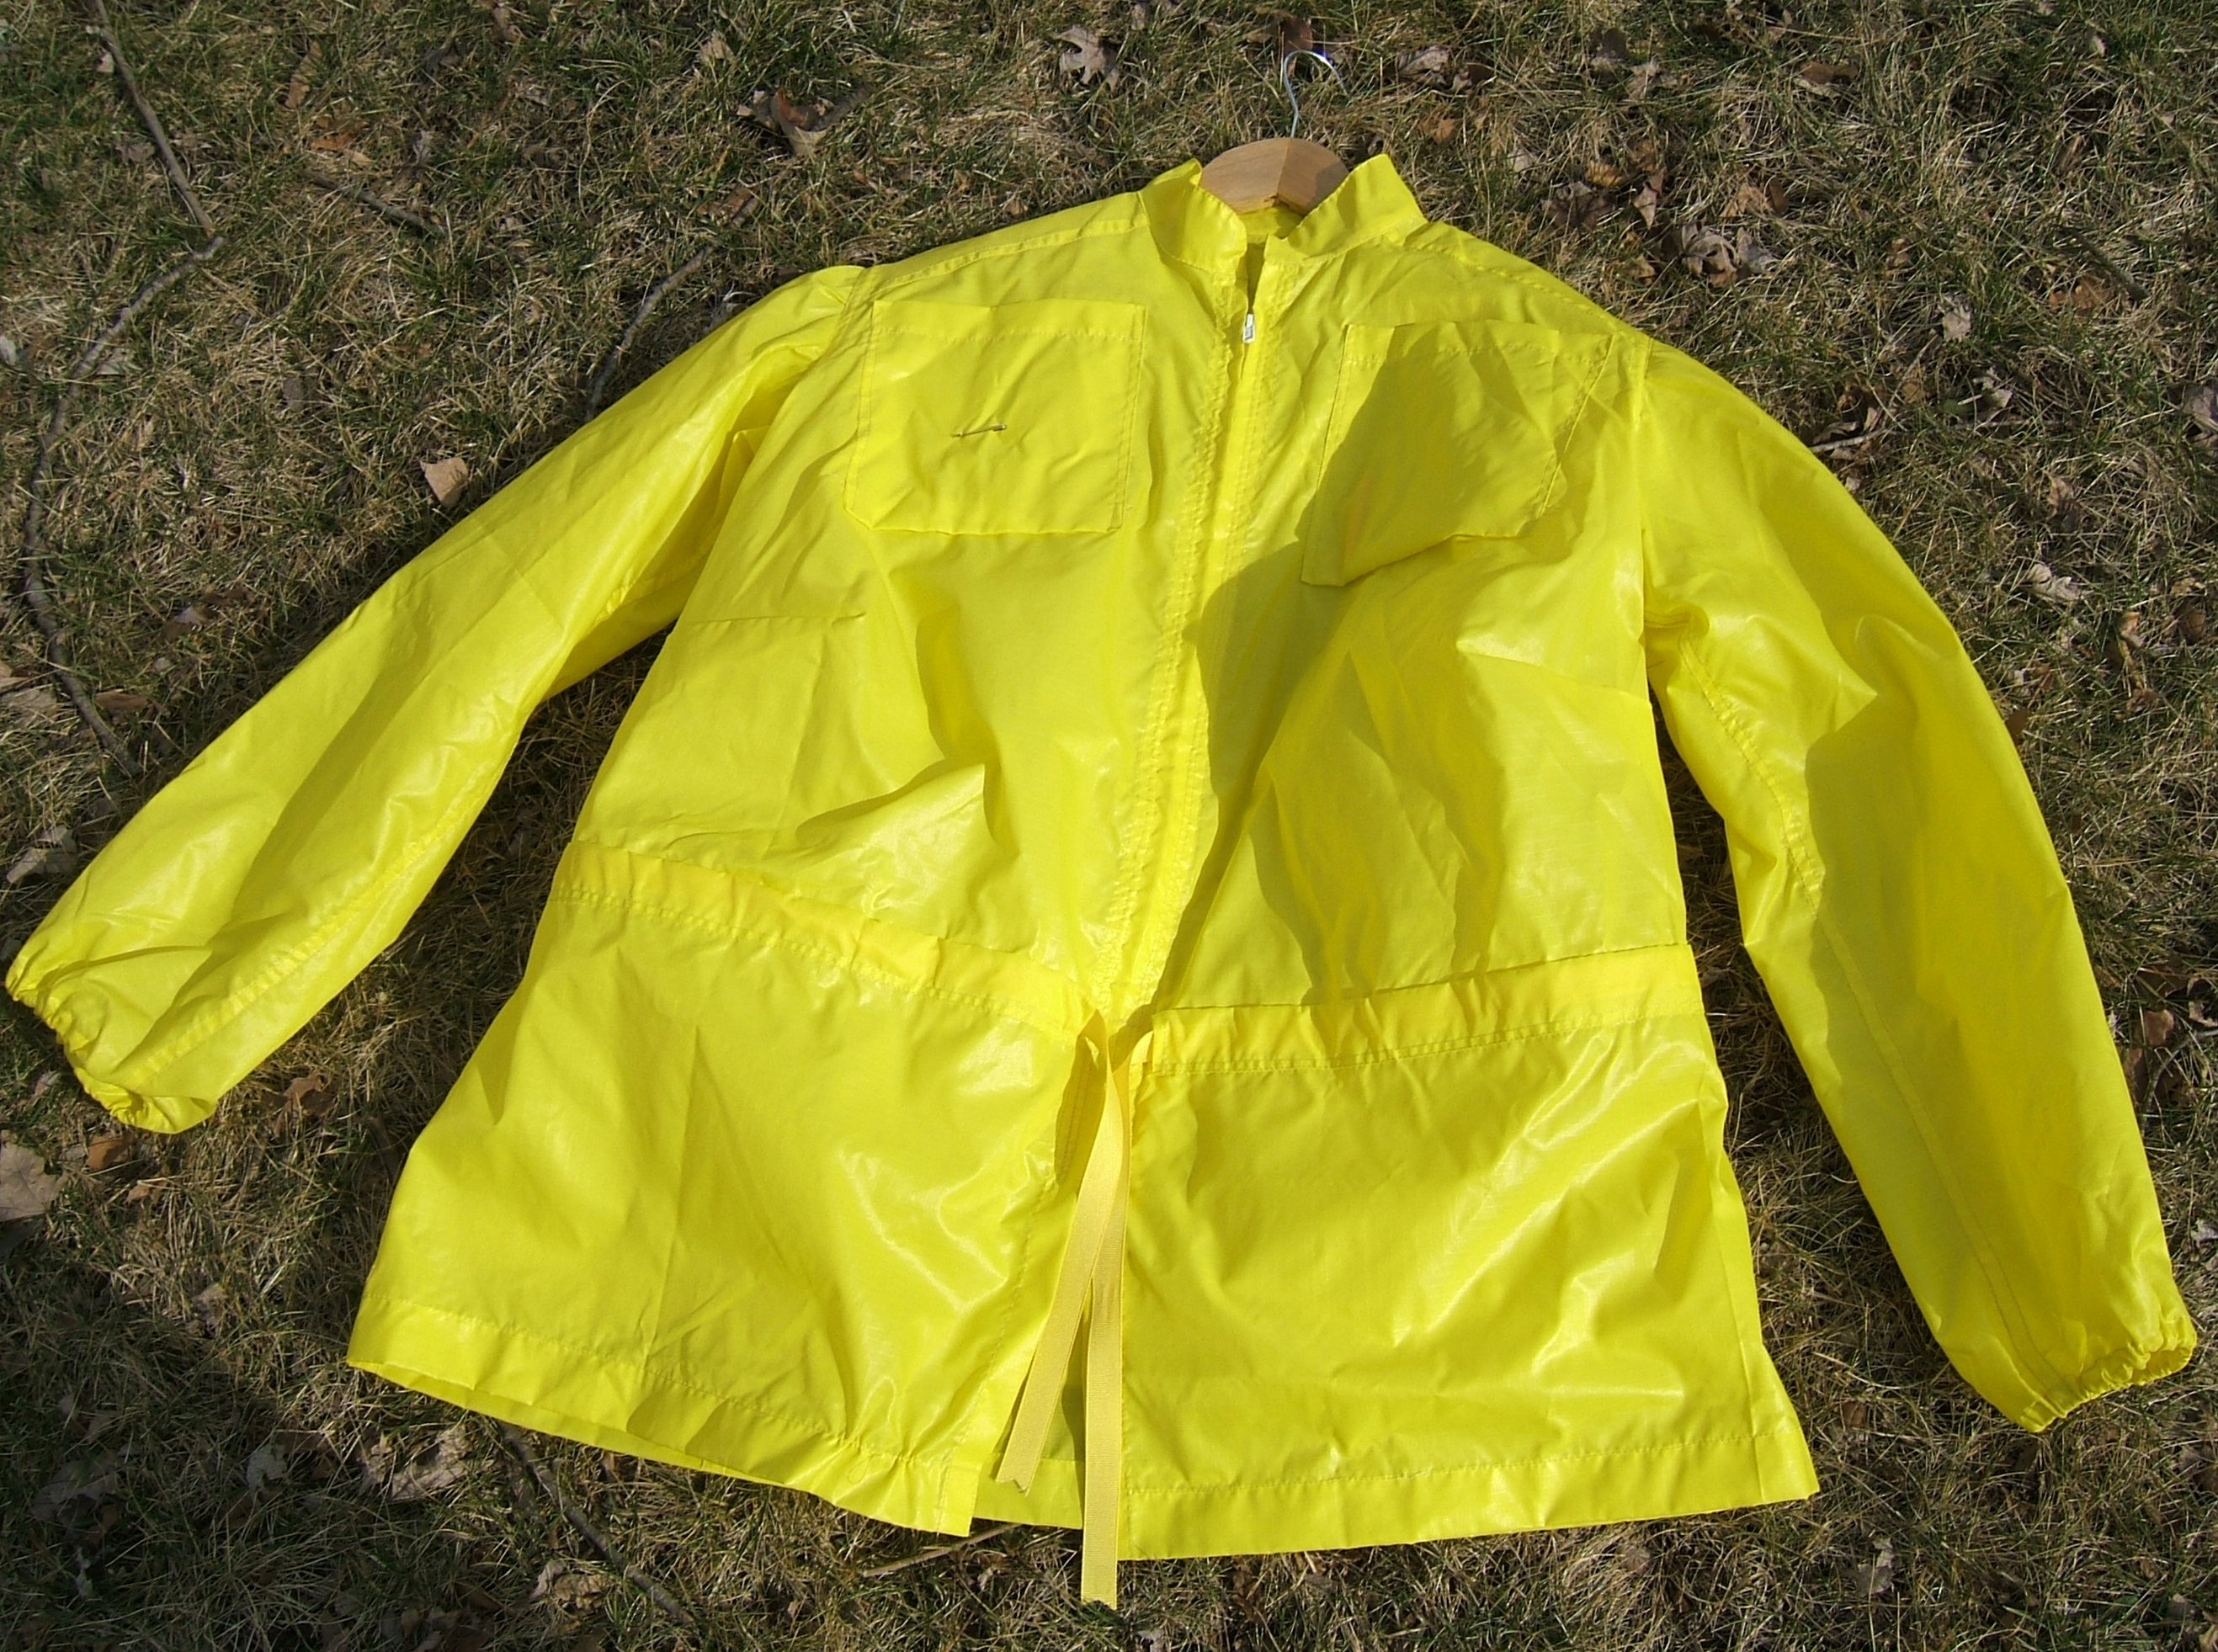
Shopping today; we were almost out of milk. Photographed my windbreaker lying on the floor, but the shots are lousy;
I opened the box of wool scraps and took out the gray doubleknit I plan to make into slippers. I also found some navy doubleknit that might make slippers someday. (I don't remember what I made of either fab . . . the gray was bike shorts, I think.)
I found that I have a piece of unbleached wool challis, scraps of three colors of H2O flannel, gray flannel, black fuzzy flannel, and lots and lots of worn-out socks. What I didn't find was the banana wool I plan to use for innersoles, but while typing the list, I remembered that it was on the closet shelf under the black fleece
So when I get out the twinkle twinkle cotton jersey, I'll be ready to start cutting. That appears to be the bottom layer on the top shelf of the closet.
I'll get it down after breakfast. [long after]
⁂
I insist on glass-head pins because I used to use plastic-head pins and got tired of the flat spots that appeared. I think that this is the first time I've used their heat resistance on purpose.
I warmed up the iron and pressed each potential casing with the pins still in, then removed the pins from the section on top of the ironing board, pressed the crease, and put some of the pins back.
(The lower crease had already been sewn in, as chronicled above.)
Then I pressed each armhole as it lay, to settle the stitches, firm up the crease in the bias tape, and neaten the seam splicing the tape together. Then I pressed just against the seam to crease the tape.
Unplugged the iron and set out to pin the bias down. I rubbed a droplet of glycerin on my fingertips so that I could roll the bra fabric just to the crease in the tape.
My first thought was to pin where I mean to sew, leaving the free edge to settle naturally, but I caught the crease in the bias tape misbehaving and shifted to pinning farther from the fold so that the turn-under was held. There were several places where I had to pin the fold to keep it from rumpling while I folded the tape to the inside. I stuck those pins in at an angle, more or less following the straight grain (or it might be the cross grain) of the bias tape, so that they would hold the fold and yet not interfere with the pins on the other side.
When I finished bra B, which was the first one I picked up. there were only five pins in the magnetic pin cushion. I don't want to take more pins out of the box, so I opened the sewing machine to sew those armholes before pinning the next bra. I think I'll sew all the armholes before resuming work on the casings.
A lesson from the _Sewing Made Simple_ book I've been reading. I'd become careless about being particularly careful to keep the work flat on the bed of the machine while stitching curves; allowing the stitching line to get pulled straight results in sewn-in rumples.
⁂
I'm wearing bra A. Pure co-incidence that that one got finished first.
Something about being drawn through elastic inspires thread to tie itself in knots, and the swimsuit elastic is an overachiever in that regard. After the second time I had to break the thread, I drew it over beeswax a few times, and it caused no further difficulty.
I drew a few lessons from finishing the armholes, but no longer remember them.
I marked dashes along the center of the casing of bra A with my Japanese centering ruler, then tried rulers until I found that the space allowed for three casings was nine picas, then went around drawing two wash-out lines three picas apart, each a pica and a half from the center.
I missed pulling the basting out of one of the gaps, but getting the threads out after the hem had been stitched was merely tedious, and it was only nine picas long. (That's an inch and a half, just under four centimeters.) At this point, it held without basting for the marking and the remaining two rows of stitching.
Something about using my new bodkin made me forget to put it in eye first — perhaps that it doesn't have an eye? — but I remembered toot sweet.
The ball-like loop on the end makes the bodkin easier to push through wrinkles, and gives me a grip when I'm trying to stretch wrinkles out. And the tightening ring that pushes down two more inches after the elastic is gripped makes me confident to pull hard without shifting my grip to the elastic.
I took a picture to illustrate the essay on patience that I recently added to the table of contents page. Haven't processed it yet. (If you see something other than a row of asterisks above, I've gotten around to cropping and scaling it.)
I photographed the finished wind jersey yesterday. I'll get around to posting it Real Soon Now. I did crop and scale it, because someone on McCunn's How to Make Sewing Patterns mailing list wanted to see a picture of my jersey pockets. I put the pictures in BLOG2XVI.
Began this morning by using my Japanese centering ruler to cut three-inch by four-inch moleskin into one-inch squares. Used it in centering mode to divide the four-inch sides, then found the center on the three-inch sides and marked four units to each side of that, since the sides are about twenty-four units long.
I wish I knew what those units were called. Probably couldn't spell it on this keyboard.
I cut two ninety-inch pieces of quarter-inch elastic to finish the remaining two bras. That left six and a half inches; I'll have to go to Lowery's soon and buy ten more yards. I do have a sandwich bag full of scraps.
Brief awk scrickle when I saw the empty coil-less safety pin on the curtain: I left the bodkin in the arm of the futon after finishing bra B.
Sometime or another, I worked a fly stitch on the shoulder seam of Bra C. Looks more like a V or a caret, and the back-stitches on the inside, which I tried to arrange into a C, are even more V-like.
Fly-stitch letters need orientation to be unambiguous.
⁂
To get elastic through the tunnel in a flat-felled seam, it is necessary to put the bodkin in backward, then reverse direction once it's fully in. I am finding it necessary to be careful that the little ring doesn't catch and get pushed looser while the bodkin is moving backward.
But I need no pin to keep the end of the elastic from pulling inside; I must push it through the tunnel in installments, and once I've passed the other side seam, it takes effort to get the puckers to pull back what's been pushed in.
⁂
make red-ramie bras
Those smooth U turns I've been so carefully making in the top-stitching? Totally not necessary. They never get near the final openings, and the one that isn't fully concealed would look much nicer as straight lines that go around the edge of the ruffle and then stop.
I hope I remember this when bra-making gets back to the top of my to-do list.
When cleaning up, I found two pieces of wool selvage and, not wanting to put them in with the other wool until I was sure they contained no moth eggs, threw them into the laundry. On Monday, I washed them and laid them on the ironing board. This morning I plugged in the iron to get the creases out of my gray wool doubleknit and pressed the selvages through a wet rag first.
And realized: just ironing them would have taken care of any eggs.
This gray doubleknit is really nice. I wish machine-washable wool doubleknit were still being made — it would make a lovely suit.
I got the twinkle-twinkle jersey down. Looks as though there is enough for a shirt and a dress, but all this print is good for (aside from making accessories for my wizard suit) is pajamas, and if I want pajamas, it's for travelling, and for travelling I prefer pajamas that aren't obviously nightwear.
I usually wear sweatpants and a T-shirt.
I didn't think there was that much difference between the left and right midsole patterns. Only part of it is that the larger pattern was closer to the camera.
Seems odd that none of these patterns have ever been pinned. How did I manage on previous occasions?
No help in my 2013 diary. My to-do list was much shorter then. Didn't see anything skimming through 2014, either.
Pins work.
⁂
On closer inspection, the patterns had been pinned. And yes, I do have an appointment with my eye doctor.
I had planned to cut out one pair, write on the pieces, and unpin the patterns for use on the next pair.
But I went and cut the fuzzy black ones first. I can't write on the pieces!
Another use for the "two-sided craft mat" I salvaged from the neighbor's trash. I'd just marked Dave's new pants to be shortened and was grumping that I'd have to cut with scissors because my smaller cutting mat isn't small enough when I remembered that one side of my wide translucent ruler is supposed to be self-healing, and lo and behold, it does go inside the pants leg, just barely. It would have been easier to use ("durable working surface" up) than my leg board for the marking. And the "self-healing" side is a cutting mat. Job made much easier.
Off to hem the newly-cut legs. I think that the thread I bought to make my "oakwood" pants is the best match for Carhartt brown.
⁂
There were a full spool and a spool with two bands of thread on it in the bag, but no White bobbin. I didn't have any empty White bobbins, so I decided to over-wind a bobbin of cheap thread I keep for basting, and just leave the thread on it. Unexpected breaks in basting are seldom a major disaster.
I wound the hand-wound band onto the bobbin, thinking it would be the shorter. But when I finished sewing the hems, there was just enough left of the other band to thread the machine. So I thought that there couldn't be much left of the thread on the bobbin, and wound it back onto the spool. Turned out to be substantial; I deduce that the hand-wound band came of a previous bobbin-emptying.
Something darker would have been a closer match to Carhartt brown, but that's the darkest brown I have that isn't basting-and-embroidery thread.
Checking: there's a spool of dark-gray Guetermann polyester on the shelf; I'll consider using it if I have to let the hem out after the pants have been washed. I suspect that it's too dark. At any rate, I have to get within three feet to detect the stitches at all, so the too-light color is good enough.
After writing the previous entry, I cut out all three pairs of mid-soles.
Went cycling yesterday, and bought ten yards of quarter-inch elastic at Lowery's. I considered swimsuit elastic, but I thought the polyester elastic was springier.
Yesterday I basted the soles of the black-fleece slippers around the midsoles. Today I frittered away the whole morning processing photographs, and didn't even link and caption the one I shot for the Table of Contents' "Patience" essay. I did cut two 9 1/2" pieces of quarter-inch elastic for the heel pieces. Tomorrow I'm getting a bump cut off my nose; don't expect an entry here.
I selected Guetermann's black spun silk for the basting thread even though the soles are polyester. I presume the fleece is polyester. I intended to use black 100+ to baste the midsoles in, but found the Guetermann first and thought it would be easier to handle. And a spun thread is more likely to stay where you put it.
In previous slippers I thoroughly quilted the midsole to the insole; this time I reflected on how firmly the banana wool stuck to itself when I unfolded it, and settled for hand running stitch around the edge. Then I went on to use the same thread to baste the insole to the outsole. I didn't bother to mark them because of the great difference between left and right, but I'll have to thread-mark "R" and "L" on the uppers.
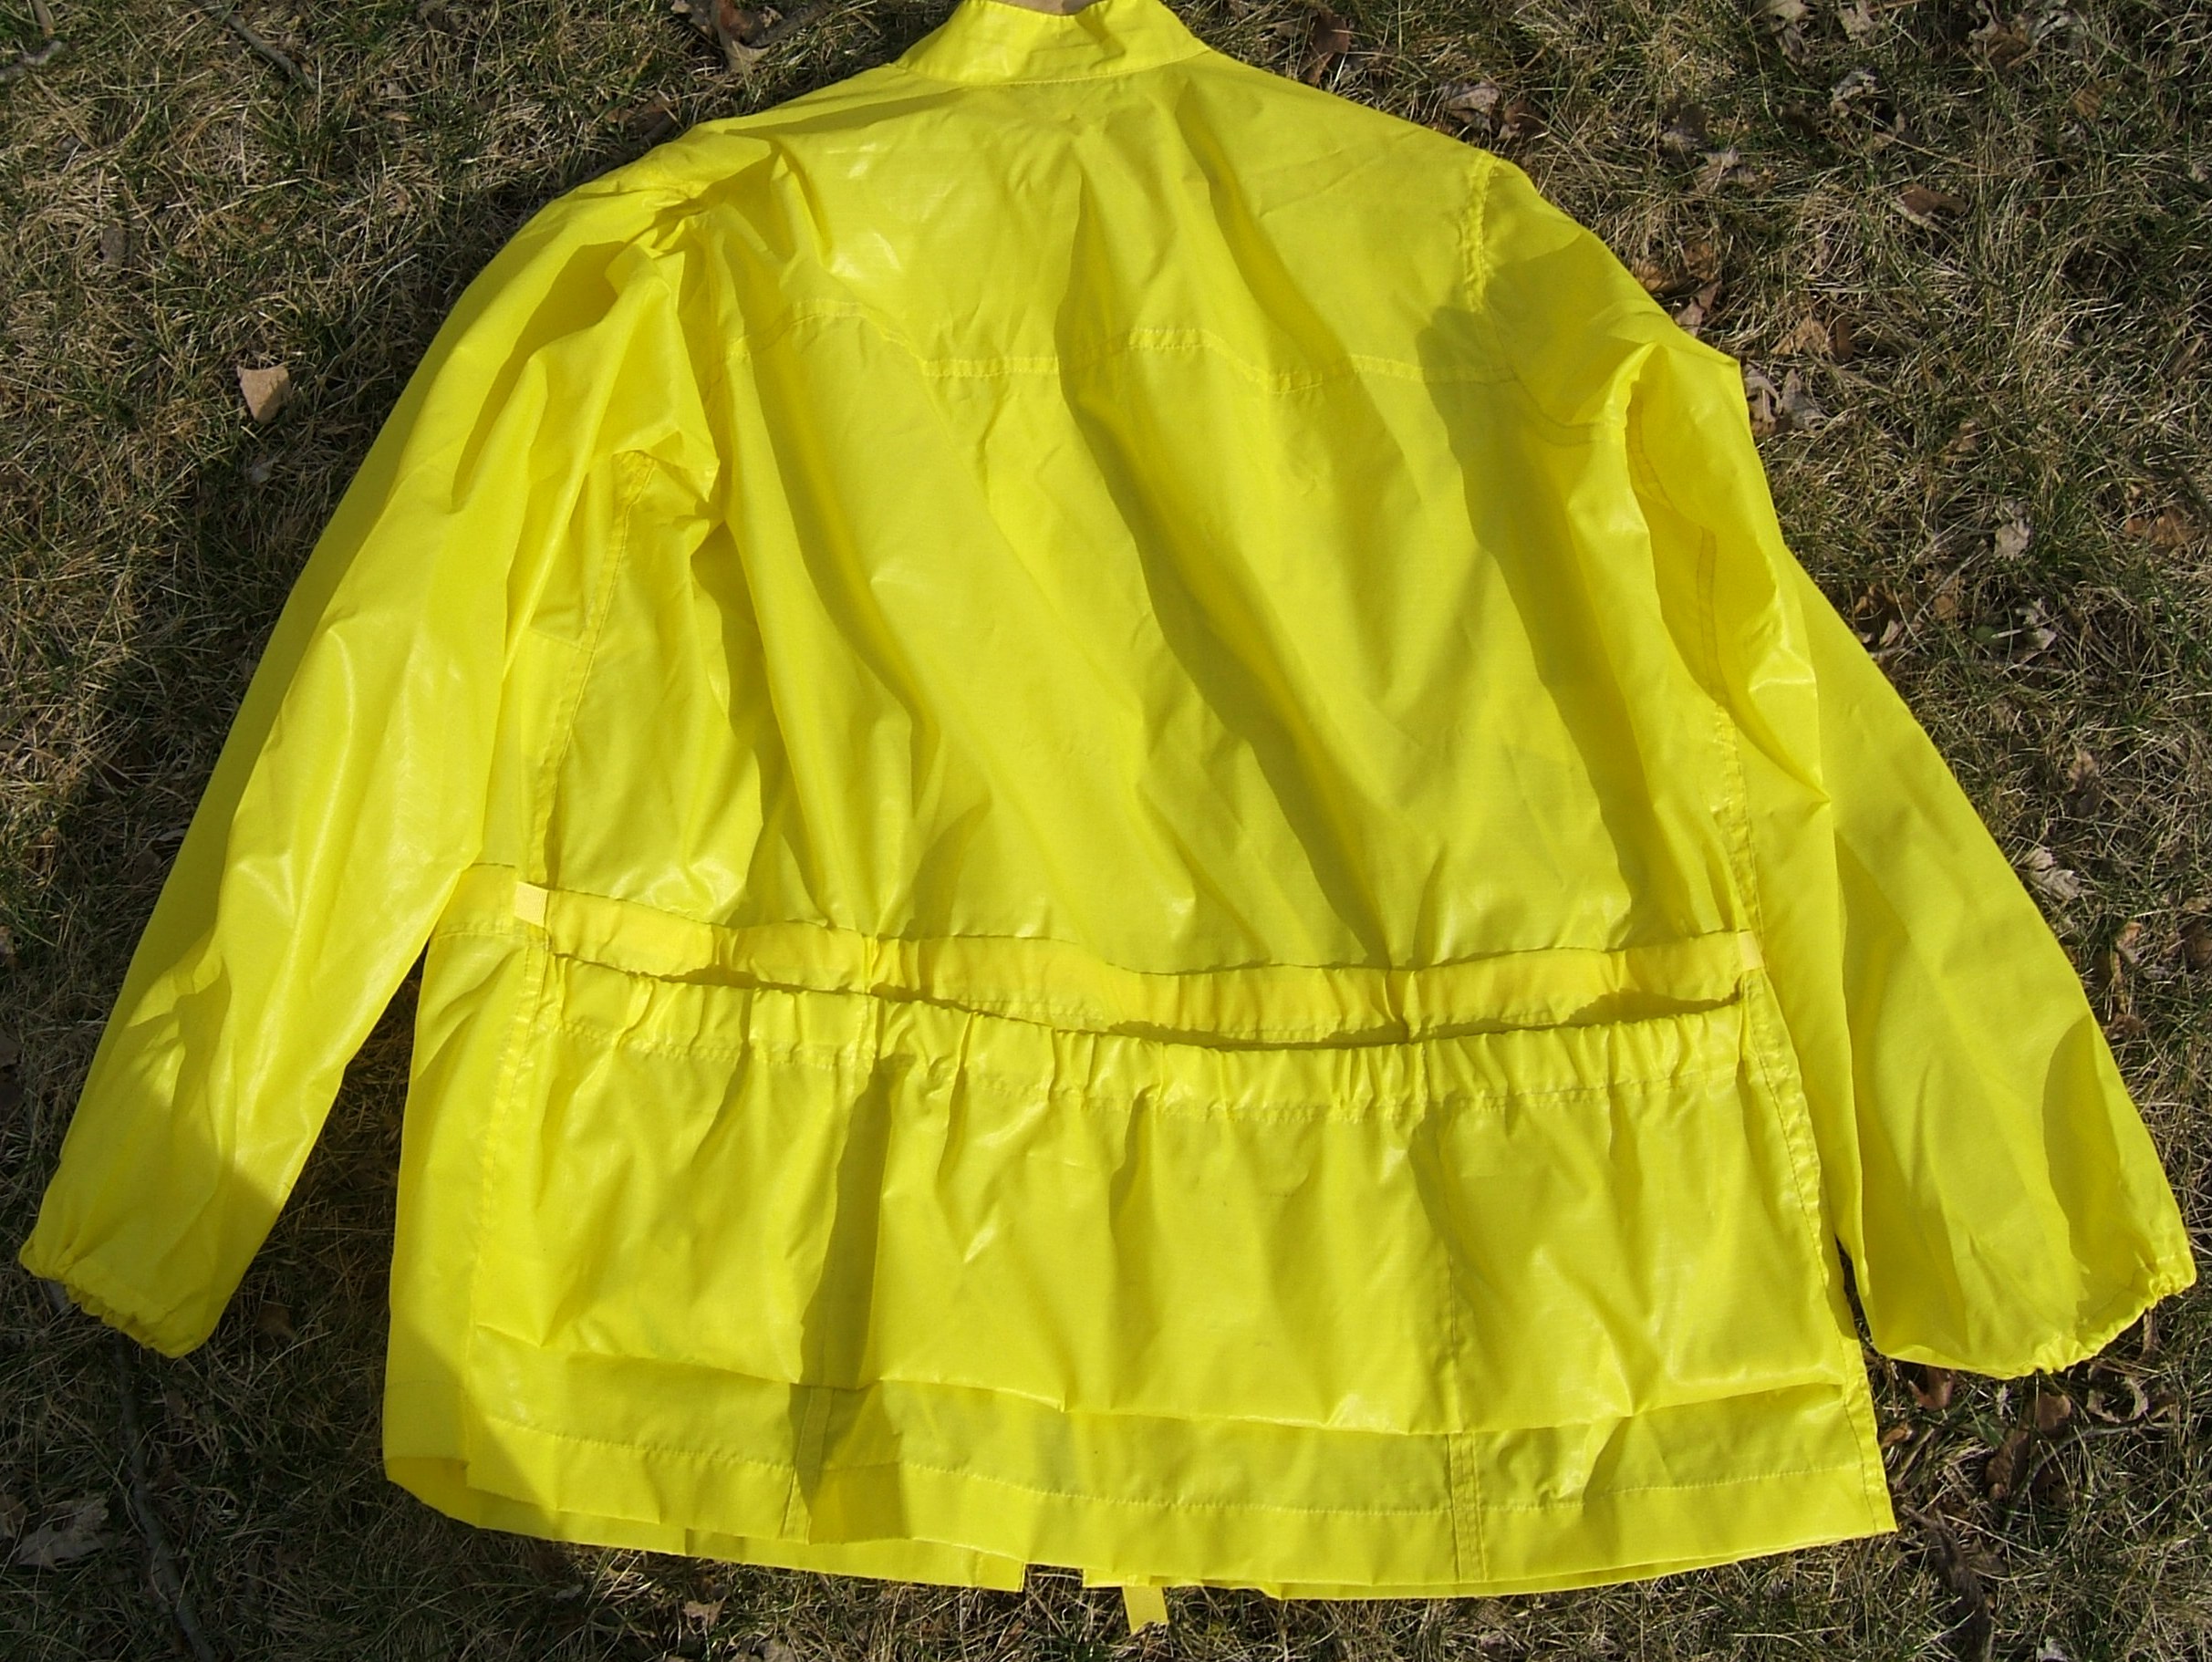
I re-took the pictures of the finished overjersey a while back so that I could append the shot of the back to a Usenet post. (rec.bicycles.misc) And on the same day, I had occasion to post a link to the back picture on Creative Machine.
So at long last, here is the finished overjersey:
This morning I removed the elastic from my prototype PFD underpants, cut along the worn edge, picked out the old stitches, and pinned a new casing to sew after I re-connect the Necchi. I'm not updating the spine index in the Table of Contents; I'm pretty sure that "assorted repairs" is already on it.

I also sewed the front of the right upper to the heel piece, basted around the upper to keep it in line while I'm sewing four layers together (both soles were basted many days ago), and pinned it ready for the final stitching. Then I concluded that I'd better have a nap before continuing.
I did the basting with the spun silk that I used to baste the midsoles in and baste the soles together. This fleece is weird to work with because it's a thin layer of fabric with thick fuzz on both sides; I frequently think that I'm basting more than two layers.
The slippers aren't going to be half as nice as I expected them to be when I bought the fabric; it isn't a black shade of black.
I think the grey interlock will be better. I hope the spool of gray thread I saw when searching for silk is #50 rather than 100+. (If I had any sense, I bought one spool of each, but I'm not renowned for common sense.)
Checked: It's #50. There's nothing but one spool of white and one spool of black in the 100+ box. There are opened spools of 100+ in zip-lock bags hither and yon, but I'm reasonably sure that I've never opened a spool of gray silk.
Well, it's lucky that the toe-hole in the old ragged slippers I'm slopping around in bugged me enough that I decided to give it a quick-and-dirty zap before lying down: I had forgotten to turn off the battery light on the White Family Rotary.
How quick and dirty? I caught the scrap that had been under the presser foot in the stitching, and just trimmed it off and left a sliver sewn to the slipper.
I wonder why the right slipper is worn through to the midsole at the heel and had a hole on the toe, while the left slipper shows very little sign of wear. On closer inspection, there is a hole developing under the big toe of the left slipper, and some fraying in the adjacent seam.
Ah! It's lucky that I postponed the final seam: I am set up to do it on the White, but I zig-zag my soles to my uppers. Makes them a little smoother on the inside.
I've half a mind to sew with straight stitch as set up, then zig-zag the edge of the seam allowance.
I just got the diagnosis: The long hiatus in posting is due to arthritis of the joint between my left hip and the spine. There were many days when I couldn't even type.
Corticosteroids rock! But only for acute conditions that can heal up before the horrible side-effects set in.
I had pinned the upper of the right slipper to its sole before the back-ache got acute. On Monday, I zig-zagged around it, which completed that slipper, and today I found all the parts of the left slipper and put them on the Necchi. It's in five parts now: Two vamps, one heel part, one sole assembly, one piece of braid elastic.
Time for a nap now, and I want to walk and cook in the afternoon. Probably no sewing. After the slipper is assembled, sewing will come to a screeching halt until I can bend over the cutting table.
The slippers are finished, no fooling.
I was disappointed that fleece, while warm, is unmistakably for bedroom slippers, but once on, they aren't all that bad.
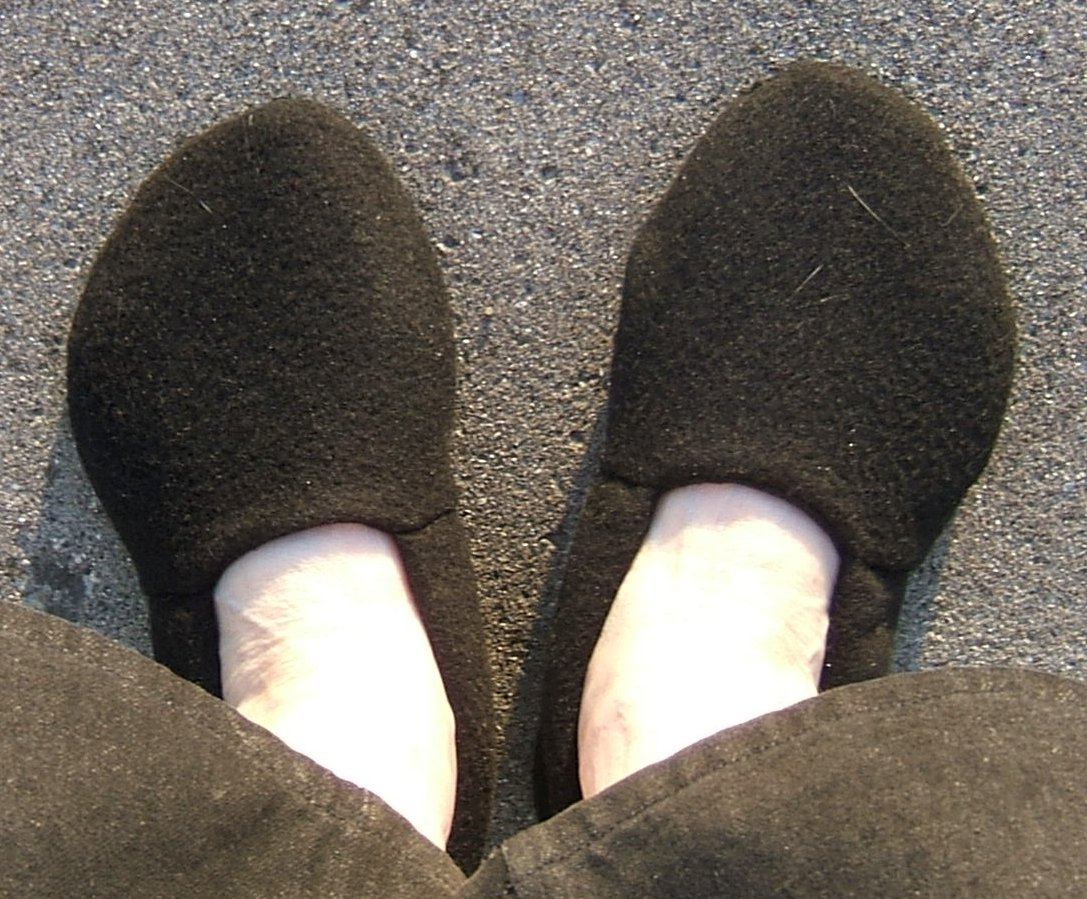
I hand basted near the edge before sewing the upper to the sole. With four layers of fleece, I had to stab-stitch. I used the same spun silk I've been basting with, and secured it only by overlapping ends and beginnings, to avoid restricting the stretch. Of course, the basting is now wedged inside the zig-zag I used for the final stitching, so it isn't going to slip much.
I still had to stop frequently to squash the fleece with Grandmother's bodkin, but I didn't have to re-do any of it.
I think I did a slightly-neater job on the left slipper.
Most of today, I've been able to stand up and walk around any time I wanted to, so I think I can cut out the gray slippers soon. They are small enough that I can sit beside the table instead of leaning over it for most of the job.
Laid the slipper pattern on the grey wool. I think the rounded cuts show where I got patches for the shorts made from this fabric — at least I can't think of anything else.
I can't remember where I put the innersoles for these slippers. Maybe I folded them up in the banana wool, but that seems to be an odd thing to do. I had thought I left them on the piano, but they are not there.
I sewed a dart into the vamp of the old, worn-out slipper that kept falling off, and it stays put now. I may do the same for the left slipper.
Darted the left slipper this afternoon.
No sewing plans.
Sewing before breakfast: I made a bag to hold spices. For want of a better term, I've called this a "bouquet garni" in the spine index.
I should have made this bag last night, boiled it, and draped it over the side of the saucepan to dry. Instead, I noted that the top skillet wipe had been put there straight out of the washing machine — I tear up defective sweat rags while putting the wet clothes on drying racks — and decided that that was clean enough.
A first: I took out stitches while making a bouquet garni. I'd put the spices in and was sewing it closed when I realized that the bag was more than twice as big as it should be; that makes twice as much soap etc. that can dissolve into the corned-beef broth, so I ripped back and tore off the excess.
Then I had a terrible time re-threading the needle because I didn't want to lick my thread or put wax on it. Wax is edible, to be sure, but my cake of wax has been rattling around for fifty years. The waxed thread would have been drawn through the fabric many times before I broke it off.
I used the hasty method of holding the needle in my right hand and waving the fabric back and forth with my left hand to pleat it onto the needle.
I've probably spent more time talking about it than doing it.
make new caddy for armchair
. He re-arranged his TV space and
is no longer using his armchair caddy.
Today was laundry day. I glanced at the fabric and patterns lying on the card table when putting drying racks into the parlor.
I dropped a clothespin while taking wash off the line, and bent over to pick it up with no support anywhere near, and without pausing to plan how to do it. I could very easily stand up long enough to cut out the slippers.
It's already too late in the spring to wear the dress the gray slippers are to go with. I make all my stuff well ahead of time!
Cut out the slippers today. In deference to my back, after pinning them, I sat down and packed my pill boxes, then while cutting, every time I freed a scrap too small to keep, I straightened up and carried it to the compost plate. It's pure wool, if I recall correctly, and therefore high in nitrogen. And each time I freed a piece, I carried it to the piano and laid it on my leg board, which is still there from when I shortened DH's new pants. Good idea anyway; if he should want to play the piano, all the stuff I've piled on it can be picked up at once.
I still can't remember where I put the midsoles, but I can assemble the uppers while thinking about it.
make black-fleece slippers
That should have been up there a ways. I'm
not going back to edit it.
I see that "finish sewing hooks and eyes on black pedal pushers" isn't on my to-do list. I must get with that; I had to wear old black bike knickers under my skirts last Sunday.
I found the midsoles when I put the grey wool scraps away: they were lying on the box of silk scraps.
Repaired my ragged slippers again today.
Wound a bobbin with gray silk and threaded the sewing machine. Thought about what thread to use for basting. I think I'll use the same black spun silk for basting the midsoles to the innersoles, then use gray silk for lining up the edges.
I chickened out of winding the bobbin all the way, because, if I recall correctly, I can get a hundred yards of size A silk on a forty-yard bobbin, and there are only a hundred meters of #50 on the spool. Not to mention that the spool has been opened. I wonder what I sewed with it — must have been by hand, since I've no bobbins.
Hey, it's a lot easier to scoot my secretary chair around this room with the ironing board folded up. I just go around the mouse stand when I want to go from computer to sewing machine, instead of having to move it.
Half the multiplier onions (family clone of winter-hardy shallots) are in the ground. We had winter-onion scallions with supper.
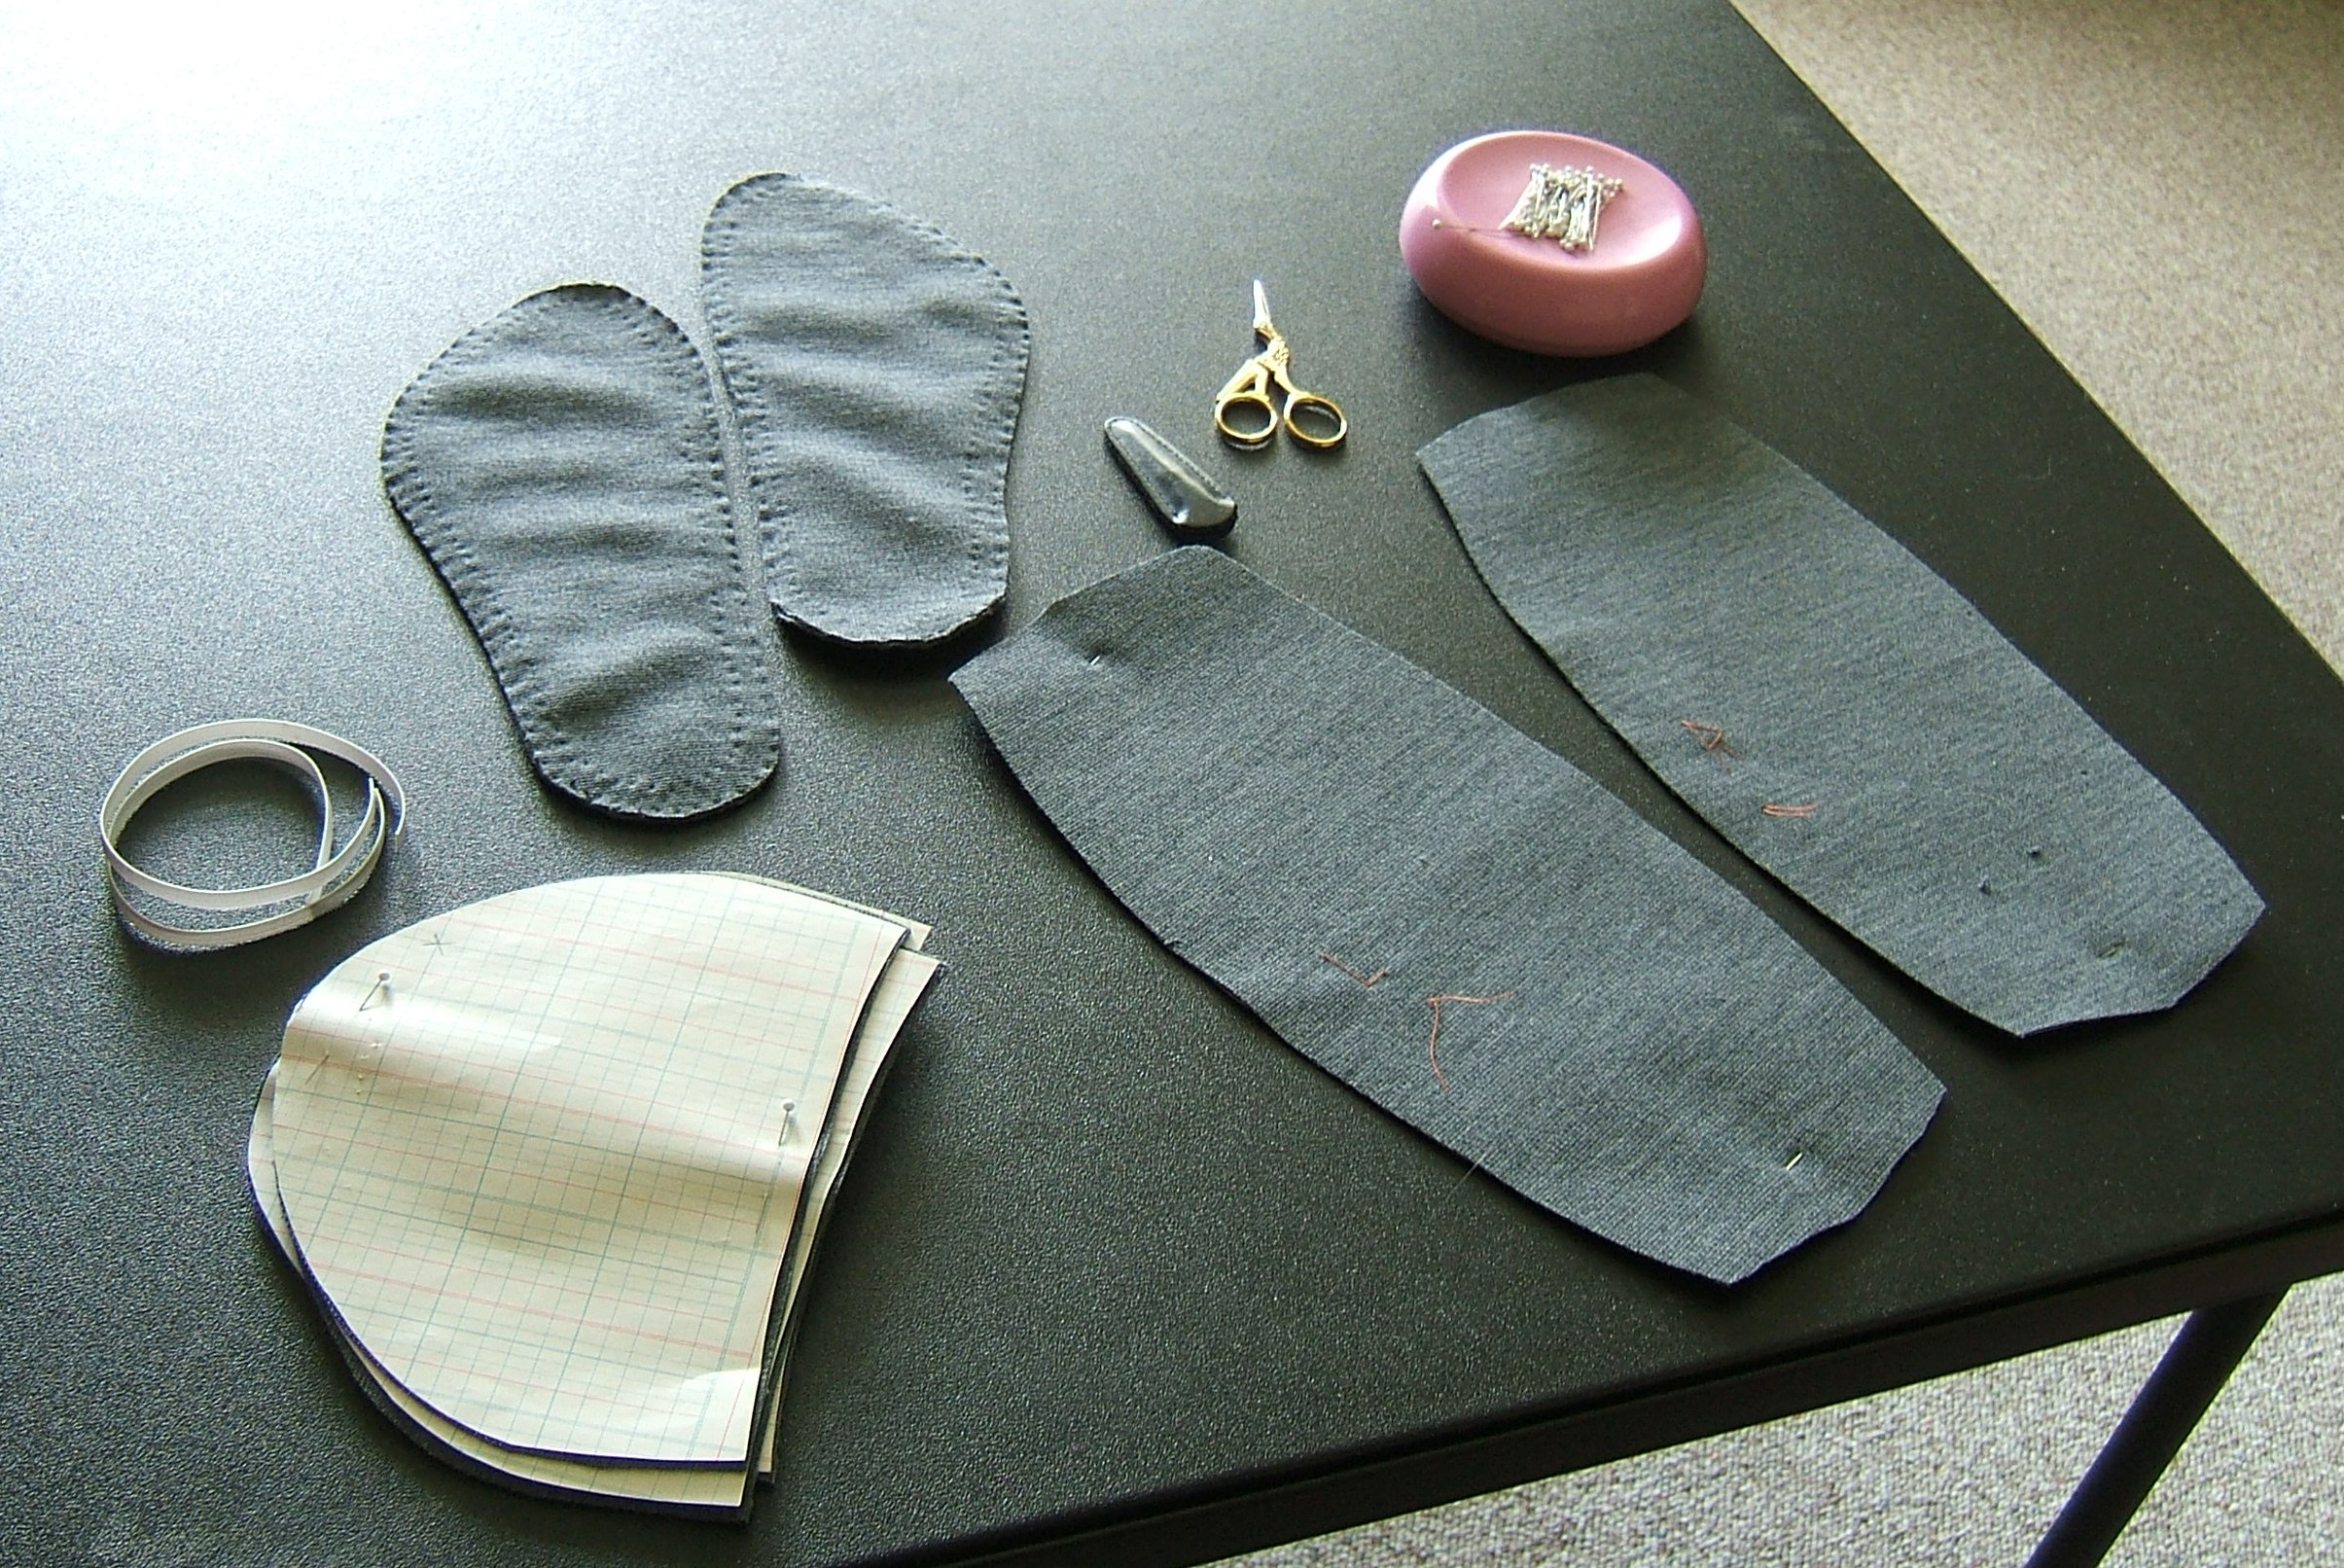
I accidentally timed myself basting the second slipper — it took nearly an hour. But getting the final seam right the first time will be worth it. I used black spun silk for all the basting. Easier to handle than reeled silk, and all will be inside the seam allowances.
The gray silk matches the gray wool perfectly — better than I could have done on purpose.
(The clerk at Lowery's can make perfect matches — but they don't sell reeled silk — or didn't when I last asked. Can't be much local demand for silk; I'd wager that they make most of their money by catering to "quilters".)
And when finished, the gray slippers didn't go with the gray dress at all, and I wore the black fleece slippers to church yesterday. Well, I changed into them after arriving, because they wouldn't fit into the sandals I'd been wearing over my old slippers. Just as well, because it was so cold I needed the thick socks I wore with my everyday sandals for the walk-and-ride. The slippers are thicker than my socks, but cover less area.
It's washday, and I left a pillow naked while washing its case. Time to move "make pillowcases" up on my priority list. It takes hardly any time — once one has secured suitable fabric. I strongly want plain white, so nothing in my stash will do.
⁂
I was about to type "the old sheet in the linen closet is too far gone", got up to check, discovered three worn-out sheets, and one was not too far gone to bother with. I plan to just tear it into rectangles and let the thin-unto-holes parts land where they may. Each such pillowcase will last at least one wearing. I might tear them in half when the holes enlarge, and make one out of two. That would be easier than cutting around the holes in the first place.
Perhaps I should sew the worn ones with basting thread.
It's safe to tear the false hems off the sheet because the hem fabric is so weak that strong spots in the thread pose no risk to the sheeting, and I've been thinking, while ripping, that I should use basting thread for the hems the next time I make sheets. I don't think there can be thread-breaking stress on hem stitches unless I do it on purpose. On the other hand, repeated washing has left the strong thread so weak that inches of seam can be simply pulled open — would basting thread give up entirely?
Particularly when you consider that my cone of basting thread has been hanging in the window for years.
I just moved "more pillowcases" down on the priority list.
It turned out that the sheet was three yards wide and ninety inches long, so I tore it into three strips and tore each strip in half. I marked one yard from each end of the edge, then marked an inch and a half outside each mark for the tear, to allow for the outside pillowcases already being hemmed. (The sheet had half-inch hems instead of selvages.)
I thought I'd get the four outside cases done this evening, but after the third, my back announced that I was going to lie down and read Alfred Hitchcock for a while.
I should write something about back-tacking. I wonder which chapter that belongs in? I did back-tack the pre-hemmed cases, but was careful to keep the turn-around point half a stitch back from the very edge, to reduce the tendency to start a tear.
I think I'll seam first and hem after on the two middle cases even though they will be put on pillows only once or twice.
Sigh. I'll have to wait for my rotator cuff to finish healing before I take another Tour d'Warsaw and look over the ninety-inch quilt backings at Lowery's. It's been three weeks already and it still clicks when I raise and lower it.
I can do all the important stuff. It's doing without trivial things that gets you down.
I got to wear my new wool overjersey today. Over a long-sleeved T-shirt instead of another jersey. It wasn't quite warm enough on the trip out, and I wore my warmer pair of gloves and two pairs of sweat pants.
Alas, my first expedition by road bike revealed that my left arm isn't healed yet. I'm re-thinking my refusal to leave the village on the "bicycle-shaped object" I use for therapy. I can always walk around the intersections that a flatfoot can't handle.
Roomba day in the sewing room, but Roomba was done before I sewed up the fourth pillowcase on the White in the bedroom. The Necchi was in the bedroom too, but not plugged in. Still is; I have to put the dumbbells away before I can roll it back into the sewing room.
I did a more-thorough job of plucking out the broken threads from picking off the false hems on this one, because I could do it outside where I didn't care where the lint went. It was still a little cool for sitting outside, but an owl hooty-hooed like a dove the whole time. (Or maybe it was a dove; I've never seen the critter.) Put me in mind of staying with my grandmother in Thorntown.
Alas, after learning that the sewing goes faster if I set the pins well back from the edge, so that I don't have to stop and take them out, this one had a crease near the edge that I had to either pin into or iron out; stopping to pick out pins was faster — particularly since I could flick some of them out without stopping.
Now to move the ironing board from the parlor to the sewing room and press a turn-under into the two disposable pillowcases.
It will be more efficient to sew them into bags, then press a quarter inch to the wrong side.
⁂
Two more advantages of setting the pins back from the edge: since I'm not going to take them out as I sew, I can put them in nose-to-tail when I feel there is a slight advantage to it. And I can let the fabric slip through my fingers for longer stretches between adjusting my grip.
The cold bothered me more this time, so I came in and sewed the first case as soon as I'd plucked it, then went back out to pluck the other.
Chirp twitter twitter: when I wanted to move the dumbbells, I just bent over and picked them up!
The Necchi is back in the sewing room, but still unplugged. No point to plugging it in until I'm ready to use it: it's less vulnerable to power surges unplugged, and I might use the White exclusively until it's Roomba day again.
Off to move the ironing board — all by myself!
hem madras pillow cases
As long as I was in pillow case mode . . .
make gray-wool slippers I
appear to have forgotten to strike that off the
list after I finished the slippers.
I got rid of one of the boxes on the floor last week.
Nothing on the to-do list inspires me to my next project. And I'm spending time in the garden now.
I image-searched and created two sheriff's badge designs, one with five points, one with six. The six-point one has one of its balls tipped a bit — limitations of png, one can see when it's enlarged enough to see the pixels. I intend to trace part of the design, then rotate it to trace the defective point from a good one.
I stored the edited files in embrogig_files and put the downloaded files into the recycle bin.
I selected three of the old designs and intend to stamp one heart, one snowflake, and two small stars. I think I have enough stamped squares of the other designs.
The snowflake printed badly. I threw the transfer away. Someday I'll create the six-point sheriff badge in Open Office Draw, but it's low priority. I'd better put that on the to-do list so I don't forget about it.
<copy, paste> "Sheriff badge" is just above "more pillowcases".
I made four more blank tracing papers, with the centers clearly marked by white crease marks. Perhaps I should try them out by making another snowflake transfer.
Today I sewed four eyes to my black linen-cotton pedal pushers. Two more eyes and a hook, and I can wear them. But the adjustment opening still relies exclusively on safety pins.
I've gotten really bored with sewing on four hooks and twenty eyes every time I make a pair of pants. There must be a better — or at least quicker — way.
So I Froogled "eye tape -eyelid" and turned up a yard of bra-closure tape. "bra-closure tape" got nothing. "bra extender" turned up a lot of hits, nothing to buy — but now I know what department to look in.
It pays to complain in public. (But I don't appear to have any lingerie-parts pages bookmarked.)
I attempted to draw the badge, but OOD won't draw a circle small enough to make the little blips on the ends of the points. It does allow me to put the star on top of the dashing guide, but the automatic center centers the square the star is drawn in, not the star itself.
This is a job for compass, straight edge, and round hole! I wonder where I put my knitting-needle gauge.
Checked: several of my drafting tools have small round holes in them. I can stencil the circles directly with the iron-on pencil. Not until someone uses the badge I've already stamped, though.
I've put all the stuff back into the backpack and put the backpack onto the shelf.
I wanted to get Threads 134 down off the shelf, because of a conversation on Creative Machine. I knew at once that the ammo box I stand on when I plug in the iron wouldn't do the trick, so I went out to the garage and brought in the library stool. (I think I'll just store it in here, at least for a while — I'd forgotten that we had one, but by good luck recently had to move it to get at something else.) That sufficed to get the magazine down even though I had to hold a flashlight in one hand to see which magazine. (It was gloomy out, and the issue numbers are very small.)
But when I wanted to put the magazine back, the issues on top of the stack started sliding down behind the pile and I couldn't quite get a firm enough hold to stop them, so I had to bring in the "three-step working platform" stepladder, move everything above #134 to the paint shelf, then put everything back. I tried to take a picture of the box, stool, and ladder to commemorate the event, but in the gloomy light the exposure was too long and both attempts were too fuzzy to use even though I braced against the back of my typing chair.
I noticed a while ago that when I rolled the Necchi back in after Roomba came through, I put it in backward, with the front to the window. I think I'll leave it that way until I want to change the thread. It's still set up with gray silk for sewing the wool slippers.
When I put the backpack away, it was to clear the card tables for cutting out twinkle-twinkle slippers, but I have made no moves in that direction yet.
I forgot the pedal pushers. Maybe I should drape them over the rocking chair, so I'll remember to sew on those last two eyes. Last two on the left side, that is. But pins will work indefinitely on the right side.
Finger went numb, so I paused before sewing the last eye on the service opening to search for bra-making supplies. So far, bra-making tapes have been expensive and not very good. Many have plush on the back, for example. And I haven't found any with more than three rows of eyes. Piecing sets of three might not be a lot less work than sewing them on one at a time. But one can do all the stitching by machine. But the end hook would probably have to be picked out of the tape and sewn on by hand.
Clicked on just one more: C$9/meter, a meter would probably do two pairs of pants, "slightly fuzzy" on the back instead of thick plush — but packages shipped across borders tend to vanish, and heaven only knows what tariff might be slapped onto it even if it arrives.
⁂
Later on I decided to make the twinkle-twinkle slippers — they are a very low priority (I can wear them only on October 31st), but they are also quick and easy. While I was laying out the pieces, vamp # 4 evaporated. One moment I had four vamp patterns, the next three. Luckily, I have enough spread-sheet paper for my next three incarnations, and it's quick and easy to trace around Vamp Beta to make vamp #5.
Then while looking for a small scrap to lay it on, I found copy #4 in the pile of scraps and put #5 into the envelope.
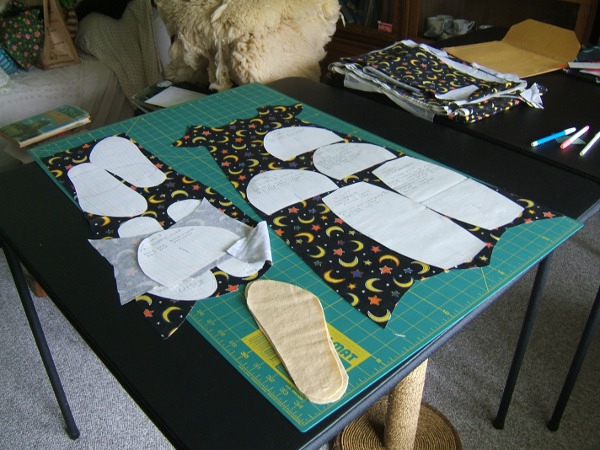
I think the scrap on the left looks rather like a baby gown:

Later on, I decided that I could get all of the upper out of the "baby gown" if I turned one of the toe pieces upside down. In that print, nobody will ever notice.

Went to look at the playground construction, discovered a rummage sale in the senior center. Never did learn what it was in aid of. I paid a nickle for a box of chalk and fifty cents for a snack bag containing a pair of tweezers and what at first glance looked like a hemostat, but turned out to be heavy-duty tweezers. I gave the scissor-shaped tweezers to Dave and dropped the eyebrow tweezers into the south arm of the futon, where I'm likely to look when I want a spare pair of tweezers. I left them in the bag so that I'll know that this pair is spare.
I already had a lifetime supply of real chalk, but when something that's totally unobtainable is available for five cents . . .
The tables were nicely sorted according to what sort of stuff it was; most of the things near the tweezers were for sewing. I mourned over a bag of vintage bias tape, remembering when I would have snapped it to up to give to Evelyn for her baby gowns. Only real cotton will do for baby clothes.
I rejected a box of gummed reinforcements when I remembered that they come off if ironed. Ironing a bit of flimsy interfacing to the spot where I mean to punch a hole in my pattern works great.
Besides, I think I've got a box of gummed reinforcements around here someplace. I should find them and repair the three loose pages in my Betty Crocker Cookbook.
I cut out the twinkle-twinkle slippers just to get them off the card table. Then I stacked the pieces on the pattern envelope and put the envelope into the pattern chest.
add leg board to
"tools" I'm pretty sure that
that meant "take a picture of it", but it's
mentioned in the passage on plywood now.
Haven't edited the other paragraphs to make it fit
in, though.
⁂
Mend pocket of red silk
underdress There was a
threaded needle stuck into the scrap from which I
ravel matching red-silk threads, so that didn't
take long. Aggravating to sew in the middle
of a long dress, though. Particularly
during the stab-stitched bar tacks — with
that fine thread, both sides had to be inspected
every time I drew through.
Took an old cotton jersey off the mending hook, inspected it: half a snap has come off, but remains stuck to the other half, several seams are popped, the hem needs to be re-sewn . . .
and the neckband is frayed, the length has been adjusted with a tuck, and I never liked this jersey in the first place. There is soon going to be a pile of yellow skillet wipes.
⁂
And also the elastic in the back pockets had stretched out. I ripped it until the pieces were flat, and dropped the pieces into the bin of dirty dish towels and cleaning rags.
Took my black linen pants off the mending hook. There's a note pinned to it saying what's wrong with it, yay!
The whole fabric is pretty delicate; held up to the light, there are a lot of proto-holes in addition to the two that have already developed. I'd better not invest too much time in this repair job.
I predict that the next time my red linen bra comes out of the washing machine, it will be a cleaning rag. So I'm wearing it until it's filthy this week.
That will leave three red ramie bras and one houndstooth-print linen bra in good condition, and one black and one white bra that I'm saving for times when only those colors will do, because they aren't in any better condition than the red linen bra I'm deprecating.
Just looked up "deprecate". I need a stronger word; I don't disapprove of it, I'm throwing it away.
Made another bouquet garni bag, boiled it, and hung it over the edge of the kettle to dry. Hand-basted half of a skillet wipe, left the thread dangling to sew it shut with in the morning.
The corned beef was delicioius. (Still is; we ate less than half.)
I printed out a new design yesterday, and two old ones I thought needed to be freshened. On good paper that doesn't show through to the back, unfortunately, and I don't think we've got any cheap paper in the house.
Found some manifold paper, as good as tracing paper. Now to fire up Open Office Draw and see whether the printer will print on it.
Draw runs on the older computer, that can't connect to the printer. But I've found that I can "export" directly to the desktop of the other computer, drag the image into Open Office Writer, crop it to fit two on a page, and print from there.
I've been giving a low priority to making new underpants because my underpants drawer is full. But it's an easy job, and I've been using the PFD underpants in rotation, so when they go, they will all go together.
And I was correct that it would kick me into motion again. The PFD was too wrinkled to cut, and that meant setting up the ironing board, so I ironed my floral-basket dress even though I fear that it will get closet-creased before we get hot weather — that fabric musses very easily, which is why I made the rest of it into pillow cases.
And I flattened the area where I plan to add pockets to my cotton-lined linen dress. (No use ironing the whole dress until *after* adding the pockets.)
And I got the piece of osnaburg out of the spare‐parts-for-the-embroidery-gig box.
It already had a thread drawn to cut another five‐inch strip; this morning I cut it off, put the rest back into the box and put the box on the top shelf, divided the strip into nine parts each four and a half inches wide, and loosened the threads that the children will be expected to draw.
Then started laying out my briefs pattern on the PFD jersey. There's a tab on one side too small to cut a front, but I can easily get two crotches out of it. Oops, need pins — off to the bedroom to get the Grabbit out of the treadle sewing-machine cabinet. And found a puzzle. There isn't a big pile of pins on the Grabbit, yet I have nothing in progress: where are the extra pins?
⁂
This job has been a gross violation of "lay out everything before you cut anything". I got two pairs of briefs cut out before lunch, and think I can get two more out of what's left.
Found that none of the images in 2015SEW2.HTM work. I've got some trouble-hunting to do. Deleting all the un-needed "./"s made it work on JOY98, but not on wlweather.
I've got to search *all* my files for places where I used "./" instead of "../" and shouldn't have used anything.
Should update the weblog. 'Druther nap.
I cut out the other two pairs of briefs and took a few pictures:
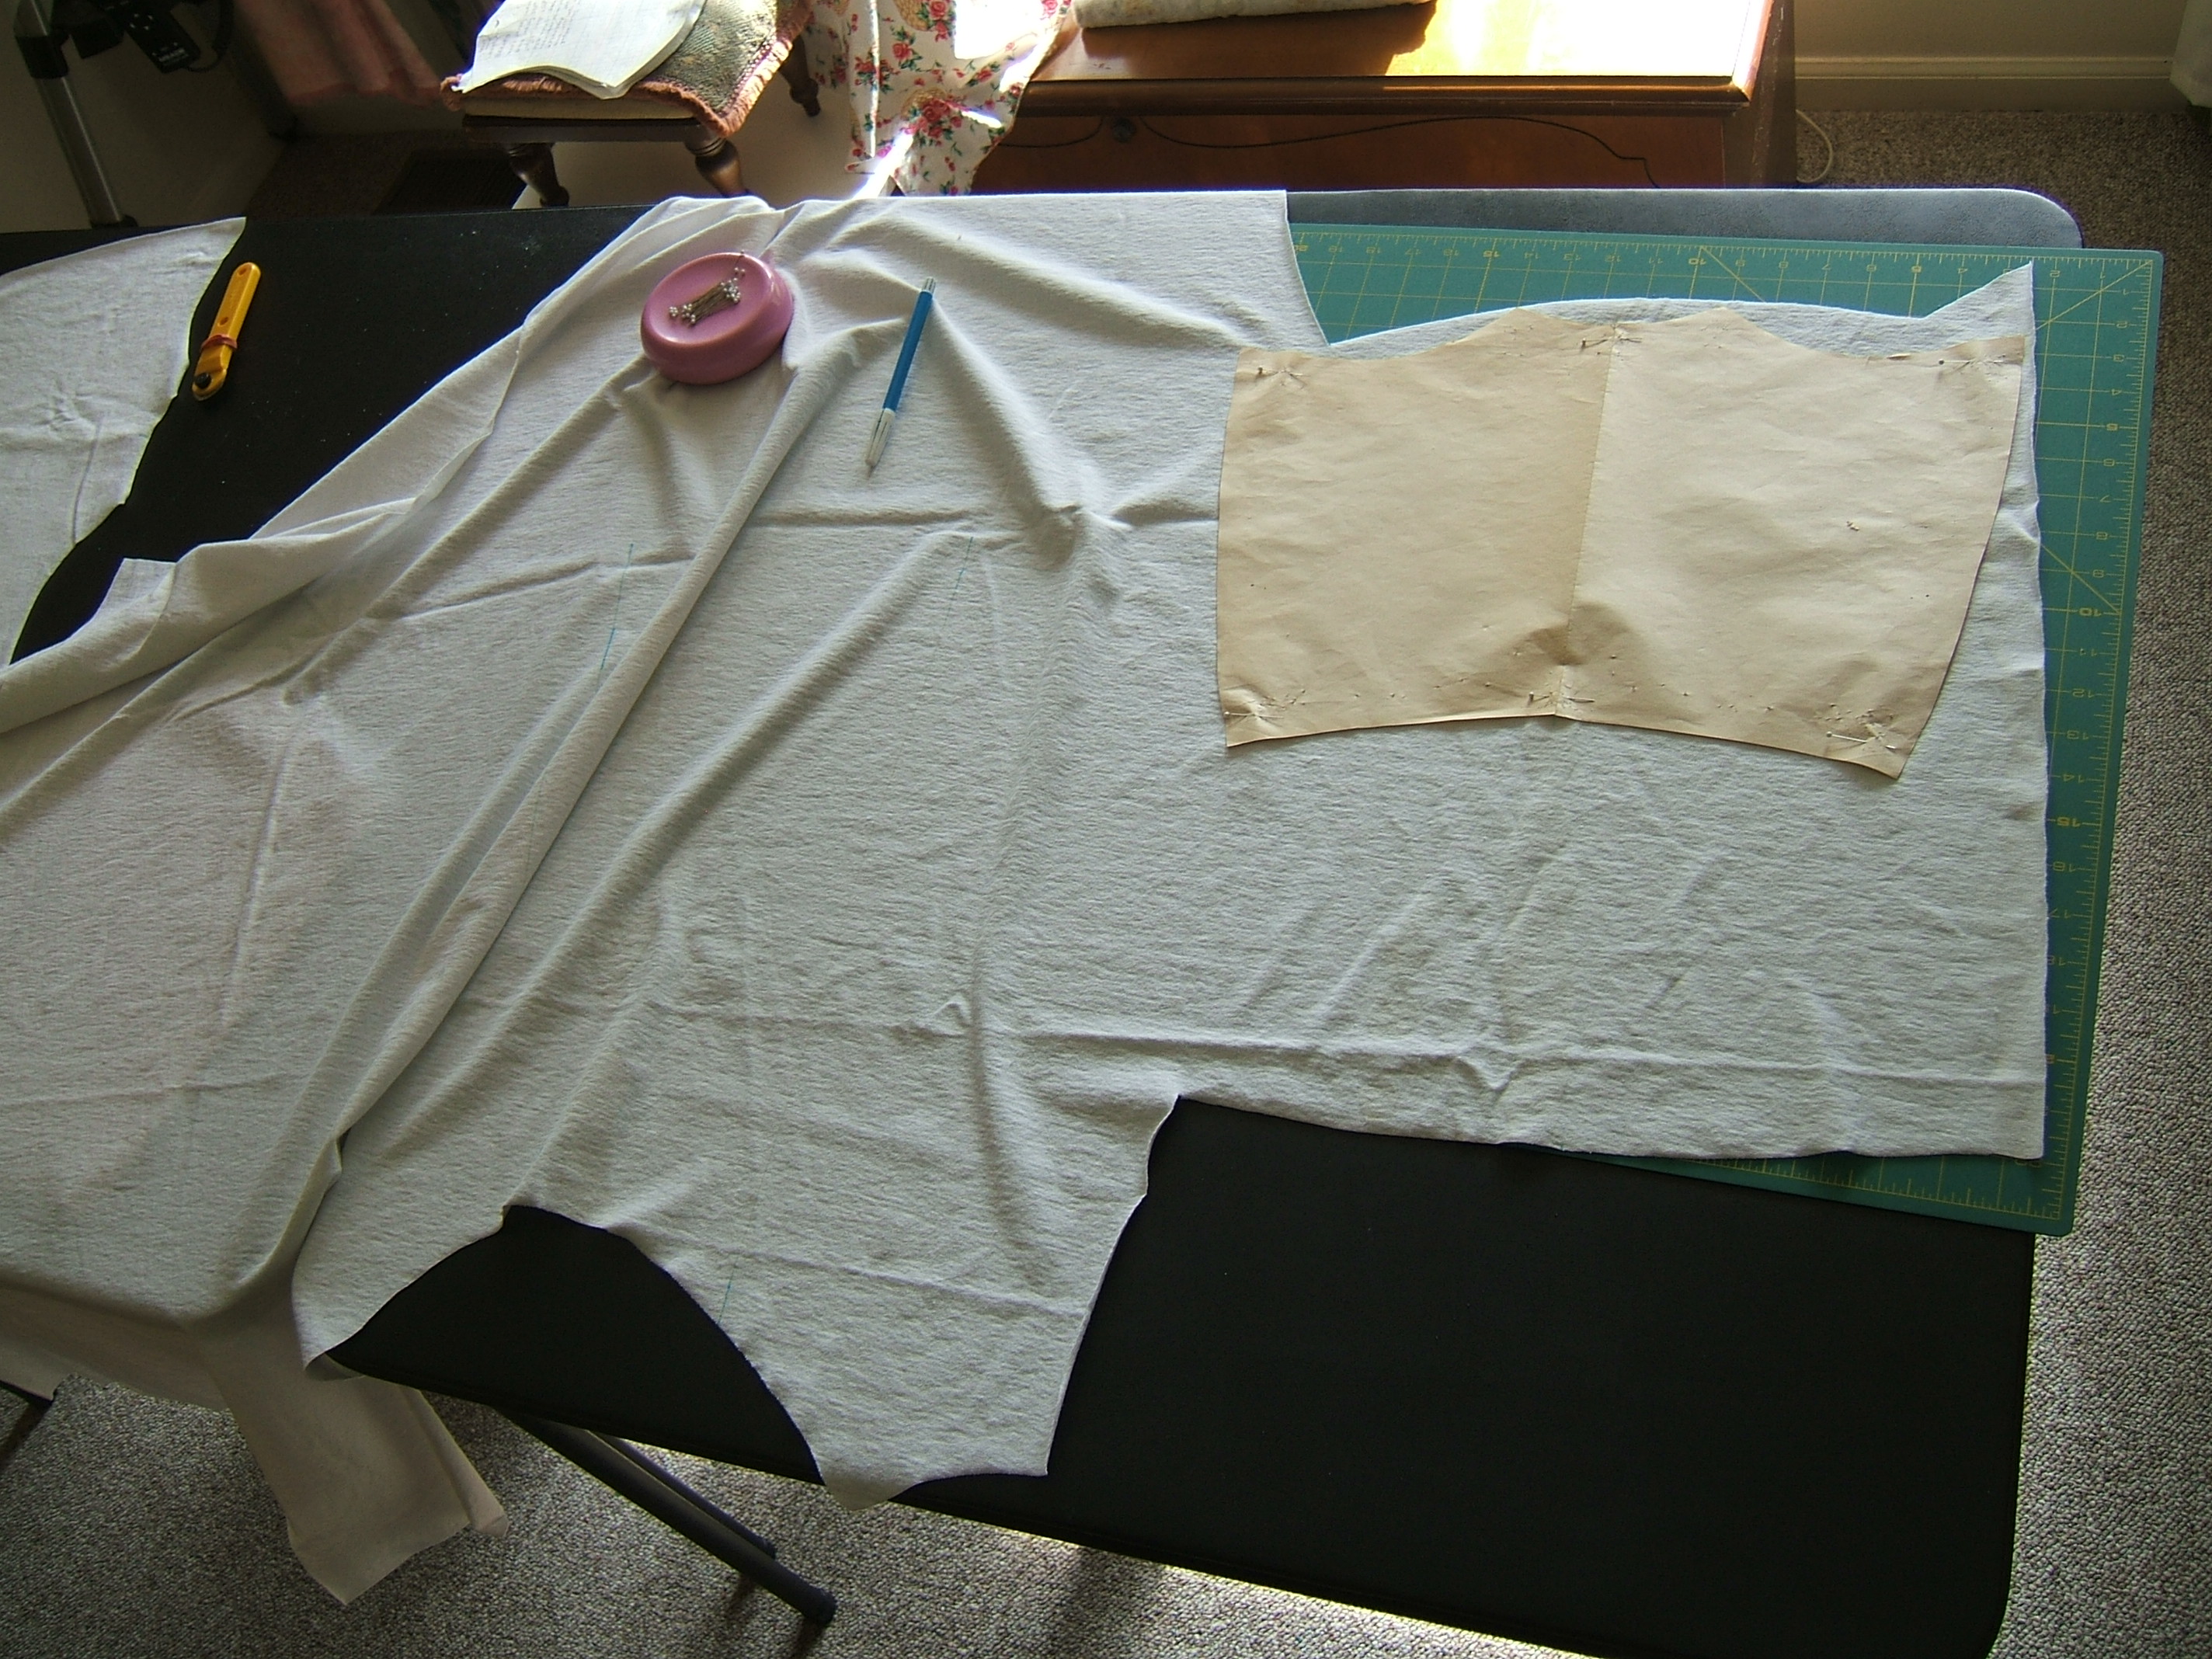
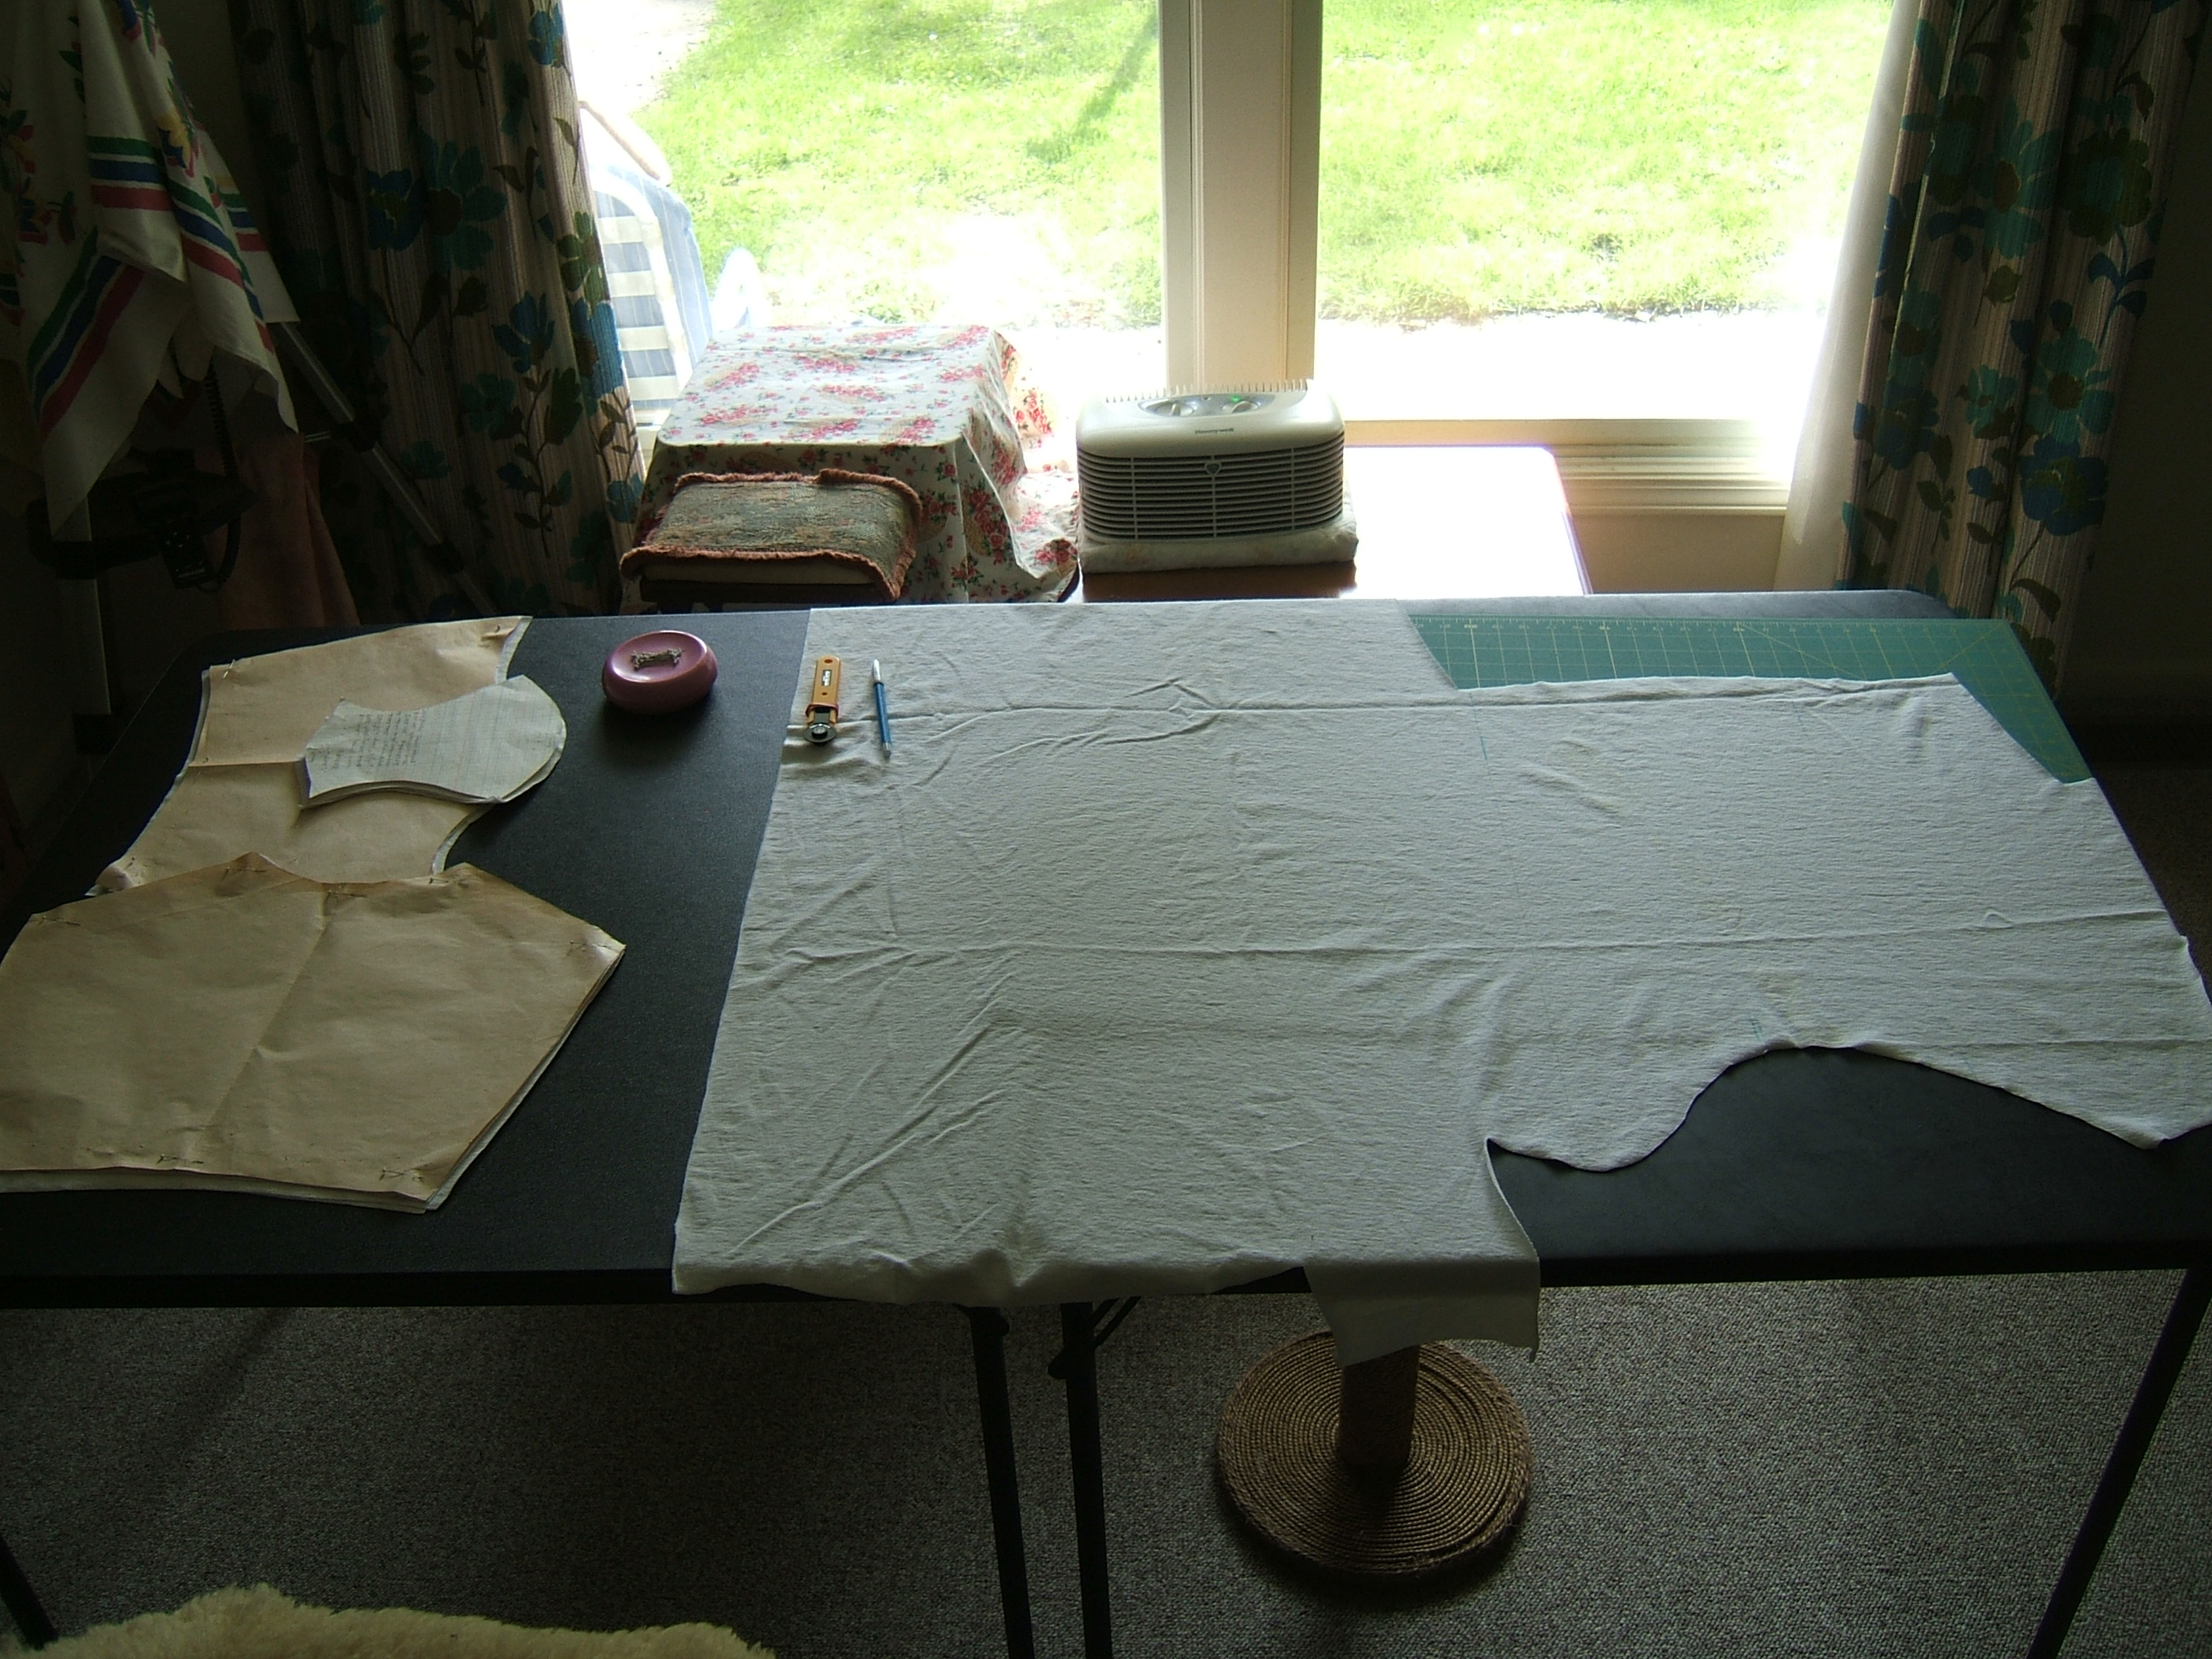
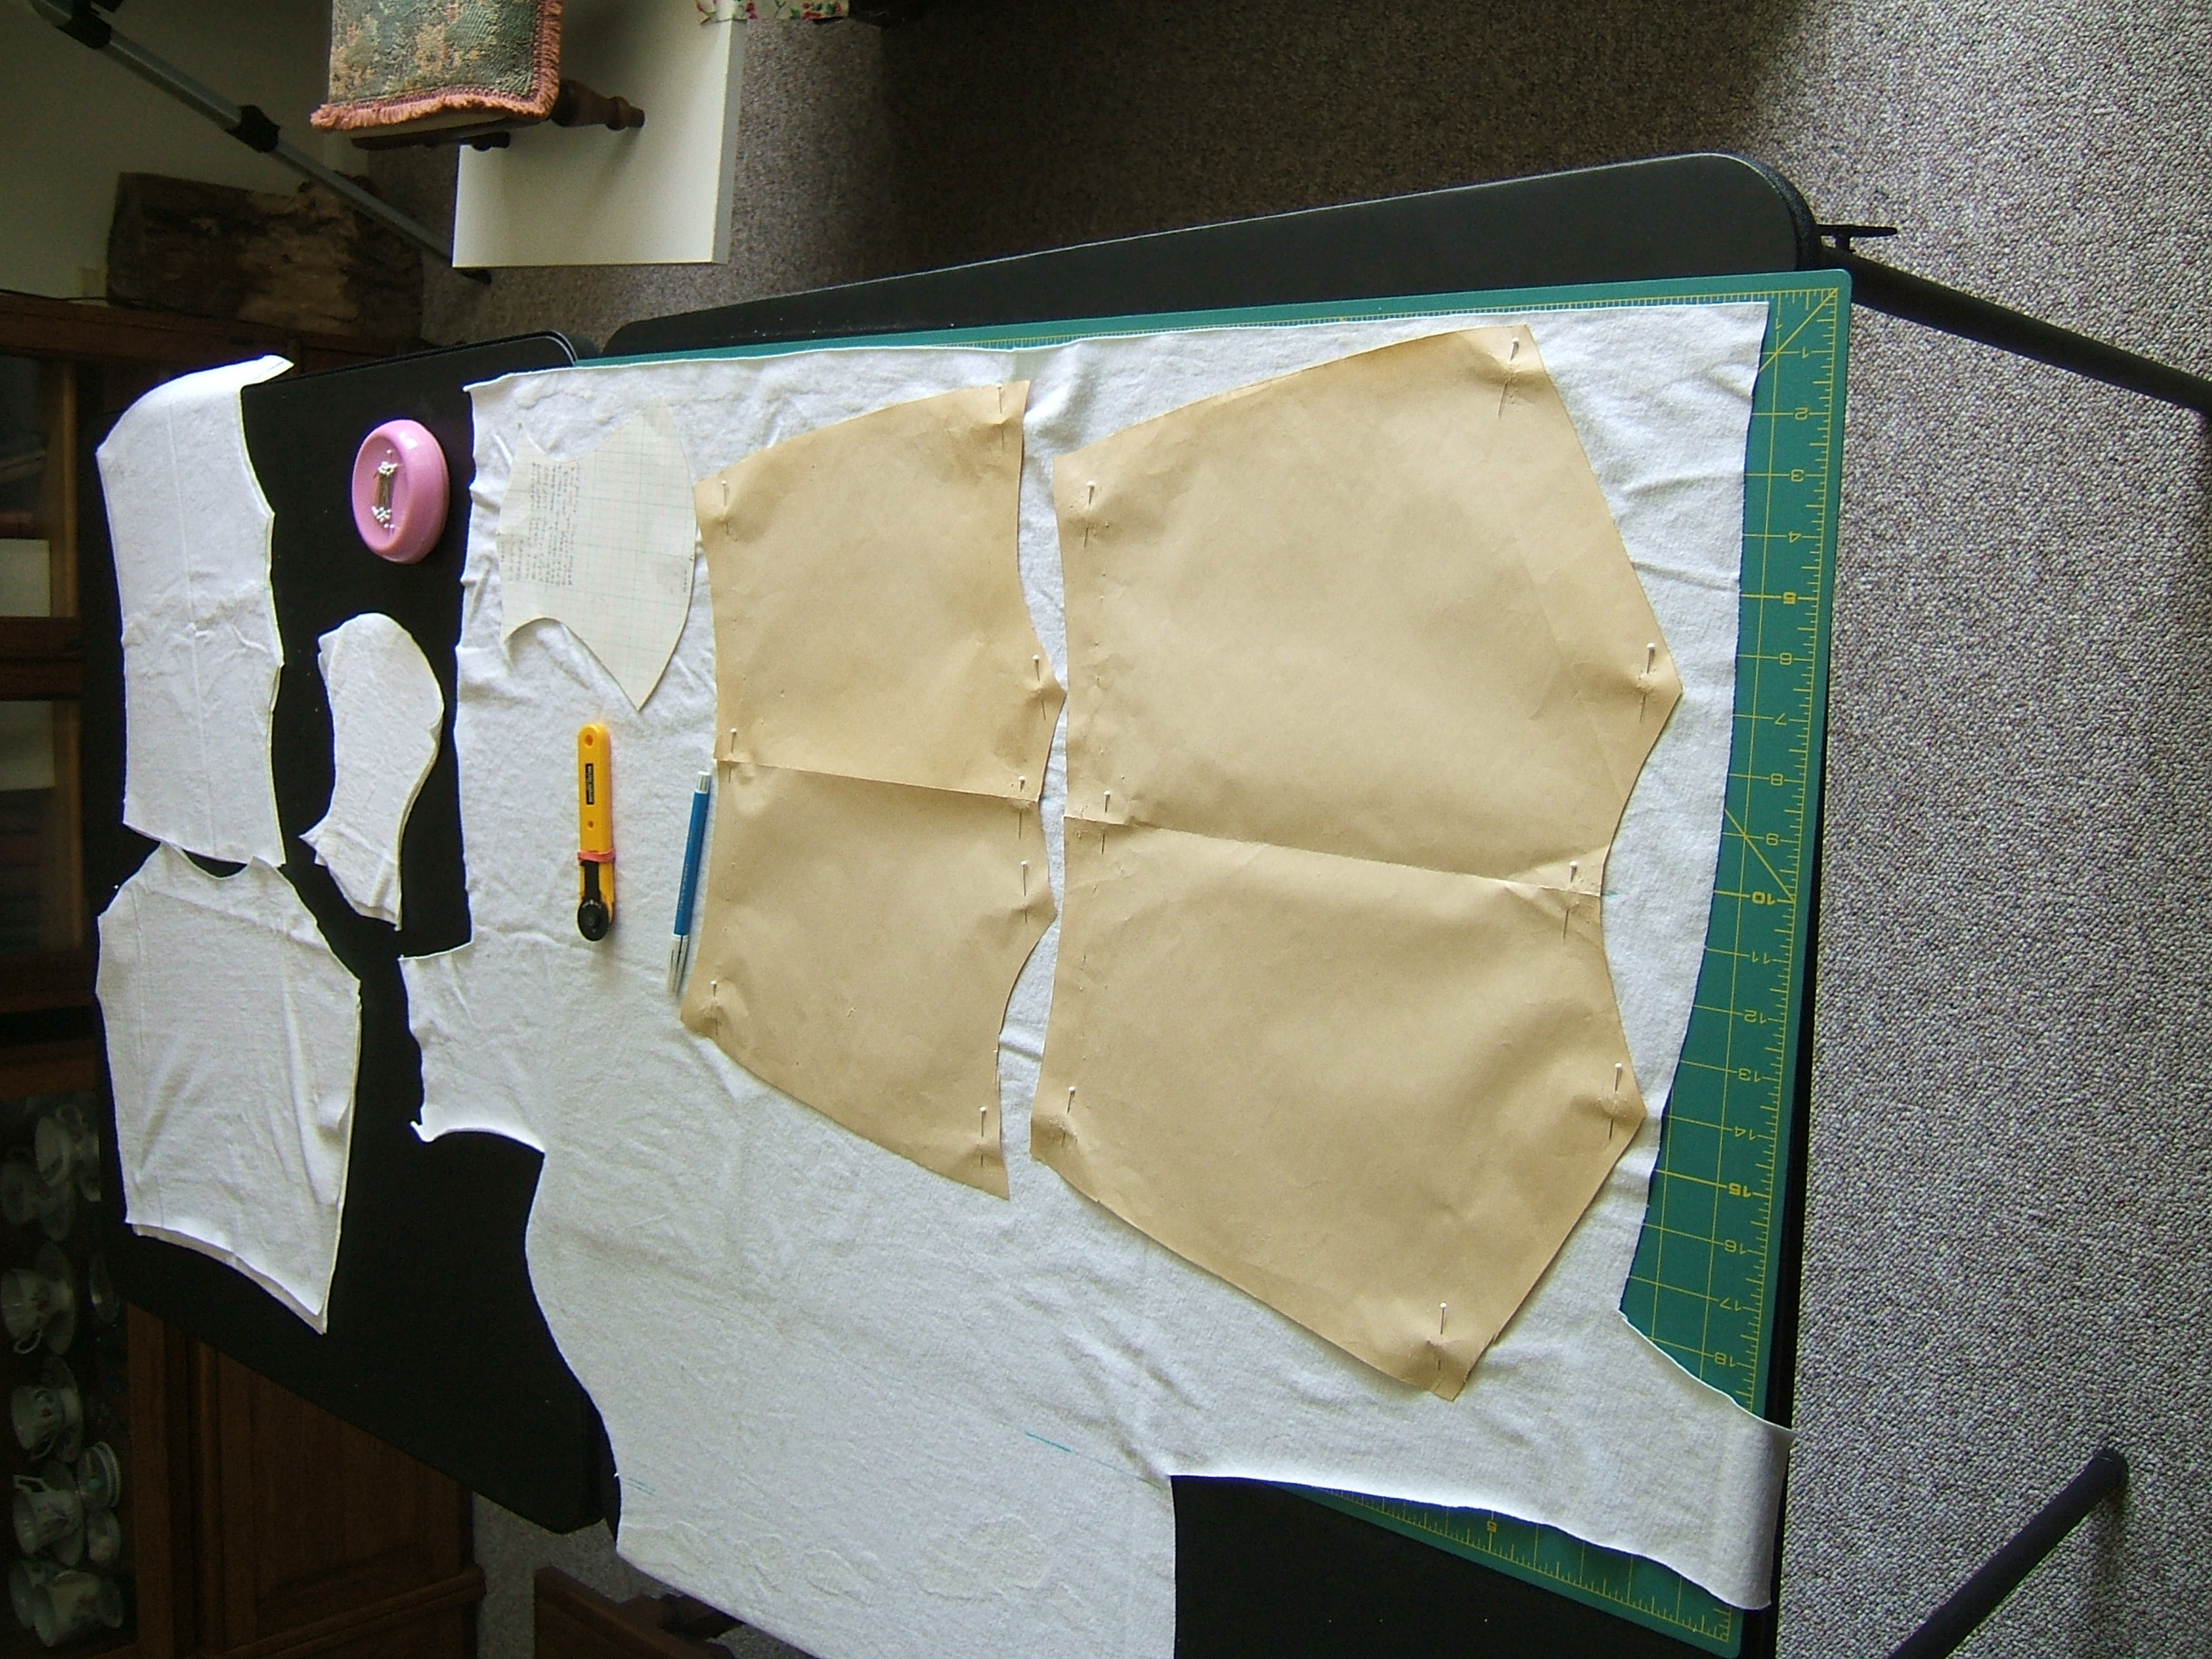
I put the scraps — the ones that aren't now on the compost heap — back into the briefs box, because that is where I'll look for PFD jersey.
Didn't take any pictures of cutting the crotch linings from hemp-and-cotton jersey. That fabric, too, is now back in the briefs box. Perhaps I should unpin the patterns, mark them, and put them away — it's quite obvious which pieces are which.
I read "Simple hemmed-leg briefs" in the file on women's underwear. Found a word had been left out; Didn't find anything relevant to the current project that I had forgotten.
If I ever hypertext Women's Underwear, I think I'll copy each section to a new file, do them one at a time, and refrain from altering the old file.
Sewed the crotch pieces to the back pieces.
Officially declared the red linen bra a cleaning rag.
I should complete the briefs today. When I was ready to pin the crotch lining, I downloaded ROUGH039.TXT to make sure I'd said to put the right side of the lining against the wrong side of the back. It read a bit queer, then I realized that I'd said to sew both the crotch and the lining to the back before attaching the front. What I did was to attach the crotch to both the back and the front before attaching the lining.
It doesn't matter which order, and I think the one in the file is easier to write and read.
To keep the work organized and production-liney, once all four panties were dangling from the back of the machine, I began to cut off the end pair, pin and stitch it, then cut off the end pair again. After a while I realized that in addition to keeping things neat, this method forced me to get up and walk around the machine after each seam. Even if you don't have a bad back, breaking up long periods of holding the same posture is a very good idea.
As is taking an occasional break to natter.
Sometime or the other, I pinned the casings in one of the pairs of briefs. It took all my pins but two — all that had been taken out of the box they came in, that is — so I quit at that point. I think it was yesterday that I changed the gray silk in the Necchi for white cotton, then balked at changing the needle.
If that's how well I do it in the morning, it's good that I didn't attempt it when sleepy!
The needle in the Necchi isn't much worn, but I couldn't remember whether it was stretch or universal, so it went into the base of the cone of basting thread. I must write an essay on the uses of old sewing-machine needles some time.
I had a terrible time threading the needle. I should have suspected something right there. Mended a couple of spots of frayed overcasting on the edge of a spectacle-cleaning rag. Skipped a lot of stitches, perhaps because what I'm sewing on is so flimsy.
Started the hems of the briefs. On the left zigs, the machine was skipping more stitches than it was hitting. ?? Maybe I didn't get the needle seated all the way in. It's in backward? I KNOW BETTER THAN THAT!!! Like, I distinctly remember feeling for the flat side as I put it in. Maybe I gave it a half twist later.
Then while attempting to re-install it, I got it in sideways THREE TIMES. That isn't even possible.
Whatever, the Necchi is sewing properly now, the casings are sewn, the pins are back on the Grabbit, and I just now remembered to turn it upside-down to protect the cat.
But instead of pinning the next pair of briefs, I'm going to change into jeans and go buy cat litter.
Sewed the last leg hems, put cord elastic into one waist, and tried it on. I think I'll hold off on the leg elastic until after the briefs have been worn and washed — they don't appear to need it, but cotton does stretch with wear.
While Roomba had me shut out of the sewing room, I selected pale-blue thread and used two strands of it it embroider lazy-daisies on the left seam of each pair of briefs: one detached chain on one, two at right angles to the seam on one, and daisies of three and four petals on the remaining two. The stitching isn't as neat as I would like, and I should have hunted for a bluer blue.
Also took down the solids-and-yarn-dye box; no yellow scraps. I *must* have had scraps from my bright-yellow cotton scarf, and I remember seeing a bright-yellow cotton scrap not too long ago.
A day or three ago I found my orange canvas while looking for the yellow scrap. I didn't find my reason for wanting to find it a few weeks ago.
One day I happend to notice the happy-face design among my embroidery-gig supplies, and realized that it should be just the features on a yellow disk.
Hum . . . there's an un-labeled box under the box of solids and yarn dyes.
Ah, white cottons — now I remember the label falling off while I was wrestling with the solids box. There was nothing in it but scraps from my wedding dress and a cheap bath towel from which I'd trimmed all of one selvage and most of the other. The strip taken from the partly-trimmed side was five inches wide; I wonder what I was making?
I pinned the wedding-dress scraps to a hanger and put them in the closet with the wedding dress, and laid the towel on the sewing machine with the intention of making two dish towels out of it.
So now I have an empty box!
I usually use two-ply thread for overedging dish towels, but the machine is already threaded with 100/6.
The Roomba-shuffling led me to find and throw out a few sheets of waste paper. If I live to be a hundred, it might get so I can find things in here.
Finished the dishtowels today. I intended to stitch on both sides of a drawn thread to cut the towel in half, but drawing a few weft threads did not disturb the loops in the slightest, and I couldn't see the mark at all without holding it up to the light.
So I cut it with my stork scissors, after finally thinking of pinning it between the curtains, and overcast those edges the same way I'd done the pre-cut edges. Then I thought that I might have caught the stitching only in the fringe, so I stitched again guiding the edge of the foot on the overcast edge. Looks quite neat.
Somehow the cut edges didn't want to ravel and fray, and the fabric is fairly stiff, so the overcasting was surprisingly easy, and didn't lettuce much.
Spent the morning grocery shopping.
Spent most of today fiddling with the Publisher file for printing out sewing kits. Finally figured out that the key was to simplify it, and not try to pre-print every aspect. Helped that I no longer want to pre-print the names of the threads; I'd rather print kits first and decide what threads to put in them later.
Screenshot, edited. I was rather disappointed that Publisher won't export. This was printed on card stock to make three kits, one for me with phone numbers on the back, the other two to give out as calling cards. If it works, I'll cover the phone numbers with a white rectangle and print three more — five calling cards should be worlds aplenty.
All marks below the middle were left over from an attempt to mark every fold by dead reckoning. I didn't see any reason to bother to delete them.
And I learned today that Gimp has a smudge tool. I mostly use Gimp for cropping and scaling, and rarely edit.
I'm wearing briefs #1, which were elasticated a while ago and washed last Monday. I'm planning to wear the new briefs exclusively until all are in the wash, then (after launddry day) put them in reserve.
I put elastic into the remaining briefs in the morning and made a bouquet garni bag after supper. Then I boiled it and hung it on the saucepan to dry.
Out of long habit, I secured the thread for the bag with a backstitch instead of a stopper knot.
For Briefs #4, which happened to be on top of the pile, I tied the ends of the elastic with a sheet bend, but it is difficult to tie a sheet bend in elastic, and with one of the ends sticking out at right angles, it might even be *more* likely to come untied than a square knot, so I tied the rest the easy way. I think the correct knot for cord elastic is one of the heavy-hawser knots that I can't tie without a diagram.
I wonder how many classes of knots there are? Some knots are in more than one class — I think the half hitch shows up everywhere. Tied in the end of a thread, it's a stopper knot. The knot made by rolling a loop off the end of your finger is supposed to be a half hitch, but nearly always has a few extra turns. I guess that that method of tying a stopper knot produces an assortment of stopper knots, depending on how many times the loop rolls before being closed. Since I seldom tie it, mine usually has surplus loops sticking out in all directions — perfect for "this is the wrong side" thread marking, so I haven't tried to learn to do it right.
Bends are for joining two ropes, binder knots are for squeezing stuff together — as in reefing sails, so the square knot is also known as a reef knot. Hitches tie ropes to things that aren't ropes. But a clove hitch tightly binds scaffolds and the necks of sacks.
Just tried to find out whether "binder knots" is the right name for that class, and learned that when I tie two threads together by holding the ends together and tying a half hitch I'm tying an "offset water knot" — I'd thought it a kludge that nobody would tie in rope.
As usual, Wikipedia gave no hint or clue as to why "Binder Knot" redirected to "Offset Water Knot". But it did tell me, after persuasion, that the right name is "binding knot".

Took a picture of the kits in progress, and put it and the screenshot into a new subdirectory, intending to write a tutorial on how to make them.
white cotton
briefs about time I
struck that off the list of things to do, don't
you think.
I finished darning the wool dress sock some time ago. Just now folded it up with the other sock, in the process discovering that I have worlds aplenty of Elder socks, including two pair that have never been worn. For a while, I was desperate for black thick wool socks, and bought a pair of Elder cotton-and-wool socks every time I went to Middlebury. Eventually, I realized that when I wear sandals in winter, I can pull thin black socks on over my thick gray socks. And my black sandals are nearly worn out. Missed this spring's sandal-buying season; by the time I toured the two shoe stores, they were all on clearance, and none of those remaining were suitable.
Also found an odd dress sock when I put the darned dress sock away.
No longer any need to patch the linen slacks: The dime has dropped, and I'm going to buy cotton scrub pants for working in the garden — I can easily cut them off to pedal-pusher length, and some come with pockets already. I must do that soon, but I'm waiting until I can make a sprawlmart tour out of going to Big R.
I've been thinking, now and again, of the trapezoid circle skirt that I've had in mind for decades. The plan has expanded to an entire matching wardrobe. (And I saw a brown paisley quilting cotton at Lowery's that might be suitable.) But for warming up, I intend to make a skirt of my black cotton broadcloth. It's cheap, but it's cheap enough that I won't mind risk, and in black the creases shouldn't show much. And a black skirt should go with all the tops I've been wearing with black pants.
Wore my plaid seersucker shift the other day, and when passing the mirror I noted that the length is exactly what I want for the skirt — but it's a shift; I don't know how to measure from the waist of something that doesn't have one.
Ah, I could try putting it on over one of my pleated skirts and sticking a pin. [Duh! Measure up from the floor!]
For the wardrobe — which has been simmering for several decades now — I'd like a calf-length skirt, just long enough that I can wear knee socks — and a matching pair of drawers made from the pattern I made for my linen drawers, in case it hikes up when I sit down carelessly. The ruffle created by the drawstring covers the tops of most knee socks. And if it doesn't, I can add an edging.
A matching blouse that can also be worn with black slacks — or two, one with short sleeves and one with long sleeves. A dress that can be worn under the skirt. Trousers that can be worn under the dress, to obviate panty hose. (And with the two blouses.)
Further musings on the trapezoid skirt will be in the trapezoid-skirt file
And I think that I shall create a new folder, in case I want to take pictures, and copy the musings with respect to the wardrobe into it. Rather silly to link to it from the TOC — but how else will I be able to find it myself?
From an icon on the destop. At the moment, the folder contains only the index file.
linen-cotton shirting pedal
pushers — I've decided to buy scrub
pants instead. Also moved "patch linen
jeans" to bottom of list.
Added "sort yarns" to list.
I've come full circle. I started out wearing shifts in the summer because they don't touch you anywhere but the shoulders. When older and fatter, I needed drawers under them to be comfortable. I reflected that if I was going to wear pants, I might as well wear a shirt instead of a dress. I was making a lot of betas out of shirting at the time, so I switched to wearing playsuits — which is what mothers called the matching shirts and shorts they made for their small children in the forties. When the playsuits gave out, I wore shabby jeans. Now all my jeans are either too new or too far gone, and after discovering that scrub suits are not to be had, I started thinking of reproducing my linen drawers, sans knee rufffles, in a slightly-thicker fabric. But seeing how long this simple trapezoid skirt is taking, I won't see new drawers any time soon, and the only fabric of suitable weight in the stash is unbleached muslin, which would look like underwear.
Hey, I've still got the unbleached-muslin beta I made for my bike knickers — I can resume wearing shifts!
Yesterday, Sunday, I cut one of the pieces of black broadcloth into three pieces, and pressed the cut edges of the middle piece to the wrong side, which I'm going to turn over and use as a right side. It was very difficult to see what I was doing even though I was right under a light, and the off-bias edges weren't at all inclined to fold neatly. I think I'd better press the others over a straight edge of some sort.
After sewing one seam in my trapezoid skirt, I felt burned out, so I picked up a pair of panties that had the casing and the top of a seam coming unravelled, and was delighted to see that the entire job could be done by machine, so those are back in the drawer. Still have four pairs I need to put leg elastic into.
I took a couple of pictures and uploaded them.
I think it naptime.
I had a brilliant idea when, while getting dressed for this afternoon's embroidery gig, I noticed the crumpled green bandana I carried one of the socks I'm wearing to waiting rooms in. I tied up the weight-lifting gloves that need darning in it. This is a very low-priority project, so it doesn't matter how long it takes to finish them.
I'll look out thread etc. later; now it's time to put iced tea into my bottle and start walking.
Notes about yesterday in EMBROGIG.HTM. We used three of the empty sewing kits, so I get to make three more and take pictures of doing it right.
Also need to cut a lot more cardboard circles, and inventory the backing papers to see which colors have been used up.
Continue to July-December
Back to 2014
Back to Part One of 2015
Back to Part Two of 2015
Back to Table of Contents
Back to cover page, which has a list of my
other sites