Dewey Decimal
DD646
DD746

revised              12 February 2020

Clicking a picture usually takes you
to a higher-resolution copy of that picture
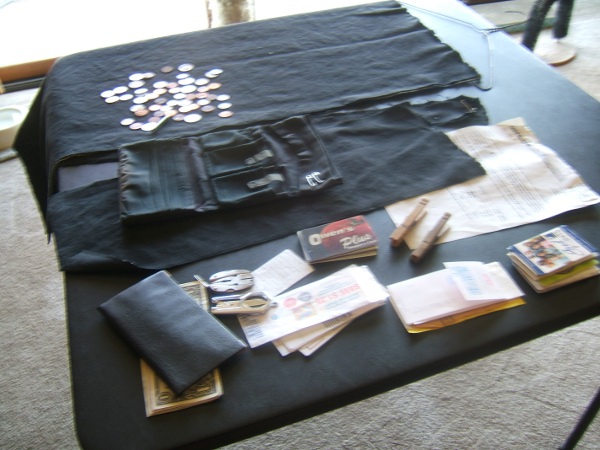
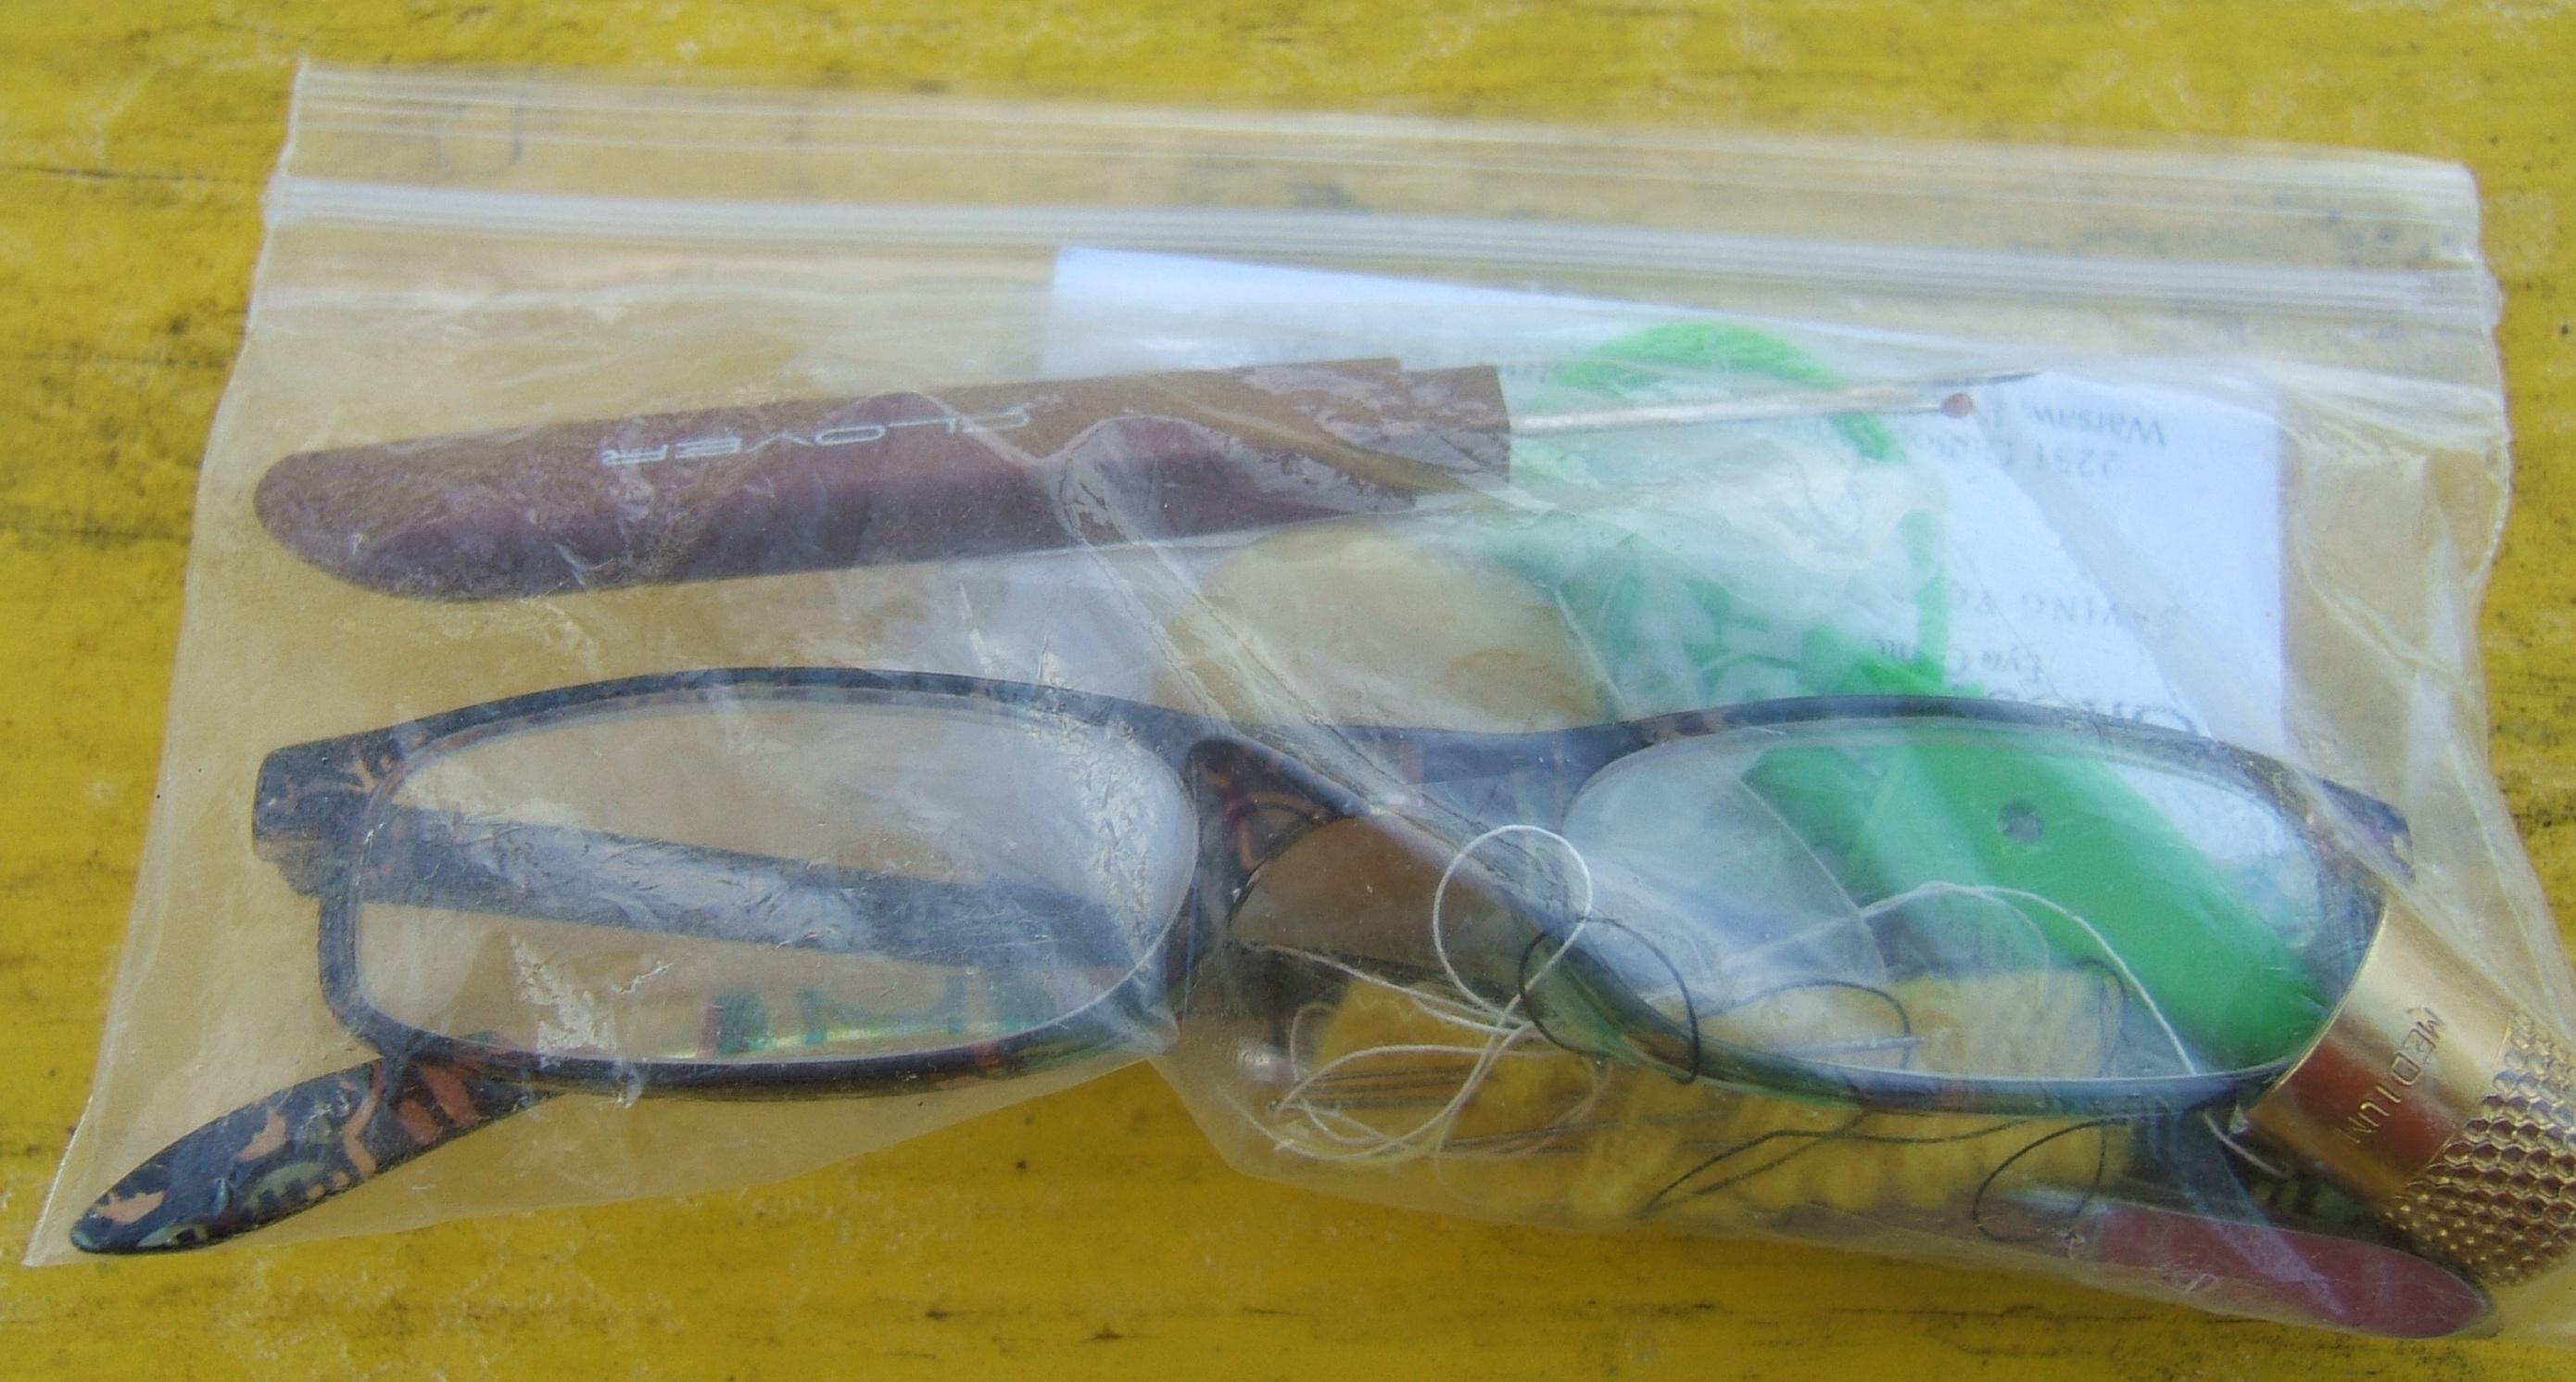
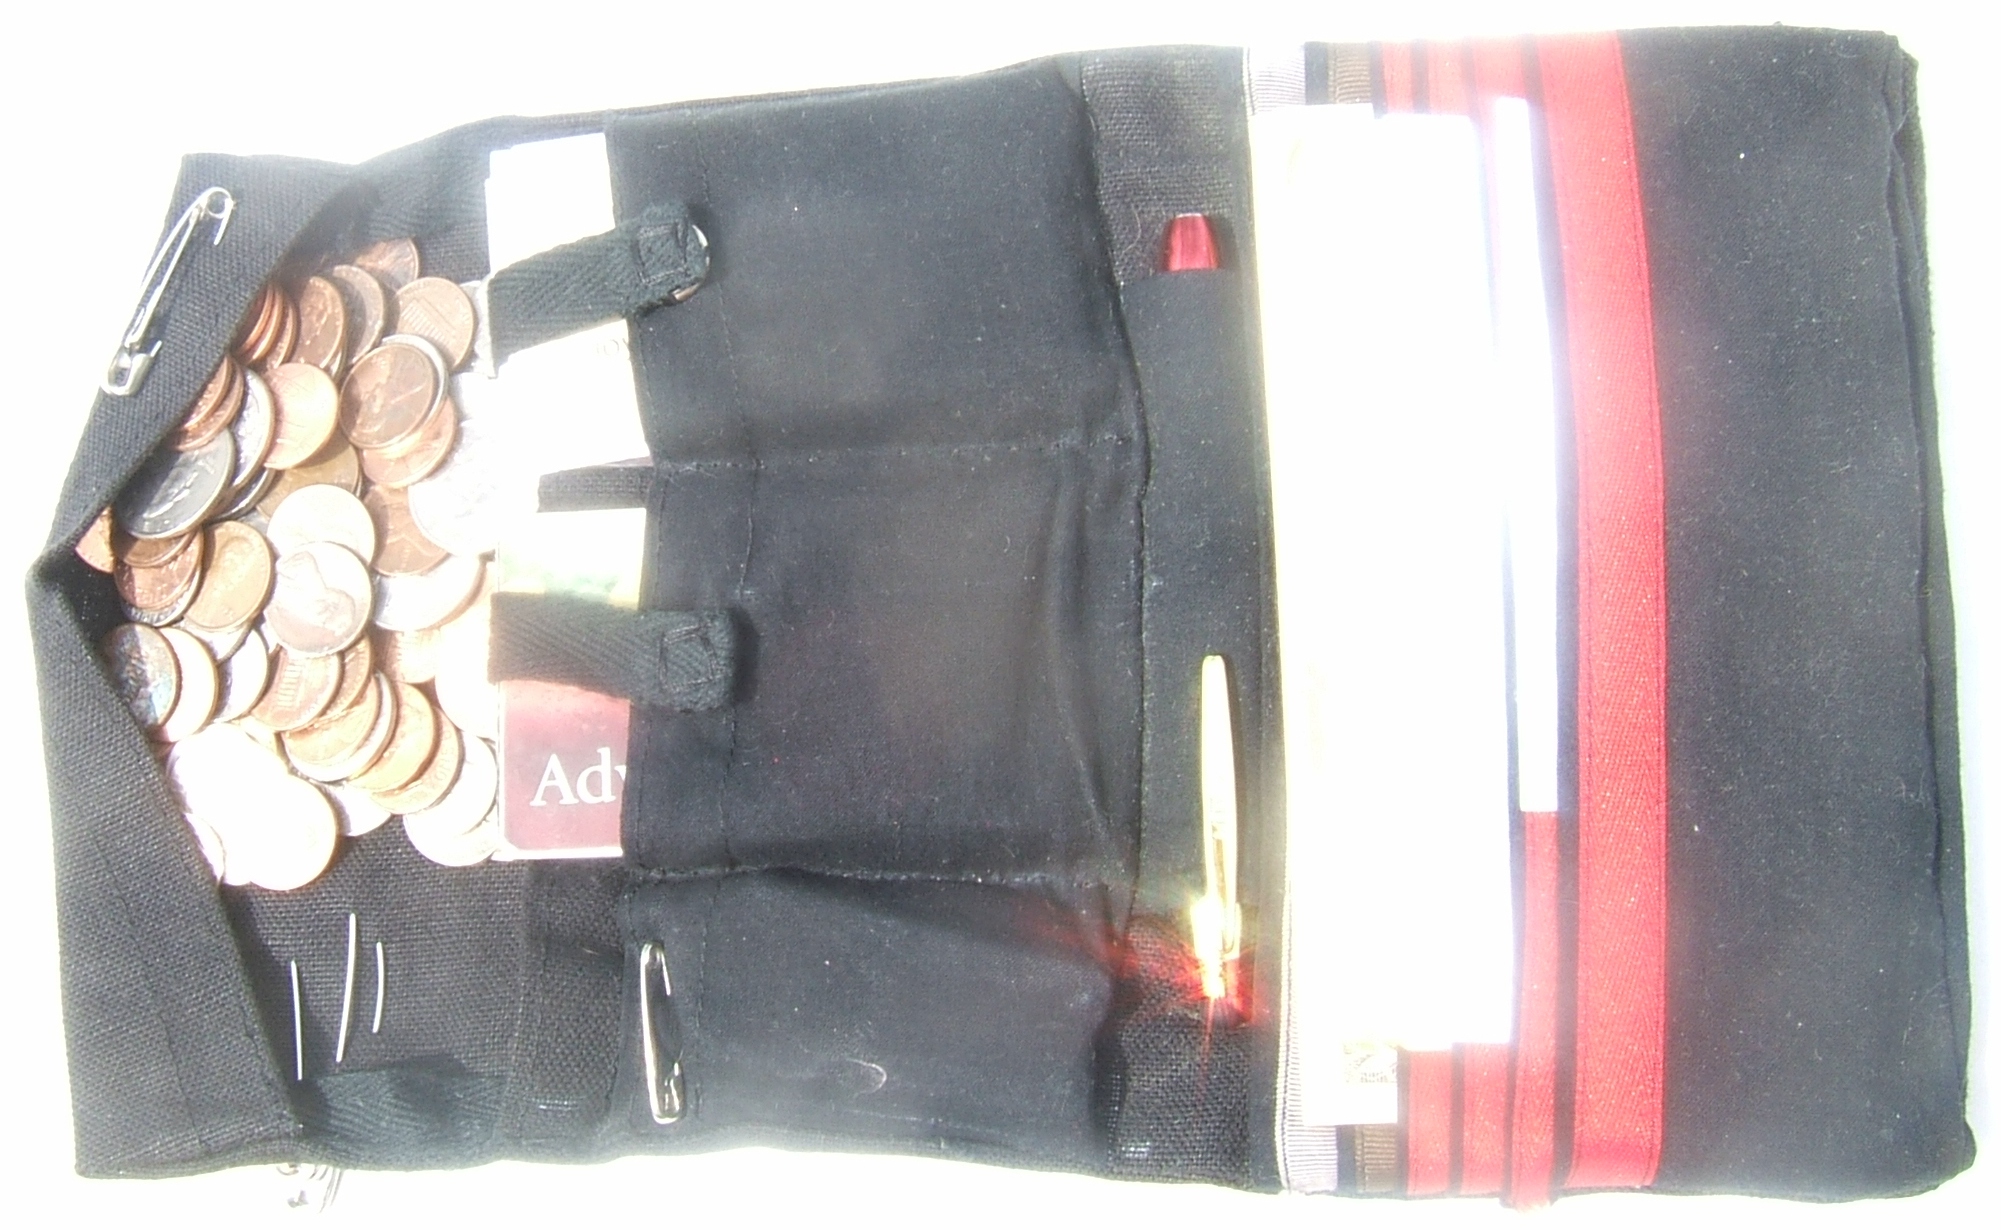
The duck from which I plan to make a wallet, the old wallet, and the contents of the old wallet. You also see the invoice that came with the duck, a wire coat hanger, and the clothespins that attach the duck to the hanger. The two metal objects next to the checkbook case are a pair of folding scissors and a pair of folding pliers. Both have come in handy. The metallic blur on the coin catcher is a couple of safety pins that I carry in case of emergency. These have come in very handy.
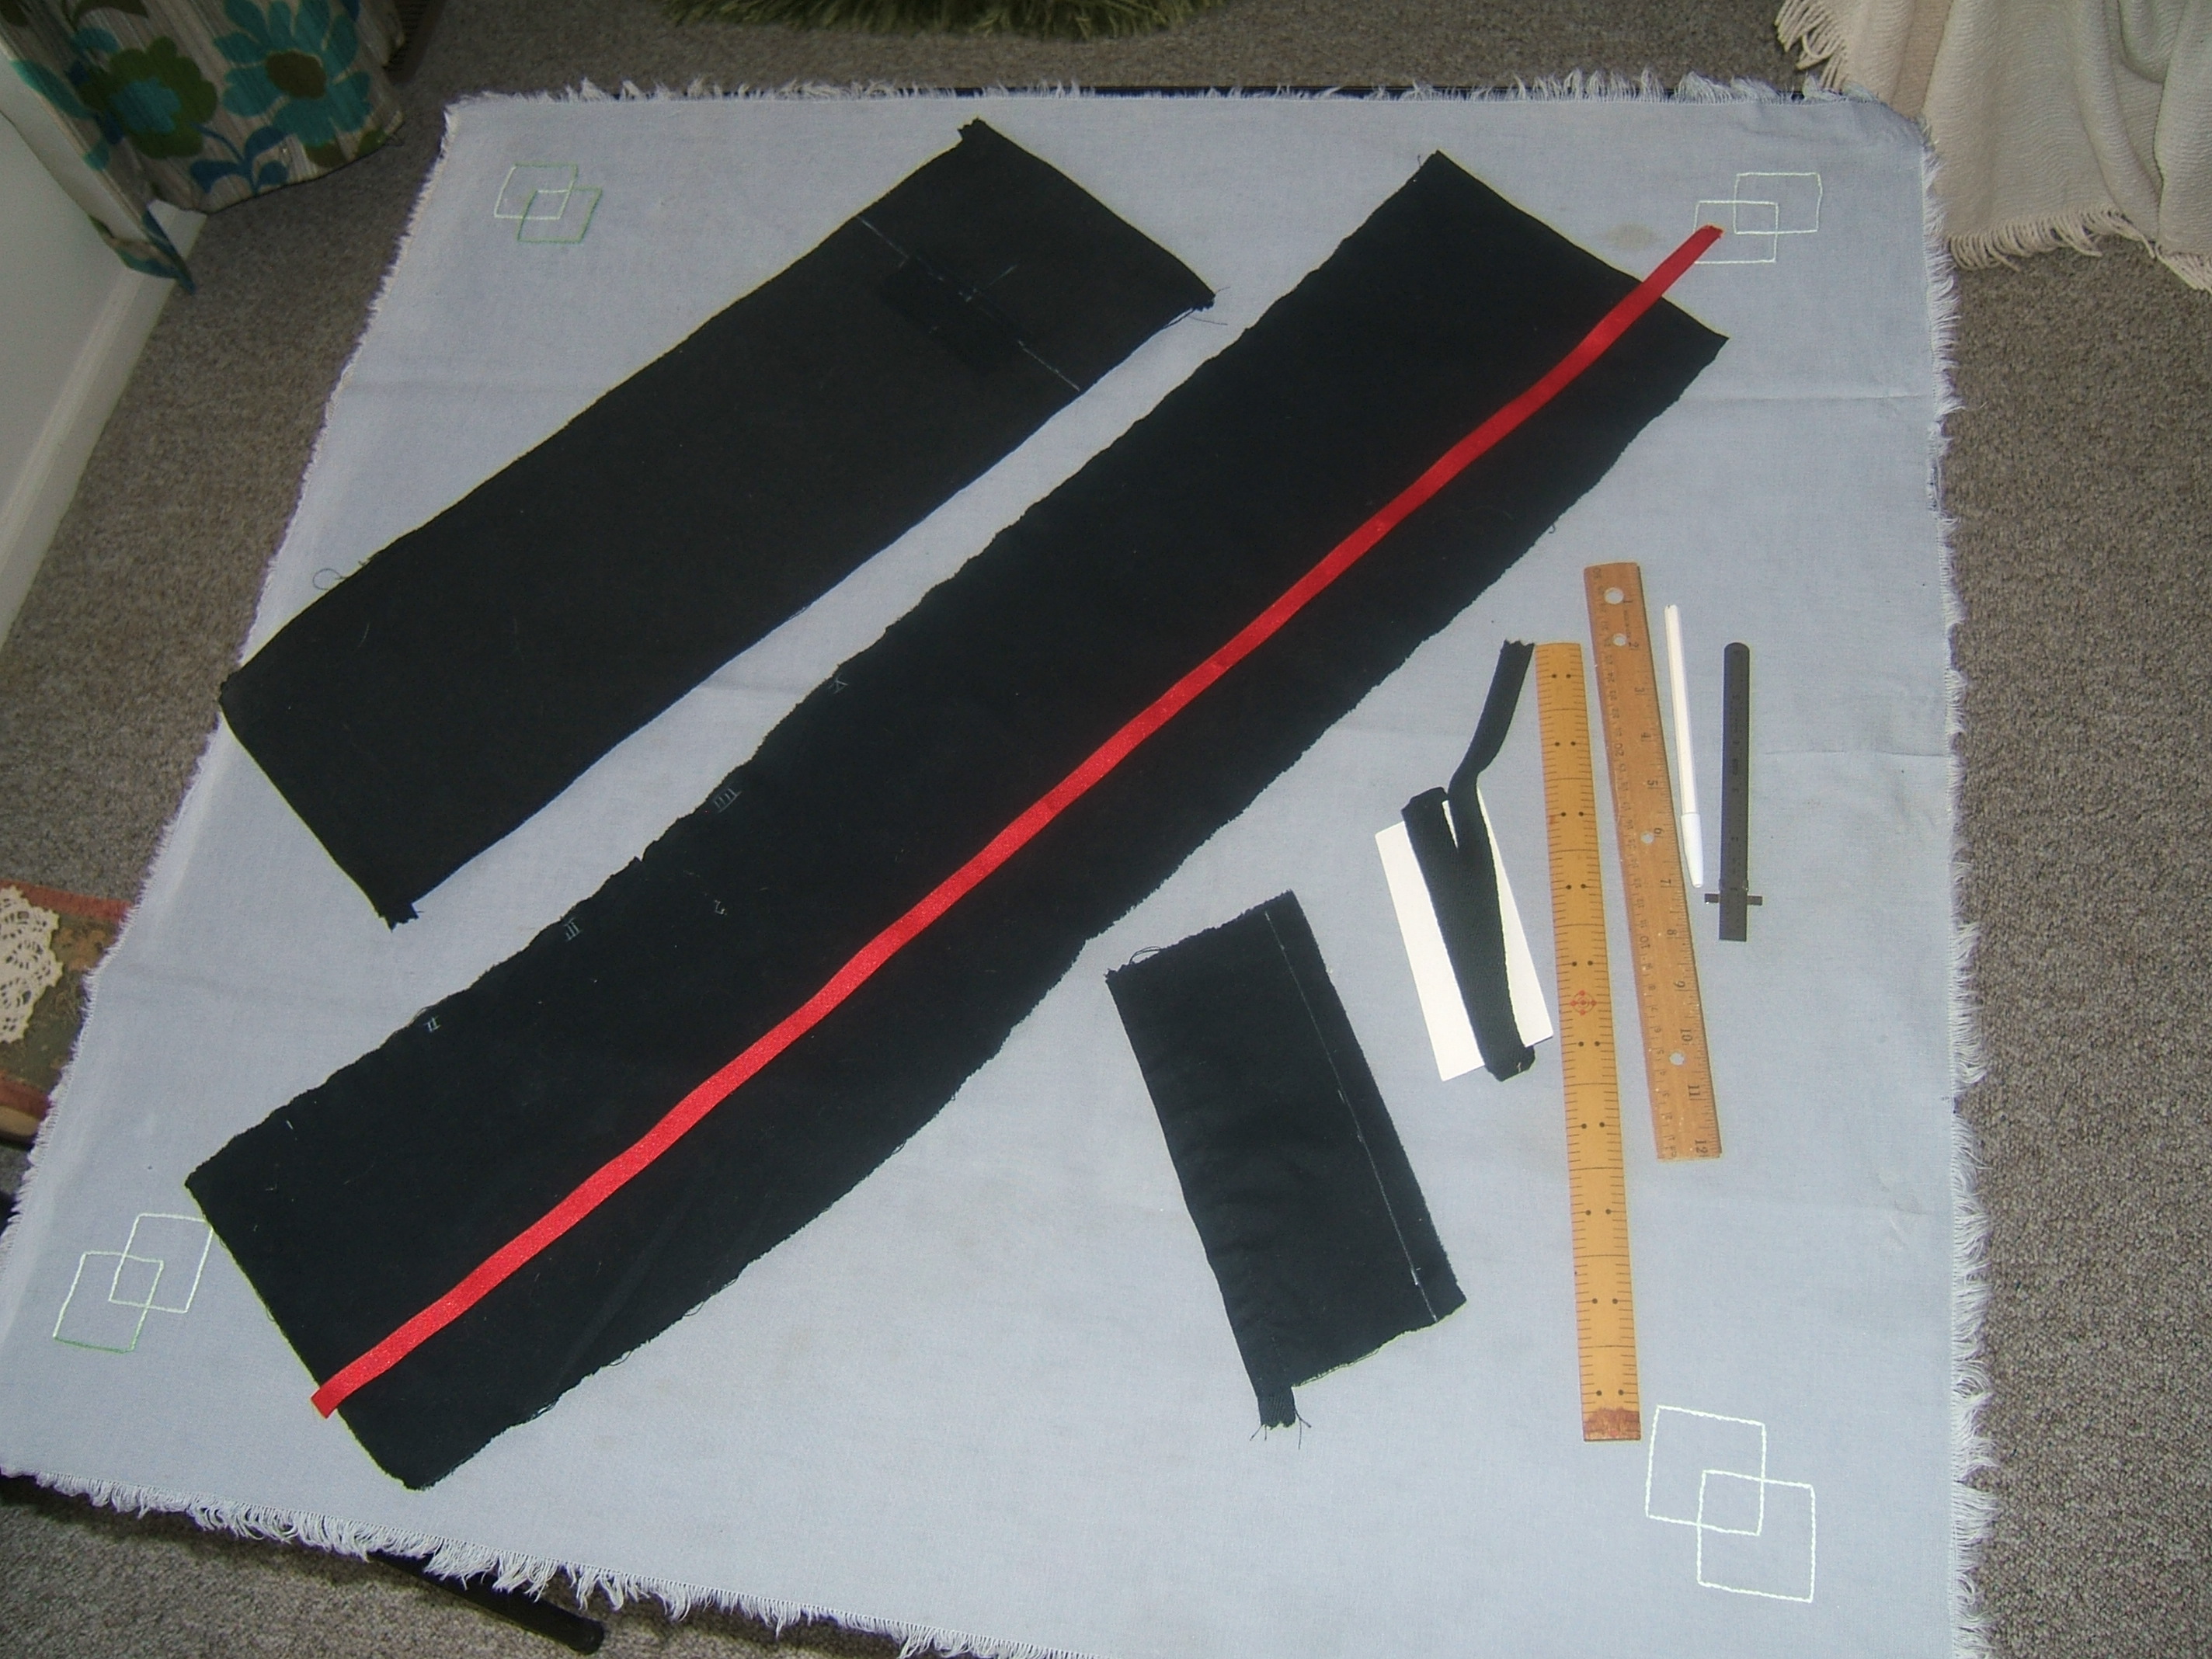
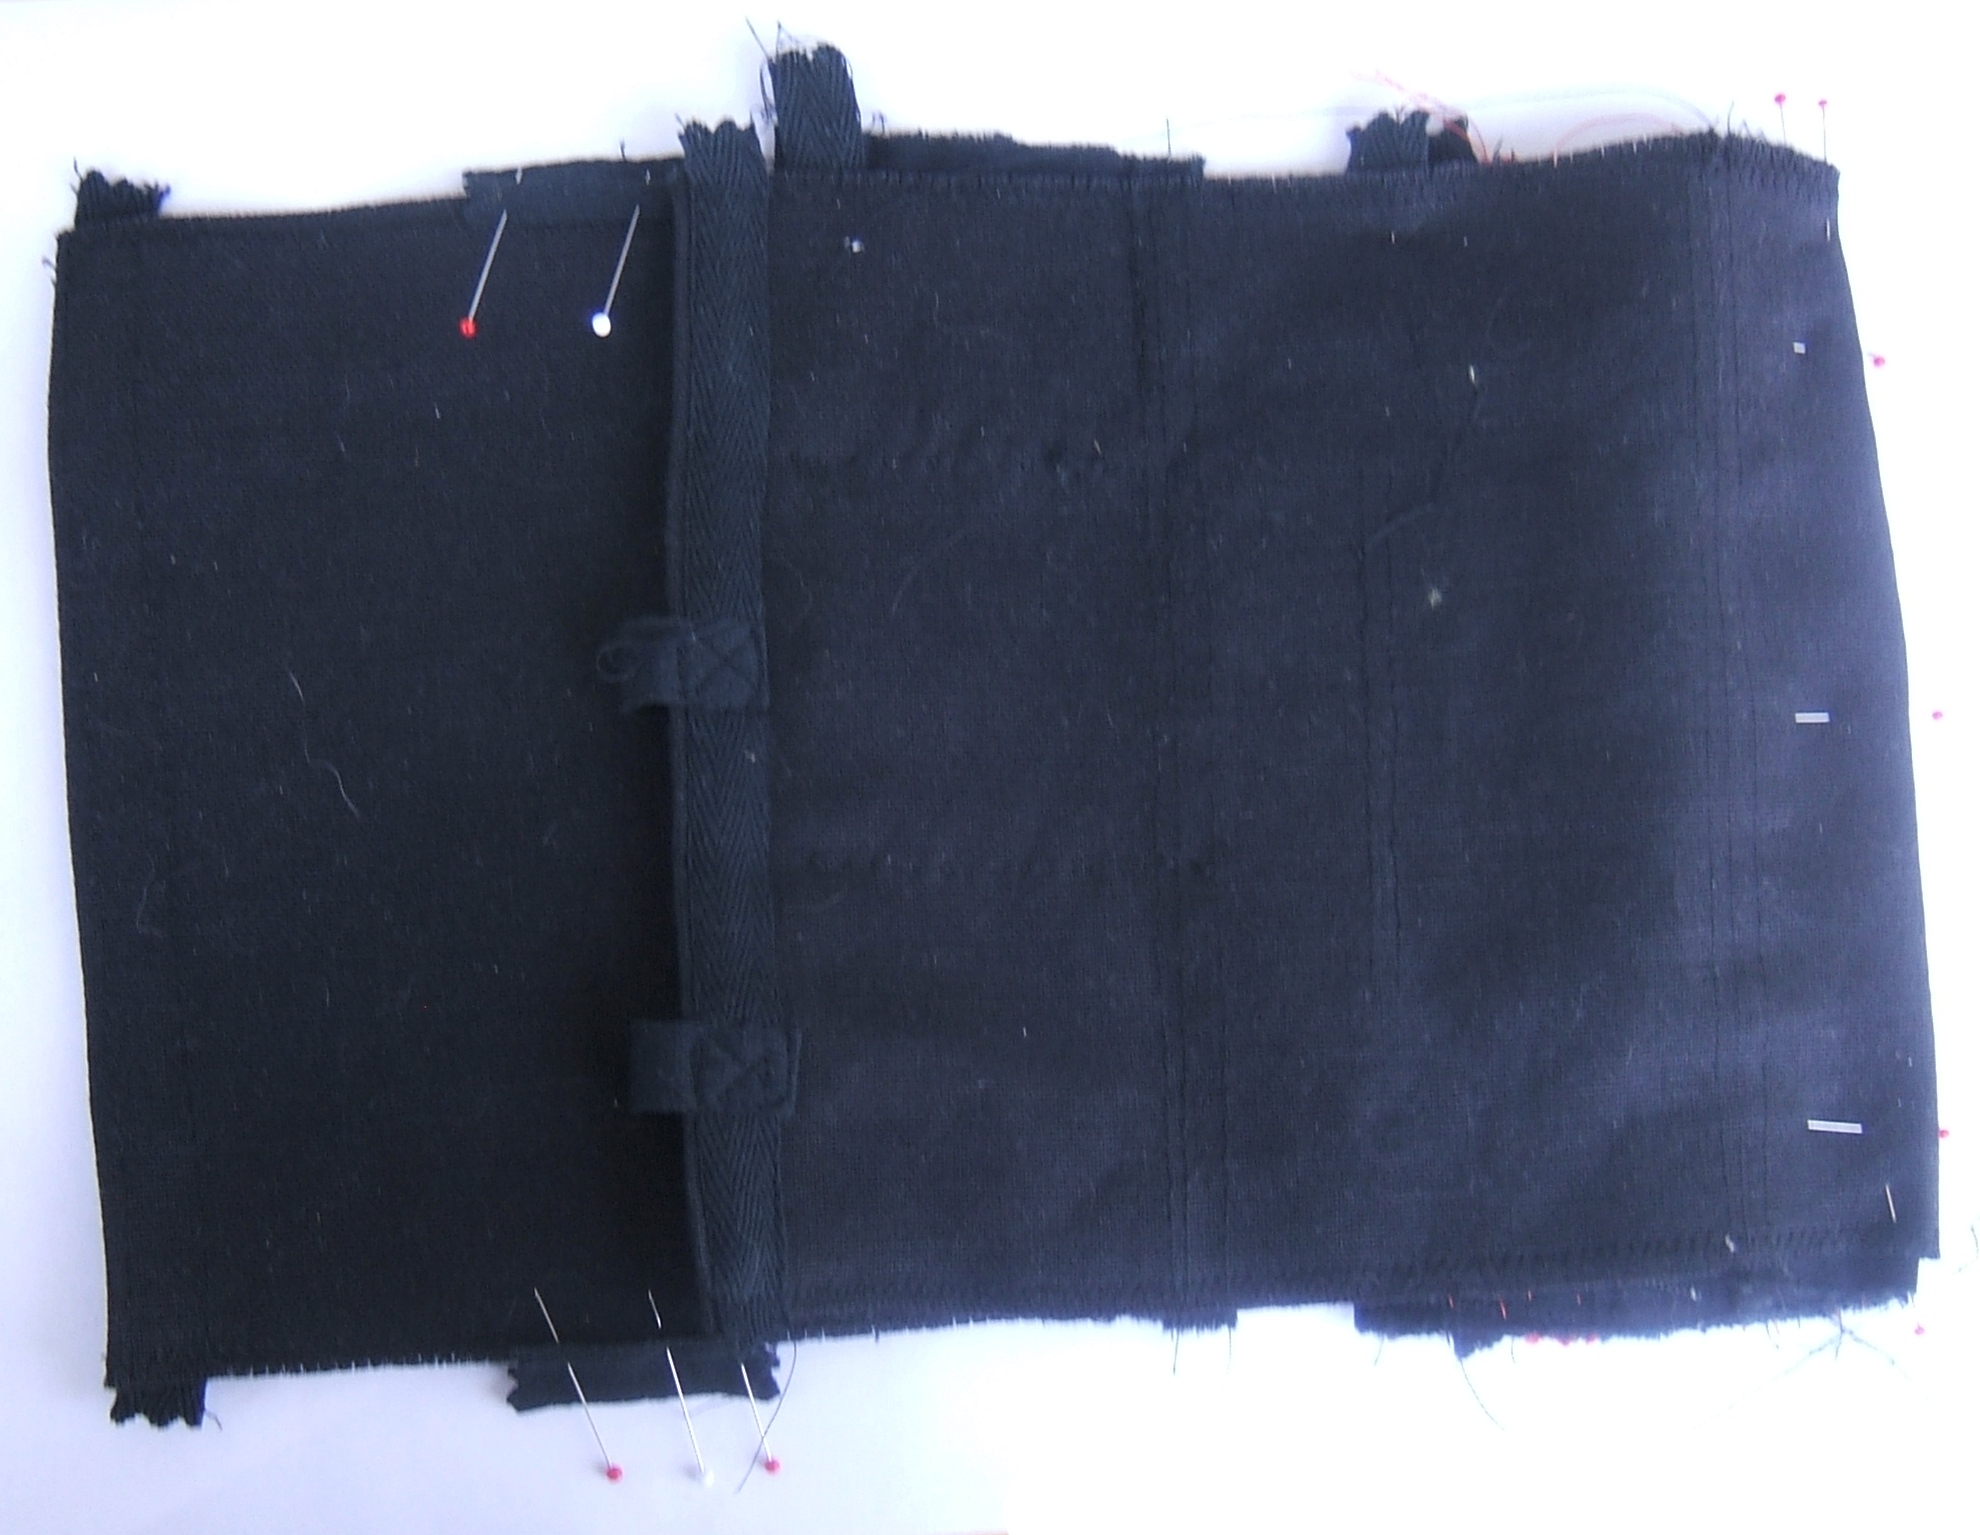
The smaller scrap measures 22 1/4 inches wide and 7 3/4 inches long. This appears to be the exact size needed to make the main pocket of the wallet -- confirming my feeling that this is the fabric I made the old wallet from.
The inner pockets are worn, but have held up better than the outer casing. I shall use broadcloth again. Perhaps off the same roll, but I bought black broadcloth a few times before I bought a whole roll.
While brushing lint out of the old wallet -- for the first time in its life, so that wasn't really a lot of lint -- I discovered that I'd used a selvage to save lumps inside the secondary pocket. The linen-cotton canvas has a fringe selvage, so this isn't the same piece.
The secondary pocket shows no wear at all; I'm tempted to make it of broadcloth, and stiffen the opening with twill tape. The fold-bottom is absurdly deep, a smidge over two inches not counting the seam allowance. I suspect that I had a piece of the correct width and used all of it. One inch is plenty for any pocket, and this one never has anything in it but a checkbook case containing a comb and a few papers that I don't want to wad into the card pockets.
Broadcloth would also avoid having to fold heavy canvas to make a finished edge inside the pocket.
I think I've talked myself into doing it, so I can put the canvas away.
I pressed each end -- or side, if you go by the grain instead of the proportions -- of the 22 1/4" by 7 3/4" scrap under a quarter inch. Then I used pinking shears to cut two pieces of black half- inch twill tape a tad longer than 7 3/4" (measured against the scrap) and appliquéd them over the raw edge and the fringed selvage. Now I've forgotten which is which, but it doesn't matter.
A smidgeon of excess tape makes appliqué much easier.
Now it's time to start cutting broadcloth. Oops! It's been ages since I used black broadcloth -- I think the last time was the muslin for my trapezoid skirt, and that was at least two halloweens ago. What the roll of broadcloth isn't behind, it's under. Going to be a semi-major shelf cleaning here. Unless there are suitable scraps on top of the roll.
⁂
There wasn't all that much stuff to take off the shelf. I decided to use the same strategy that I used with the twill tape, and tore a strip a bit wider than the scrap that will be the main part of the wallet across the end of the roll. That should be enough to cut all the pockets.
Then to put the bits back. I found an empty box nicer than the one I keep snaps in, but it was a bit smaller and the snaps wouldn't go.
⁂
Oops, I forgot to put the old iron back. What I get for parking it on the ironing board!
I have decided to turn the hem of the secondary pocket to the right side and cover it with red half-inch ribbon. Synthetic ribbon will be stiffer than twill tape, and a contrast color will make it easier to find the edge of the secondary pocket and easier to see the receipt pocket that is folded over it.
Now, do I sew the bill pocket hem with bright thread, or also stiffen it? I have enough of the red ribbon to do four pockets. There are five pockets on the secondary pocket, and I want to alternate colors, so that would take three -- should I put ribbon on the strip of three pockets on the main pocket just because I have enough? Should I put narrow green ribbon on the alternate pockets or leave them black? I have only enough green for one pocket and I don't like that shade much, but there's a rather pretty blue that will do three.
I didn't make any progress on the wallet today, but my synthetic-tape box is much neater. I've kept out a red ribbon and a blue-teal ribbon to label the shingled pockets with. I'd prefer a blue-er blue or a grass green, but not strongly enough to make a special trip to Lowery's.
I'm trying to remember the order of work that I worked out one night. The first step is to cut off the selvage of the broadcloth to make a pen pocket. I'm glad to have thought of a way to not waste the selvage; good selvage is hard to come by.
I'd planned to make a pencil pocket, but I've acquired a really-cool pen with a flashlight in it. I'll continue carrying a pencil stub in my coin pocket for emergencies.
Since the pencil pocket is on a fold, I plan to make the rows of stitching holding it on just half as far apart as the circumference of the pen. Since there is a pocket clip on the pen, I can afford to make the pocket a tad loose to be sure the pen will go in. Even if tight on the pen, it won't hold onto a pencil at all.
I plan to hem the ends of the strip -- wider on the left end, since I plan to have that end under the pocket clip -- then lay it flat on the main piece, stitch down the selvage, and sew the three- pocket strip over the other edge. (Two card pockets, and the left-over narrow space is for a pair of folding pliers and a pair of folding scissors. I don't really need the scissors, as there is a smaller pair on my keychain.
Thinks: I'll always have the pen in my right hand when I'm done using it, and will naturally stick it into the pocket non-cap end first. So I want the re-inforced hem on the right. end. On the other hand, I'll be holding the wallet in my left hand, so I'll pull on the left end to keep the pocket straight while the pen goes in. I was right the first time.
Maybe I'll sew the ends of the pocket together and make it double its whole width. A pocket half the width of the wallet would be about right.
I need to make the strip of three pockets first, to see where to sew the pen pocket. This should be the same depth as the current strip, and it should be the same distance from the top of the strip, but the hem should be wider and double for sewing on the snaps. (Checks: I have four black snaps of a suitable size, and need only two.)
Next I need to make the secondary pocket and the shingled pockets attached to it. I was thinking of having the top of the pocket on the stitching, so that the seam allowance of the pen pocket would be under it, but I think that folding it to meet the edge of the selvage would be better, as that would give more room for folding. And the combined thickness of the stuff in the pockets above and below might be thicker than the pen.
If I label all the shingled pockets, I don't need to label the edge of the secondary pocket. I shall fold the hem to the wrong side and cover it with black twill tape, same as the old wallet.
I think I have a plan in mind, here it is written down to refresh my memory, and I'm getting sleepy, so I'll knock off for the night.
A tape measure doesn't work on something as small as a pen, so I wrapped a Carniceria San Jose receipt around it, slightly spiral, stroked a pencil of the edges, and it's one inch and twenty thirty-seconds between the marks.
1 20/32 = 1 10/16 = 1 5/8
Say an inch and three quarters for the circumference of the pocket, half an inch and three eighths between the rows of stitching on the patch: 7/8" plus a quarter inch allowance on the selvage side and three eighths on the raw side: 12/8" = 6/4" = 1 1/2".
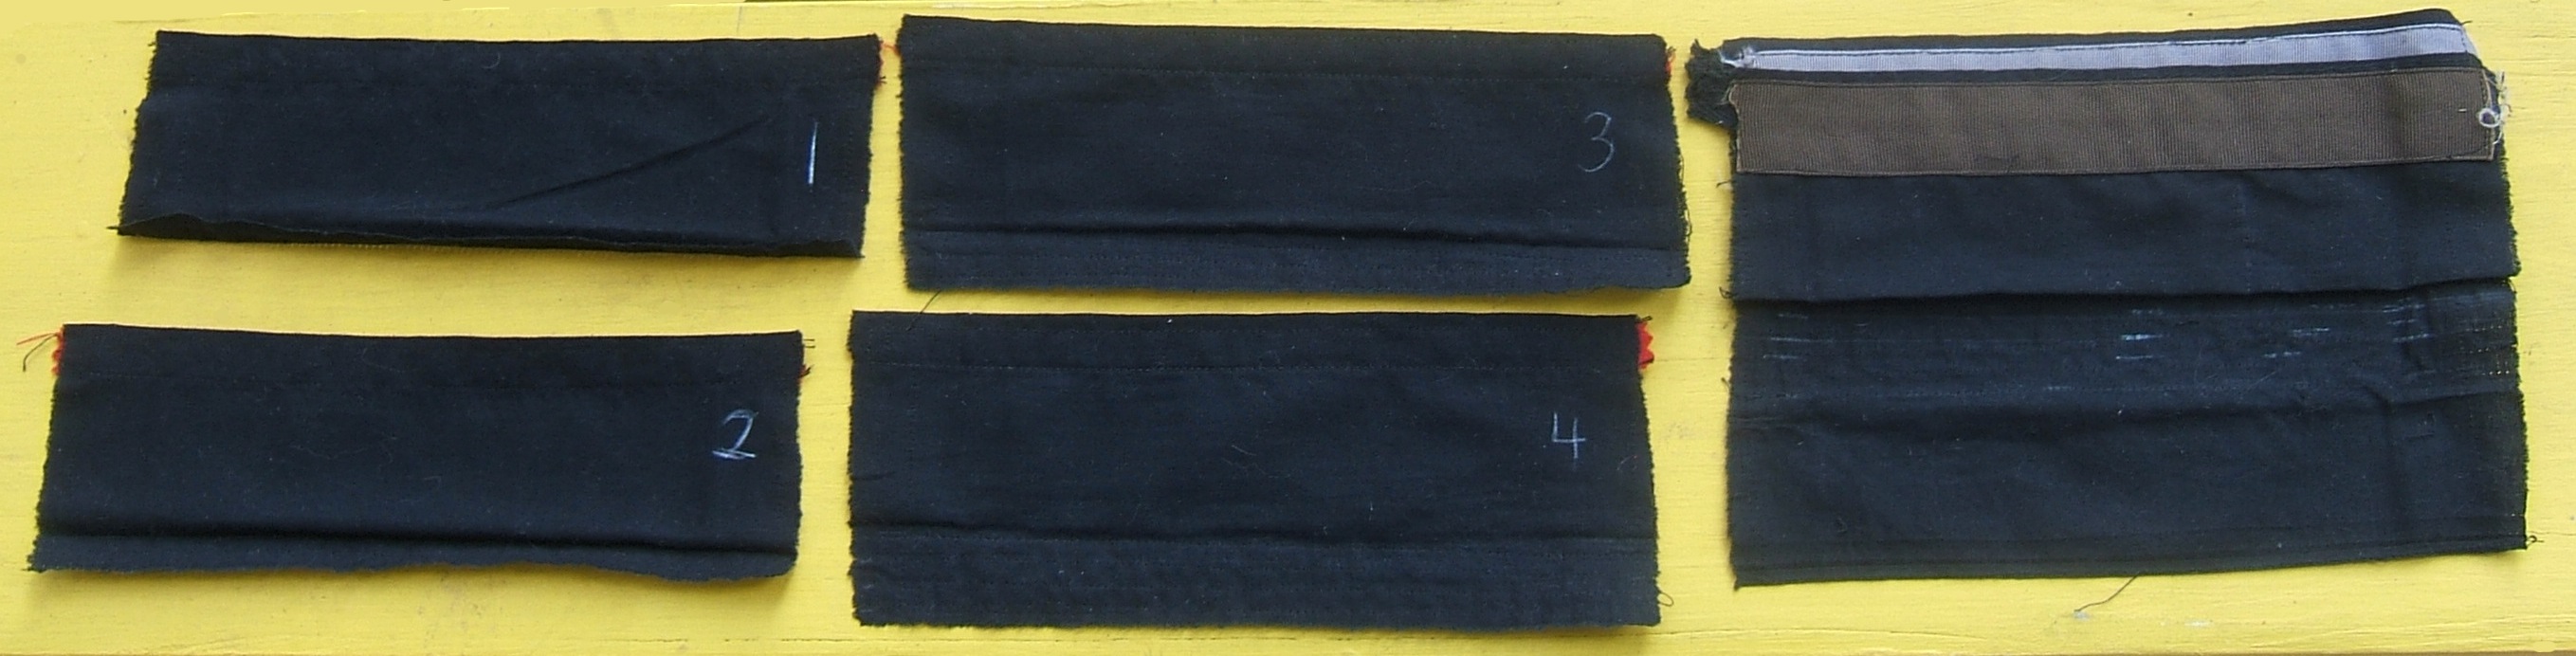
Planning what to tear for the pockets:

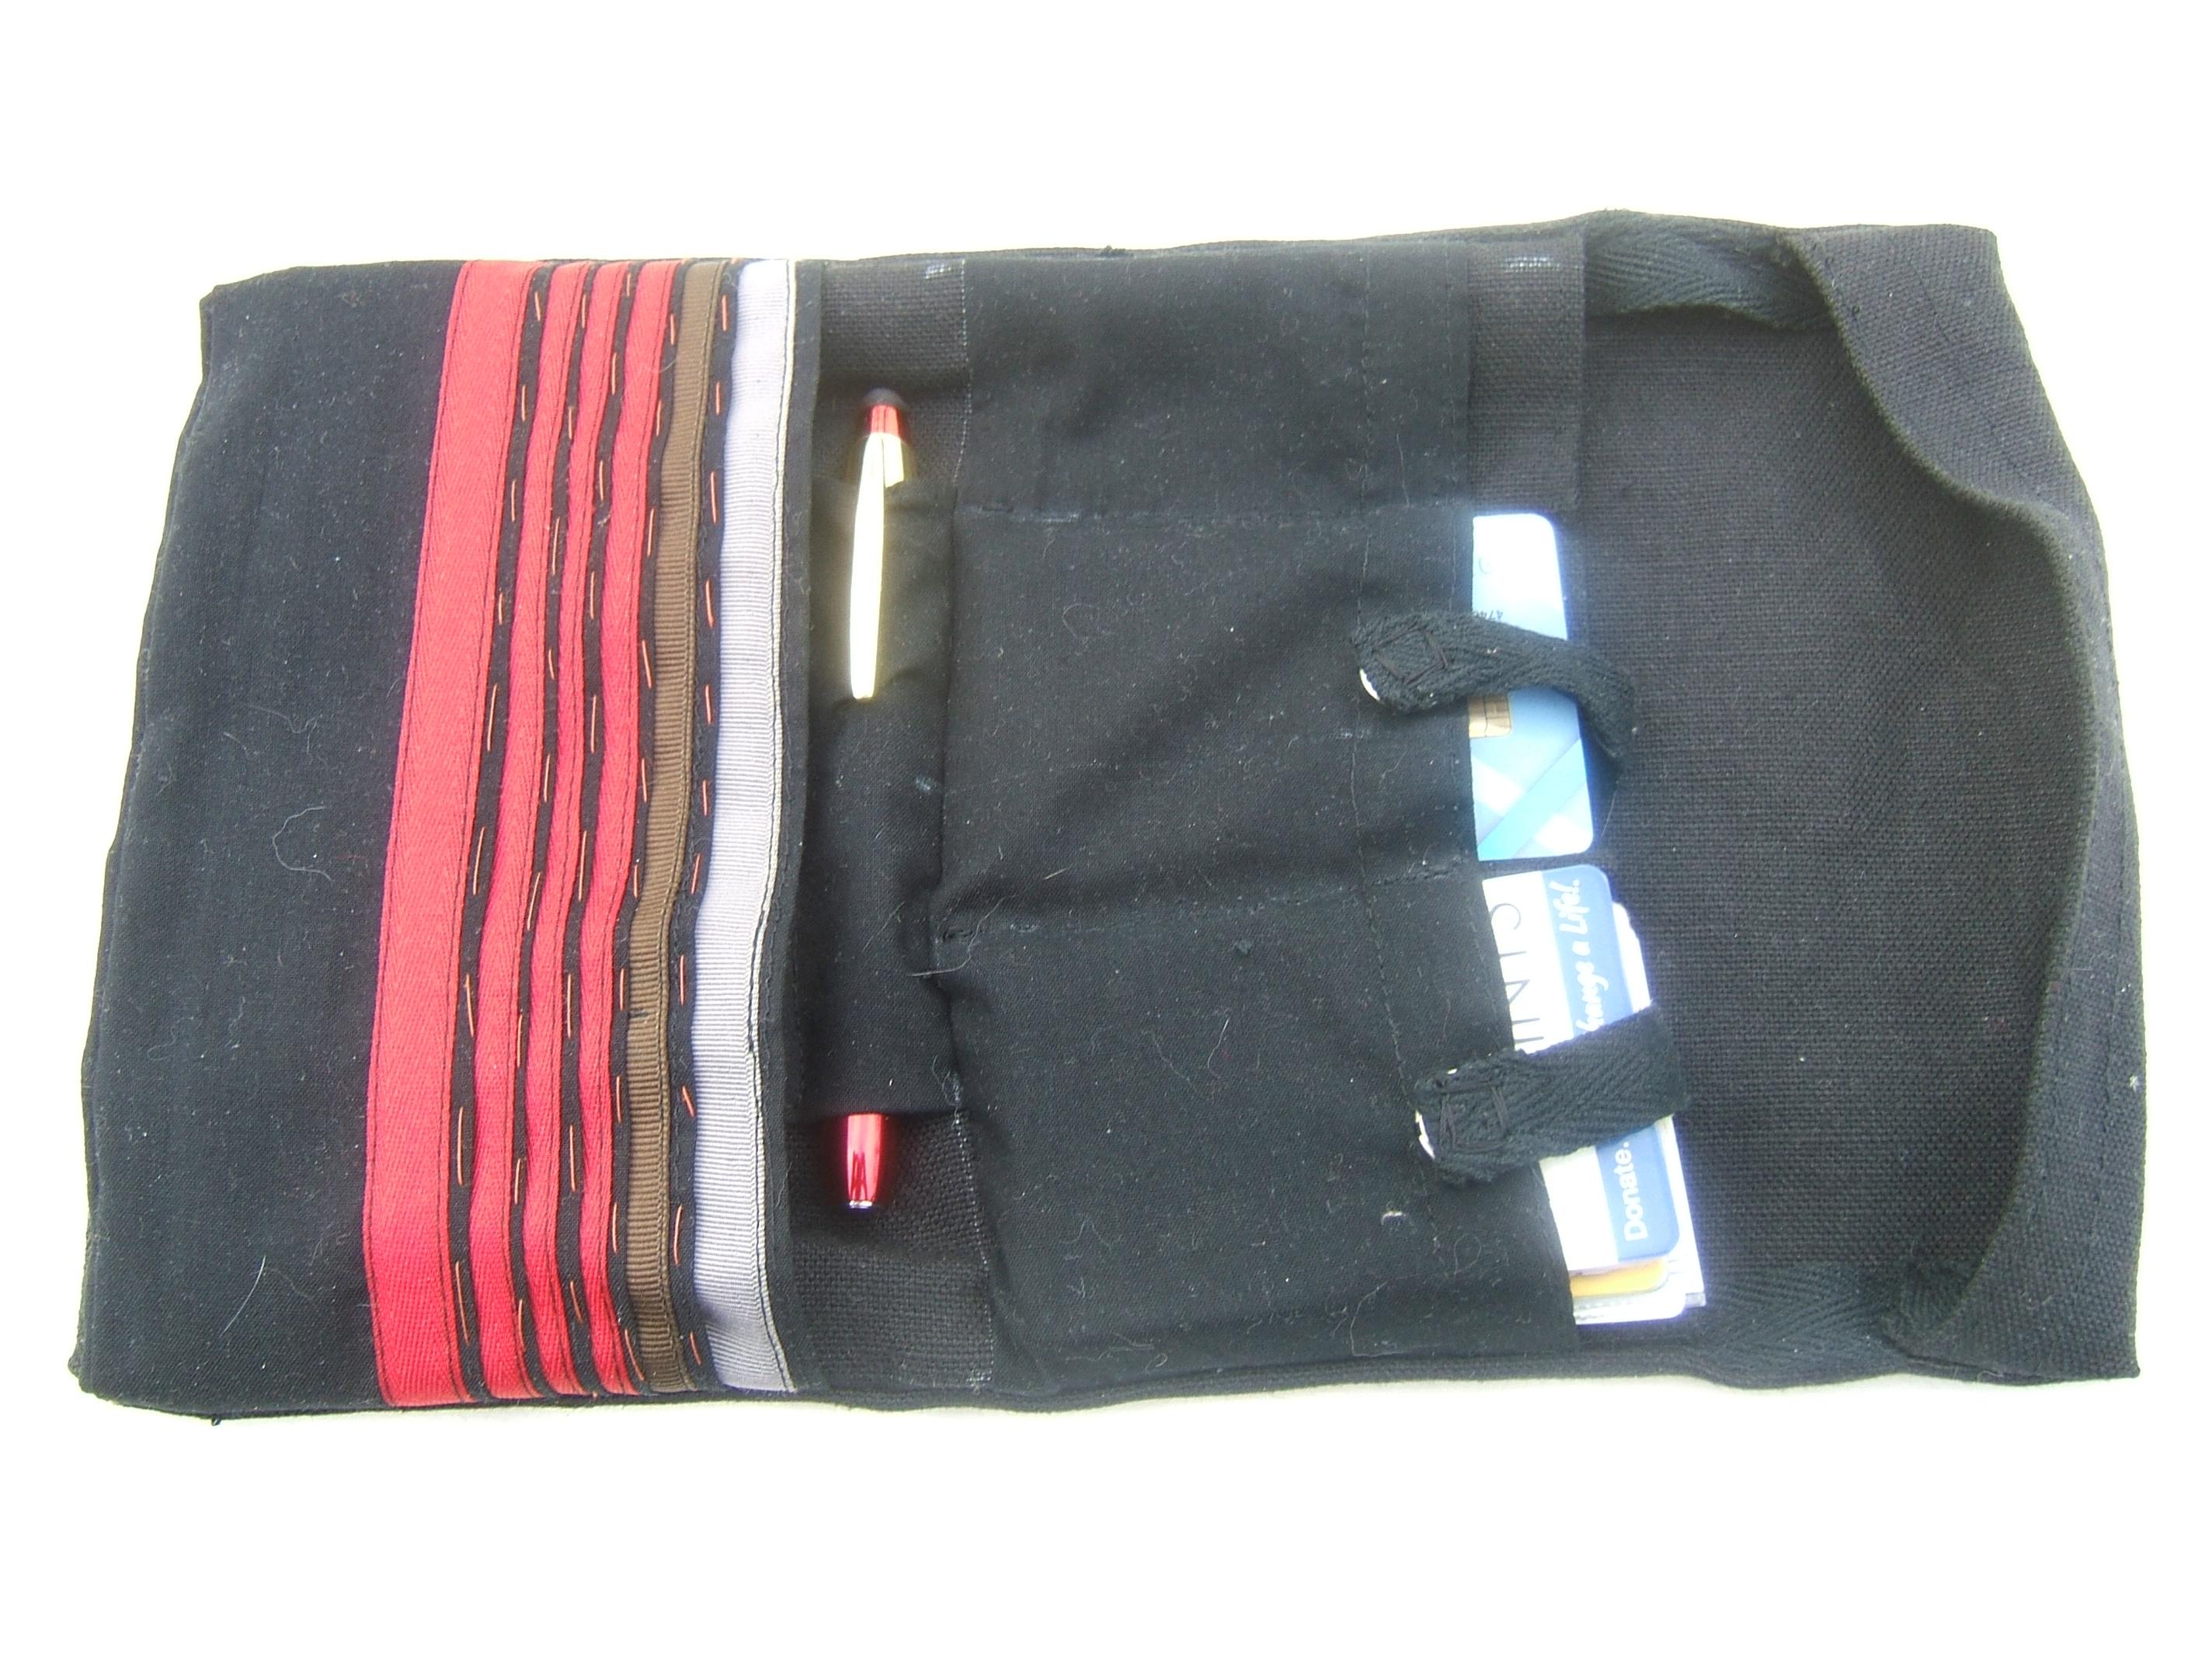
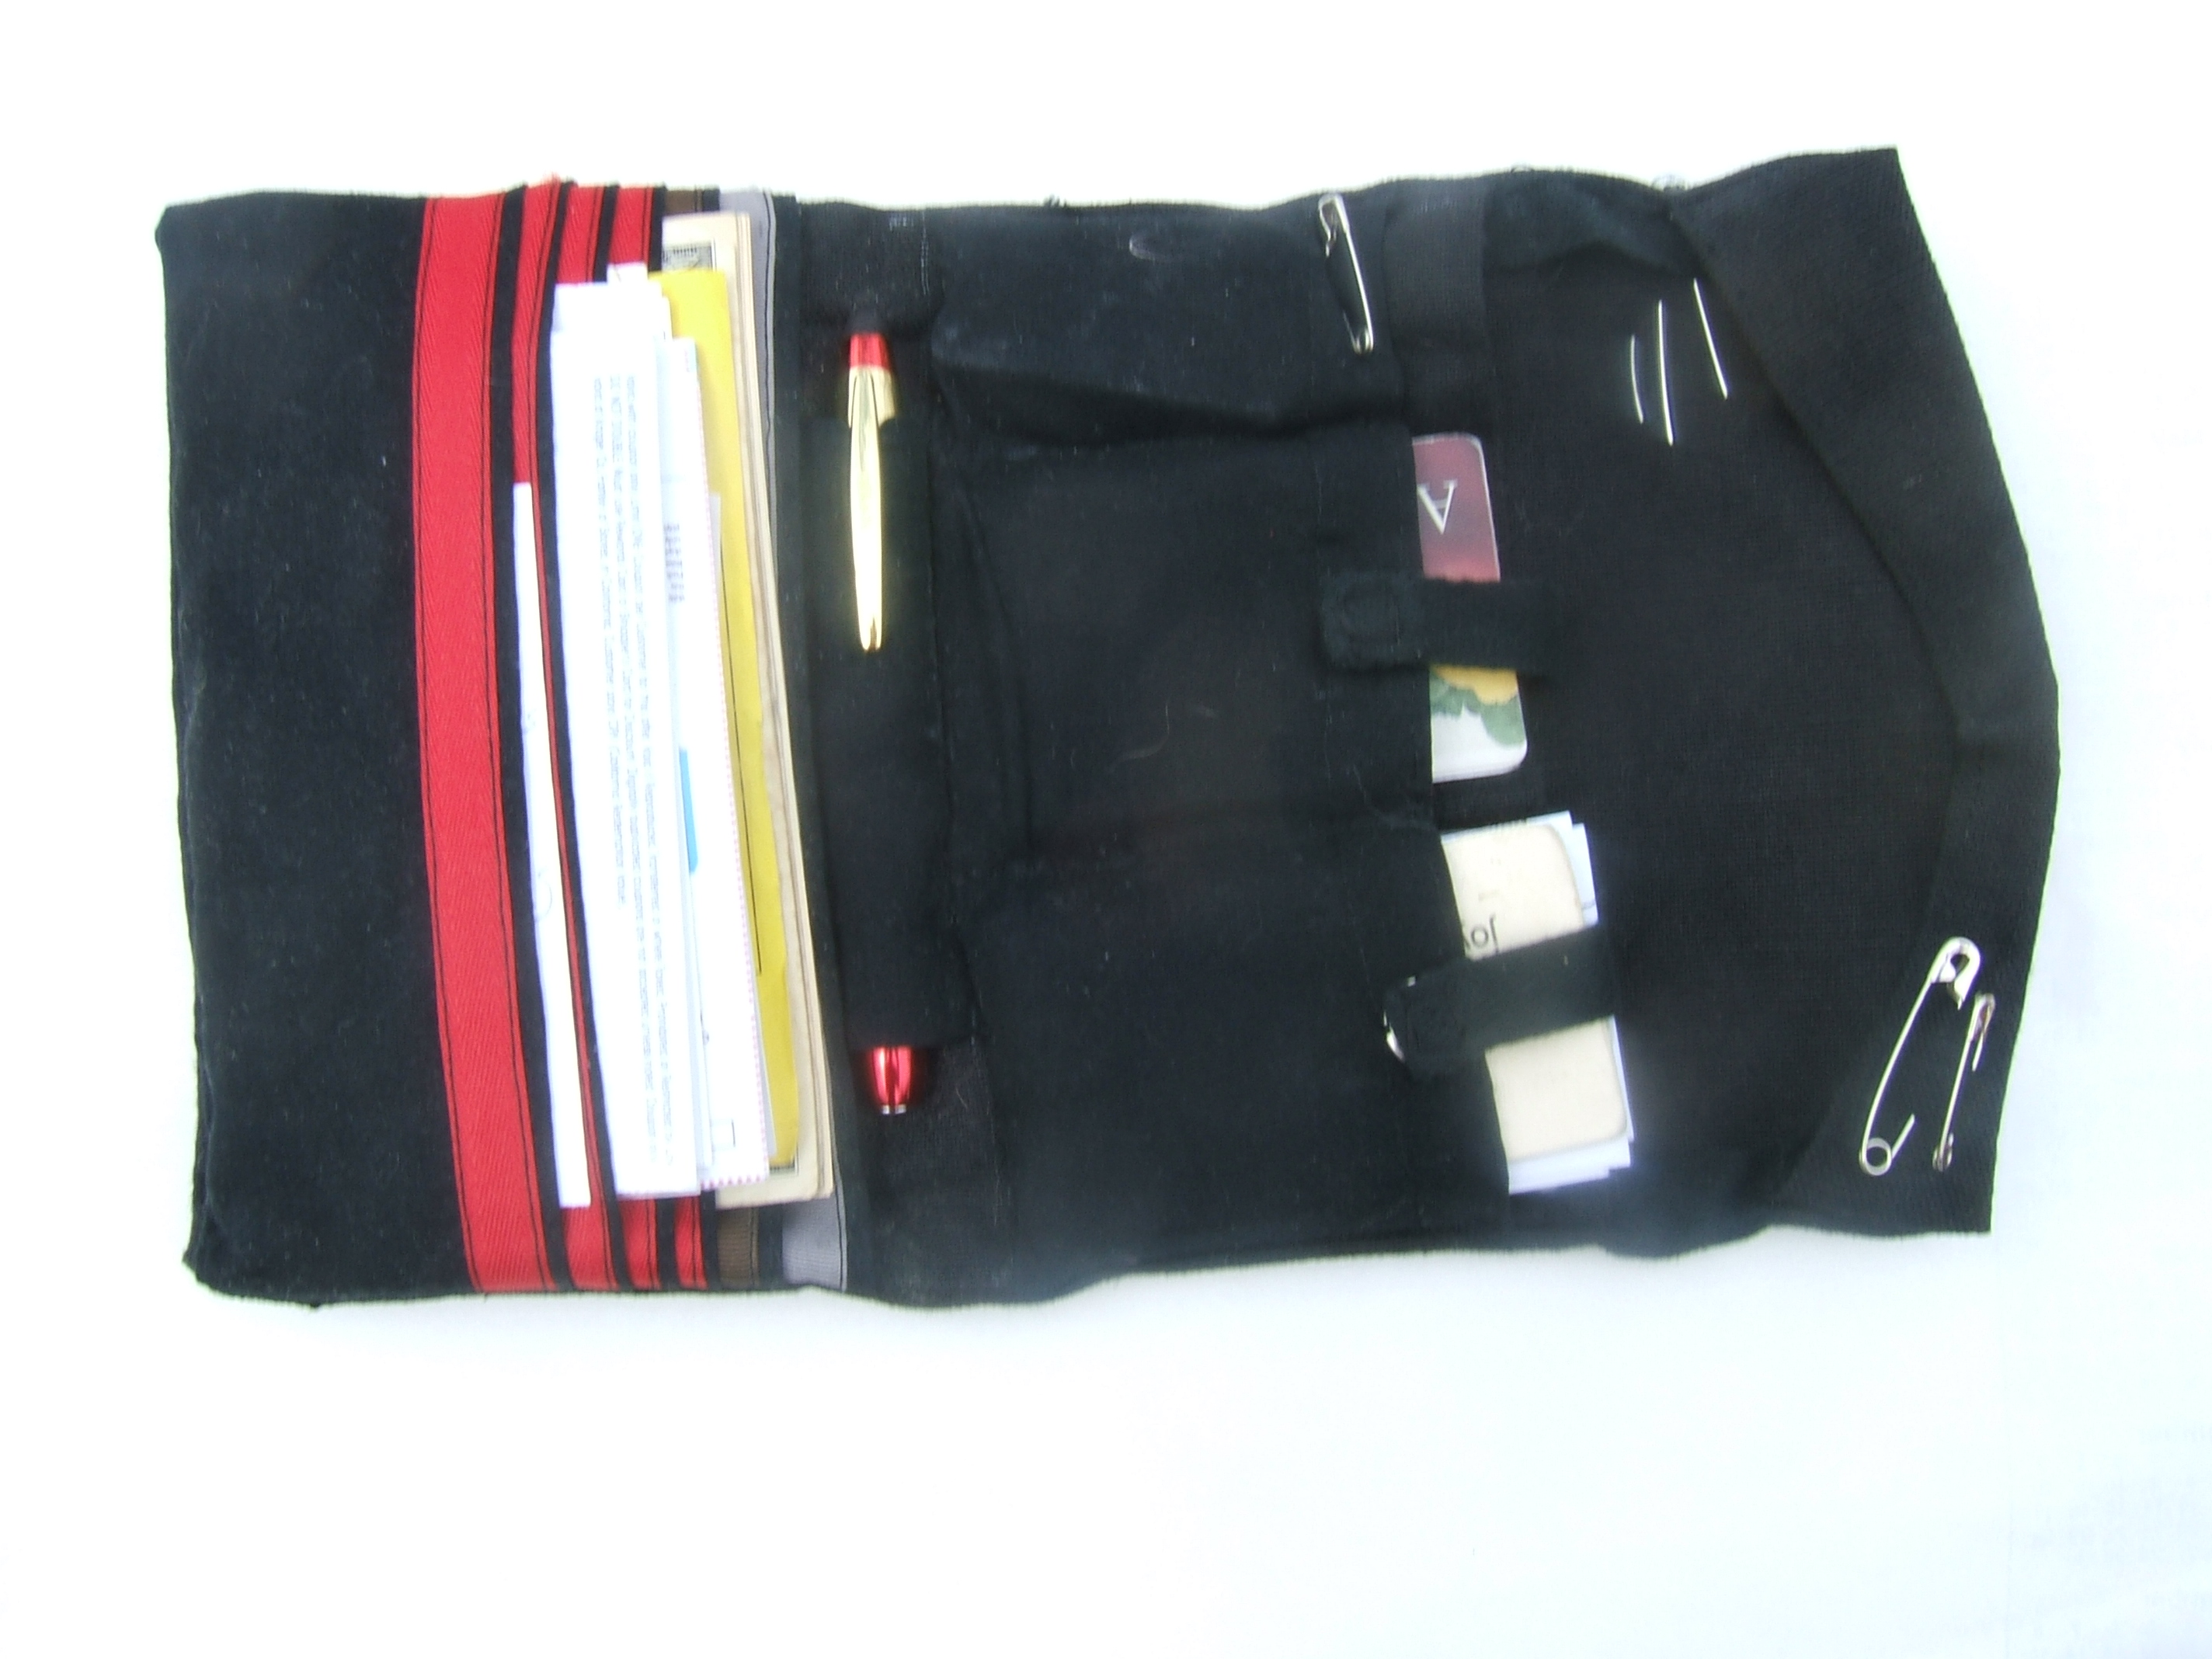
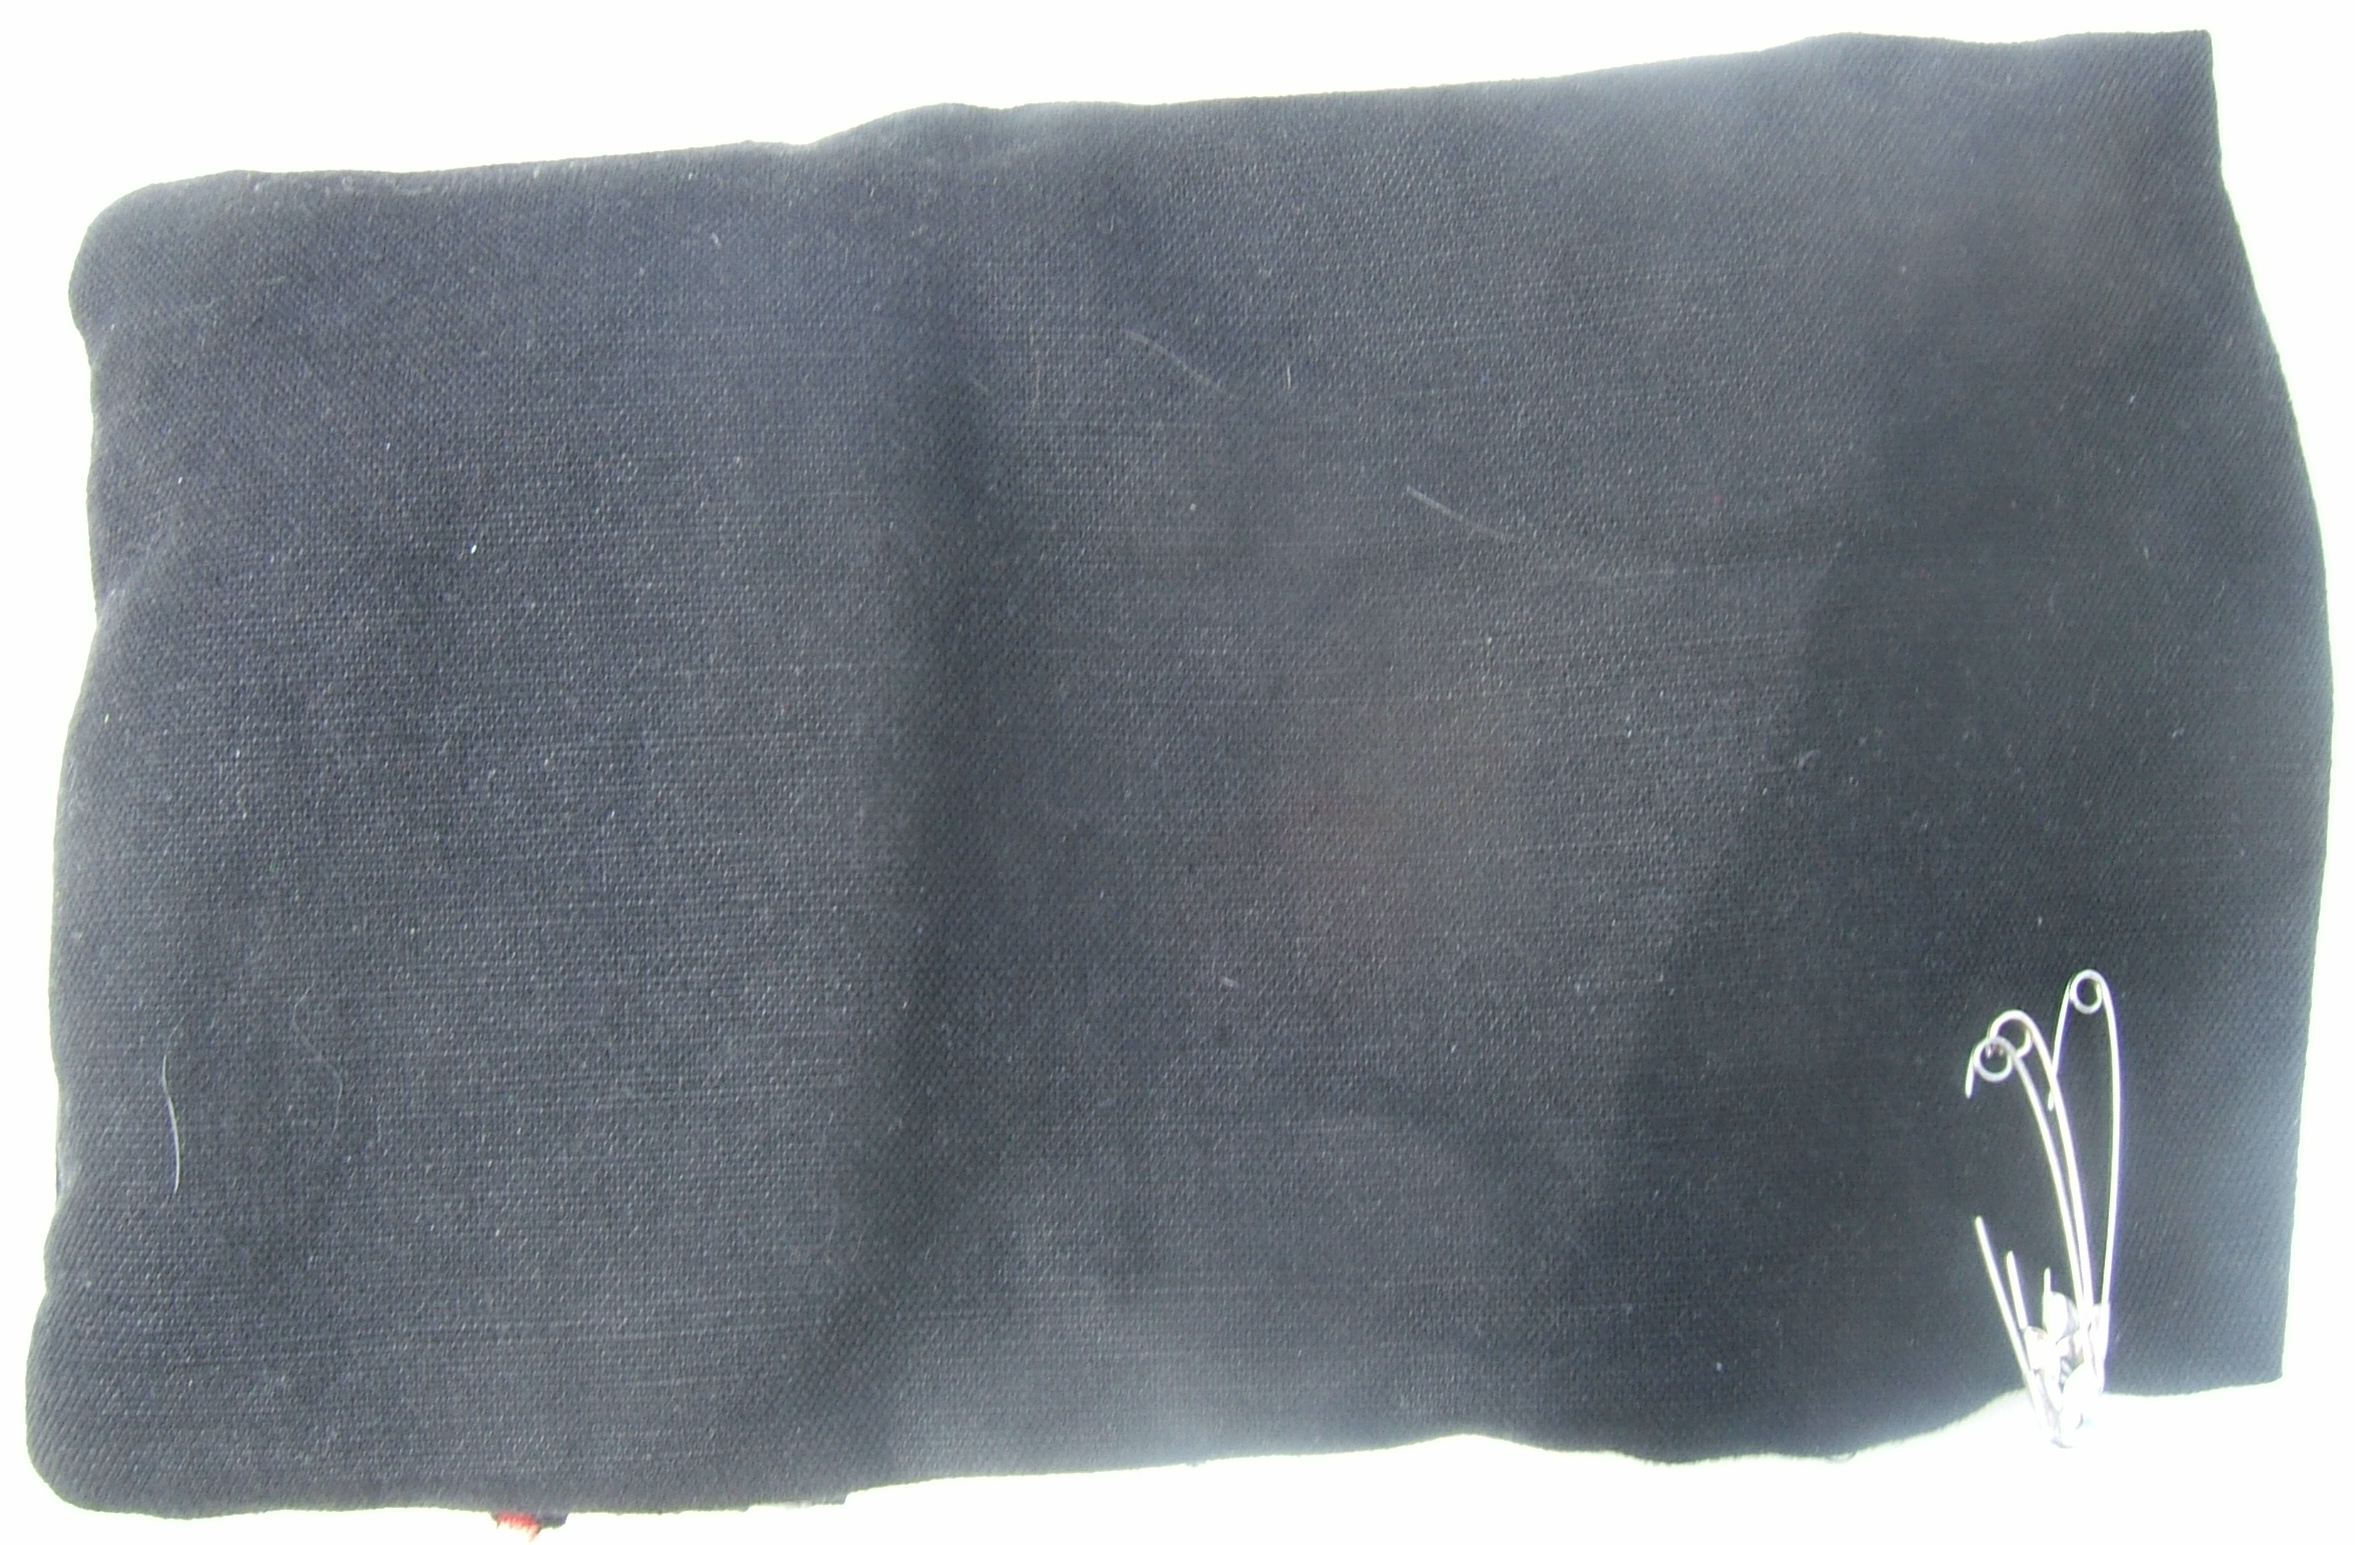
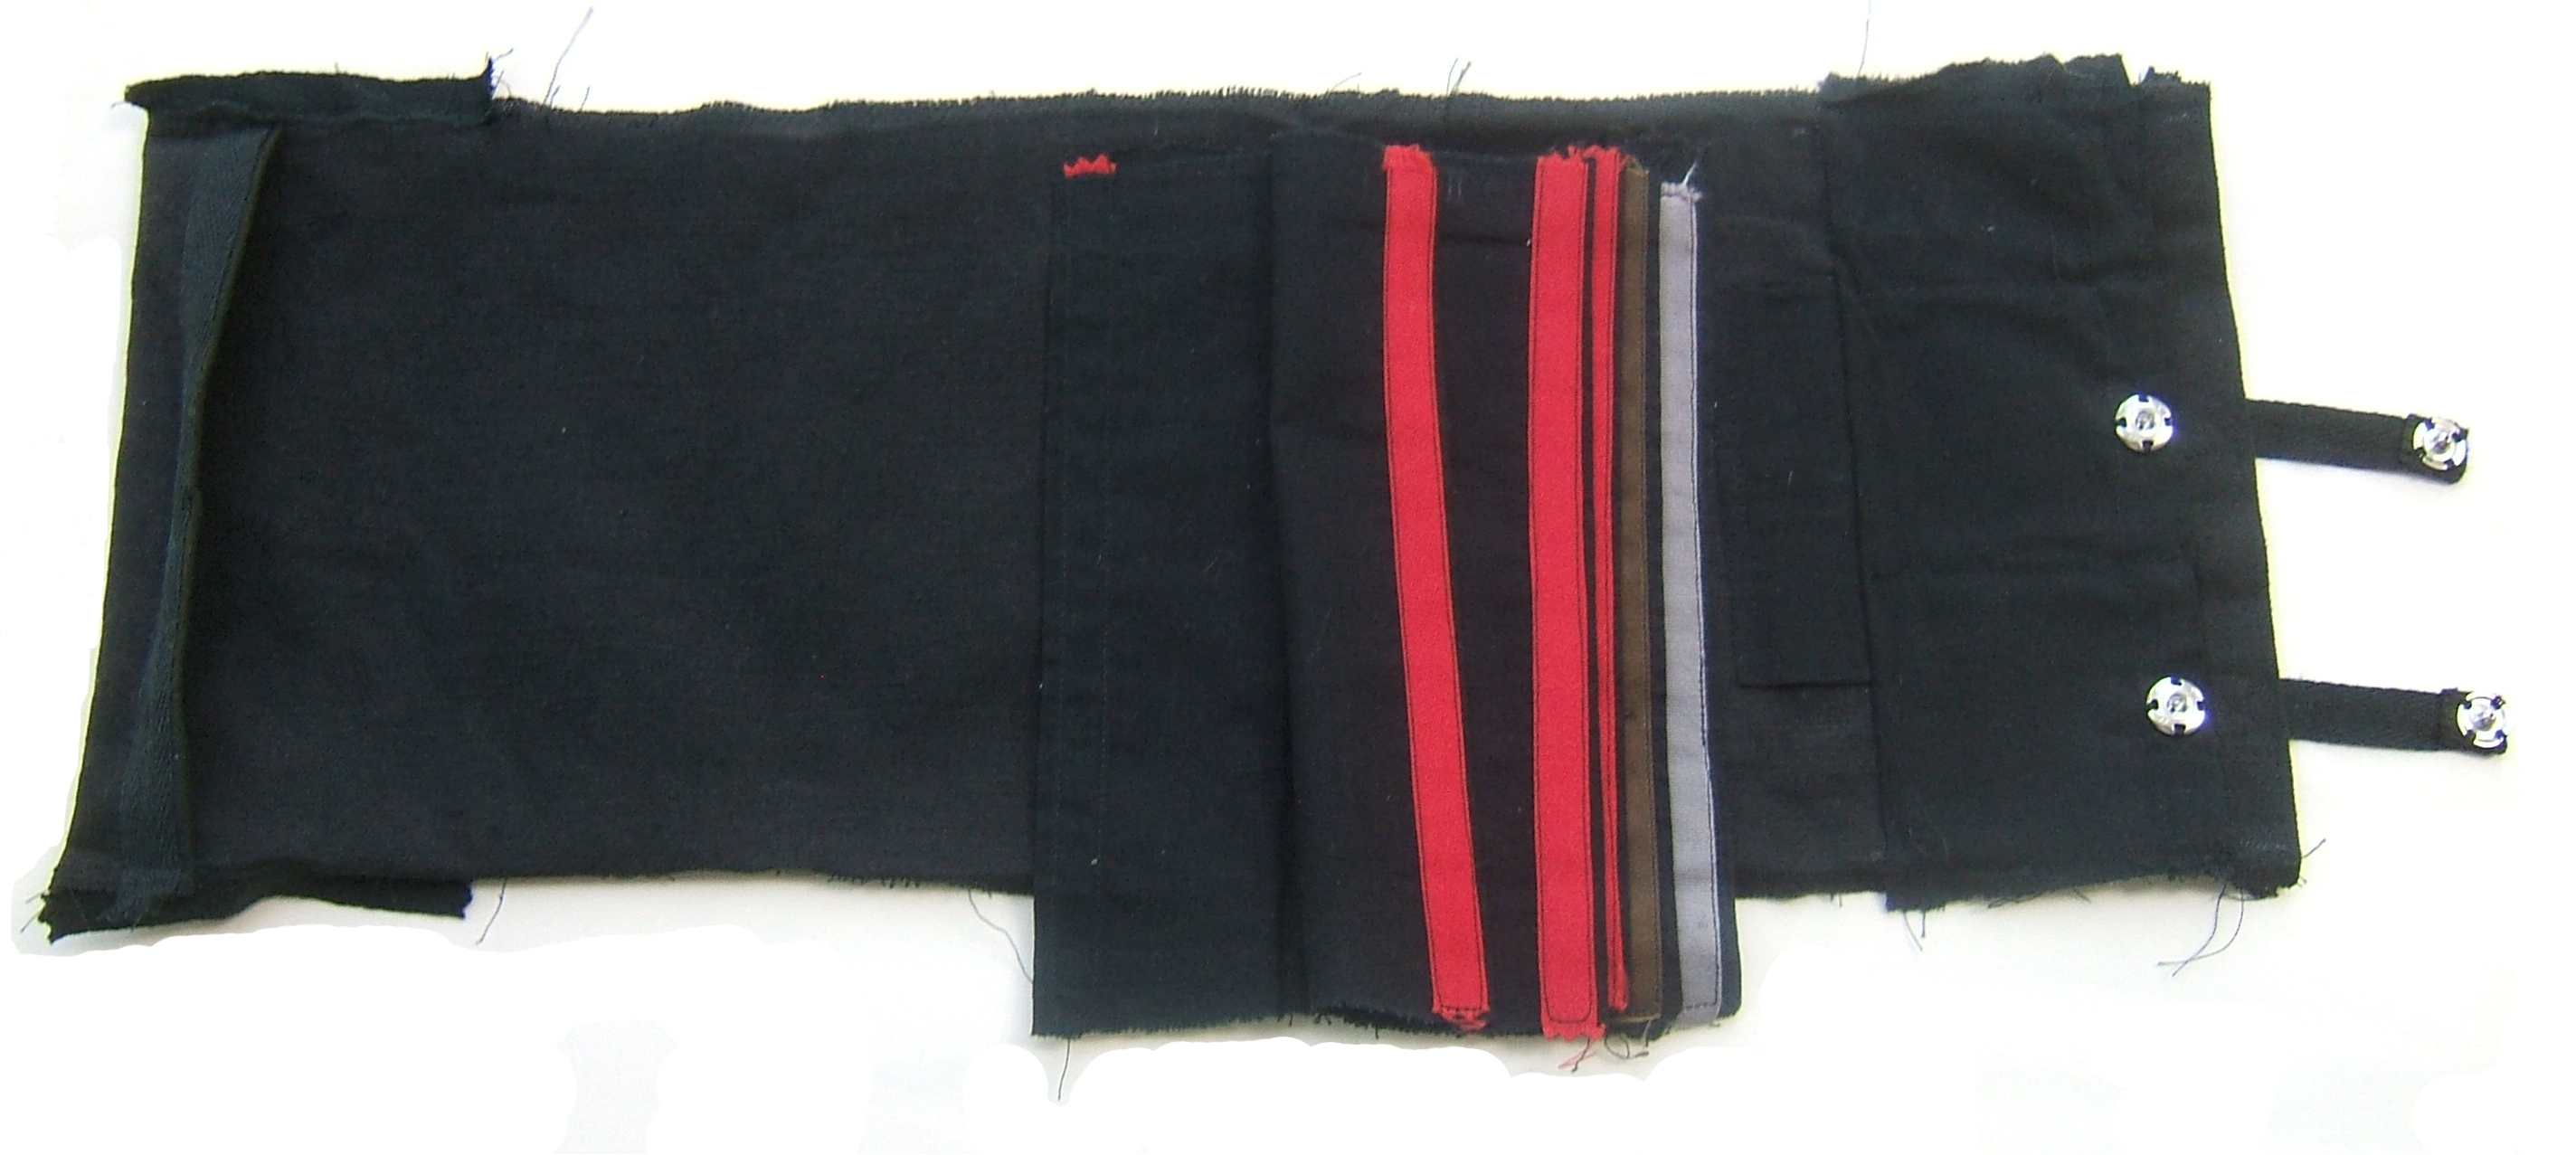
The old wallet to be measured. Left to right: the coin-catcher lip with two emergency safety pins, the card pockets with twill-tape retainers, the wrinkle which in the new wallet will be the back of the pen pocket, bill, coupon, receipt, and shopping-list pockets shingled onto the checkbook-case pocket. Background: a fuzzy rug.
An inch and a half for the pen pocket
The card pockets are three and one-eighth inches deep, with a slight fold at the bottom. I could allow an inch for a hem and fold it double to make a place to sew the snaps, or I could allow half an inch and cover it with black twill tape.
Bottom seam allowance: another half inch. No I'll make it 5/8", draw a line 3 1/8" from the hem, and match that line to a line drawn on the main pocket 3 3/4" from the hem.
4 1/4". Check: 3 1/8" + 5/8" + 4/8" = 3 10/8"
Four shingled pockets. 2 1/4" deep, half an inch to be turned to the right side and covered with ribbon (actually one piece of polyester twill tape and one piece of seam binding), half an inch to be caught under the pocket above, except the top pocket will be turned under and stitched twice.
Pockets a quarter inch apart, a quarter inch to lie under the pocket above. Check.
Five pieces 3 1/4" wide.
The secondary pocket aka checkbook pocket:
Three and five-eighths inches deep. Doesn't seem like much. Shingles 2 1/4" plus four quarters: 3 1/4", leaves 3/8" above pockets. That adds up.
Hokay, plus half an inch turned to the wrong side and covered with black twill tape. 4 1/8".
Plus fold-bottom and seam allowance.
Inspecting old wallet: I used a selvage inside the checkbook pocket to keep from turning under the duck, and hey, I've got another selvage on the strip I tore off. Not as good a selvage as the one I mean to use for the pencil pocket, but it isn't going to show, and the crease will be sewn flat if it doesn't iron out.
And here's how the fold-bottom got so deep: five and one-eighth inches would do; I'll tear off six to leave wiggle room.
Summary:
Pencil Pocket: 1 1/2"
Card Pocket strip: 4 1/4"
Five shingled pockets: 3 1/4" ==> 16 1/4"
Checkbook pocket: 6"
Sum: 28"; the broadcloth is 38" wide, we are in business.
But I will tear after my nap.
I wish I had another color of twill tape. Can't buy more because current tapes imitate cotton. I haven't checked recently, but it will be January before I can go look, and I'd like to have my new wallet in my pocket when I pick up my bike.
I'm seriously considering making them all red. The black edge showing beyond the tape will show up well against the red tape on the next strip.
⁂
Notches all snipped, and there are ten and a half inches left. This is to the precision with which I measured the width of the cloth.
I shall leave each pocket attached until I want to do something with it. I marked the shingled pockets with roman numerals because my nonce pencil would make only straight marks on the fabric.
⁂
Edited a picture of the wallet I took earlier today, inserted it above, and wrote a caption.
On re-reading, I had trouble seeing what I was about with the bottom seam of the card pockets. I was making sure the torn edge doesn't stick out of the seam, by making the allowance wider than the turn-under. A wider allowance will also prevent the edge of the pen pocket from poking out inside the card pockets.
I tore off the pen pocket, sewed the ends together, pressed the seam open, flattened it with the seam in the middle, and left it under a weight.
I also sewed twill tape to the card-pocket strip without tearing it off the piece.
And I ironed the strip of broadcloth.
I marked a line 3 3/4" from one end of the main pocket and sewed the pencil pocket, pinned the line, and tried the pen in.
Then I drew a line 3 1/8" from the hemmed end of the broadcloth and tore off the card-pocket strip.
I pressed under the edge of the card-pockets strip an eighth of an inch, then tore apart the broadcloth strip and pressed half an inch on one edge of each pocket.
I happened to have an old brochure lying on the floor, and used one folded edge as a guide to press straight. I eyeballed the width; it didn't occur to me until I was nearly done that I could have drawn a line half an inch from the edge of the brochure.
The broadcloth strip must be eight and a half inches wide; the brochure exactly fit.
The scrap is ten inches long. I drew a double-headed arrow on it to show where the long grain is.
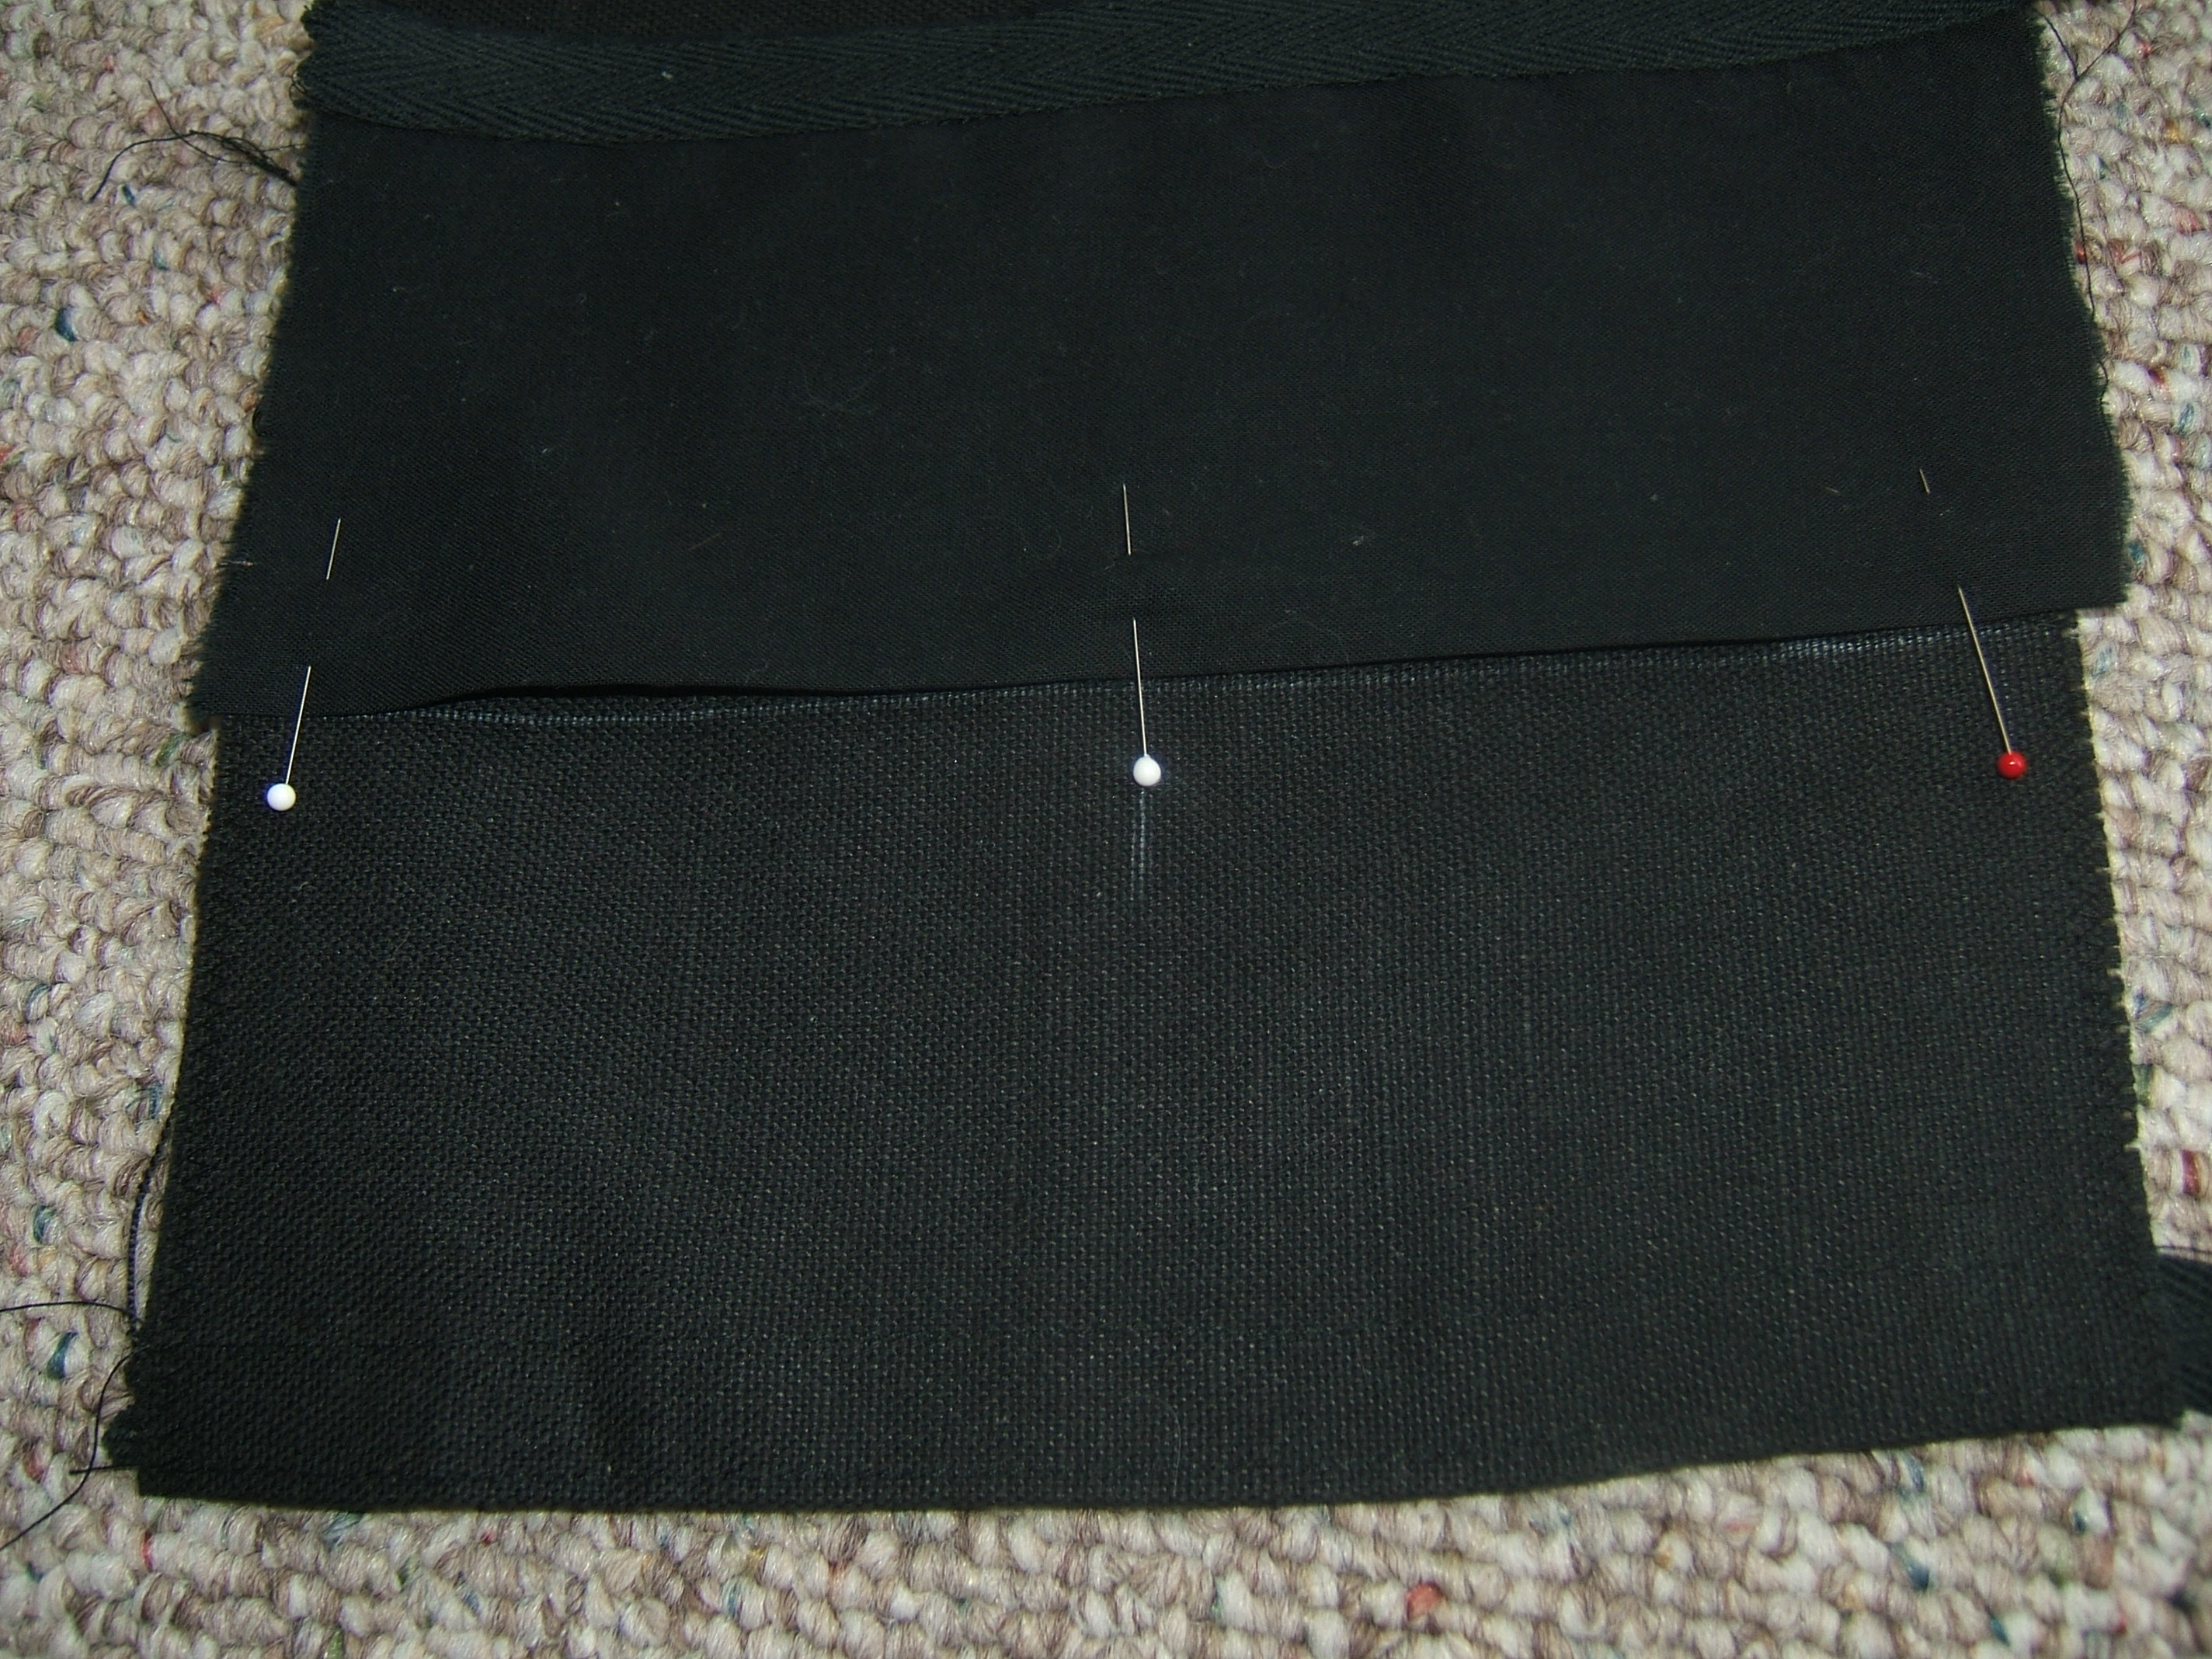
I puzzled a moment over how to match the line drawn on the card pockets to the line drawn on the outer casing, then laid the pocket on the line and marked each end just beyond the folded edge, used a ruler to connect these two marks, then pinned with the folded edge touching the line.
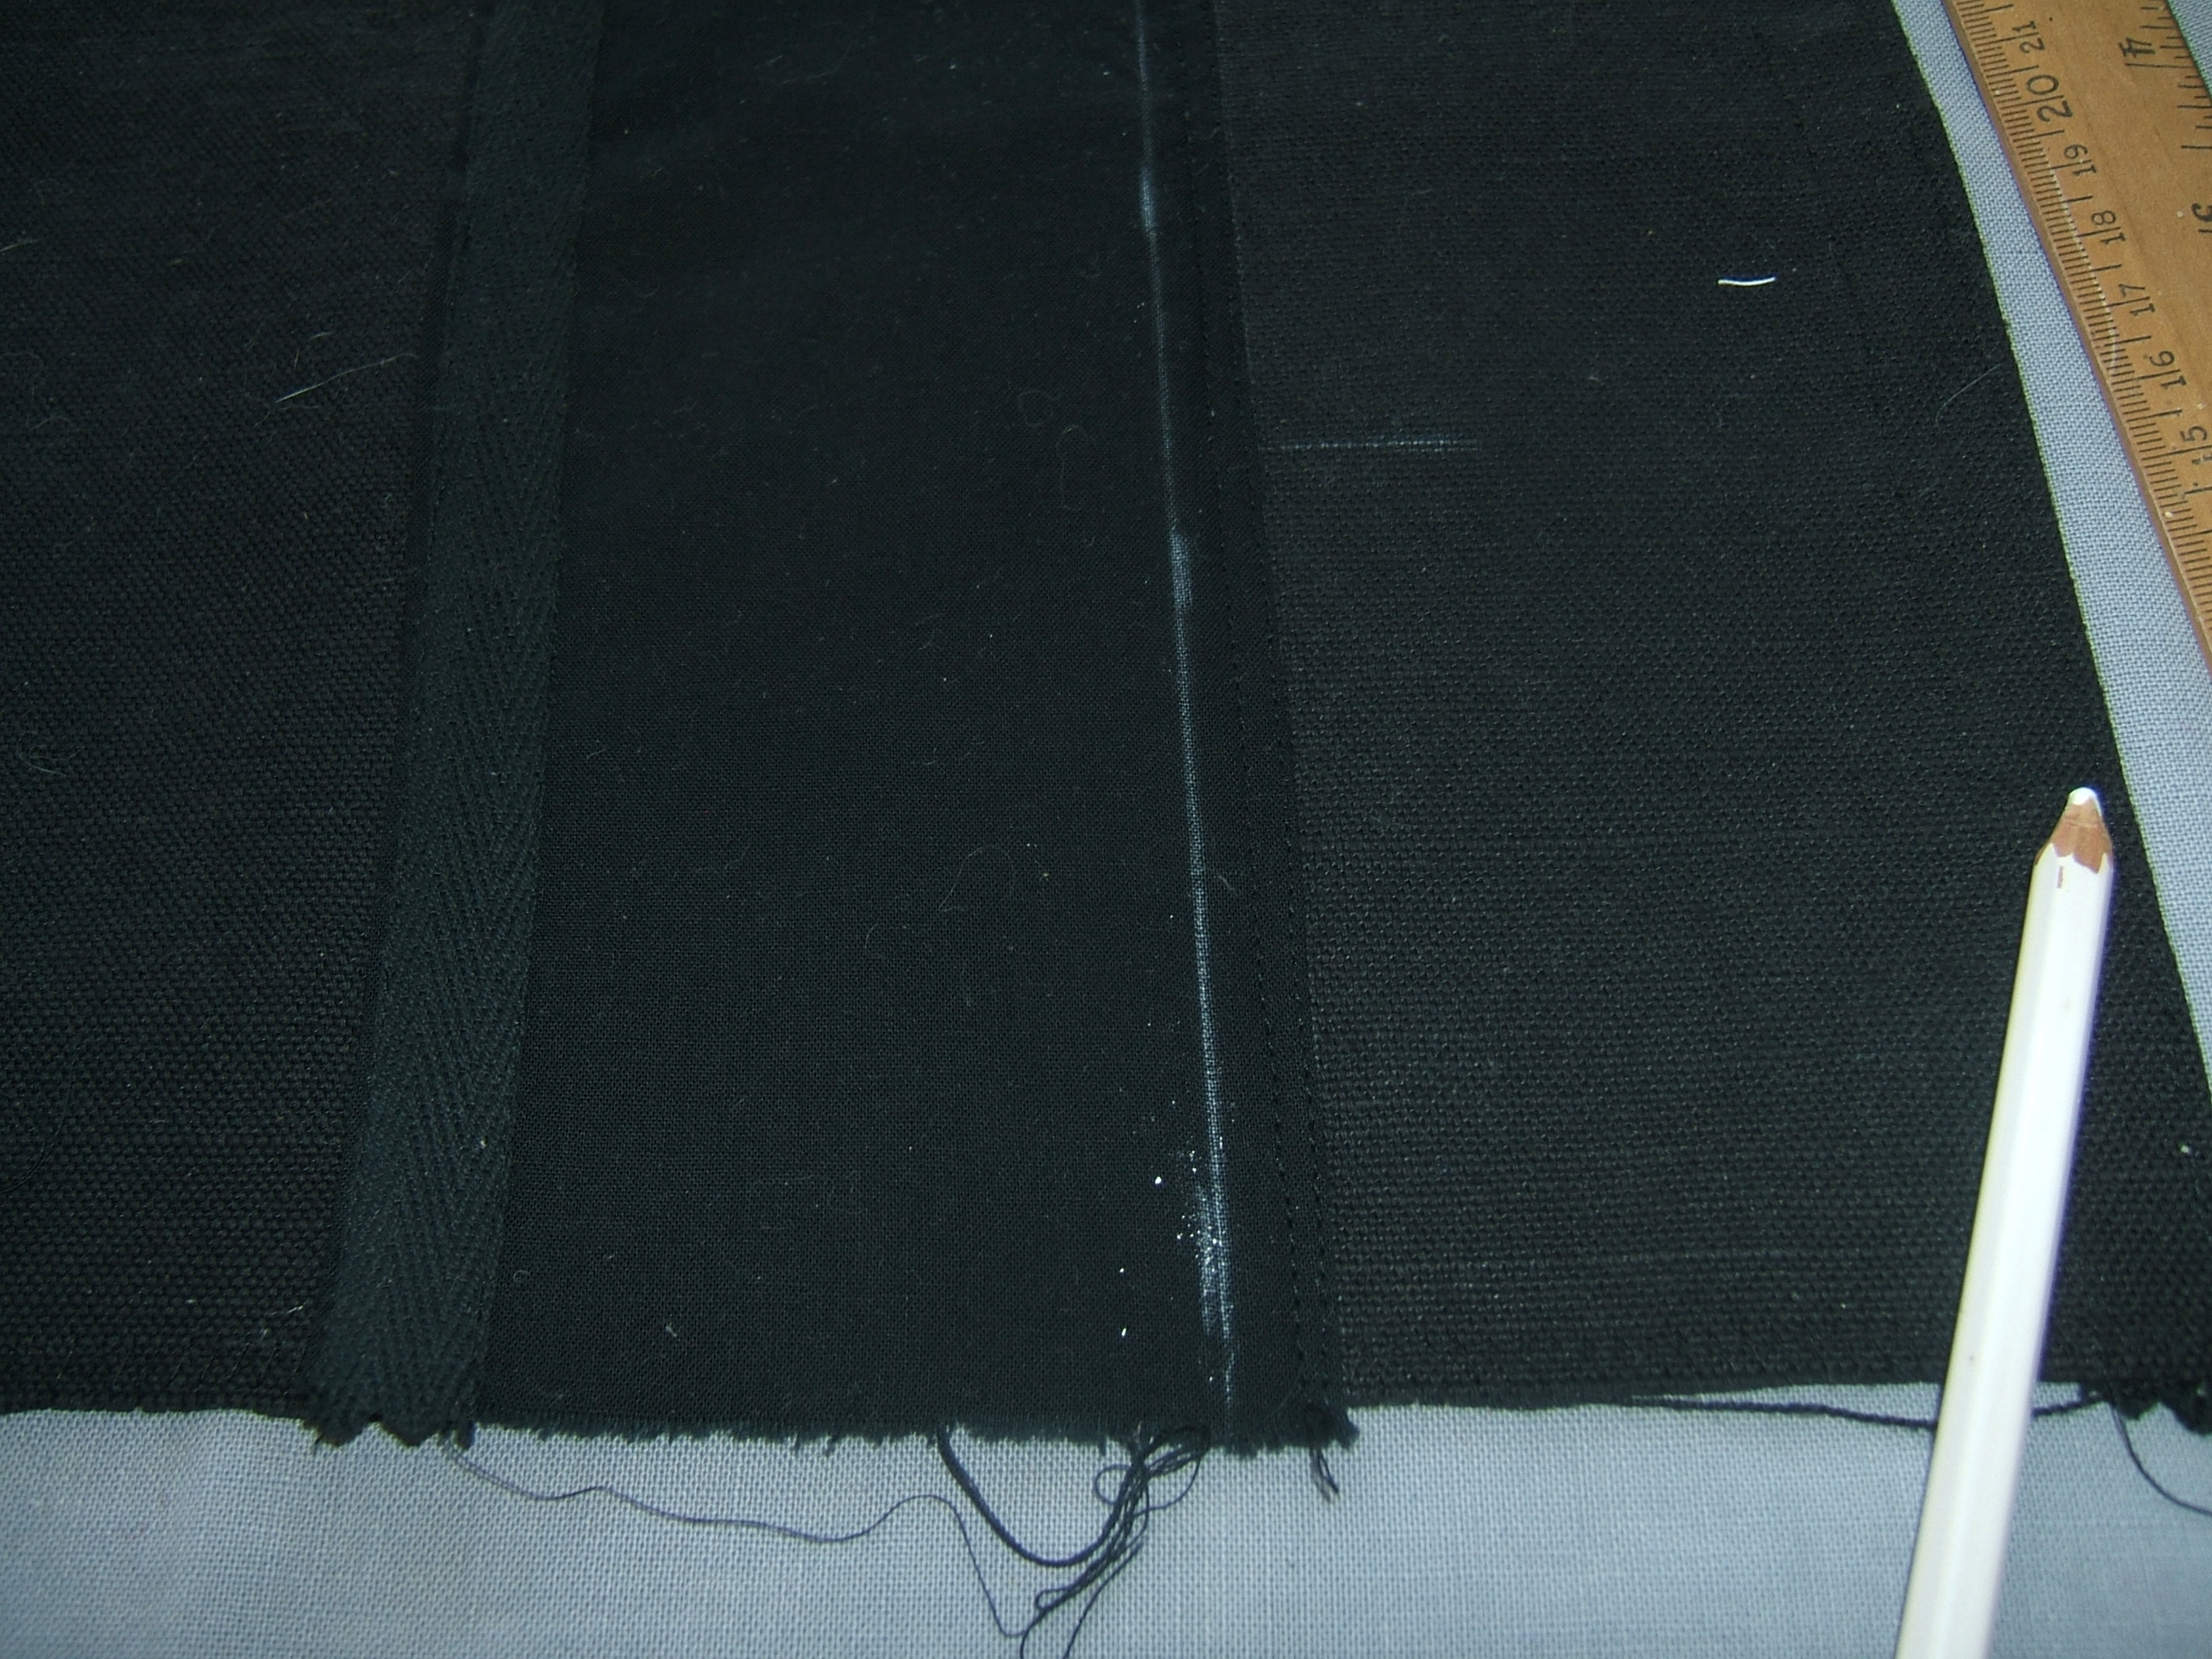
Line drawn three and one-eighth inches from the hem of the card pockets. I tried to take a picture, but the camera insists that the wallet is a smooth homogeneous black, even when I use the flash, and moving to the patio doors didn't help. (Flash seldom helps much, because the light comes from the same direction as the camera.)
Line drawn and stitched along; now I've folded it into final position and marked a center line. Which will be useless because the pockets are not symmetrical.
Next: mark divider lines, sew on snaps, sew along divider lines.
Outside pocket measures 2 7/8". Middle pocket measures 2 3/4". Pliers pocket measures 1 3/4". Total 7 3/8".
Width of flap they are sewn to: 6 7/8". I did measure under tension. (The old wallet is really rumpled, and ironing wouldn't help.)
My stainless-steel pocket ruler has been a big help here. I place the square end on one nearly-invisible line of stitches, slide the T-shaped pocket clip to meet the other, then pick up the ruler to read the fine marks. The pocket clip was also of use when marking the 3 1/8" line. I don't use my hem gauges much.
First I'll mark 3/8" seam allowances.
Then I'll take a nap.
⁂
1 1/2" for the pliers pocket.
1 3/4" for each card pocket.
⁂
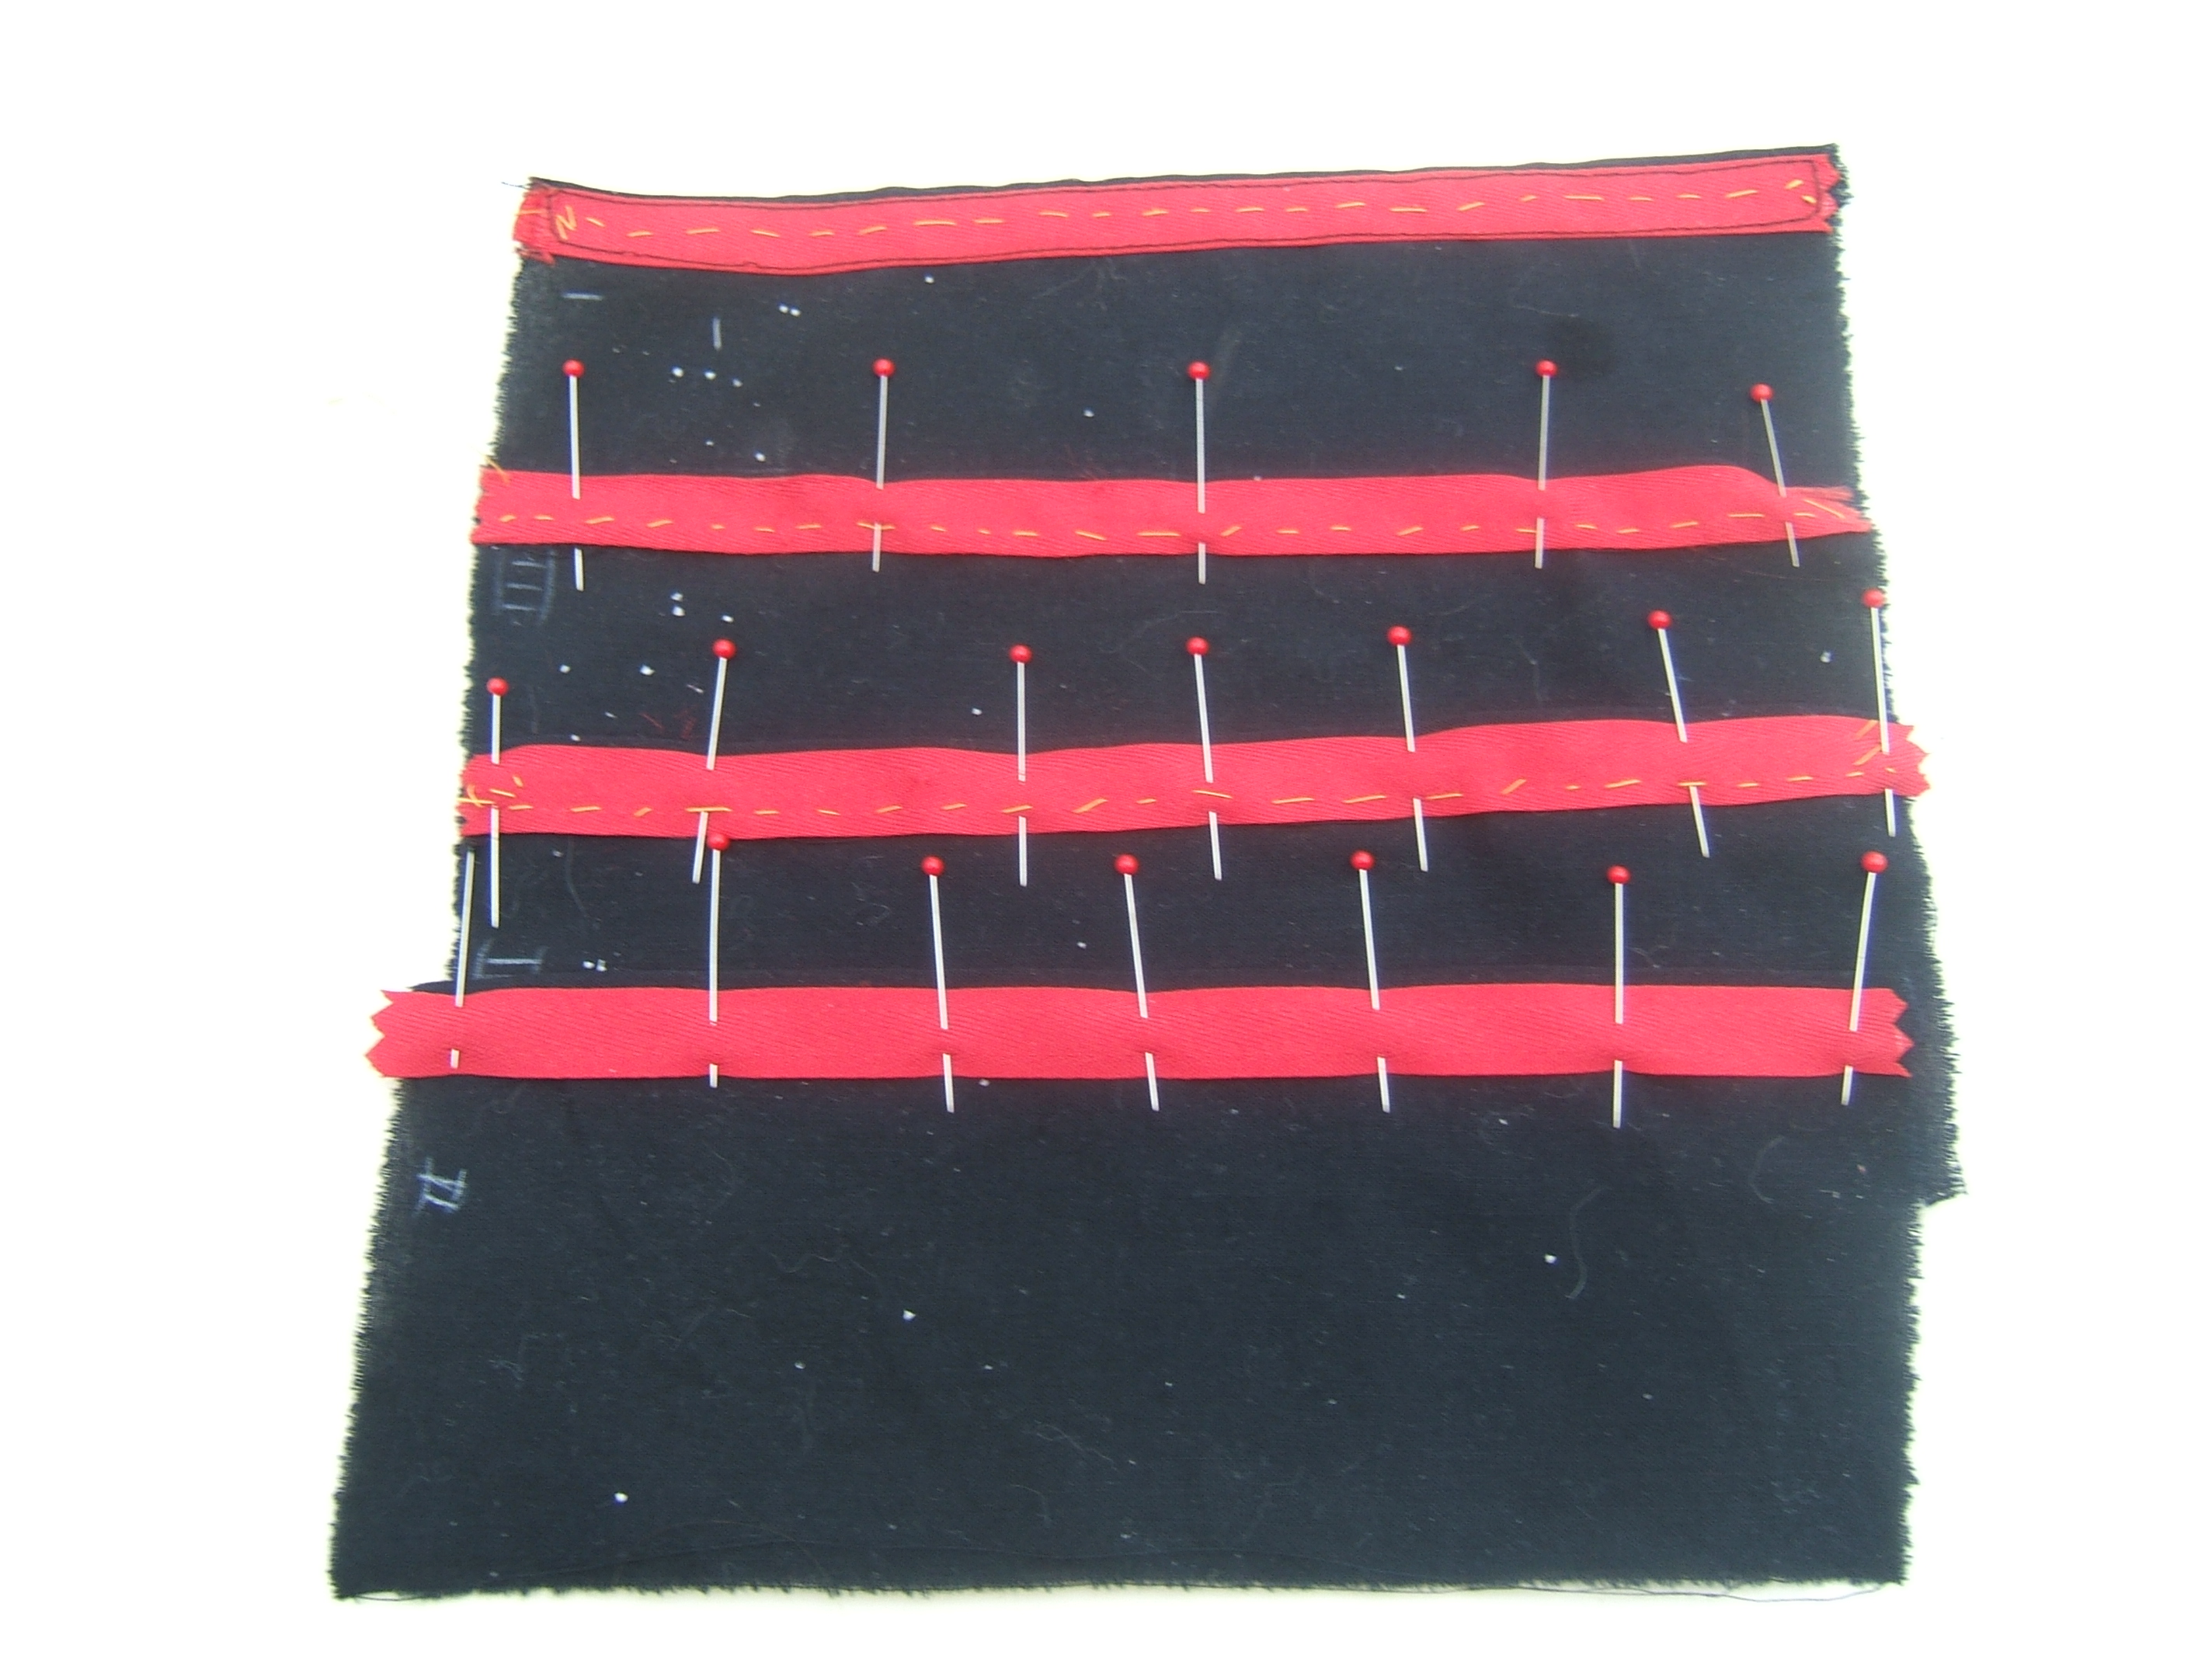
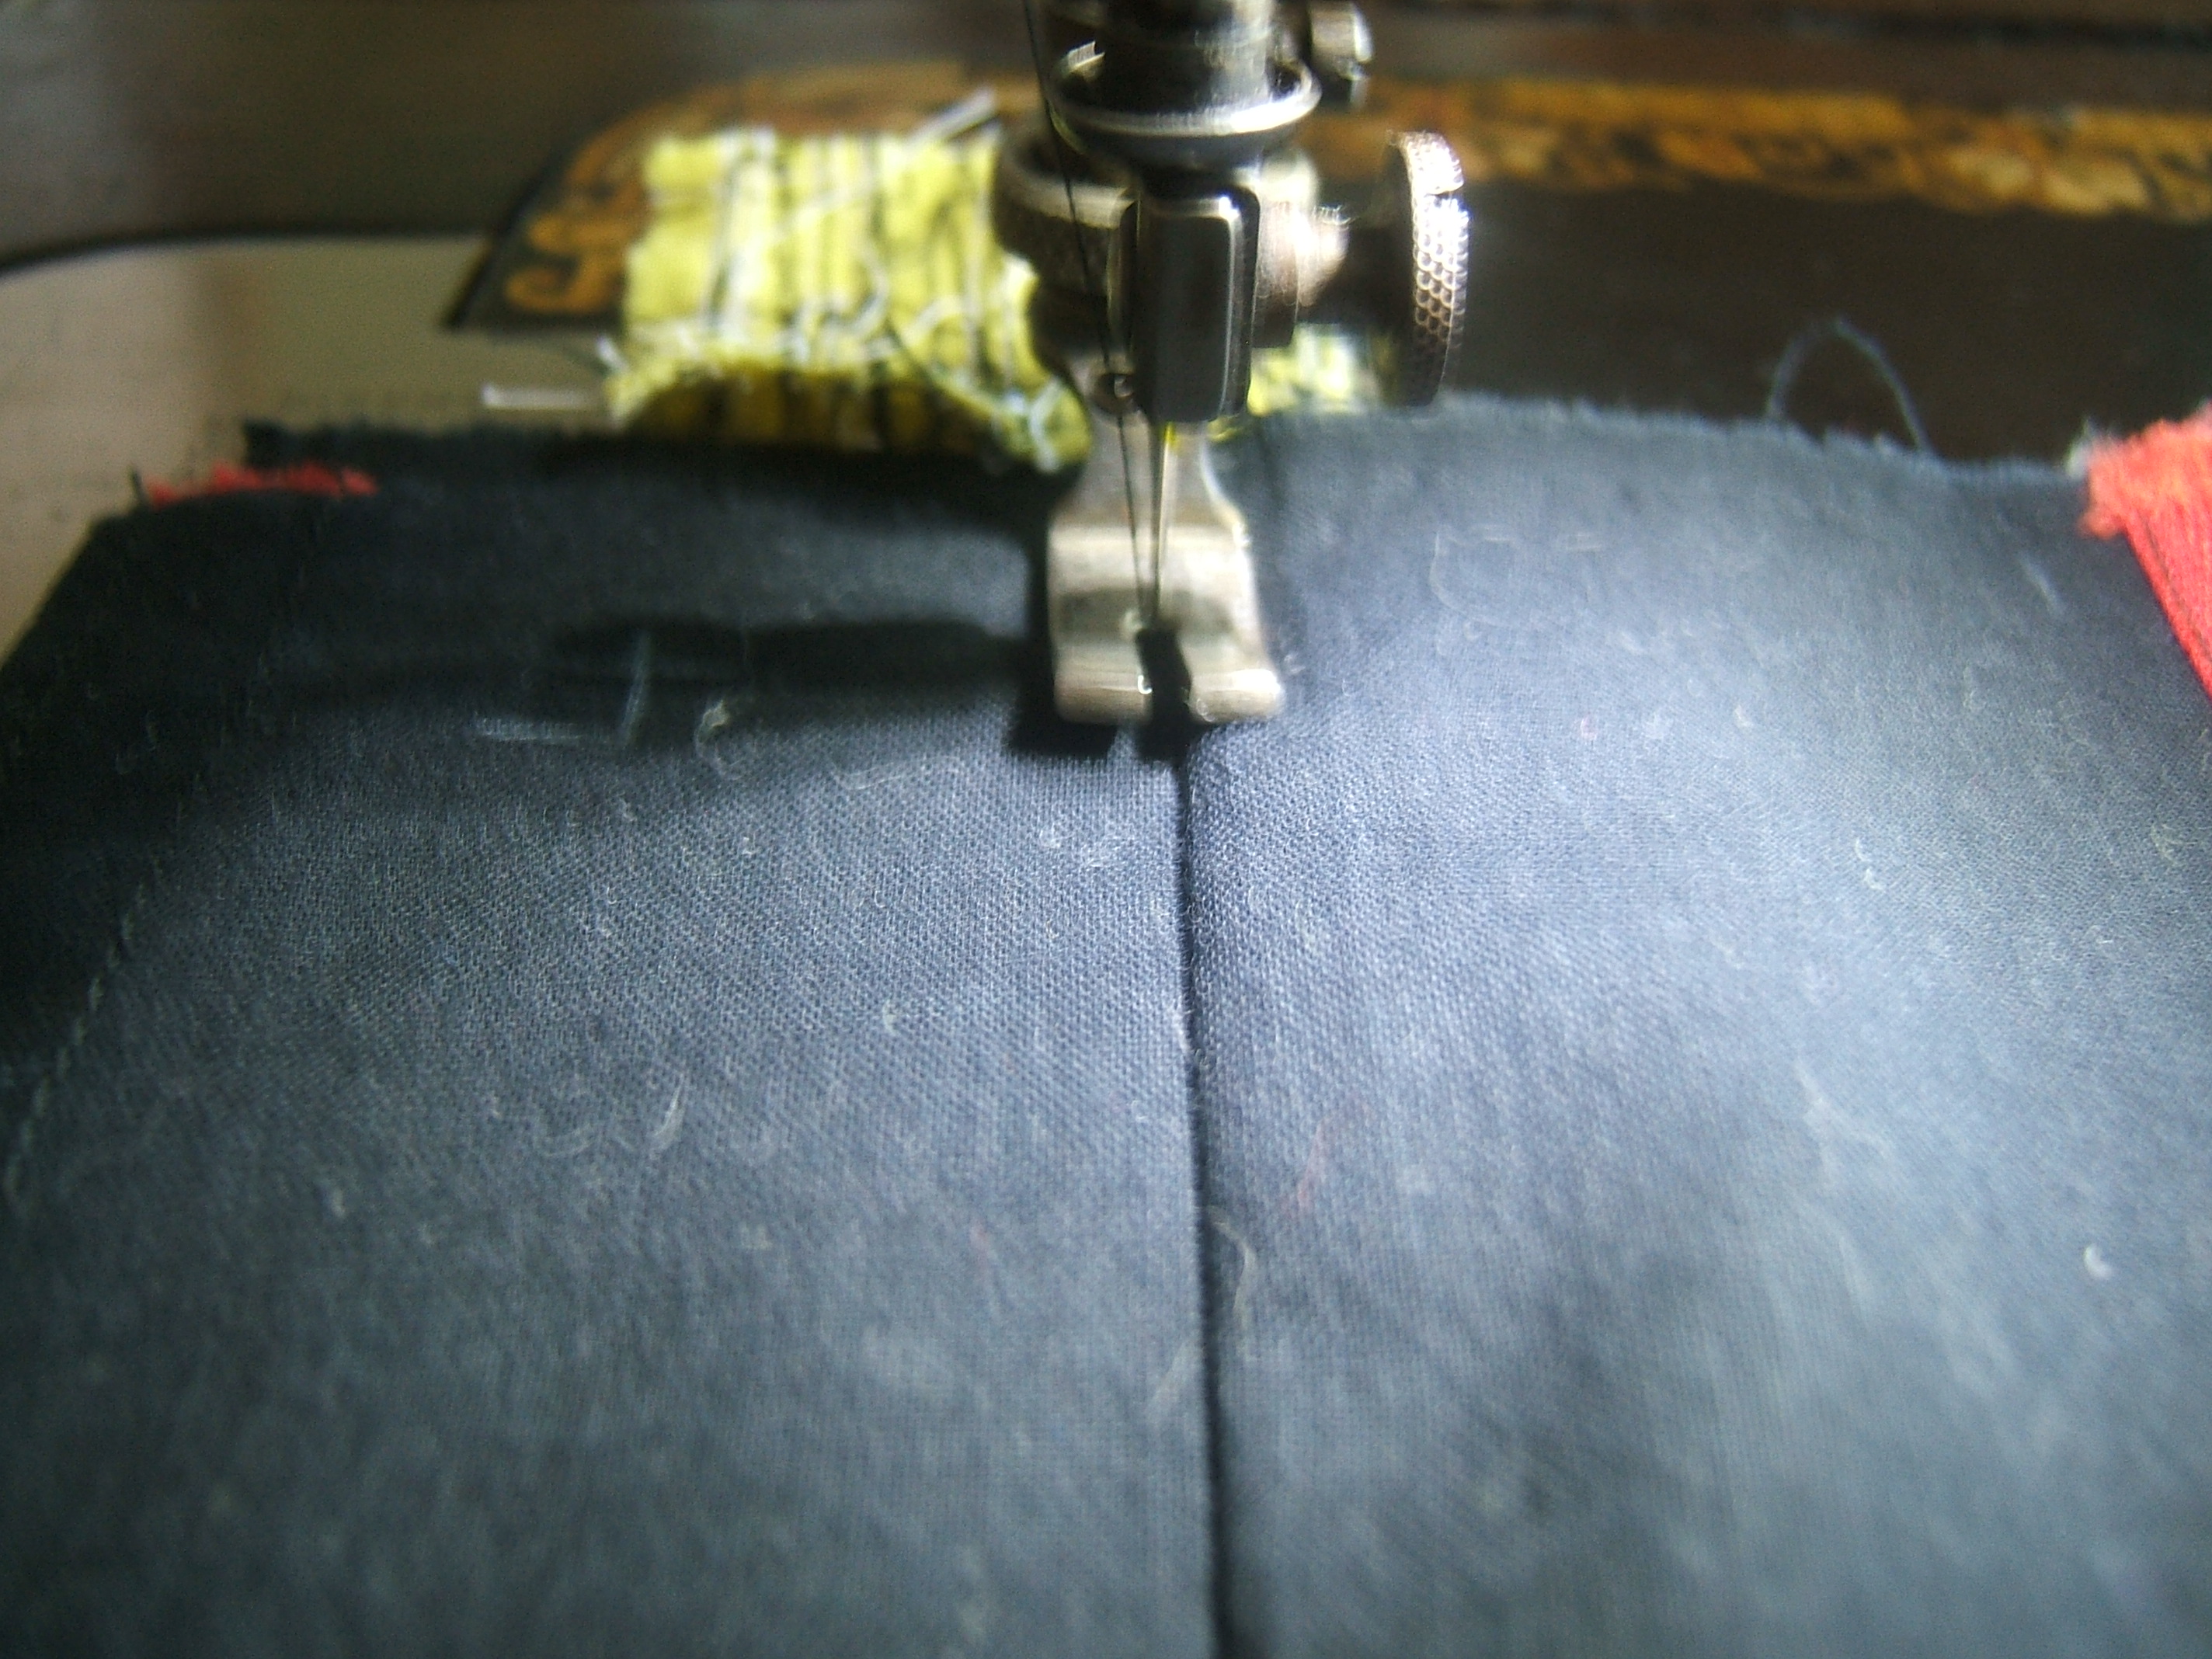
After marking the places for snaps, I reflected that I can sew on snaps under a task light, and sewed the black tape to the receipt pocket. To keep the tape from creeping while I stitched the bottom edge, I made four rows, working down from the top. This also made it stiffer. I wish I'd thought of that when hemming the checkbook pocket.
My snaps were in an old box that Holly van Sciver improvised when shipping me some DMC Cordonnette; I remembered a neat white box in the box marked "empty". It's smaller than the old box, but once I arranged the snaps neatly, both bags of snaps fit in, with space left for the strip of snap tape.
Except for a half-snap in the bottom of the bag, my largest black snaps are #1. That would work, but I don't mind silver snaps. I might even prefer a bit of contrast.
I have oodles of teeny silver snaps, and four unlabeled large snaps on a sheet that appears to have been used to collect loose snaps. There is also a snap about the same size as a #1, and two smaller snaps. Since the large snaps fit between the holes, I suspect that this card was theirs to start with. All the label says is "1 dozen/Prims", though "1/0" is written in ink on the back. I got excited when I noticed what appeared to be "6" on the socket, but my needle- threading glasses revealed that there were four characters between the four holes: "P R Y M".
Today: Hemming shingled pockets with red polyester twill tape. I've been cutting the black cotton tape a bit longer than the width of the hem, but I reflected that there is already a margin for error in the width of the pockets, so I'm cutting to exact width. Don't want it sticking out inside the seam.
This stitching has to be very neat because I'm using black thread on red. Even if red thread matched perfectly, it wouldn't continue to match as the wallet wore.
Not to mention that all I have in red is embroidery cotton and cheap basting-grade 50/3 cotton.
I eyeballed a sixteenth of an inch of black border under the red tape when I pinned. I thought I was eyeballing it a tad wider, but the pocket ruler says 2/32".
Now I'm going to hand-baste it, since making two intermediate rows of stitching is out of the question.
⁂
I basted the first hem straight down the middle. While sewing it, I realized that I need to make the basting as close as practicable to the lower edge. While sewing the second, I realized that I ought not to tie a knot in the end of the thread.
Now two are sewn, one is pinned and basted, and one is pinned. Upon admiring the completed pockets, I noticed that I need to pick out all the stitching of the second pocket. There is a loose stitch in the top row, and the bottom row is unacceptably uneven.
Since holding my arm up to twirl the handwheel is tiring, I'm not going to stitch more until after my nap -- and I need to take a walk in the afternoon.
I do intend to pick out and re-pin the second pocket, and baste the fourth, before lying down. WALLET23.JPG 1566520 1-03-20 11:37a first shingled pocket, pinned, basted down middle WALLET24.JPG 1551104 1-03-20 12:03p second shingled pocket, pinned, basted below middle WALLET25.JPG 1598560 1-03-20 12:08p When your scrap for under the needle goes "thunk!" when you drop it into the drawer, it's time to start a new one. WALLET26.JPG 1577134 1-03-20 12:26p third shingled pocket, pinned and basted
Roman numerals were ignored. The white specks are snow.
I used the herringbone lines to baste the last pocket exactly an eighth of an inch from the tape, and basted both edges. I wish I'd thought of this sooner. (I keep learning things I'll never get to use because the situation will never occur again.)
⁂
Grrr. I do get to use what I learned. As I was starting to take the basting out of the last hem, my crochet hook caught on a black thread. The stitches on the back, which I'd never thought to examine, are an unholy mess -- on all of the pockets. So I get to use the "final" stitching as basting while I re-baste three hems before picking the stitches out. At least the bobbin thread is easy to pull out of the exceedingly-loose needle thread, and the basting that I hadn't taken out was the one guided on the herringbone on both sides.
So I'm ending the morning a tad back from where I began.
Washday, but I managed to baste two pockets and start the last one between loads and while waiting for it to be time to fetch the truck.
Finished the basting, fiddled with the machine, sewed the pockets, reluctantly took out the basting. The gold basting thread went so well with the red and black!
⁂
Walking past the card table I paused to reflect "I want to sew the snaps here, and here.", then thought of sewing a snap on the pliers pocket too. I considered sewing a snap on the pocket and the wallet body, as I did for the phone pocket on my jersey, thought that I might not get it in the right place to clear the pliers, considered a strap like those on the card pockets but tighter fitting, ended up thinking that a safety pin would work better.
Sometimes not doing something is an activity and a decision.
Next step in the shingled pockets requires heating the iron, so I'll do it after my nap.
⁂
In the afternoon I sewed the socket halves of the snaps to the card pockets with upholstery thread. The ball halves seemed wedged tightly into their holes -- the card must have come with small snaps after all -- so I left them on the card. I dropped it into the zip-bag that the upholstery thread belongs in, in case they let go.
I used the rotating method -- each hole in turn around the snap, leaving a square of thread on the back.
Then I sewed the straps to the body. The straps on the old wallet work well, so I measured the new straps by them. First I machine-sewed one end of the tape to the body, stitching all around to hold the tape on, then an X across the middle (doubling the stitching at top and bottom in the process) just to make it look nice -- not that anybody is going to see it, black on black, without using a magnifying glass.
Then I laid the corresponding old strap on the new strap, stuck in a pin, then measured two widths of the tape beyond the pin and cut. Well, a tad more than two widths, to allow for the turn of the cloth.
Then I folded the end double, folding to the pin for the first fold and folding on the pin for the second, stuck in two pins to hold it, and there the matter stands because it was time to throw left-overs on the table, and it's dark after supper. I plan to sew the snaps to the tapes without otherwise securing the folds.
?? both straps are two and one-eighth inches long. I know that I cut the plastic-card strap shorter than the one on the etc. compartment.
That's five centimeters plus four millimeters, according to another ruler.
⁂
Having laid out the shingled pockets on the checkbook pocket, I see that the receipts pocket really, really needs to contrast with the checkbook pocket.
I thought I'd have to put that stage on hold until I could buy some ribbon or tape, but I laid a piece of olive-green grosgrain on the pocket, stacked them up again, and it doesn't look half as dull as it did in the bag. I'd still prefer grass green.
Or the gray inch-and-a-half grosgrain looks like silver when only a quarter inch of it shows against the black.
Then I tried the brown one-inch grosgrain: subdued, but not bad.
I think I'll ribbon both the checkbook pocket and the receipts pocket. Gray and brown work well together, particularly when there is a narrow streak of black between them.
So I'll be hand basting again. I'll have to eyeball the straight line on grosgrain.
I kept clicking the wrong icon when I wanted to open this file, so I replaced it with a green tree. Utterly irrelevant even when one goes into retcon mode, but it STANDS OUT.
I have pinned brown ribbon to the receipts pocket, and gray ribbon to the checkbook pocket, and cut along a grosgrain line in each, using magnifying glasses.
I usually pin crosswise when I'm going to baste, but I found that parallel pins distorted less, probably because I could put them below the twill tape on the back. I eyeballed an eighth of an inch of black beyond the brown ribbon, and a tad more on the gray.
Cool! My stainless-steel pocket ruler says 4/32" on the brown, and 5/32" on the gray.
⁂
I forgot to take my pincushion with me when I went to the rocking chair to sew, but a magnetic pincushion doesn't have to be in the same room to do its job. I threw the pins onto the kitchen chair I was using for a table, and swept them up later.
While basting, the thought occurred to me: did I boil this ribbon before storing it? Almost certainly "no". Ribbon isn't a notion in the sense that twill tape is -- and when I boil a notion, I affix a label with the date.
So I saturated the ribbons with my laundry sprayer before lying down, and did the red twill tapes sewn to the shingled pockets for good measure, though it now occurs to me that that was left over from making my yellow poncho (right after I attended a night fire wearing my black poncho), so it was almost certainly shrunk.
The gray ribbon expanded when wet, but settled back when it dried.
In the afternoon, I sewed a snap to one of the tapes sewn to the wallet body, and was halfway through whipping the second triple edge of the other strap when the Trailhouse called to say that I could pick up my bike. It's going to take a good light to pick up where I dropped it. After putting on walking clothes, I bethought me of cats and thimbles, carried the chair I'd been using as a table to the sewing room, and moved everything to the ironing board -- which probably didn't help the mess I dropped my work in.
When whipping the selvages of the tape together, I frequently made a stitch in two steps, to skip over the middle layer and trap it out of sight. I running-stitched the fold of the plastic-pocket strap, and backstitched the fold of the etc.-pocket strap.
Yellow-orange basting doesn't do a thing for gray ribbon, and very little for brown.
I'm glad that a substantial part of that 800-yard spool of SubSilk is left. I've become very accustomed to picking out basting stitches of that color.
I rotated the ball snap an eighth of a turn with respect to the socket, so that the stitches don't line up. Again, each stitch went down in the hole of a snap and came up just outside the next hole, and there is a square of thread on the back. I brought the thread up outside the beginning hole after making the last stitch, so there would be the same number of threads on each side of the square.
I meant to begin by pressing the checkbook pocket and all the shingled pockets and working on that, but I felt that I needed a warm-up, so I finished sewing on the snap first.
As I was carrying the body of the wallet to the sewing room plotting how to leave enough thread at the ends of the divider stitching to make bar tacks, I realized that it would be easier to do the whole job by hand -- it's less than three inches of running stitch per divider. I switched to spaced back stitch while crossing the tape.
I've opened the machine intending to machine-baste the ends of the pocket strip.
⁂
And in the afternoon, I stitched the brown ribbon and the gray ribbon. While making the first stitching across the gray ribbon, I fell off the edge. What with the soft tape on the back, and the synthetic ribbon on the front, picking the stitches out proved so difficult that I decided to put up with a bit of doubled stitching. Then while doing the repair, I wandered perilously close to the edge of the ribbon.
Of course the second line, which will be hidden inside the pocket, followed the ridge at the edge of the grosgrain perfectly.
All the pockets are on the ironing board under a piece of plywood with an iron on top, and I'm done for the day.
When I pressed the pockets before stitching, the iron stuck to the gray ribbon. I now have reflexes that get the iron off the fabric before any damage is done. I pressed the rest on the wrong side and under a press cloth on the right side, but I'd already pressed the brown ribbon and I'm pretty sure the red twill tape isn't sensitive.
It says up there on December 24 that the shingled pockets are two and a quarter inches deep.
Since all the marks will be covered, I chose pencils that made fine lines, rather than pencils that could be removed. I regretted this when I made a mistake marking the checkbook pocket.
All the shingled pockets were marked with stitching lines two and a quarter inches from the top. In the process, I discovered that one of the pockets had been torn half an inch too deep. I left the inch-wide allowance on, and put it on the bottom so that the other pockets would cover it up.
I'm not sure what I'll do with the top pocket, which has half an inch of allowance and . . . duh, somewhere along the line, I must have decided to make the receipt pocket wide enough to sew it above the highest red-tape pocket, then I lost track of it thinking all the shingled pockets were the same. Well, I'm not unpicking no more ribbons.
I'm not, I'm not! Well, there's a scrap left from making the shingled pockets. The brown ribbon is the only one I need to unpick. I'm going to sew the red-ribbon pockets on first. I want to see some progress!
⁂
It pays to procrastinate! With the red pockets sewn, it was easy to see that all I needed to do was to increase the clearance between the receipt pocket and the bills pocket a tad. This made the clearance between the receipt pocket and the checkbook pocket a tad less, but I'd started with three eighths of an inch, so it could spare it.
I pinned it right sides together with the torn edge overlapping the torn edge of the pocket that had already been sewn just enough to be sure it would be caught in the next stitching -- I drew a line on the sewn pocket for this purpose -- and stitched a toe width from the torn edge. Then I turned it down and edge-stitched the fold as if making a flat-felled seam, then stitched a toe width from that stitching.
Then I folded all the pockets into place and machine-basted the edges. About three-fourths of the way through, I reflected that I should have lengthened the stitch first, in case I wanted the basting out.
And now I notice that I forgot to sew the divider between the receipt pocket and the special-bills pocket.
(When one denomination is scarce, I put those bills into the special-bills pocket so I'll have some when only that denomination will do.)
I'll pick out the basting after my nap.
Now the wallet is in only two pieces: I might finish today!
⁂
While lying down, I thought of a way to sew the shingled pockets that would have been much less trouble, it would have given better results, and it doesn't call for any extra allowance.
First, lay one of the red-tape pockets on another with a quarter inch of the lower pocket exposed. Hand baste to hold this position.
Lay a third pocket on the second pocket, repeat until all four are a unit.
No, lay the bundle on the added pocket, so that each row of basting goes through only two pockets.
Now lay the brown-tape pocket on the checkbook pocket half an inch higher than is wanted. Stitch a quarter inch from the torn edge.
Lay the bundle of pockets on the checkbook pocket with the highest torn edge just touching the stitching that holds the brown-tape pocket. Pin or baste to hold this position.
Lay the brown-tape pocket down on the bundled pockets. Press into position or sew along the fold flat-fell style. Stitch a quarter inch from the fold.
Fold the brown-tape pocket into final position. Press, pin, or baste as required. Sew the divider between the receipt pocket and the special-bills pocket.
Stitch a quarter inch from the fold -- it will be easy to guide the toe along the fold, if the toe is the correct width.
Unbaste the pocket just attached, fold it into final position, repeat until all pockets are attached.
⁂
There was a good reason for the checkbook pocket to stick out three eighths instead of a quarter.
So I picked all the pockets off, then basted them shingled. Now I can't for the life of me see what was so clear when I was half asleep.
I think I need to baste with the decorative edges hidden, and only the bottom pocket's tape visible at the top of the stack. Then when I lay it face down on the checkbook pocket, the top pocket's seam allowance will stick out the farthest.
And the basted-in shingling will reverse, because each pocket starts out a quarter inch lower than the pocket that will lie on top of it, and it moves up half an inch.
But tomorrow is Sunday and Monday is washday, and Tuesday is predicted to be a good day to take my weekly exercise.
I hope I remember what I'm doing when I take this up again.
If that bit about the pocket edge starting a quarter inch low and moving up a half inch when sewn didn't make any sense to you -- it didn't make much to me.
In bed last night, I imagined all the pockets standing at right angles to the substrate, then shingling one way if pushed up into the final position and shingling the other way if pushed down into sewing position, and now it makes sense.
So now I'm all set to baste the pockets together with the black side out, and the lowest pocket covering the back -- which is the fronts. Um … it's clearer to say that each added pocket covers the outsides of the previous pockets, and that I'm basting with the insides toward me.
Right now it's time to dress the scrape from walking on black ice, eat lunch, and go to bed.
The pockets are back on the checkbook pocket. It all went without a hitch, despite getting up at intervals to tend the wash. I wasn't willing to go out into the cold, so I didn't even try to take pictures.
I think I'll take my old wallet for a ride tomorrow.
And every time I put a receipt into the pocket, I longed for the color-coded pockets on my new wallet.
Today I smooth the pockets into position, pin them, and baste the edges. Stay tuned.
⁂
Oops, I can't smooth the second pocket with pins in the first pocket. My spool of basting thread isn't in its expected place; instead of wasting time hunting for it, I took a spool of reddish-brown thread that doesn't contrast with the tape as well.
Now I've sewn the shingled pockets to the checkbook pocket and pinned the checkbook pocket to the body of the wallet.
I placed the checkbook pocket by folding the seam allowance with a bit of fold extending below the lowest shingle pocket (the shopping-list pocket), Then I carefully laid the checkbook pocket on the body where it belonged and pinned its bottom to the body so it wouldn't shift while I lifted it to pin the seam allowance in place.
Then I stitched a toe width from the edge of the selvage, stitched along the edge, and stitched a third time a toe width from the first stitching.
I eyeballed the cutting of the tapes to cover the edge between the top of the card pockets and the lip of the coin catcher. They measure somewhat less than two inches, because I plan to bring the coin catcher close to the card pockets.
I accidentally discovered, while pinning tape to what would otherwise be an exposed edge, that if I held the edge of the wallet beyond the edge of the sewing machine's leaf, I could see the needle marks left by the overcasting as pinpoints of light, so I used those to line up the tape to be securely attached to the wallet, yet not be involved in the final stitching.
Then my lunch was ready. While eating, I wondered: did I pin them to the correct side, and which is the correct side.
They are pinned to the right side, and it's the right side that will show when the seam allowance is folded in.
⁂
After supper, I thought that I could finish the wallet. So I sewed one tape on. Oops, the other tape isn't pinned right -- I must have left off after pinning the first -- and there isn't enough ambient light to see the pinholes.
Then I noticed that the shiny needle plate reflected the light of my sewing-machine light through the pinholes. We are back in business! I sewed close to the edge of the tape, turned the wallet over, sewed close to the edge of the duck, realized that I'd sewed a fringe sticking out through the overcasting, sewed again through the zig-zag.
Then to fold the wallet to final shape (but inside out) … nope, nope. Not in dim light black on black.
First thing in the morning for sure! Then I'll start zapping potatoes to make salad for Sunday's carry-in dinner.
When I have daylight, I'd better closely inspect what I did tonight.

oops, but not the oops I thought I'd made
Moving my chair to the window to get good light for picking out stitches had an unexpected side benefit: it brought me close to the foot-wiping mat, so I just held the work over the mat and let the snippets fall.
Mats are far superior to baskets for collecting threads. A thread falls straight down onto a mat; if you don't put your hand way down into a basket, the thread or paper will make a right-angle turn in mid air and fly across the room.
I had to do all removal by separating the layers and cutting or pulling the stretched stitches, because it was impossible to see the zig-zag overcasting that must not be damaged. Even the illuminated magnifier so strong that the field of vision isn't wide enough to be useful didn't help.
I had almost all of one side of the wallet picked out before I realized that I hadn't sewn it wrong, I had turned it right-side out wrong.
The cover-edge tapes and the sticky-out bits of the pockets made it hard to line up the edges of the main pocket, but not as hard as it first appeared. That's one advantage of working with very heavy fabric.
Now to re-pin that side and re-stitch. I also picked out the coin catcher lip, because I hadn't allowed enough space above the top of the pocket for folding it over the card pockets.
I think I've used a bit more space in a lot of places, because the lip is going to be much narrower than the lip on the old wallet. Which will mean that the finished wallet will be wider, but there is plenty of depth in my wallet pocket.
⁂
And so Friday ends precisely where Thursday ended, save that one side of the main pocket has been sewn. I didn't make potato salad either, but I did bake a turkey.
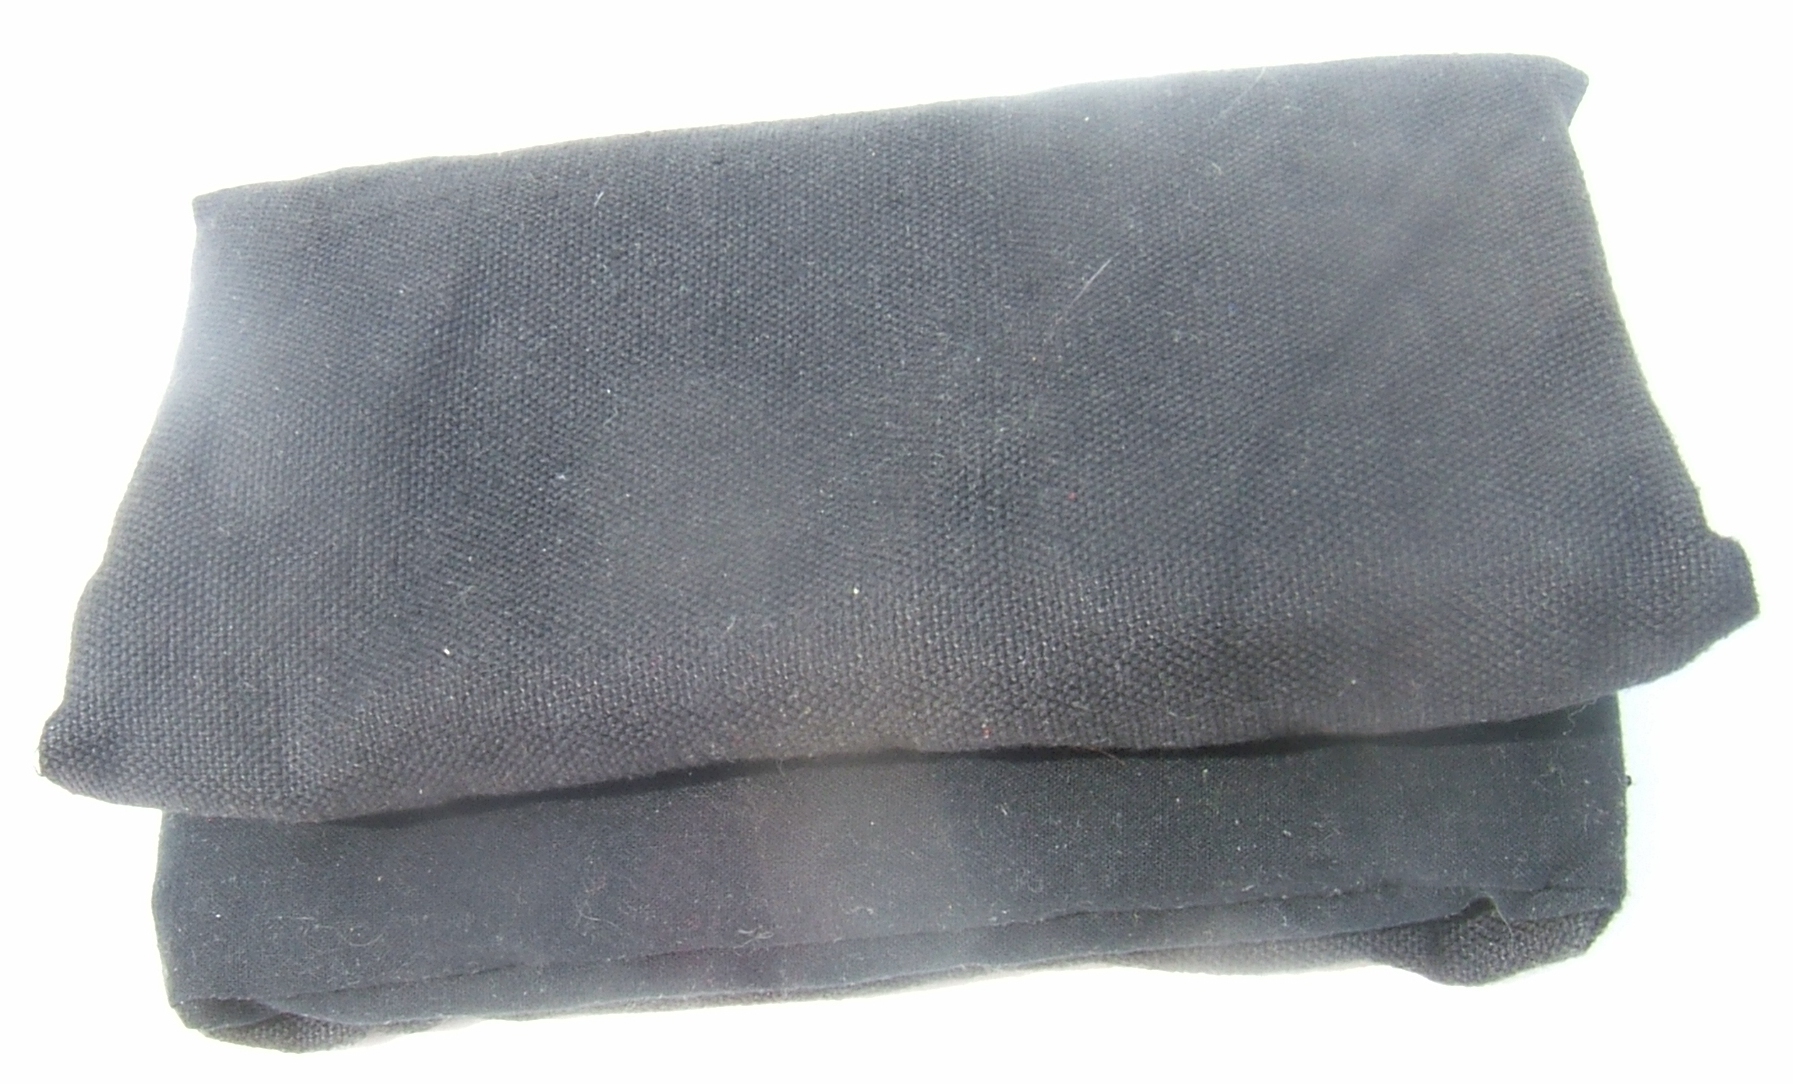
I folded up the new wallet and laid the old one on top. It's going to be wider, but not by much.
One pin, two zips with the sewing machine, and done!
Not quite. The coin-catching lip is too wide. After fiddling, I decided that an inch and a quarter would be just right -- but the edge-covering tapes aren't long enough to allow that, I've got some more unpicking to do.
After that, I unearthed the Caradice wallet: its coin lip is an inch and a quarter.
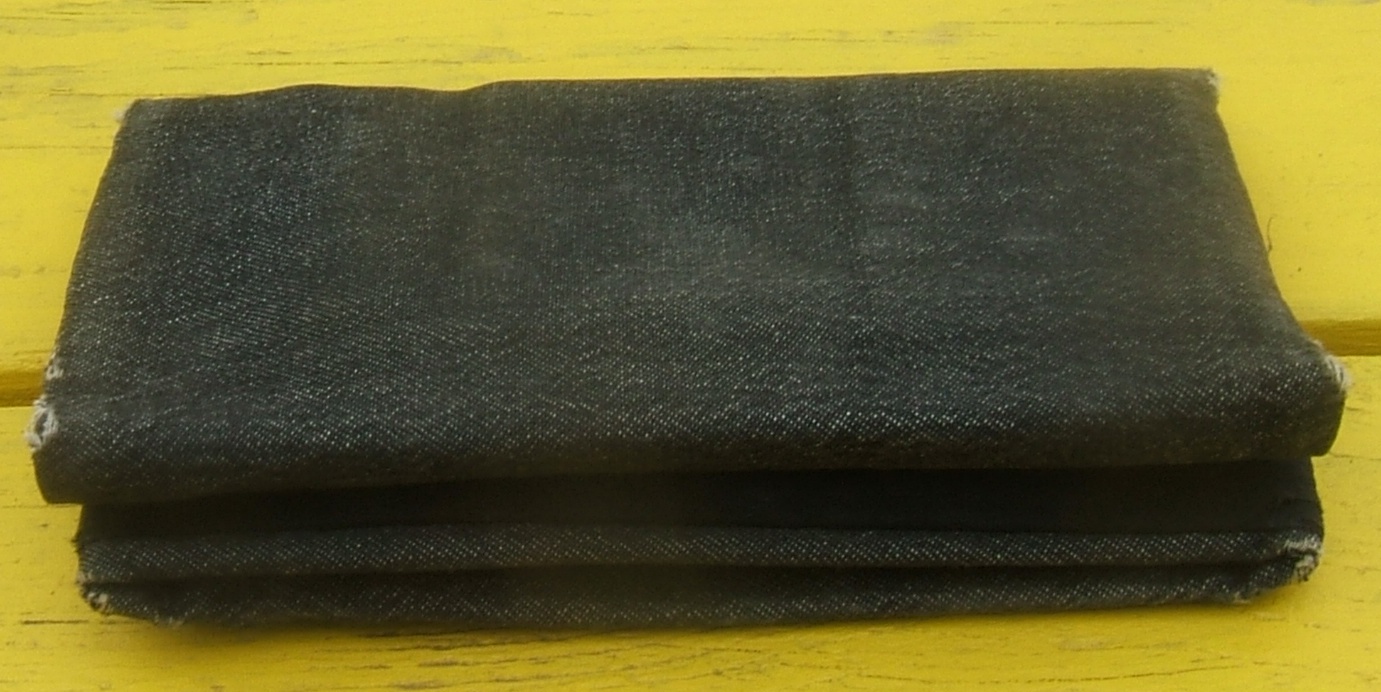
In the process, I discovered that before making the duck wallet that I'm replacing, I made one of bull denim. It's in much better condition than the one that replaced it; the holes wouldn't be visible if they didn't expose the white weft threads of the denim.
The denim wallet is thinner and flatter; if I live long enough to wear out this wallet, I'll use denim for the next one.
Provided, of course, that I read this note before starting work.
⁂
Again, black-on-black, stitches sunk into soft tape, and zig-zagging I didn't want to cut. I decided to just rip recklessly, and if I took the zig-zagging out, well there is already black thread on the zig-zag machine.
I didn't nip the zig-zag once! I took a close look with 4.0 glasses to be sure. There were several threads from the stitches that I did remove that I couldn't pull out, so I nipped them close with the tiny, sharp-pointed thread snips in my futon
hand-sewing kit.
⁂
All done but removing the basting
I can't believe it's done! There has to be one more little hitch.
The stitching and unstitching had closed up some of the needle holes in the edge of the wallet, but I was still able to use them as a guide for pinning the new cover-edge tapes. Because of the gloomy light, I had to work over a lamp, to the annoyance of the cat. The cord on the lamp wasn't long enough to reach the sewing machine and I didn't want to drag in a table, so I moved the machine -- which had been overhanging the bed, making an easy way for an arthritic old cat to get onto the sewing machine.
I really, really, should have obeyed the urge to make the shopping-list pocket a quarter inch shallower than the other pockets. I could have basted it to the coupon pocket and thereafter treated the two pockets as one.
And making the shingle a quarter inch shallower would have improved the over-all construction. But I'd have to unpick all the shingled pockets to retrofit it.
On the other hand, I wouldn't need to unpick the checkbook pocket, since I could fold it out flat to re-sew the pockets. On the third hand, if I don't unpick it, it won't move up a quarter inch to improve the over-all construction. And I sewed it on really, really well.
Before the alteration
I took everything but the pen/flashlight out of the new wallet and put it into the first wallet I made. I hope the new one lies this flat after the alteration. Whether it does or not, my shopping list will not sink below reach in a too-deep pocket.
Hokay, I think that I remember what I was trying to do. I hope that I need a shopping-list pocket again someday.
When I'd left off, I'd unpicked the checkbook pocket —used for an old checkbook case that stiffens the wallet, and holds a comb and any papers that I don't want to get rumpled— but I hadn't unpicked any of the shingled pockets, so I think that that means that I have all the pieces.
So the next step is to unpick the shingled pockets and trim those that have too much seam allowance. With the image of the shingled pockets standing up at right angles to the checkbook pocket, I don't think that I'll have to re-read the section on how to sew them on too many times.
I also need to take -- or edit -- missing pictures.
This morning I picked the shingled pockets off the checkbook pocket. I realized just in time that I didn't need to pick off the receipts-and-tens pocket because only one of its three rows of stitching went through the pocket below.
I see that some of the guidelines that I used the first time around are still in there. With lots of pockets sewn firmly over them, they wouldn't catch any wear, and I never washed the wallet.
The numbers I put on the pockets as I removed them will probably wear off, as they will be exposed inside the pockets.
First step will be to baste the shopping-list pocket to the coupon pocket and thereafter treat them as one, so that the shopping-list pocket will come out a quarter inch shallower than the other pockets and also a quarter inch below. I am concerned about both being secured at the bottom by the same row of stitching, which could constrain movement. Perhaps I'll make a second row of stitching just missing the pocket above.
I pressed all the wallet parts this morning, and photographed the body.
The magnified picture showed me some threads I had missed when plucking, and I found a lot more after I put on my magnifying glasses and picked up my tweezers.
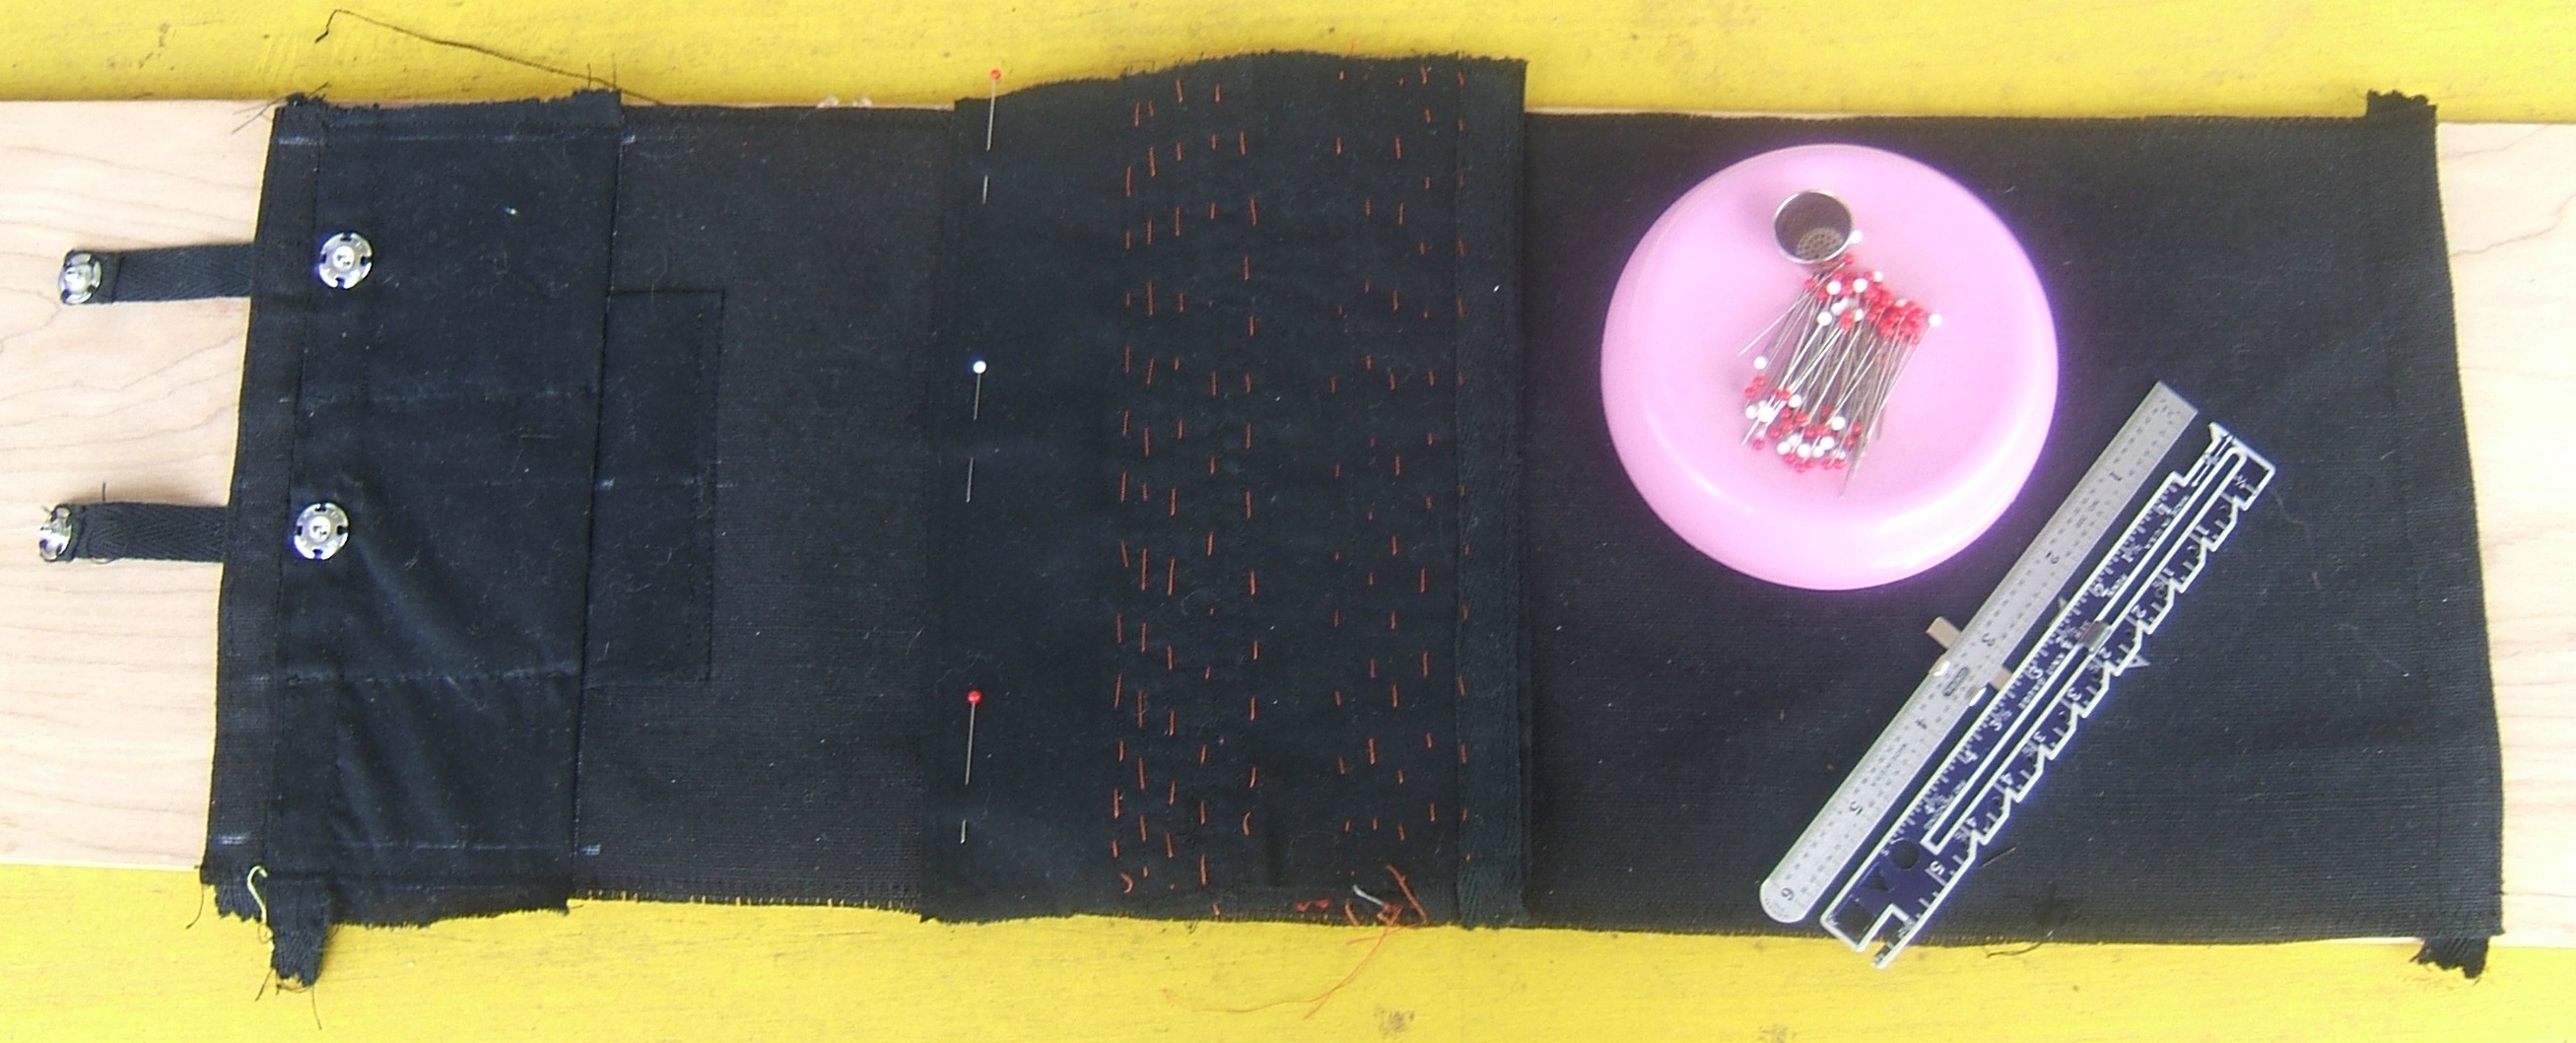
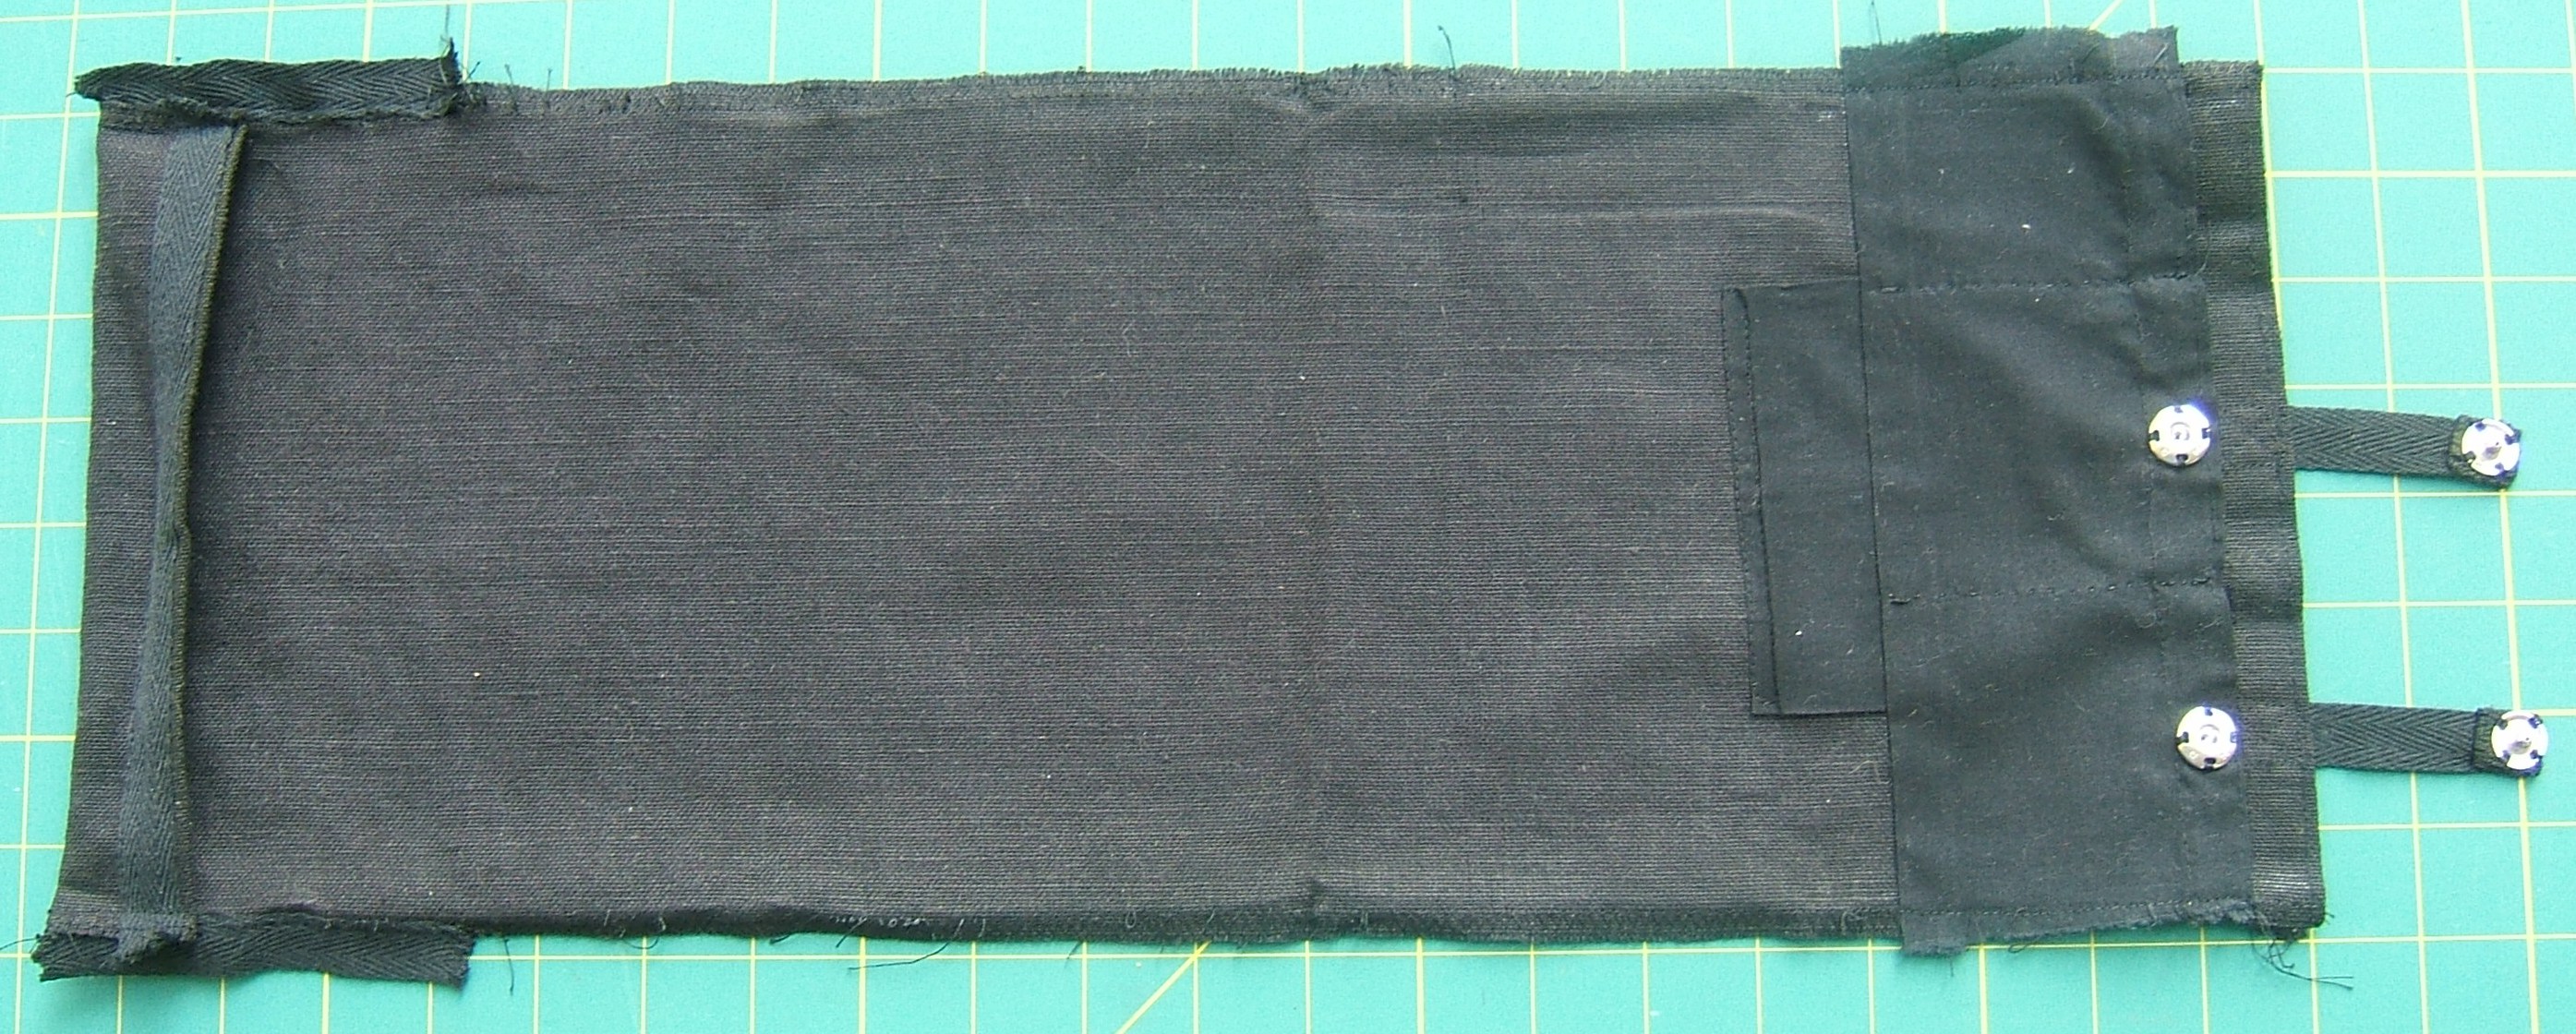
At the left end you see the coin-catching lip, inside out, and the twill tapes that will cover the raw edge between the coin lip and the coin pocket.
At the right end, left to right: the pencil pocket for my pen/flashlight, a strip of pockets for cards and tools, and two twill-tape straps for keeping the cards in their pockets. A safety pin will keep the folding pliers and scissors in their pocket.
Hokay, pockets 3 and 4 are to be basted together in their final relationship, then the other two pockets are to be basted to the pair, shingled down on the black side. #2 will line up with #4, on the reverse side of #3.
Then I tuck the raw edge of #1 underneath the seam allowance of the brown-ribbon pocket and re-sew the stitching I picked out of the brown-ribbon pocket, which will cover the raw edge of #1.
So: grab my snack bag of essential tools, the spool of basting thread that has an attached needle, and the four pockets, then to the porch!
⁂
All the pockets were basted to the extra-wide #4. When all were basted, #4 stuck out a quarter inch past the edge of #1, so I drew a thread and cut along it with my teeny Super Snips.
I turned the brown-ribbon pocket up as far as I could, then laid the edge of the shingled pockets over the edge of the brown-ribbon pocket and basted it. I disturbed the arrangement of the torn edges a bit while moving the pockets outside to take the picture, and will have to tuck them back with an awl.
⁂
Turned out to be easier to tuck the shingle edge under the brown-ribbon edge than to put it back the way I basted it.
Then I folded the brown-ribbon pocket flat and stitched a toe-width from the folded edge of its flat-fell style attachment. This completed the flat fell, and covered the raw edge of Shingle Pocket #1 (and, incidentally, SP #4).
Removed the basting, folded the brown-ribbon pocket up, and stitched a toe-width from the fold to attach pocket #1.
Removed basting, folded up SP#1, attached SP#2.
Removed basting, folded up SP#2, attached SP#3.
Removed basting, folded up SP#3, attached SP#4. This time I stitched as close to the fold as possible. I should have basted #4 closer to the top of #3; I didn't allow for the turn of the cloth.
But
the difference isn't all that much, and a slightly-wider gap above the shopping-list pocket may be all to the good.
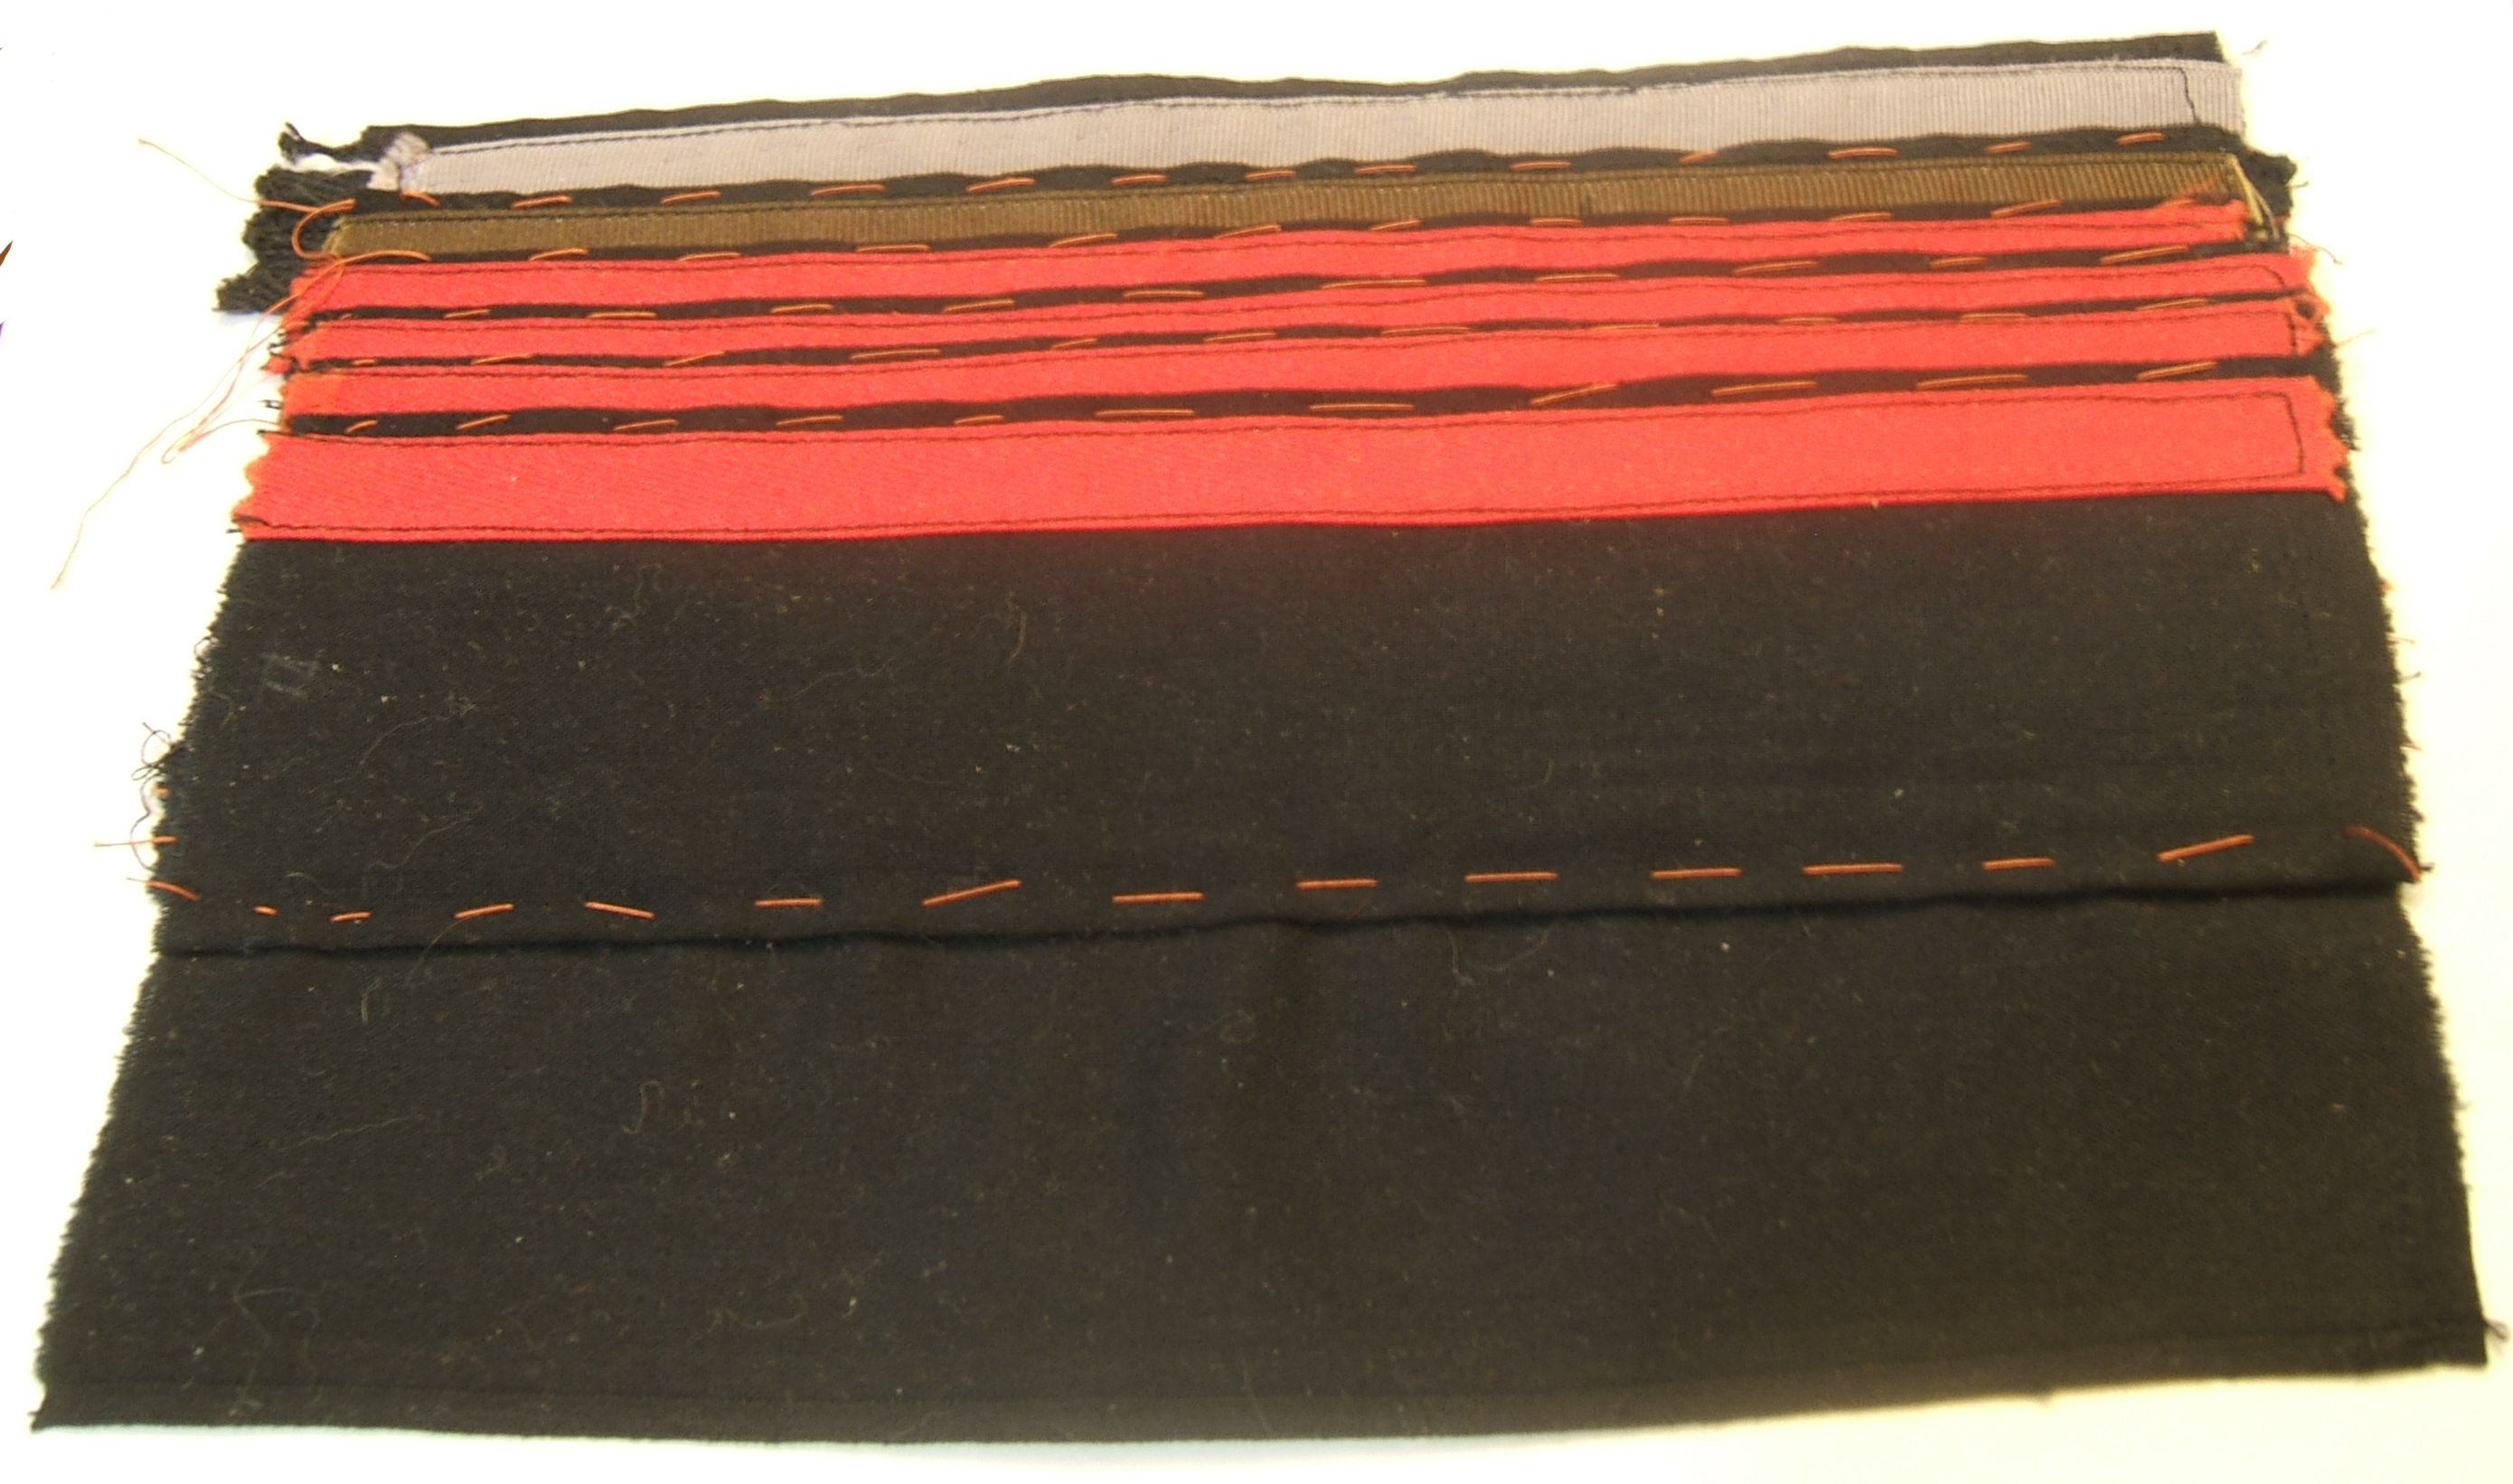
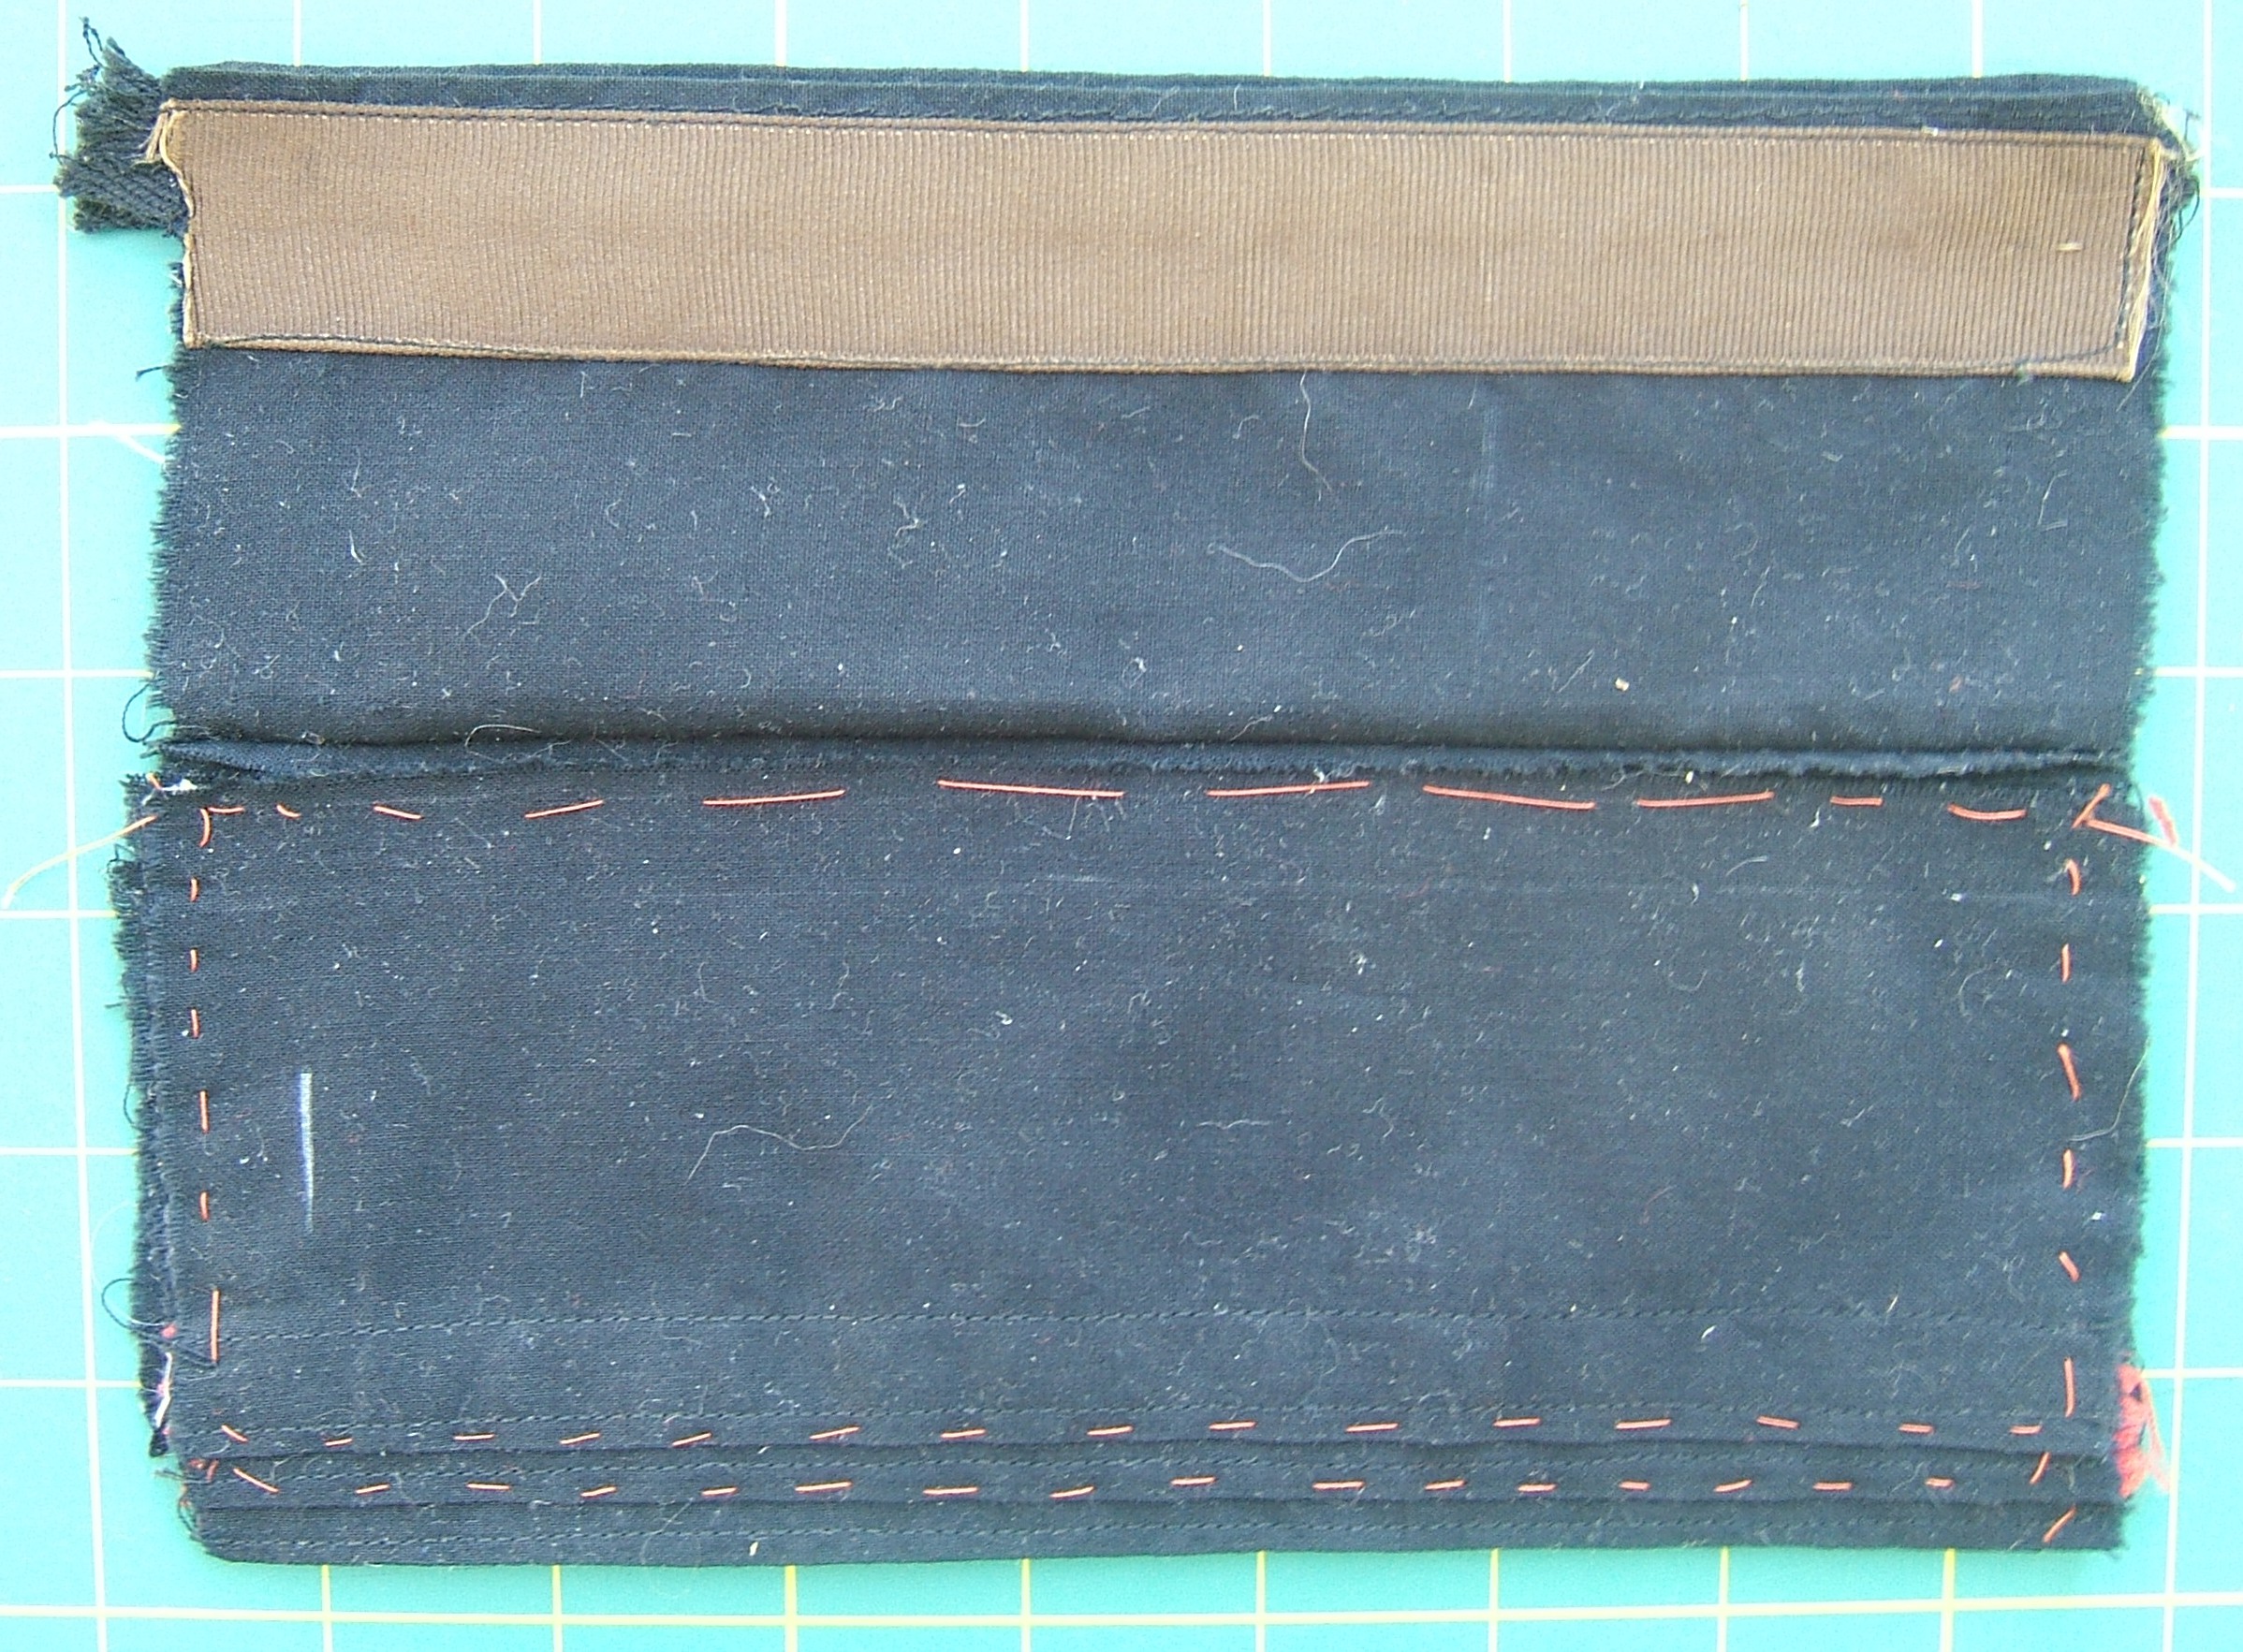
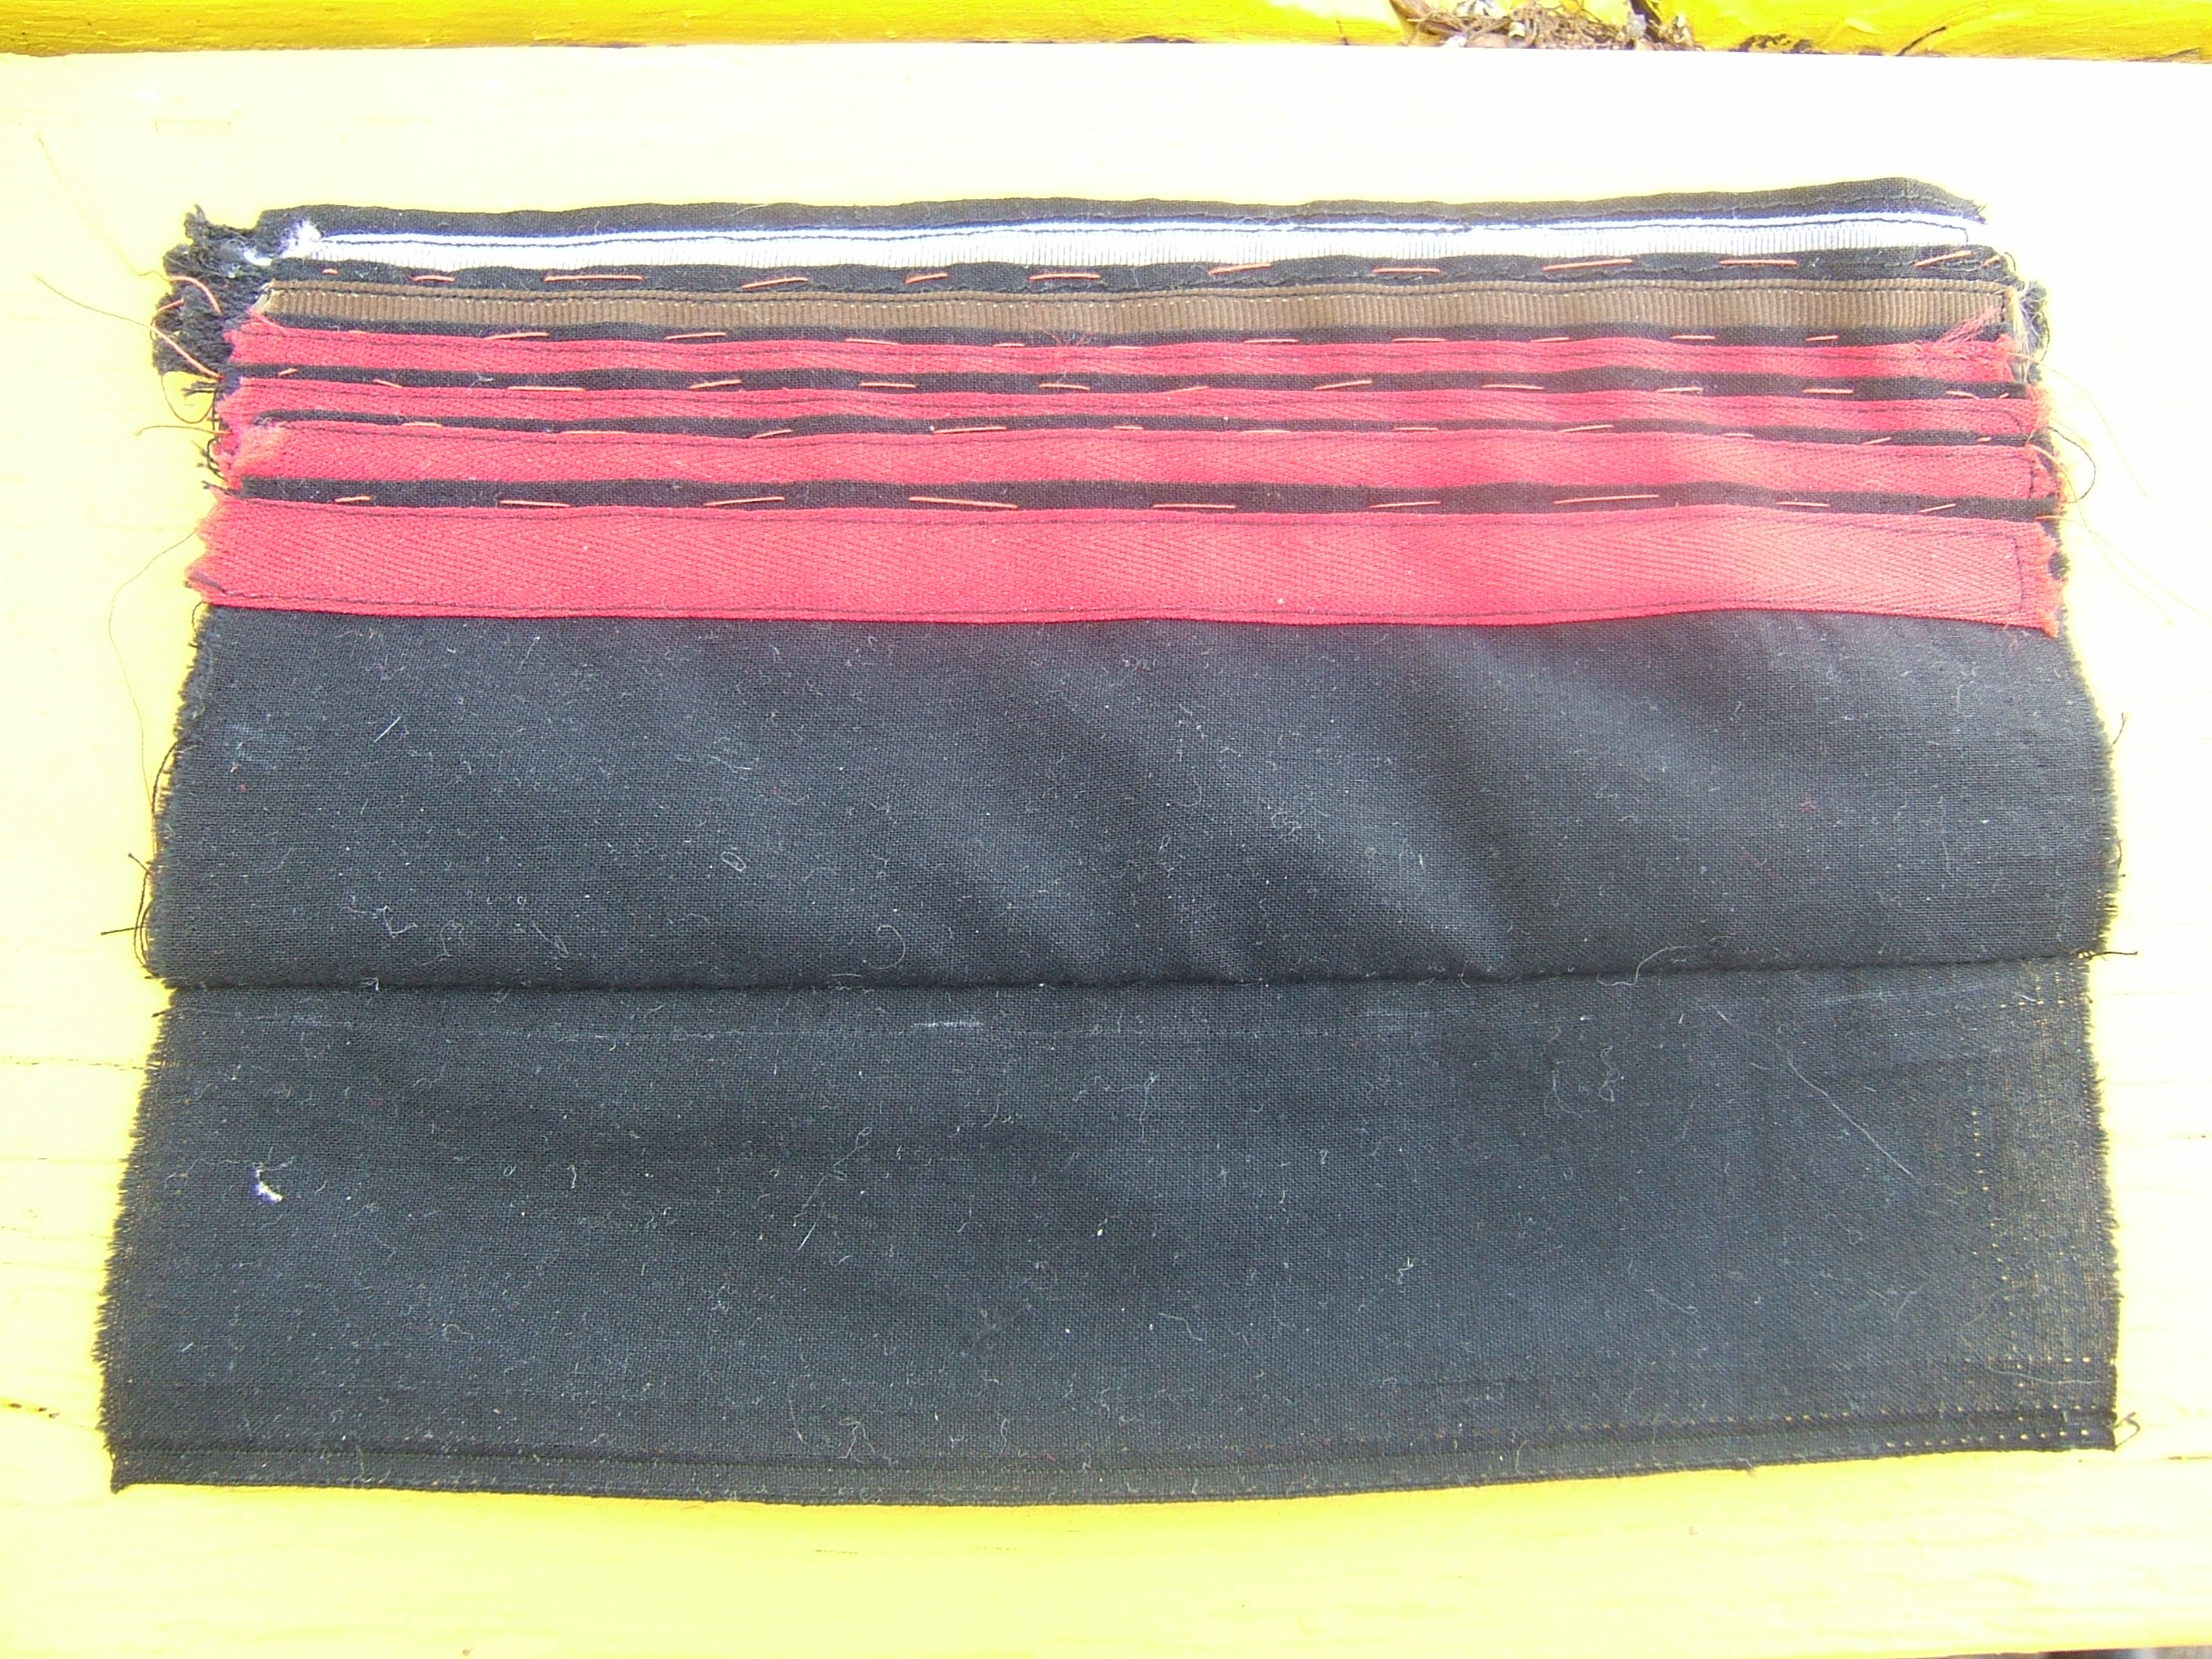
This picture shows the shingled pockets basted into final position, ready to attach to the wallet body.
⁂
After supper, I folded the flap at the bottom of the checkbook pocket right along the stitching of the shopping-list pocket, placed it into final position, then unfolded it very carefully and pinned the selvage of the flap where I will stitch it.
It's fortunate that it's a selvage; sewing this flat-fell style would require a lot of measuring.
Or I could just press a crease in and treat it like a selvage.
⁂
Oh, grumbly-gripe!
I stitched a toe width from the edge of the selvage, stitched again (with my magnifying glasses on) right on the edge of the selvage, then stitch a toe-width from the first row of stitching, folded the shingled pockets back into position with great care, pinned them, and folded the body of the wallet overthem with the fold right at the edge of the checkbook pocket, preparing for the final stitching that will, at long last finish this job.
Only to discover that the tapes that will cover
the raw edges between the coin catcher and the
coin pocket
don't
quite
reach.
But at least they extend into the coin catcher farther than they should by more than the distance that they fail to reach the coin pocket, so after I've picked them off, I don't have to hunt up the proper tape, calculate how long the pieces should be, and cut new ones.
⁂
Caloo, callay, oh frabjous day! Only one of the tapes needed to be picked off and moved. This was a very big deal, because in addition to being black-on-black, the tapes are very soft and the stitches sink into them never to be seen again, not by the brightest light or highest magification.
Yes, I'd like a firmly-woven tape, but I have to buy tape mail order and Web sites are extremely stingy with vital information. You're lucky if you can find out whether you're ordering cotton or polyester.
I wonder whether anybody still makes filament polyester twill tape, rather than imitation-cotton tape. When poly tape first appeared, it was excellent ribbon.
⁂
Oops, I forgot to divide the receipts pocket. On reflection, that is good. The division was from a time when five-dollar bills were hard to come by, and I didn't spend one unless nothing else would do. I don't need a pocket for special bills now, and a wider pocket will be better for receipts.
All the pockets seem to be a tad narrower than they were before the revision; the checkbook cover almost didn't go back into its pocket.
Carried the wallet today. It works. I still have the coin lip pinned to keep it from unfolding; I figure it will be pressed in a week or two.
⁂