There is no use saving an experiment unless you label it to say what threads, tools, and techniques you used. If experiments are stapled to notebook paper, they can be filed in a looseleaf binder. I tag them and throw them into a shoebox. Total randomness is a filing system that never gets disorganized, and the best benefit of ancient records is the occasional discovery of a technique I'd forgotten completely, or did not think of in connection with the current question.
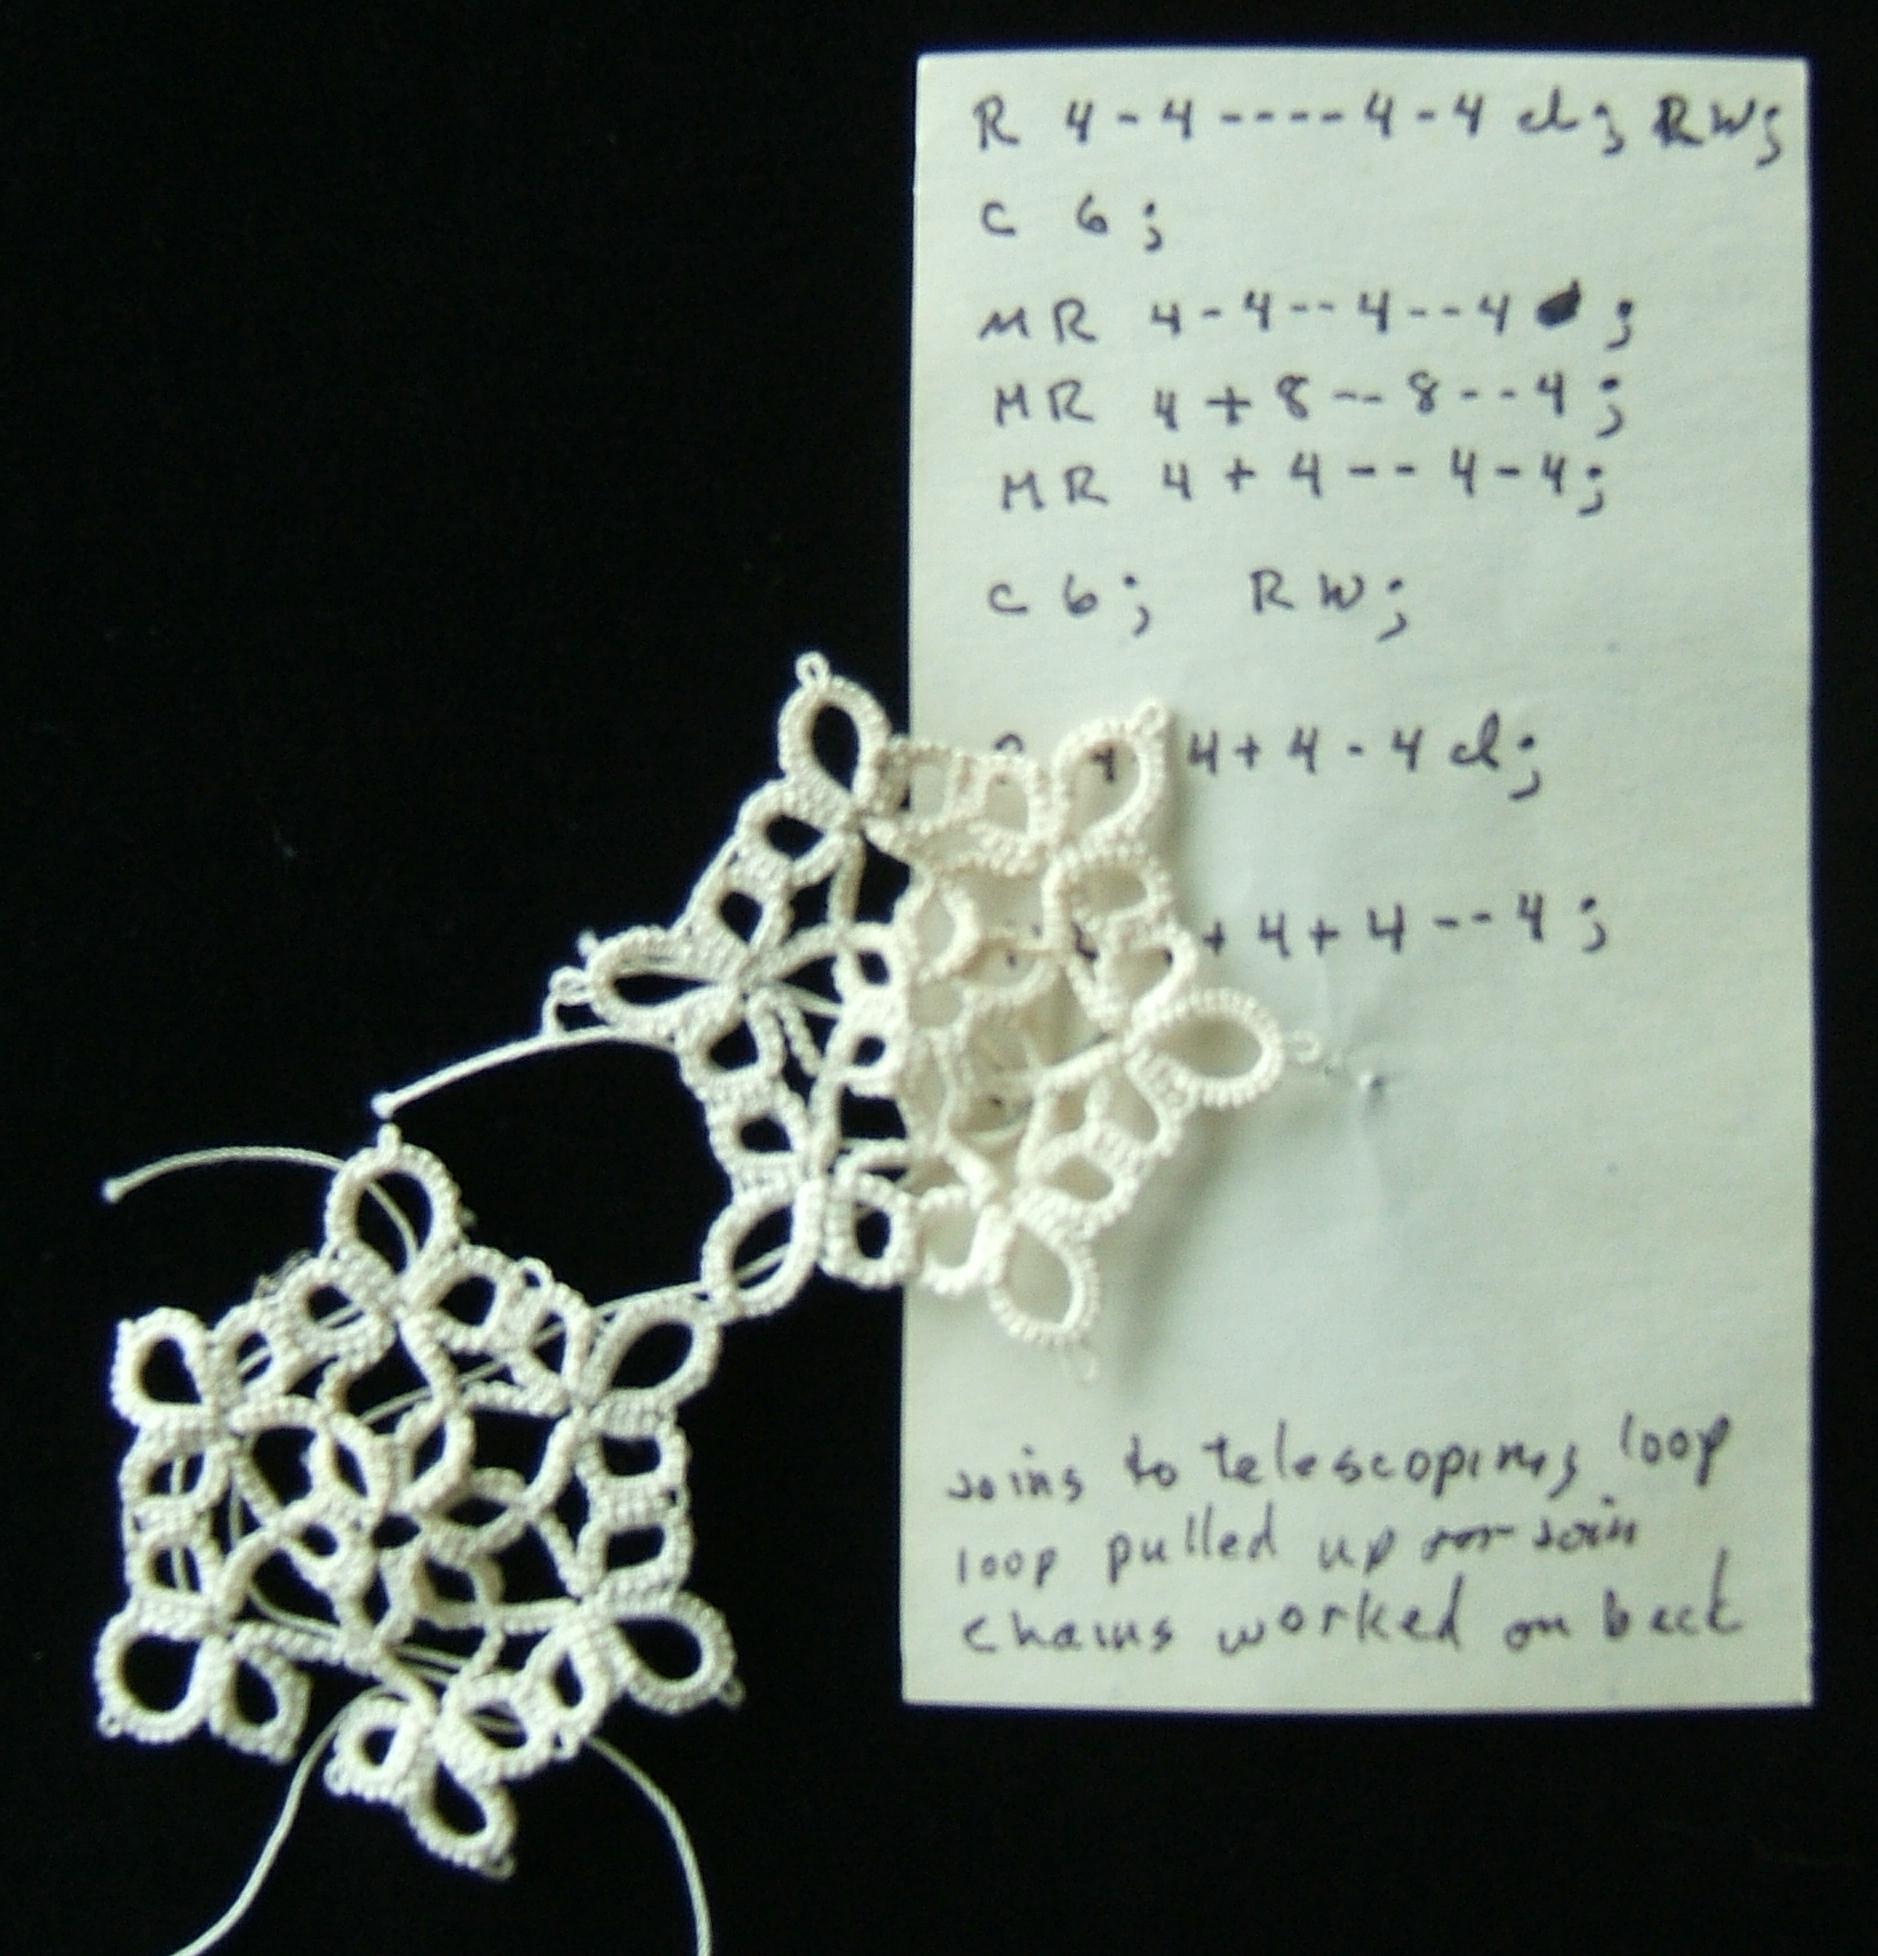
Stitch-by-stitch instructions for making a clover of three rings, two like the default rings we have been using, and one that's four stitches larger, can be abbreviated to fit on a postage stamp:
     R 4-4-4-4
     R 4+6-6-4
     R 4+4-4-4
The "R"s tell you where a ring begins. The numbers tell you how many doubles to make, the hyphens tell you where to make picots, and the plus signs tell you where to join. Note that this clover differs from the trefoil made in the second exercise only in that the middle ring is four stitches larger.
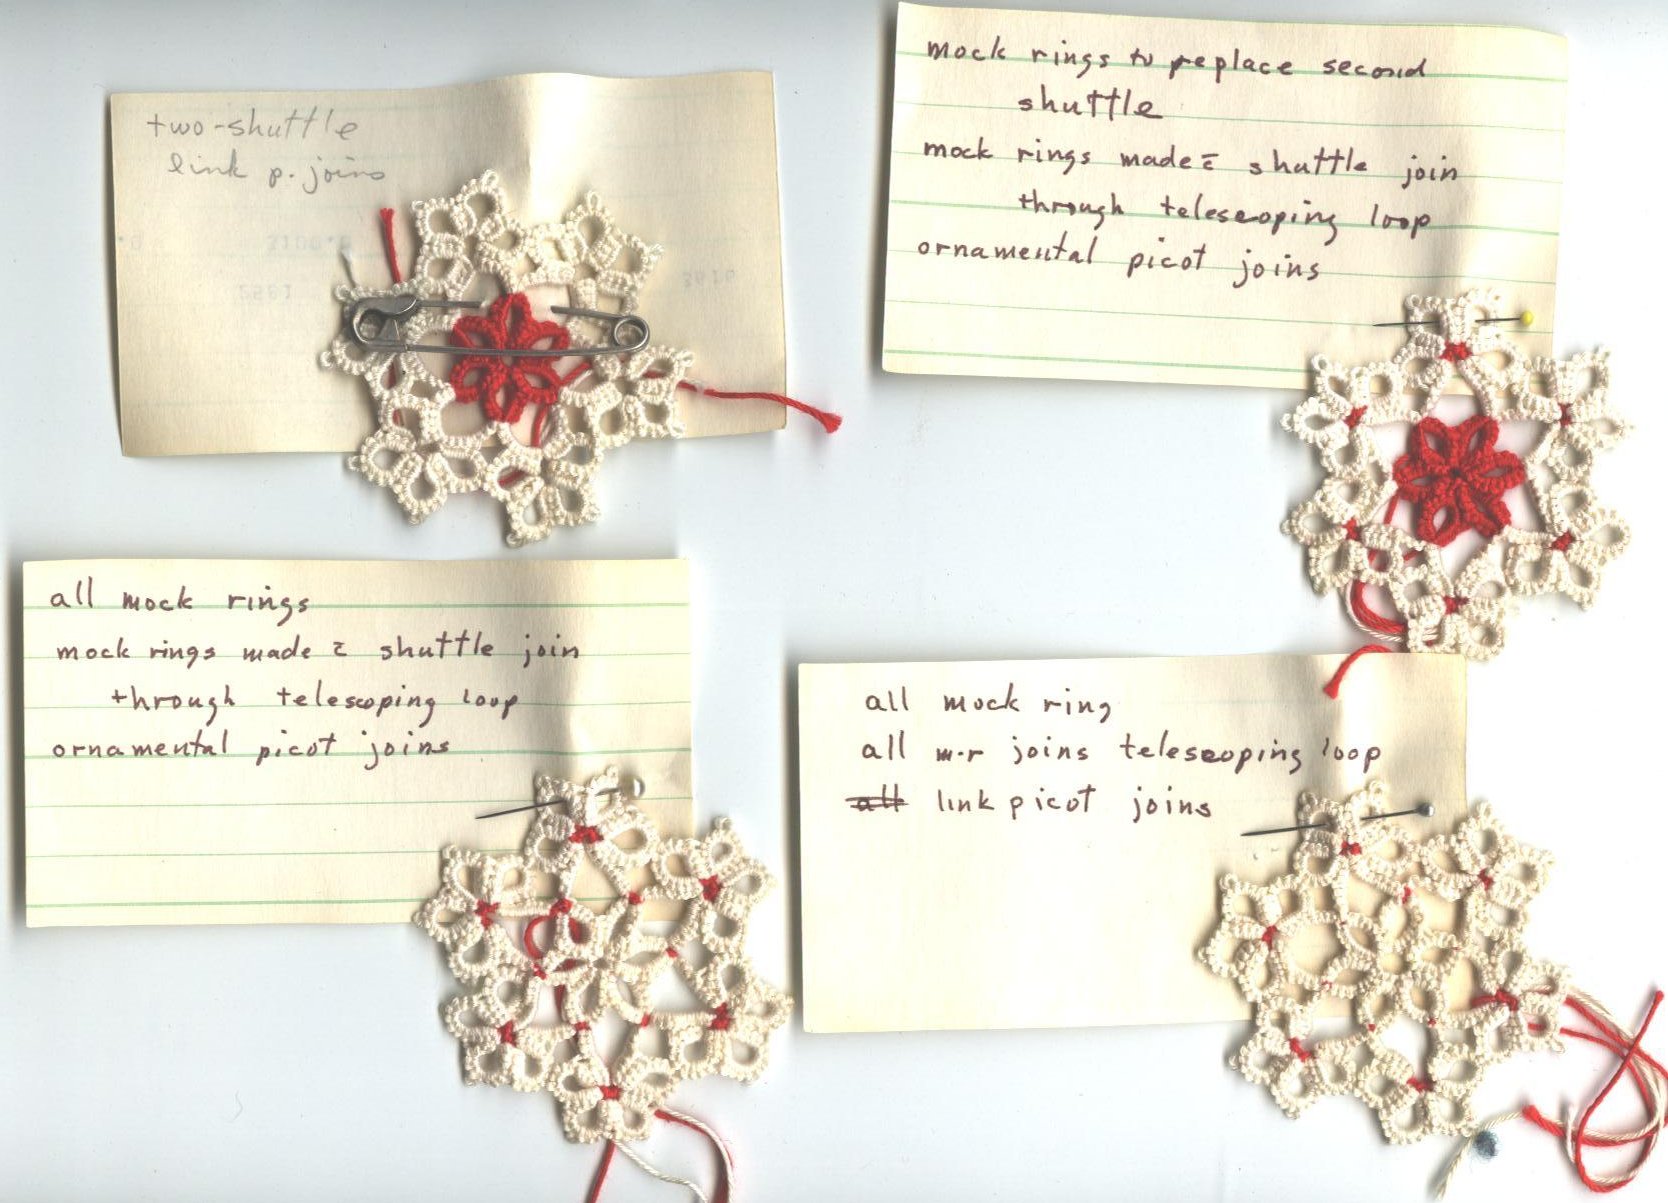
A note above the record should say how long the picots are to be. Use "-" for the smallest picot, "--" for the second smallest, and so on. Unless otherwise stated, I'll use "-" for a smallest-possible picot to be used for joining, "--" for an ornamental picot which may be made according to taste, and "---" for a picot to be used for multiple joins.
When you expand your repertoire to include chains, each chain goes on a line exactly like the rings, except that the lines start with "C".
It is not necessary to say "close ring," but you will need to mark rings that are to be only half- closed.
If the work is to be reversed after a ring or chain is completed, put "RW" at the end of that line.
If you need to distinguish between one-thread joins and two-thread joins, use "&" for the one-thread joins.
You may need to add a note on a line to tell you into what the join is to be made. (Put comments in parenthesis, so they won't be mistaken for instructions.)
To show the overall effect, you need a sample, diagram, or picture of the completed work; a diagram is useful even when you have a sample.
Only a professional can make a photograph that shows sufficient detail, but there are two easy ways to make a picture:
Take a rubbing: put a blank part of the notebook page over the completed piece and rub with the side of a pencil point to make a spot over each knot. A surprisingly detailed record of the work can be made in this way.
You can also record tatting with a photocopier. You can silhouette the motif against a contrasting paper, or set the machine to pick up shadows. To show individual knots, the lever usually should be moved toward "dark" for a white motif against a white background, and toward "light" for other colors. Most copiers can enlarge the image of the lace.
Diagrams can be much easier to draw with an enlarged photocopy of the work under a sheet of tracing paper on your drafting board. The oval stencils which are intended to show circles in perspective can help you draw neat rings. For extra neatness, make your diagram with thick lines, then reduce it to a reasonable size when you photocopy it. (Diagrams are discussed further in the Seventeenth Exercise: Principles of Design. )