Assembling Broadfall Trousers
Last revised on March 31, 2003
comment added June 29, 2007
The lines of text are too long for comfort,
but you need the full screen to view the photos.
I suggest increasing the font size.
(clicking "ctl+" once or twice does it in my browser.)
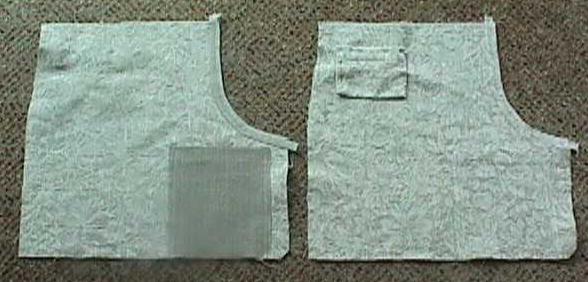
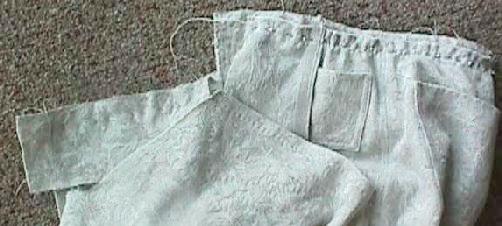
Broadfall pockets with "passport" pockets sewn to the wrong side, which will be the outside, and watch pockets pinned ready to sew to the right side, which will be the inside. The passport pockets are still open at the bottom and will be closed by the same stitching that closes the broadfall pockets.
A selvage of the linen from which the passport pockets and interlinings are made serves as hem tape.
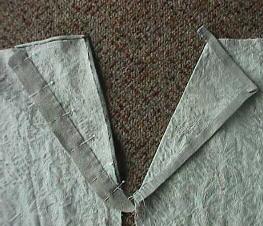
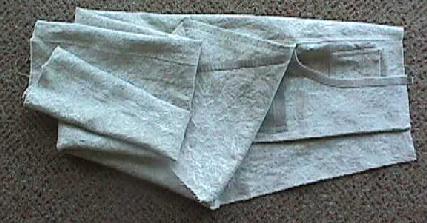
In the photo at left, I am hemming the pocket-openings on the fronts of my pants. Having lost weight, I went back to a pattern I'd used before settling on slant pockets for all my pants, and forgot to fold the corner of the pattern before cutting. On a whim, I folded the corner of the fabric without trimming it to a straight hem, and also folded to a slantier slant than my other pants. Both decisions were mistakes — the three-cornered hem shows on the right side, and the hem-tape on the broadfall pocket shows through the wider opening. I should have turned the pocket hem to the right side (the inside) anyhow. (It's hard to remember to turn a hem to the right side to keep it from showing!)
Since the fabric is thick, I sewed hem tape to the raw edges, pleating it at the corner. Note that the tape continues into the seams to reinforce points of strain. I sewed from fold to fold, and left the ends of the threads long to thread into a needle and run out to the ends of the tapes, correcting any errors in stopping and starting as I did so. Since these threads will pass through the full width of a triple-stitched mock-felled seam, I did not secure them in any way.
Since the hem tape does not run along the edge of the hem, and because the opening is more bias than the slant openings on my other pants, I felt the need of tape inside the hem. Since it's fully enclosed, a raw-edged strip of fabric will do. I had a heavily-starched scrap of linen left from cutting the interfacing of the collar of the matching shirt. I felt that the same consideration — using the interfacing for a pressing template — applied here, so I chose this scrap to cut my "tape". It was, of course, impossible to draw a thread in fabric that I'd stiffened with undiluted bottle starch, but I ravelled one side, trimmed the fringe, and drew the other side with a ruler. Unravelling a thread from this side proved that it was as straight as the other.
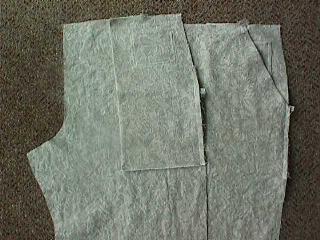
The photo on the right shows the pockets basted to the fronts, filling in the part of the front that was removed by hemming the pocket opening. When making a skirt, I sew the pockets to the back with a flat-fell seam, then attach the back to the front with seams that can be pressed open below the pockets, and slip-stitch the side seams from the bottom of the pocket to the bottom of the pocket opening.
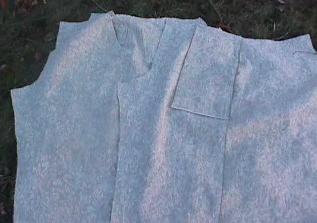
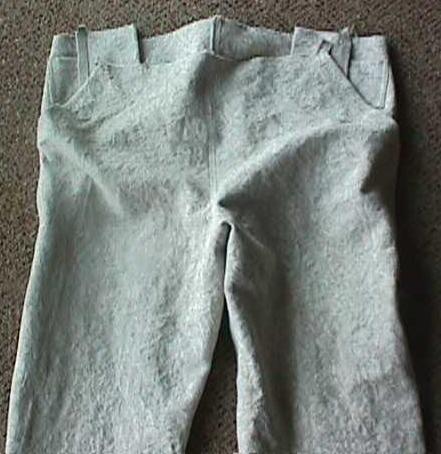
You may notice that there are no darts at the waist either front or back. This fabric doesn't dart well, but I expect it to ease easily, and there isn't a lot of dart control in this particular pattern. (The later, looser pattern used for the herringbone pants in "Photographs of Modified-Broadfall Closures" has prominent darts.)
Left: side seams sewn
Right: inseam sewn (only one leg shown)
Right: center seam sewn, now it lacks only waistbands, hooks, and hems.
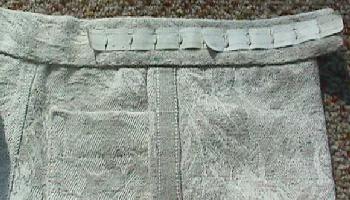
Left: Back waistband pinned and ready to stitch. The front and the back of the pants are marked on the stitching line with wash-out marker, and gathering threads run on both sides of each stitching line. These details don't show up in the picture, but they don't show much in real life — the basting threads are ecru and white, and the washout marker is pale blue. A detail that you can see is the extra-wide seam allowance at each end of the waistband, which will become a little tab when the band is finished. A tab is much easier to sew than a flush end, and the ends of the back waistband won't show in the finished slacks.
Ordinarily, I'd sew a massively-eased seam like this one with the longer side down, so that the feed dogs could work with me instead of against me, but the style of waistband I'm making calls for the raw edges to be offset a quarter inch, which would leave me in some doubt as to where to stitch if I worked from the other side. Had I thought of this sooner, I could have used thread marking instead of washout marker to show where to put the raw edge of the pants. Since thread marks show on both sides, it would then have been easy to draw the stitching line on the inside of the waistband instead of the right side of the back. (I'm sewing the wrong side of the pants to the right side of the bands; The bands will later be turned to the right side and stitched down by hand.)
Waistband basted, ready to fold and stitch. The extra-wide seam allowance will serve as an interfacing. The lower corner is basted the same way I make a "handkerchief hem" corner, save that I worked with less care, and didn't secure the ends in any way. When the corner held its proper shape, I stuck the needle in at the point, brought it out at the raw edge, pulled it snug, and snipped the thread. I also used a cheap, two-ply thread noticeably thinner than the threads I use for permanent stitching.
The upper corner started the same way, but left a long diagonal unstitched below a very short miter. This bias fold wanted to unfold, so I encouraged it to do so, then overcast it to the turn-under.
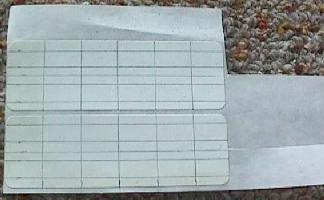

Left: It's easier to draw lines on a whole sheet of removable labels than to mark up just one, so I had a set of embroidery guides left from the previous pair of broadfalls.
Right: I folded three inches of the front to make the slanted pocket opening, and the seam allowance was half an inch, so I stuck the embroidery guide to the waistband with the center mark two and a half inches from the side seam. If you look closely, you can see the blue dot I made with a water-erasable pen to help me align the label.
If I had put the last eye of the second set at the end of the waistband,
there would have been less than an inch between the two sets of eyes,
so I overlapped the embroidery guides to place the first eye of the second set
exactly as far from the last eye of the first set as the spacing of the eyes
within sets.
This way I'm all set if I gain or lose weight
the waistband shrinks or stretches — I can "move"
the sets of eyes by working more at one end or the other.

I'll get around to photographing the two hooks sewn in tandem to the inside of the front waistband sometime. Meanwhile, the pants are all assembled except for hemming the legs. You will note zig-zagging on the hem tapes. My slacks usually get frayed at the hems while the rest is still in fairly good condition. Since this suit won't be washed very often, I thought I could obviate that difficulty by basting the hems in, and removing the basting before I wash them. This will eliminate all edge-wear on the hems during washing. Better yet, it will be impossible to put the hems back precisely where they were before, so the abrasion while I'm wearing them will be spread around a little. [It turned out that it's also much easier to deal with a dirt line on white fabric when you can spread it out flat.]
To prevent fraying in the wash, I zig-zagged over the raw edges of the tape and the fashion fabric. There are two rounds because my widest zigzag wasn't quite wide enough to secure both edges in one pass.
Back to Rough Sewing
Back to the writing page
Back to the links page
Back to the cover page